Tool Search: Portal Request Processor
The Address type change request is used for household address changes, such as:
- Street address changes
- Mailing address changes
These options are determined by the Portal Self Service settings.
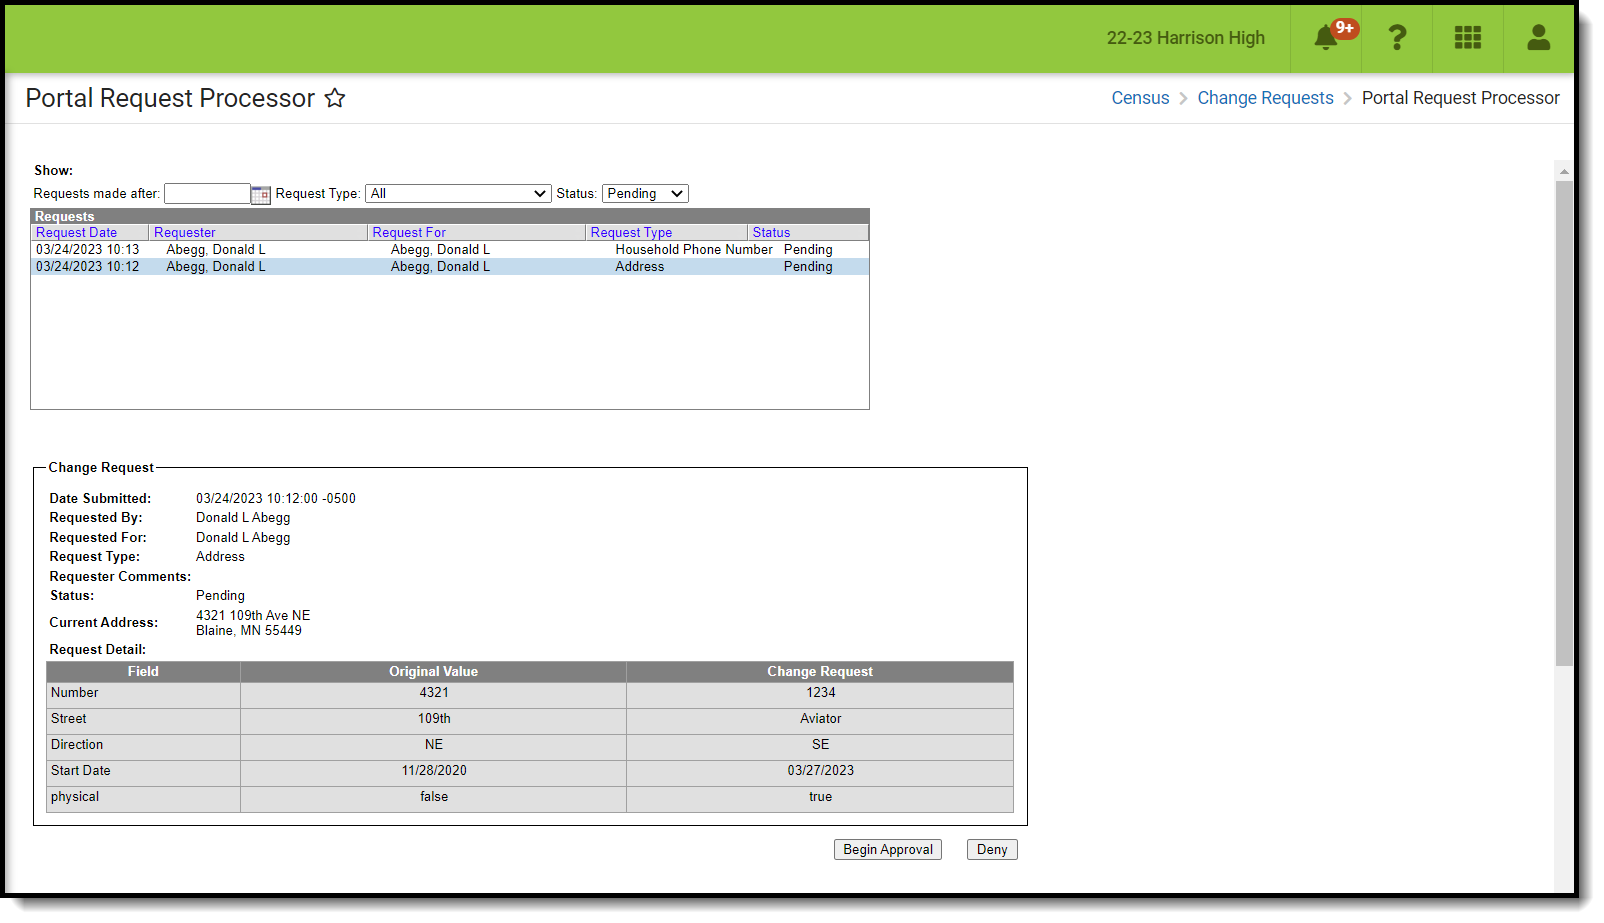 Portal Request Processor - Address Request
Parents/Guardians see the following, depending on Self Service options chosen by the district.
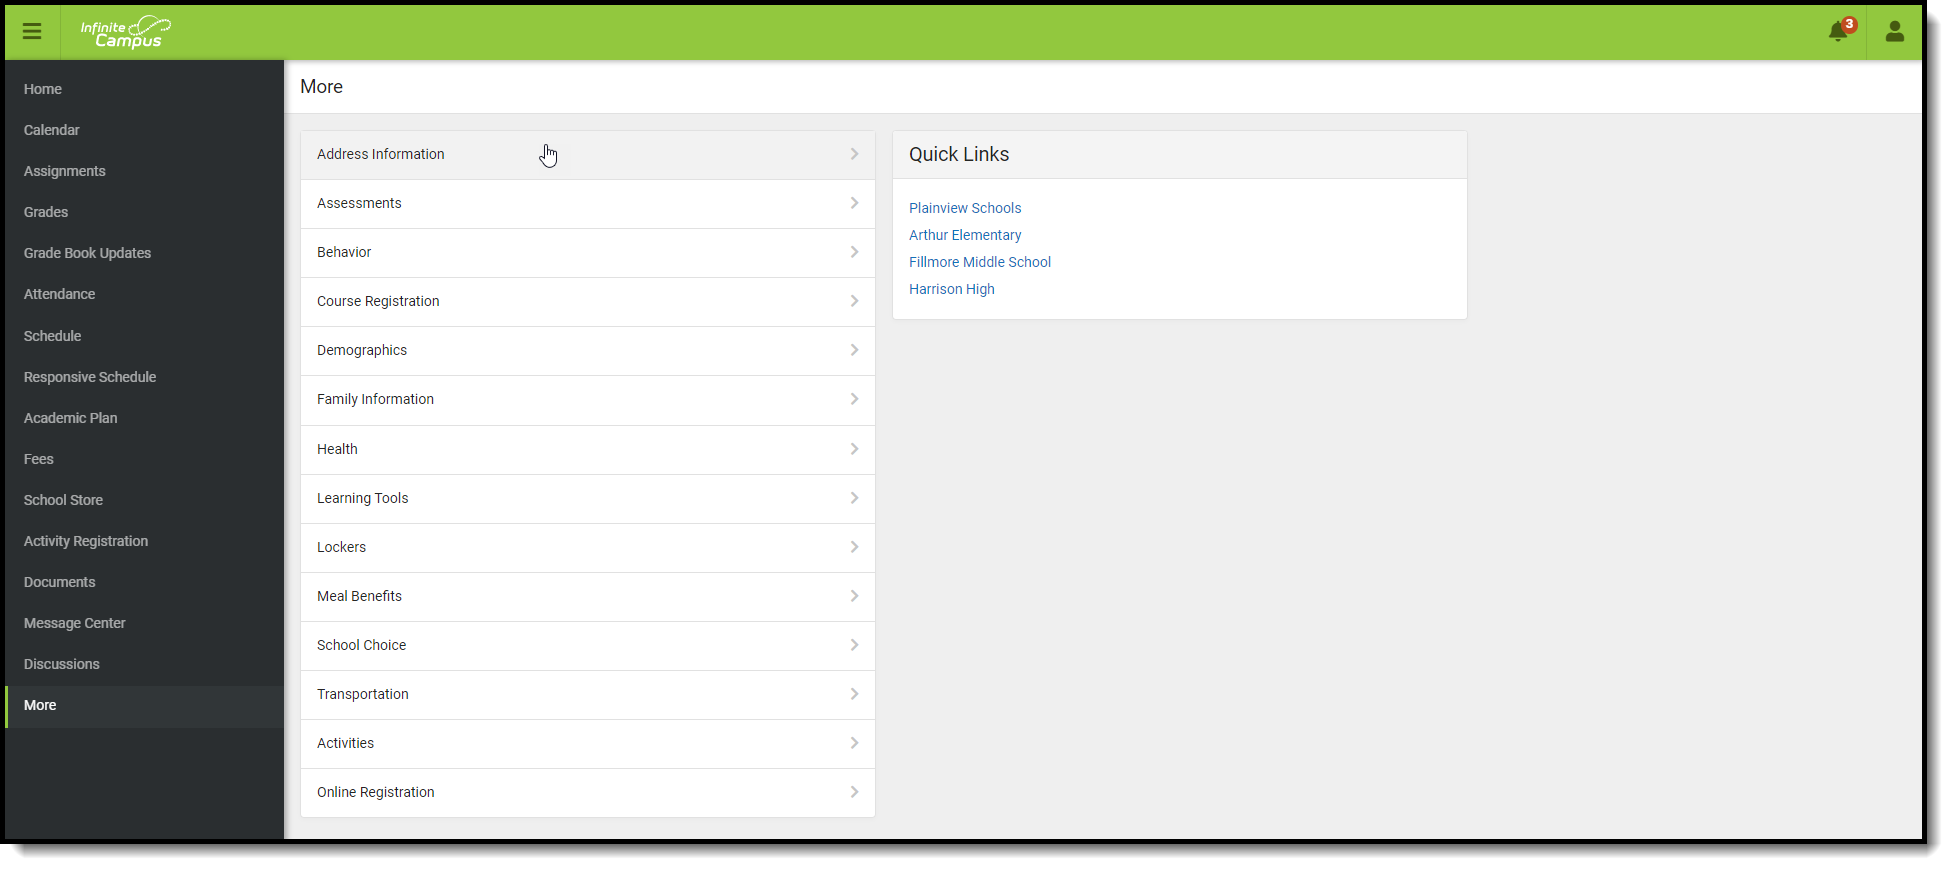 Campus Parent - Address Information Update View 1st Screen
 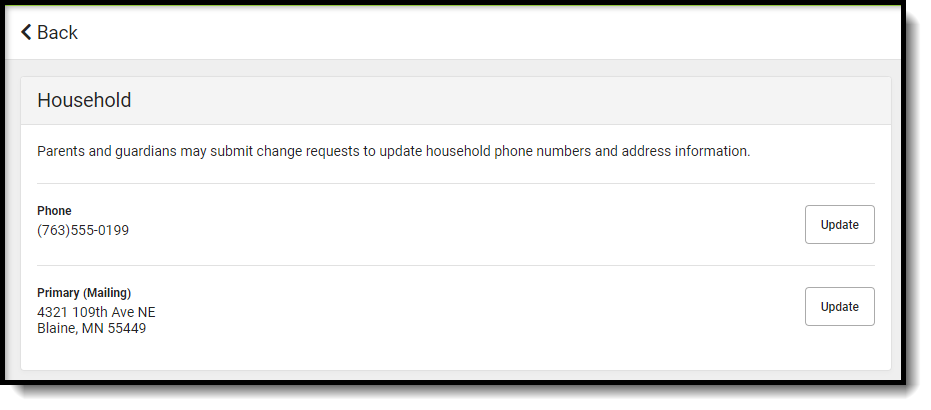 Campus Parent - Address Information Update View 2nd Screen
Tool Rights
Staff persons who have rights to the Address Portal Request Processor have two options:
Read Functionality | Write Functionality |
|---|---|
Allows a user to view the Household Address Requests if:
| Allows a user to view, approve and deny the Household Address requests if:
|
In addition to these rights, if the staff person does not have rights to other items that require subrights (i.e., Social Security numbers), the user is not able to approve change requests to those items.
View Address Requests
- Select an Address Request from the User Request List. The information entered displays in the Change Request section.
- Review the Change Request of submitted data.
Approve Address Requests for an Address that Does Not Already Exist in Campus
- Select a Pending Address request from the User Request List. The information entered in the request displays in the Change Request section.
- Click the Begin Approval button. A Census Wizard-like view displays. Prior to updating an address, a search must be performed to see if that person already exists.
- Click the Search button below the Search Criteria. This searches the database for an address that matches the entered information. The default search options are Number and the first five characters of the street name. Modify search criteria as often as desired.
- When certain the requested address does not exist in Campus, mark The requested address does not exist in Campus checkbox.
- Click the Continue button.
- Review the entered information appearing on the next popup (step 2).
- Make any necessary changes as required by district policy for address entry.
- Enter Comments for the request.
- Select the Approve Change Request button. A confirmation of the request being approved displays.. This changes the information in Census People.
The person who made the request receives a notification in the Message Center on the Portal indicating the new status and any comments that were entered.
There are three Save Options for addresses:
- Save Changes - adds the new address to the household beginning on the date entered and maintains the history by keeping (and ending the household's previous address. Historical information is retained.
- Overwrite the Existing Address - overwrites the address in the database. The original address no longer exists in Campus.
- Change the Address - the original address is kept in the database, but it is no longer associated with the household. The requested address is associated to the household starting on the date the original address started.
When the household address is assigned to a staff member, address changes are updated in Campus HR as well.
Approve Address Requests for an address that does already exist in Campus
- Select a Pending Address request from the User Request List. The information entered in the request displays in the Change Request section.
- Click the Begin Approval button. A Census Wizard-like view displays. Prior to adding a person, a search must be performed to see if that person already exists.
- Click the Search button below the Search Criteria. This searches the database for an address that matches the entered information.
- Select the matching address in the Search Results window.
- Click the Continue button.
- Review the entered information appearing on the next pop-up (step 2).
- If the address is shared with other households (i.e., multiple families share the same address or the address is an historical address for another family), a warning appears.
- Determine and select the appropriate checkbox if the address is a Mailing address, a Secondary address and if it should be marked as Private (hides the address from the Portal). Mark the checkbox if this is a Physical address.
- Enter Comments for the request.
- Select the appropriate save option for this address:
- Save changes in a new address and end the previous address for the household.
- Change the address on the household to the one below (previous address are no longer associated with the household, but it will still be available in Campus).
- Select the Approve Change Request button. A confirmation of the request being approved displays.
The person who made the request receives a notification in the Process Inbox on the Portal noting the request was approved and any comments that were entered.
Deny Address Requests
- Select a Pending Address Type request from the User Request List. The information entered in the request displays in the Change Request section.
- Click the Deny button.
- Enter Comments for the reason for denial of the request.
- Click the Deny button when finished. A warning message displays indicating the request has been denied. In addition, the list of requests will update this item to have a status of Denied.
The person who made the request receives notification the request was denied in the Process Inbox on the Portal.
