Tool Search: Add Person
The Add Person tool allows the creation of new persons - staff members, students, parents/guardians, etc. - in Infinite Campus.
- When creating a new person as part of a census record, use the Census Wizard.
- When reviewing or modifying an existing person's information, use Demographics or Identities.
 Add Person Tool
See the Add Person Tool Rights article for information about rights needed to use this tool.
Like students and parents/guardians, staff members are entered in Campus as a person record. That person record does not become a staff record until a District Employment record is created and they have a Staff ID number.
Staff members can be created by using the Add Person tool or by using the Staff Locator tool. The Staff Locator find staff members already entered into Campus throughout the state (in State Edition installations) or the district (in District Edition installations). With both tools, a search needs to be done before the user can create a new person or a new district staff member.
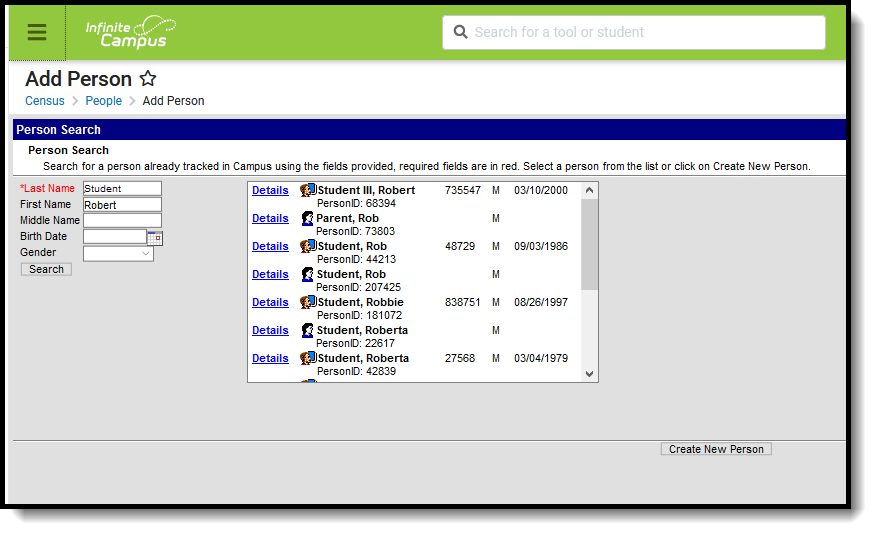
To eliminate the possibility of duplicate persons, this tool forces the user to search prior to adding new persons. The last name must be entered before the Search button becomes active.
Use the Add Person Wizard to Create a New Person
When entering Information in the Last Name, First Name or Middle Name fields, double quotation marks and parentheses are NOT allowed.
- Enter the Last Name of the person who needs to be entered into Campus. This is a required field. Additional search criteria may be entered – First Name, Middle Name, Birth Date and Gender.
- Click the Search button. Matching search results, if any, display in the box to the right. It is recommended that the results be thoroughly reviewed before creating a new person. To review in more detail the search results of the persons, click the Details link next to the person’s name. This displays a Person Summary Report of that person’s demographic data, contact information and relational information.
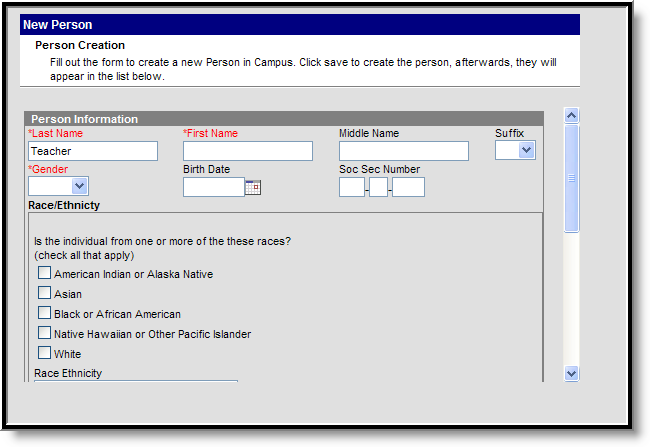
- If the search results do not match the information that needs to be entered, select the Create New Person button. The Person Creation and Person Identifiers editor screen displays. Enter as much of the information that is known at this time.
- In the Person Creation fields, enter the Last Name, First Name and Gender of the person. These are required fields. There may be district specifications for entering this information.
- Enter additional person information where known and follow recommended district procedures for creating new persons.
- In the Person Identifiers area, enter the Staff State ID and Staff Number, if applicable. Sites tied to a State Edition may have Staff State ID generation enabled. In that case, the Staff State ID field is not available for editing and an ID automatically generates when the person is given an employment record.
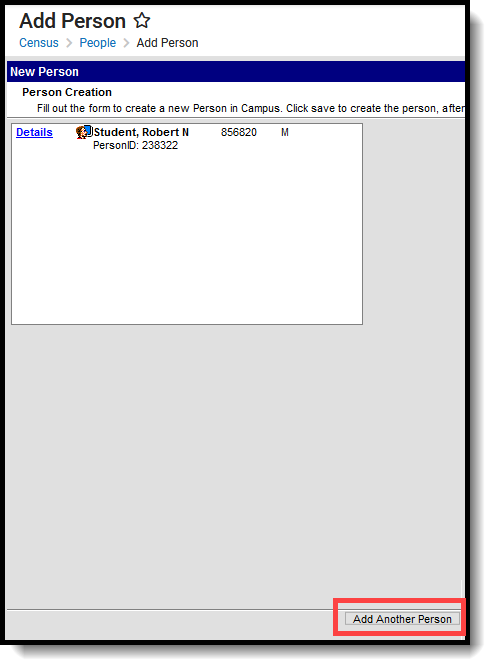
- Click the Save button at the bottom of the screen. Once the information is saved, the tool displays the new person entered in a search box. To review or to enter additional Census items (household memberships, relationships, enrollments), select the person’s name.
 Create New Person Editor
To create another person, click the Add Another Person button. This returns the user to the search fields where another person can be created following the steps above.
 Add Another Person
Use the Add Person Wizard to Find a Person
When entering Information in the Last Name, First Name or Middle Name fields, apostrophes and parentheses are NOT allowed.
- Enter the Last Name. This is a required field. Additional search criteria may be entered – First Name, Middle Name, Birth Date and Gender.
- Click the Search button when finished entering criteria. Matching search results, if any, display in the box to the right. To review in more detail the search results of the persons, click the Details link next to the person’s name. This displays a Person Summary Report of that person’s demographic data, contact information and relationship information. It is recommended that the results be thoroughly reviewed before creating a new person.
- Select the correct person from the list of results by clicking on the Person icon, the name or the person ID. The Demographics tool displays.
- Review the entered information for accuracy and district policy for entering Census information.
- Click the Save button at the bottom of the screen. The person information updates accordingly.
 Add Person, Demographics Editor
