Tool Search: Electronic Release Setup
Districts can establish connections for the electronic release of student transcripts through an eTranscript vendor if their vendor of choice uses an electronic release API. The district's system administrator must request this information from your eTranscript vendor. Infinite Campus does not provide this information to districts.
Establishing a vendor configuration is Step 4 in the eTranscript Workflow.
See the System Preference Tool Rights article for information on tool rights.
 Electronic Vendor Setup
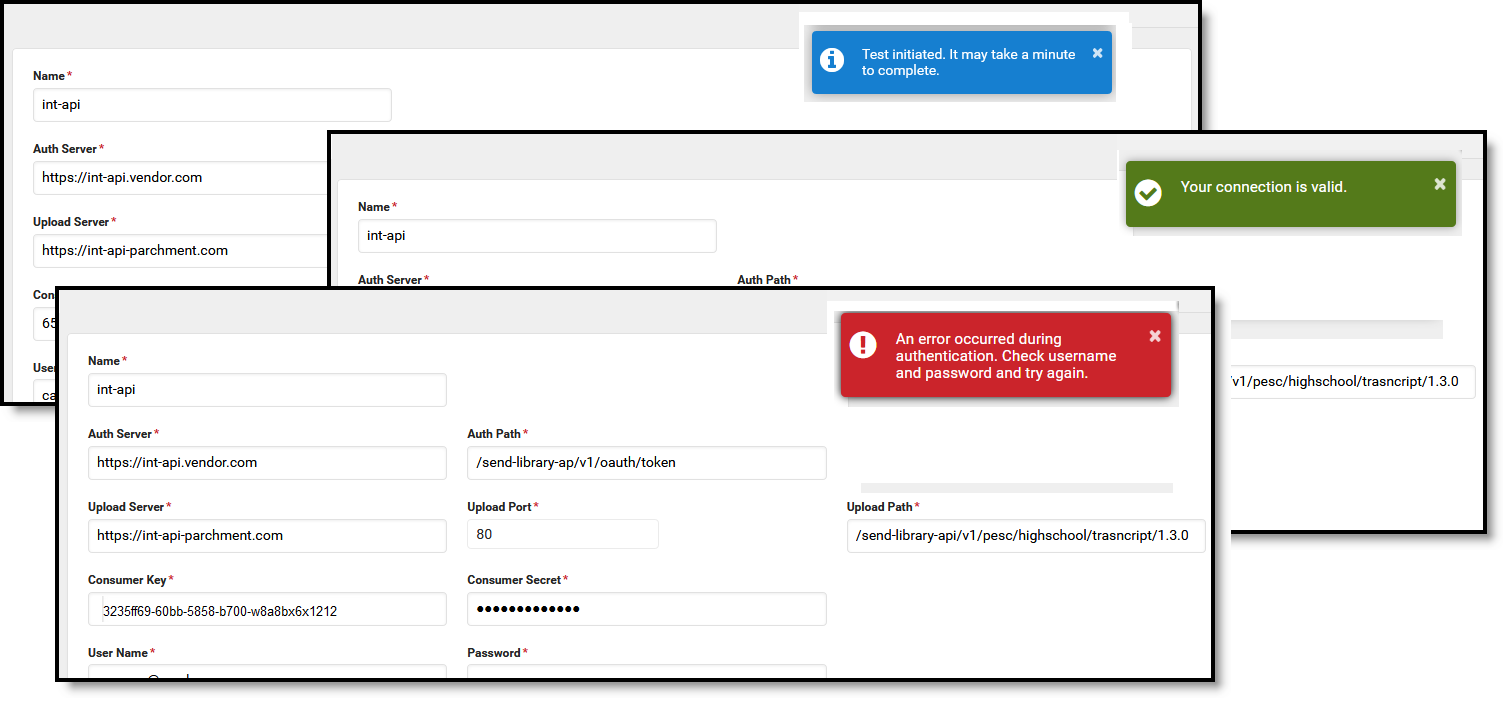
Electronic Release field descriptions
| Field | Description |
|---|---|
| Name | Indicates the name of the vendor (Parchment, NCS, etc.). |
| Auth Server | Displays the root server address for OAuth authentication. |
| Auth Path | Indicates the authentication endpoint relative to the authserver. |
| Upload Server | Indicates the root server address for transcript submission. |
| Upload Port | Lists the port used for transcript submission. |
| Upload Path | Indicates the release server (port) endpoint used to submit transcript information. |
| Consumer Key | Lists the client key for authentication of eTranscript authorization. |
| Consumer Secret | Lists the code provided to the district for eTranscript authorization access. |
| User Name | Login credentials for accessing the eTranscript vendor information. This field can be up to 100 characters. |
| Password | Login credentials for accessing the eTranscript vendor information. |
Enter Electronic Release Information
- At the bottom of the page, select New. A blank editor screen appears.
- Enter the required values in the appropriate fields.
- This information must be provided by your selected vendor.
- Infinite Campus does not have access to vendor‑specific credentials.
- When all fields are complete, select the Save icon. The configuration is stored in the editor.
Test the Electronic Release Configuration
After entering the vendor’s API access information, verify that the system can connect to the vendor’s server.
Test the connection
- Select the saved configuration by clicking its entry in the editor.
- At the bottom of the page, select Test. A blue Test initiated message appears, indicating that the connection test has started.
- When the test completes, one of the following messages appears:
- A green Your connection is valid message, indicating a successful connection
- A red Connection failed message, indicating that the system could not connect
When the connection is valid, you can generate an eTranscript Batch Report using the Batch Queue and release eTranscripts electronically.
 Connection Pop-ups
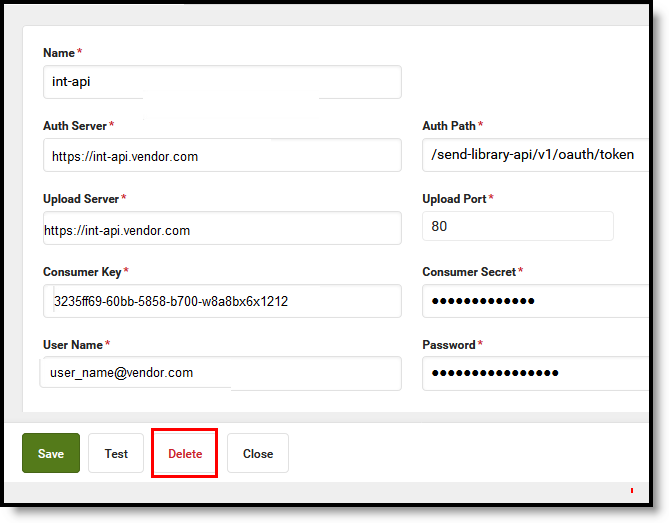
Manage configurations
- After a successful test, select Close.
- To add another vendor configuration, select New and enter the required details.
- To delete a configuration, select it and then select Delete at the bottom of the page.
 Delete Vendor Configuration
