The Scanning toolset is part of the Campus Workflow Suite.
Tool Search: Classroom Attendance Kiosk
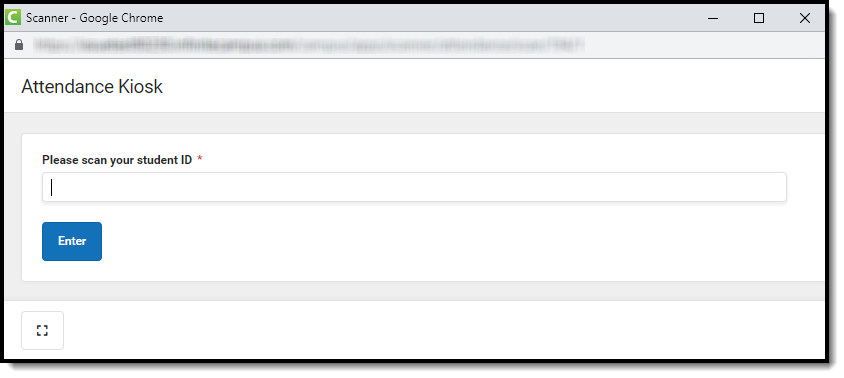
The Classroom Attendance Kiosk scanning tool is used to issue hall passes and/or take attendance in kiosk mode. When the Classroom Attendance Kiosk is launched, a separate window displays and the user is automatically logged out of Campus. This allows students to scan in for attendance without having access to a Campus account.
NOTE: Once logged into the kiosk, the kiosk remains open unless the computer on which it's running has an inactivity logout time. For the kiosk to remain open, the computer itself must remain awake.
If Issue Hall Pass is unchecked at launch, the kiosk will only allow a student to scan in for attendance. If Take Attendance is unchecked at launch, it will only allow the student to select a hall pass location.
Using the Classroom Attendance Kiosk
Three options are checked by default: Issue Hall Pass, Take Attendance, and Allow Hall Pass for Non-Rostered Students. A teacher can uncheck these options depending on how they would like to use this kiosk. Non-Rostered Students allows any student to create a hall pass via the kiosk regardless of being rostered in the current class. If the Issue Hall Pass option is unchecked, the Non-Rostered Students option is also unchecked.
If the options remain checked, and the kiosk is launched, students scanning into that location for the first time will end any current hall pass that the student has and mark this student as being absent, present, or tardy to that class depending on the Tardy threshold set up in Scanner settings. If the section the student is scanning into spans more than one period, the scan history report will show multiple scans for that student. This is due to the kiosk needing a separate scan for each period in order to take attendance.
The second time a student scans in, the system will display hall pass locations that are flagged as Student from within Hall Pass Settings and either has the All Rooms checkbox checked or is in a Hall Pass Group, where the room the student is in has the hall pass assigned to it.
A student can select the location for the pass and click Confirm. This will add the student to the Hall Monitor grid and issue a digital pass for the student that can be accessed from the Student Portal/App. The Teacher Hall Pass View will also display this pass. A student returning to class can scan in and that current hall pass will end.
If you are using the Classroom Attendance Kiosk, do NOT take attendance through Campus Instruction at the same time. If manual attendance changes are made via Campus Instruction after using the kiosk, the teacher must continue taking manual attendance for that section until the end of the period. This ensures a teacher's manual entries are preserved, and the kiosk will NOT overwrite them.
Launching Classroom Attendance Kiosk
It is recommended to have a webcam with the ability to auto-focus at close distances if you plan to use your webcam as a scanner. Webcams without this feature may have trouble reading barcodes.
- Use the Room field to select the room number of the classroom.
- Click the Launch button to begin taking attendance. Selecting the Launch w/ Camera option allows users to use the device's webcam to take a picture of the student's ID and use the picture to scan in the student.
- The Classroom Attendance Kiosk launches in a new window. You are logged out of Campus, but the kiosk remains connected, allowing students to scan in/out as needed.
- Before the kiosk can launch, if you are currently logged in with a Single Sign On account, you must use the Sign Out of Single Sign On button to sign out of your account. As you are signed out of your account, additional windows automatically open and close.
- Before the kiosk can launch, if you are currently logged in with a Single Sign On account, you must use the Sign Out of Single Sign On button to sign out of your account. As you are signed out of your account, additional windows automatically open and close.
The Room Number, Period Name, and Course Name display. If multiple sections of a course meet in the same period, this also displays.
Attendance is automatically recorded at the period's Tardy Threshold. Any student that has not scanned in previous to the Tardy Threshold will have an absence record. Scanning into the classroom after the Tardy Threshold will update the absence to tardy if the absent threshold has not been met.
Tip:
The Expand button can be used to extend the work space to the full size of the user's screen. Click the Expand button again or Esc on the keyboard to exit full screen mode.


