Location: Attendance > click Seating Chart
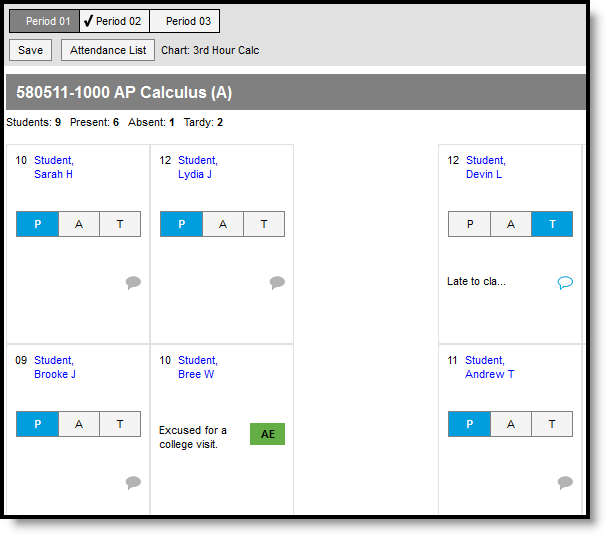
Another option for taking attendance is to use the seating chart you've created for the section. The period you're recording attendance for appears selected at the top, as with Period 1 in the example below. The Course and Section displays at the top of the attendance list. If you teach multiple sections in a period, each appears in its own section.
To use seating charts for attendance, mark the Use Seating Charts for Attendance option in your Account Settings.
Taking Attendance Using a Seating Chart
Use the P, A, and T buttons to indicate which students are Present, Absent or Tardy. The totals of each type calculate at the top. Excuses can only be entered by the attendance office; teachers cannot enter or modify them. Include any information you may have about the attendance event by clicking the speech bubble icon and entering a Comment. Click Save to submit the attendance record to the attendance office.
Click on a student's name to view the their demographic and contact info.
If any attendance information has already been entered by the attendance office, that information loads automatically, as with Bree Student in the example above.
If a school has implemented Blended Learning, a Virtual tag displays in seating chart attendance for students who are attending school virtually. Use the roster-based attendance tool to record virtual attendance and participation.

