Tool Search: Filter Designer
Ad hoc filter publishing allows State Edition users to create and maintain Ad hoc filters which are automatically published to districts connected to the State Edition via DIS. Through this functionality, State Edition users can publish filters to connected districts, unpublish or remove State filters, and revise and republish filters back to districts, as necessary. District users also have the ability to export Ad hoc filters into a file which can be imported into State Edition.
Publish State Filters to Districts
Published filters are placed in a State Published folder (or BIE Published folder) where districts can then generate and use the filter.
Users must have Filter Designer, State Owned Filters and Publish Filters tool rights in order to use this functionality.
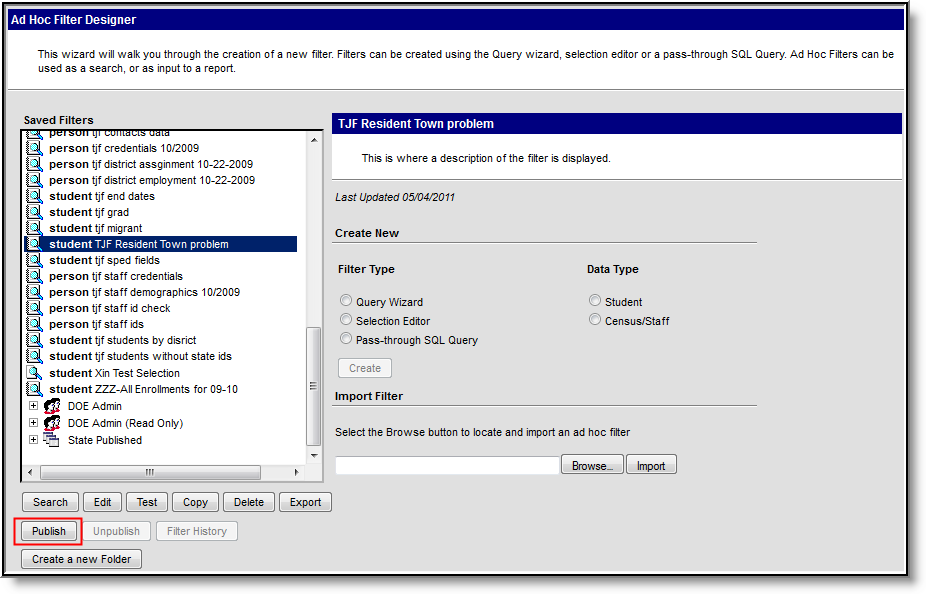 Publishing an Ad hoc Filter
To publish a filter, select the filter within the Saved Filter window and click the Publish button. The filter will move to the State Published folder (or BIE Published folder).
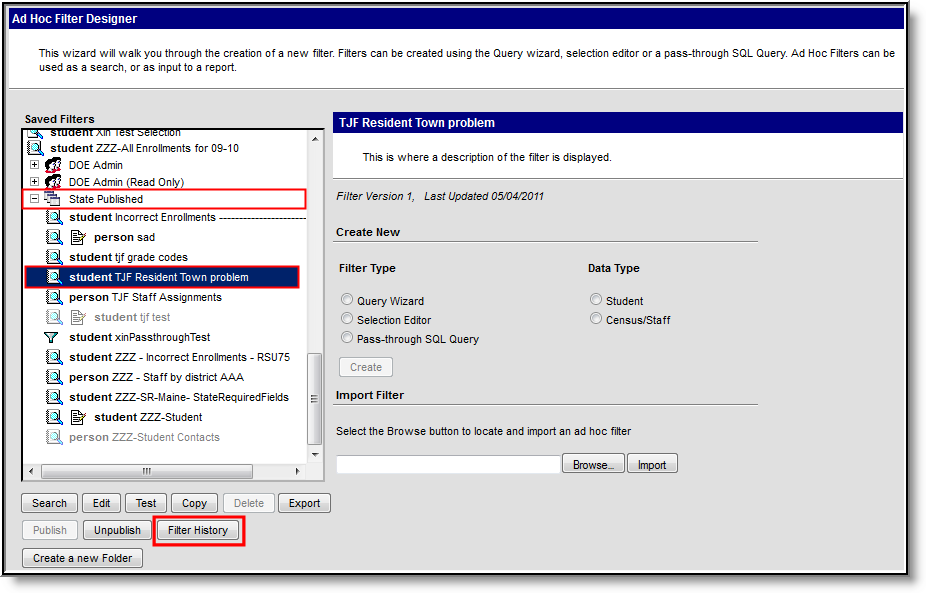 Published Filter Moved to State Published Folder
All published filters are moved and maintained within the State Published folder. This folder indicates what state filters are currently published or unpublished (greyed out) and requires unique tool rights as a means of protecting and controlling the filters from other Filter Designer users.
Once a filter has been published, users can select the filter within the State Published folder and click the Filter History button to view the current status of the filter's publishing process.
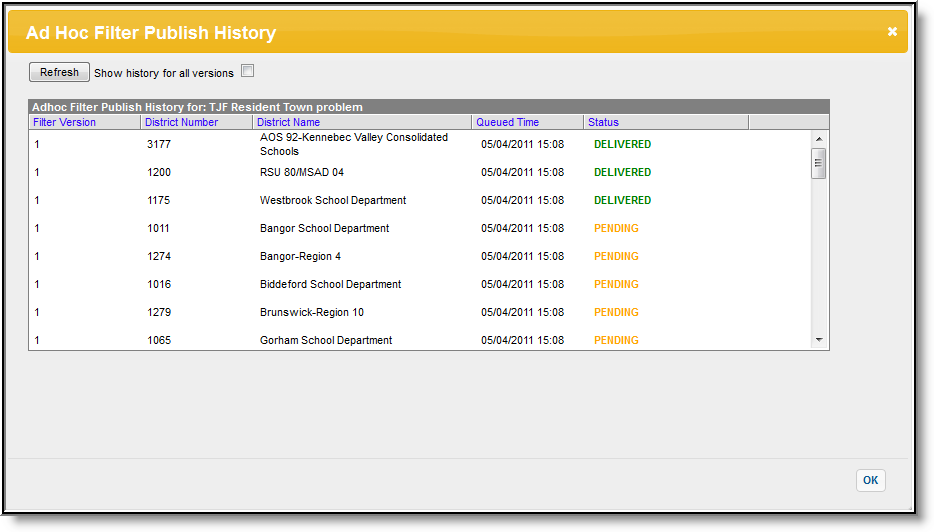 Viewing the Status of a State Published Filter
The Ad Hoc Filter Publish History detail window displays the current status of a filter's publishing activity. Information is broken down by district and the Status indicates where the filter is along the publishing process. A status of DELIVERED means the filter was successfully published to the district. A Status of PENDING means the filter is attempting to publish to the district but has not completed the process. A Status of TIMEOUT means the filter was not published to the district. A status of TIMEOUT is often an indication that the district is not properly synced to the State Edition via DIS.
To refresh the window and view the most up-to-date information, click the Refresh button. If the filter has been previously published, users may view publish history information about all versions of the filter by checking the Show history for all versions checkbox. See the Republishing State Filters section for more information about republishing filters.
Manage State Filters in District Edition
State-published filters can be added or removed from districts at any time. In order to properly manage these filters, notifications are provided in the Process Inbox and filters are stored in a State Published folder. When a filter is published from the state and received by the district, schools within that district will receive an indication of this within their Process Inbox.
District users MUST have State Owned Filters tool rights in order to access State Published filters.
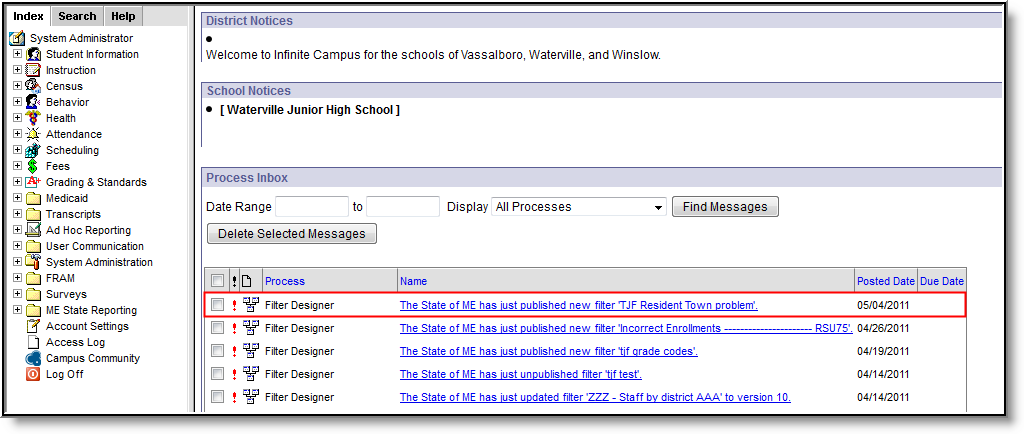 Notification of a New State Published Filter
Users can click the notification to be directed to the filter or go to the Filter Designer tool and view/generate the filter from within the State Published folder.
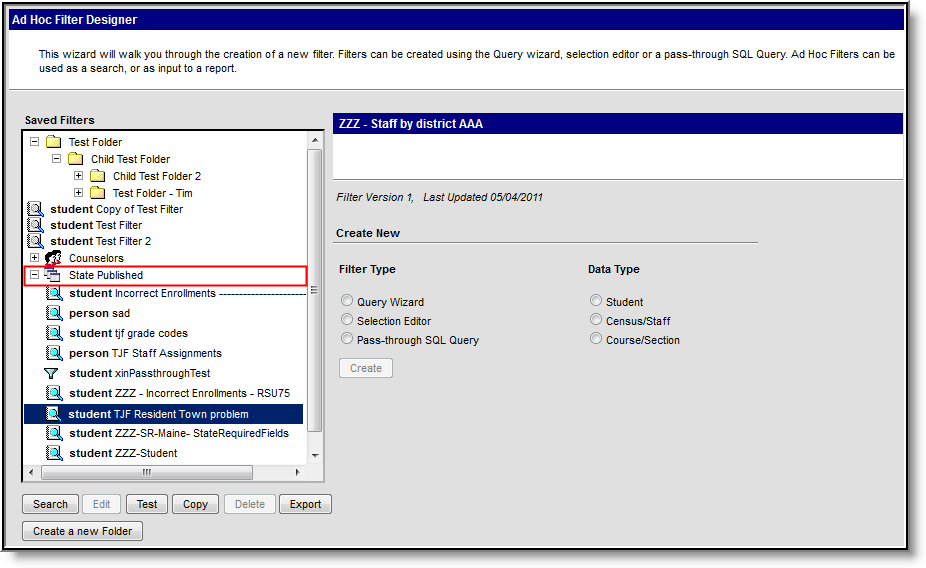 View a Moved Ad Hoc Filter
As seen in the image above, the state-published filter TJF Resident Town problem was indicated in the Process Inbox notification and has been placed within the State Published folder. This filter is now ready for use by district users.
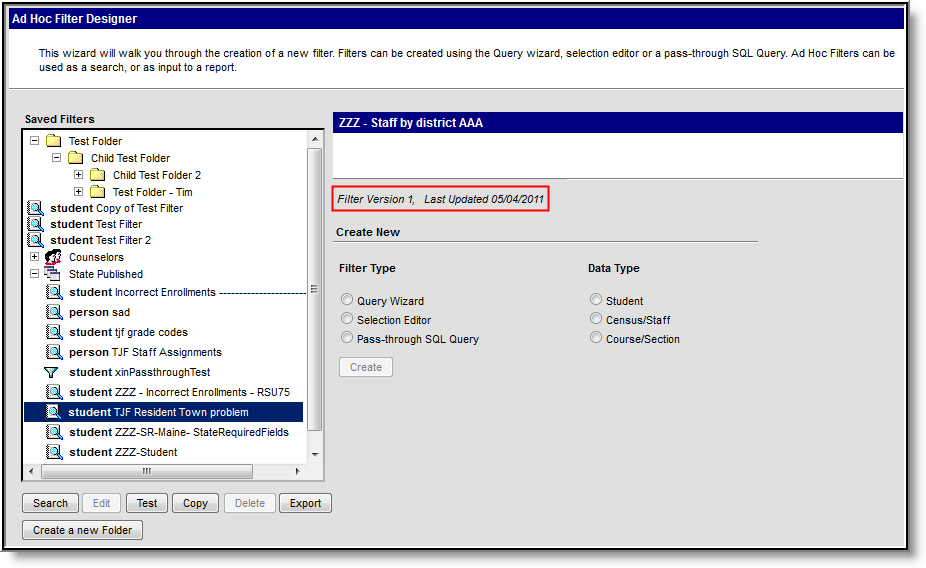 View Filter Versions
Because filters can be unpublished, modified and then republished back to districts, the Filter Version indicates what version is currently being used. This indication is important for coordinating with the state or other schools/districts when sharing or discussing information based on the filter. The Last Updated field serves as a good indication of how new or recent a filter version may be. Each time a filter is modified and republished by the state, the Filter Version is updated to reflect this change.
Copy State Filters
Once a filter is unpublished by the State it is no longer available for use by the school or district. For this reason, users may copy state published filters for personal use. Once copied, the filter will remain amongst other standard filters within the Saved Filters window and can coexist with newer, more recent versions of the state published filter.
A copied state filter becomes the user's personal filter and will not be updated when the corresponding State Published filter is updated to a newer version.
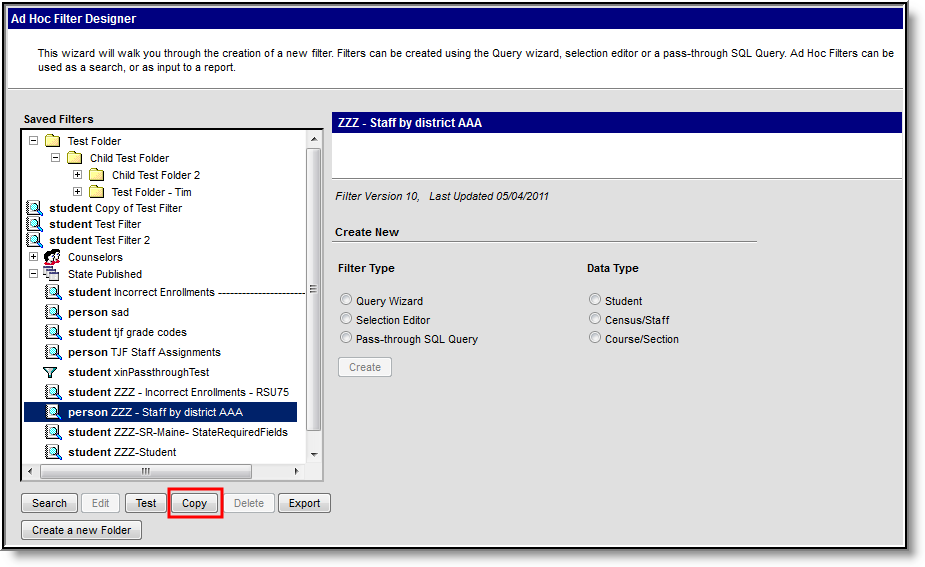 Copy State Filters
To copy a filter, select the filter from within the Saved Filters window and click the Copy button.
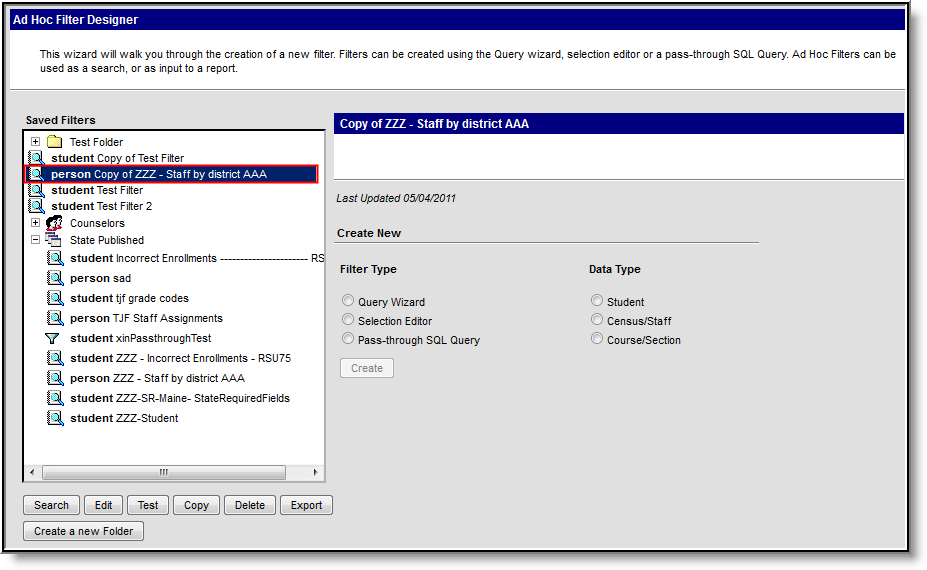 View a Copied State Filter
A copy of the state filter is placed amongst other non-state published filters and can now be edited, deleted or exported as necessary.
Unpublish State Filters
State Edition users can unpublish State Published filters at any time. Once a filter has been unpublished, District Edition users can no longer view or use the filter.
Users must have Filter Designer, State Owned Filters and Publish Filters tool rights in order to use this functionality.
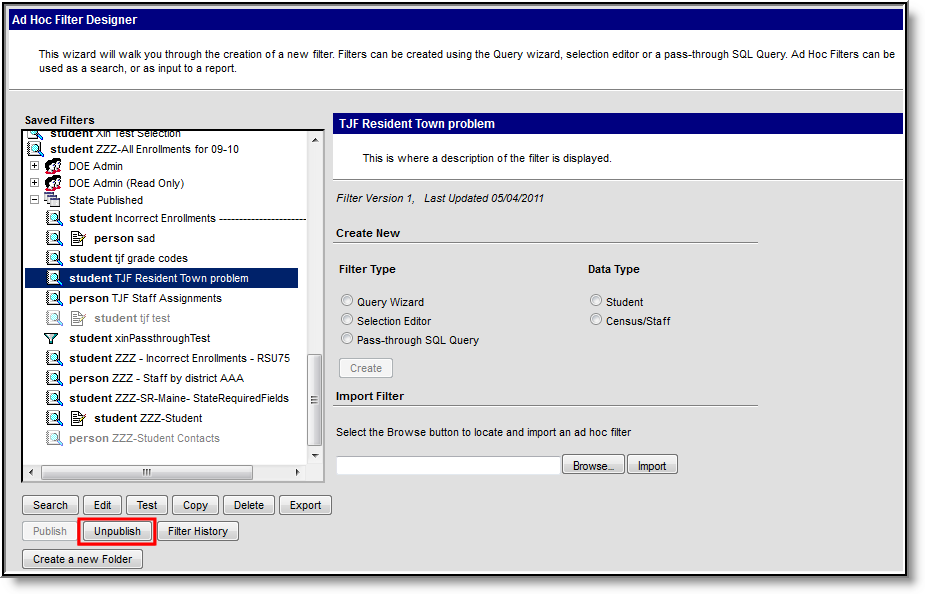 Unpublish a State Published Filter
To unpublish a filter, select the filter from within the State Published folder and click the Unpublish button. The filter will become a light grey color, indicating it is currently unpublished.
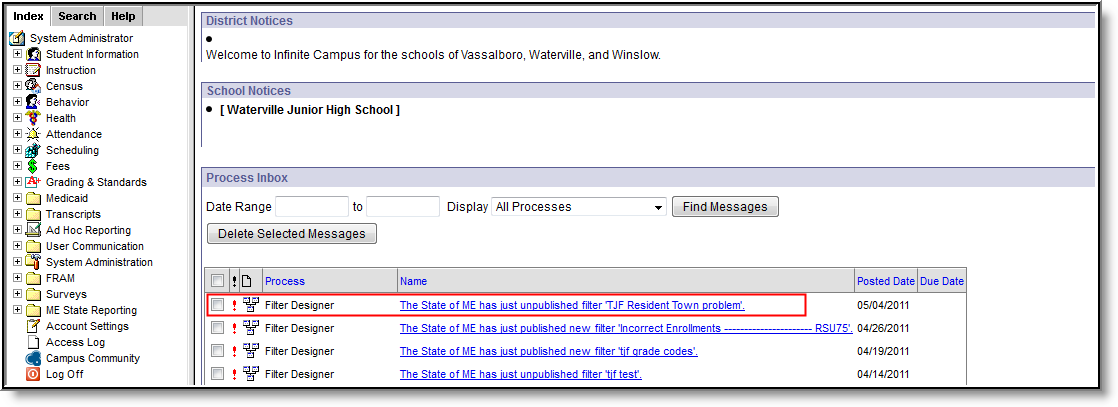 View a Moved Ad Hoc Filter
Once a filter has been unpublished by the state, users with State Published filter tool rights will receive notification of this change within their Process Alerts. This notification means the filter is no longer visible or available for generation.
Republish State Filters
Previously published and then unpublished filters can be republished back to districts.
Users must have Filter Designer, State Owned Filters and Publish Filters tool rights in order to use this functionality.
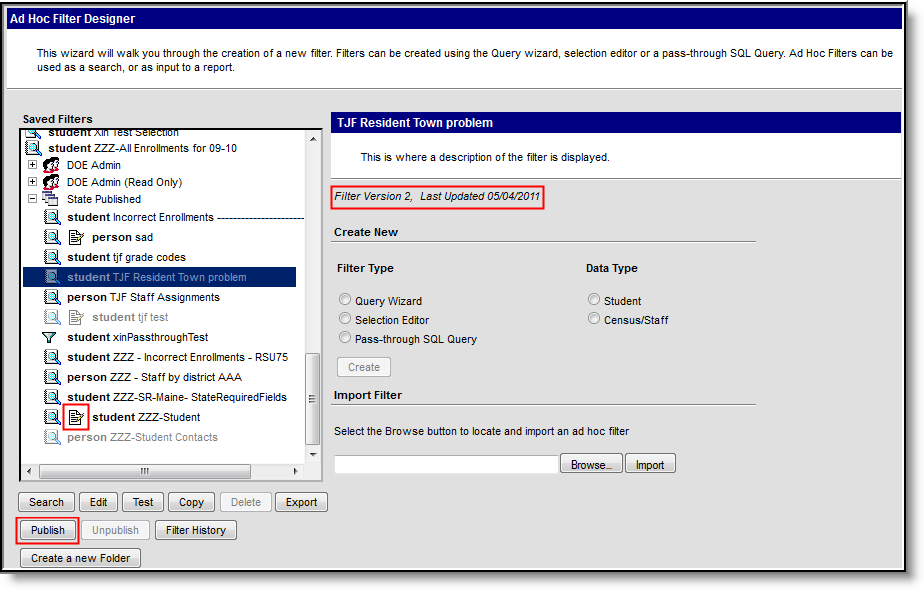 Republish a State Published Filter
To republish a filter, select the filter from the Saved Filters window and click the Publish button. The filter will turn from a light grey color to regular black font. This indicates the filter has been published. In the image above, because the filter has been previously published (Version 1) and then modified, the filter is now considered Version 2.
If a published filter has been edited after being published, an editing icon will display to the left of the filter name. This icon indicates the filter has been modified and must be republished in order for district users to receive modifications.
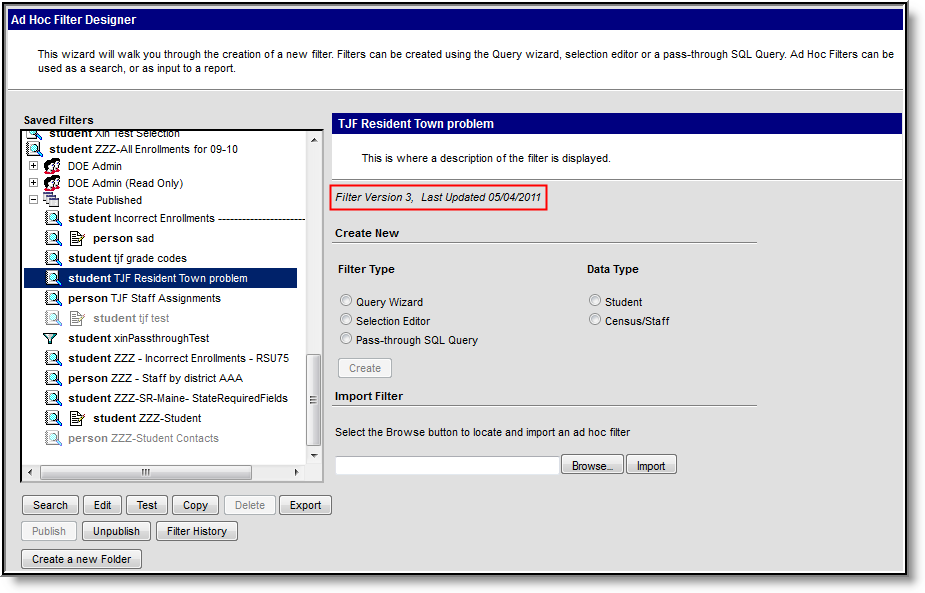 Filter Versions
Once the filter has been modified and republished to districts, the Filter Version is now 3 because logic treats every modification to the filter's movement in the publishing workflow as a version.
 Notification of Republished Filter in District Edition
Once a filter has been republished by the state, schools within the district will receive notification of this change within their Process Inbox. If selected, this notification will direct users to the newly updated filter as well as indicate the filter's version.
District and State Edition users have the option of exporting Ad hoc filters into a file format that can be imported into the State Edition.
Users must have Filter Designer and Export Filters tool rights in order to use this functionality.
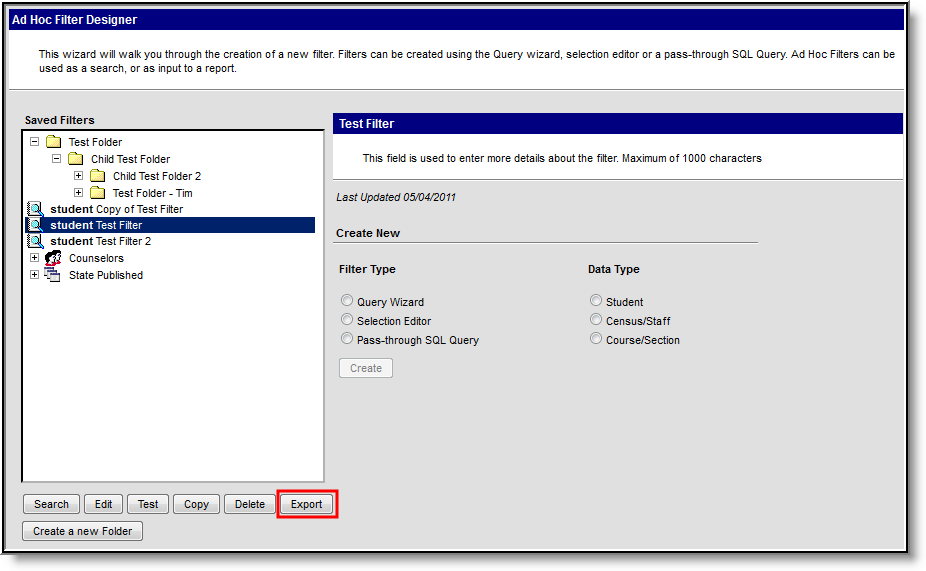 Export an Ad hoc Filter
Export an Ad hoc Filter
To export a filter, select the filter from the Saved Filters window and click the Export button. A pop-up message will appear, asking where to locally save the file.
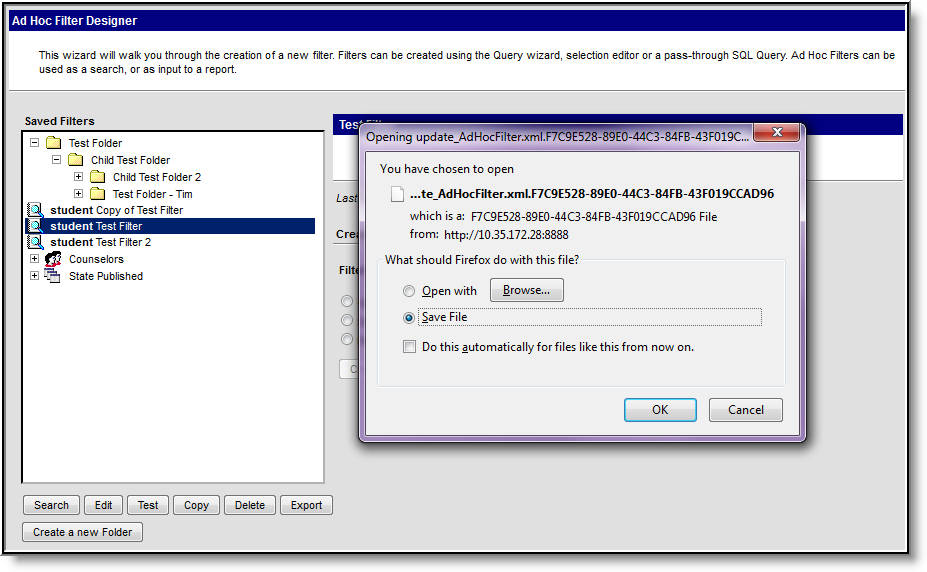 Save an Exported Ad Hoc Filter
Select whether to open the file using an installed program or save it locally to a hard drive or storage device. Once saved, the file can then be imported into the State Edition.
- When opening the file, click the Browse button to select the desired program in which the filter opens. This selection applies to this and every future time the same filter is selected by the user.
- It is best to open filters in Notepad, Textpad, Wordpad, etc., unless there is a reason to export it to another format.
- A program must be chosen for every filter available to the user.
Do not modify the file name or any data within the file. Modification of these items will result in the file not being allowed to be imported.
Export and Import Ad hoc Filters
Exported Ad hoc filters can be imported into State Editions of Campus using Import Filter functionality.
Users must have Filter Designer > Import Filters tool rights in order to use this functionality. This functionality only exists within State Editions of Campus. Filters are published down to districts using Publish functionality and districts are able to send filters to the State for import using Export functionality.
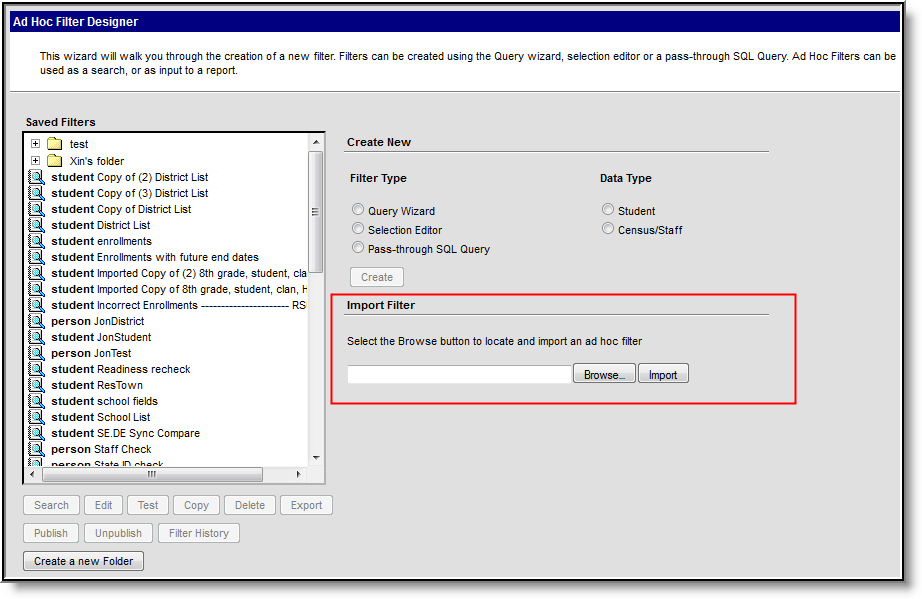 Import an Ad hoc Filter
To import an Ad hoc filter, select the Browse button. A pop-up editor will appear, asking to select the filter from a locally stored location.
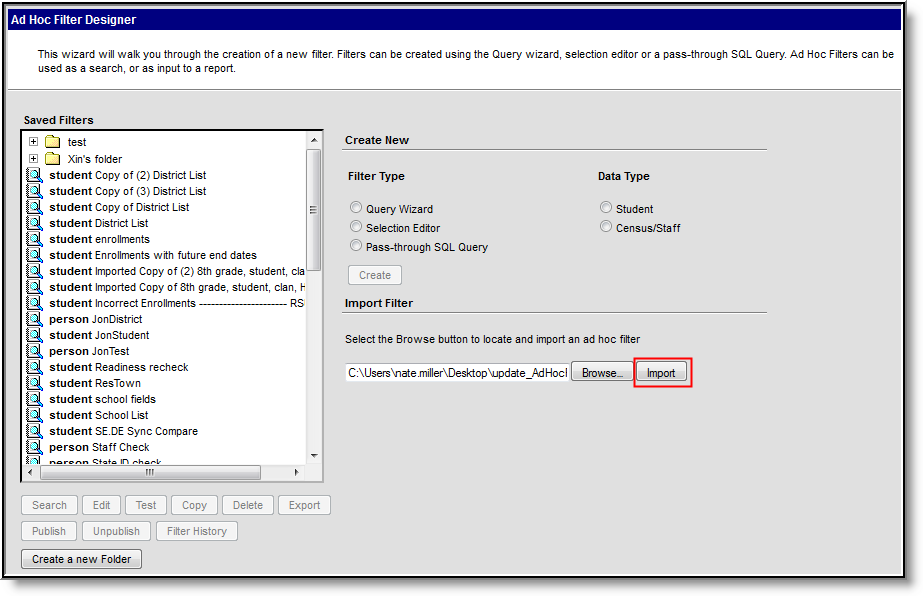 Import the Exported Filter File
Once the file has been selected, the file path will populate the field to the left of the Browse button and is now ready to be imported. Select the Import button to import the file.
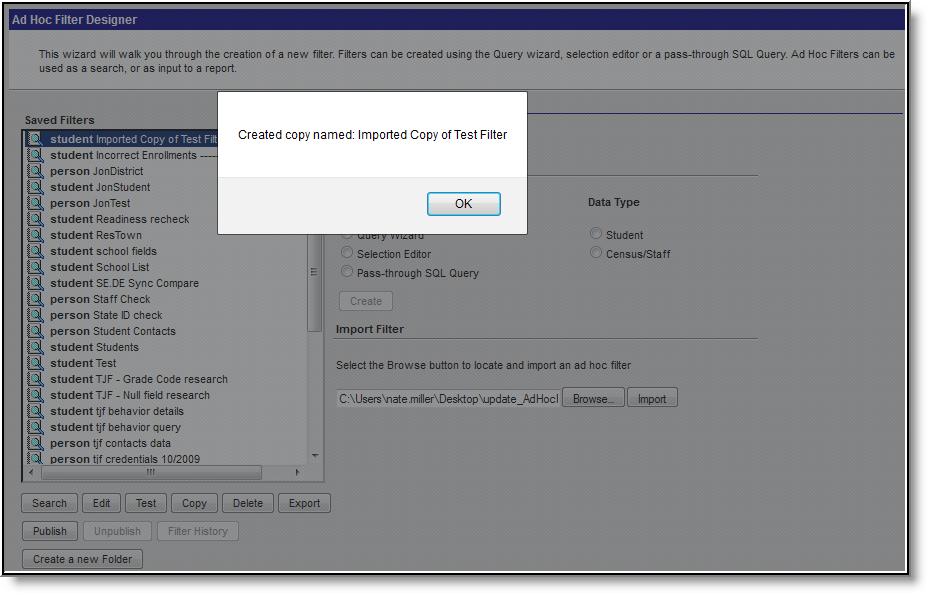 Confirmation of Imported File
Once the Import button is selected, a pop-up message will appear, indicating the filter was imported and listing the filter name.
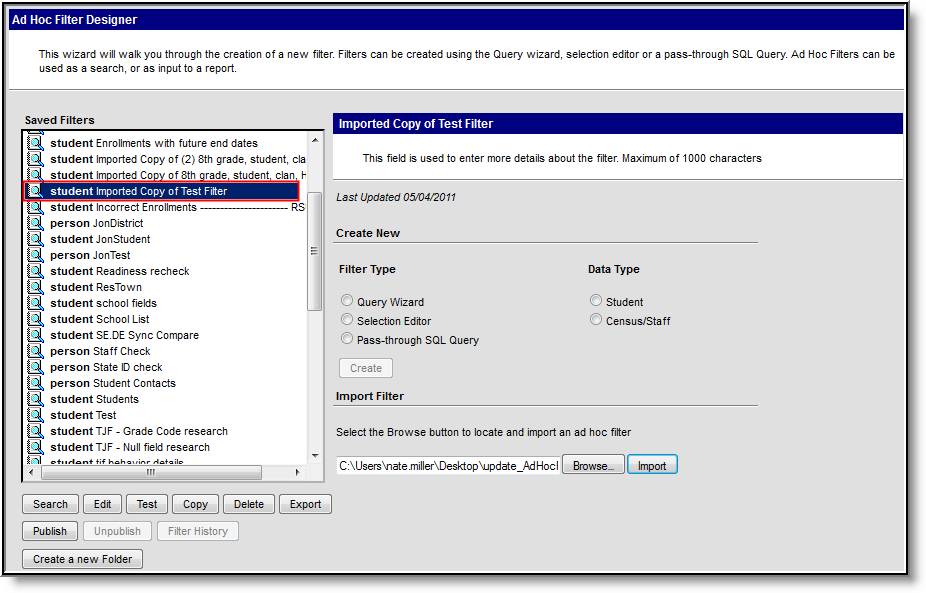 View an Imported Filter
The imported filter now appears within the Saved Filters window and is able to edited, copied, deleted, or published as desired.
