Tool Search: Custom Tool Setup
Custom Tool Setup allows you to create custom tools for tracking local or state-level information. You can also use this tool to embed hyperlinks to appear as a tool within the Infinite Campus navigation and have these links open in a new tab or within the workspace.
Custom tools are district-wide, but information can be displayed or hidden from users through the assignment of tool rights. Custom tools can also be added to the Parent and Student Portals. Tools created at the state level can be published down to DIS-linked districts and these tools can only be modified or deleted by the state.

See the Custom Data and Links Tool Rights article for information about tool rights for this and related tools.
Step 1. Create a Custom Tool
- To create a new custom tool, select the New Custom Tool button. The New Custom Tool Setup editor will appear on the left.
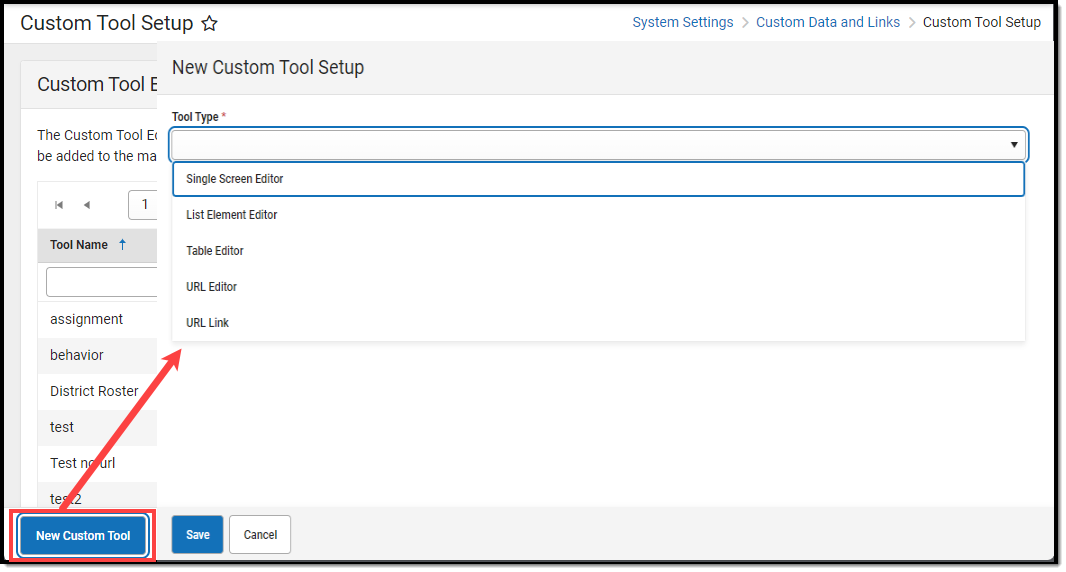
- Select the Tool Type. See the table below for more information about each option:
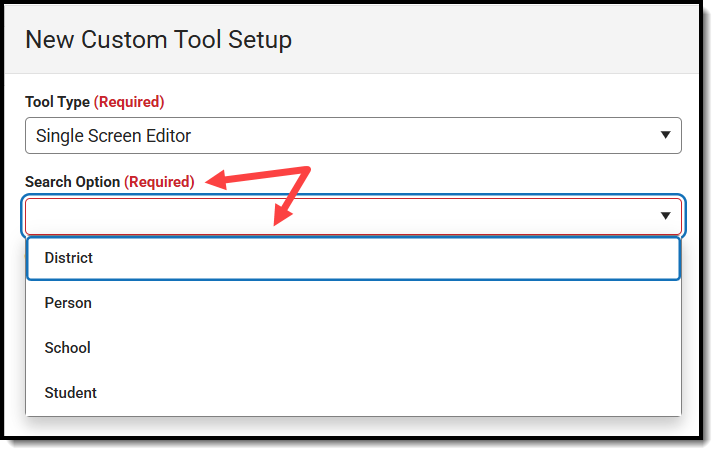
Single Screen Editor List Element Editor Table Editor URL Editor URL Link - Select the Search Option. This determines which type of custom object the tool will be associated with. For example, selecting Student will associate the custom tool with a custom student object.
This comes into play when performing a batch resync, as resyncing all student information would also resync all information associated with a custom tool set with a Search Option of Student.
- Enter the Tool Name. Tool names are limited to 33 characters, unless the Tool Type is 'URL Link', which is limited to 50 characters.
- Fill out the rest of the editor, which will vary depending on the Tool Type selected.
- Determine which Menu Item the tool will live under.
- Determine which Category within the Menu Item the tool will live under. This is where the user will find the tool when navigating Campus. You can add additional menu placements later using the Custom Tool Placement Editor.
- Click Save.
Once saved, the tool will now appear in its designated area. For example, in the image below, the Additional District Info custom tool was assigned to the Menu Item of School & District Settings and a Category of District.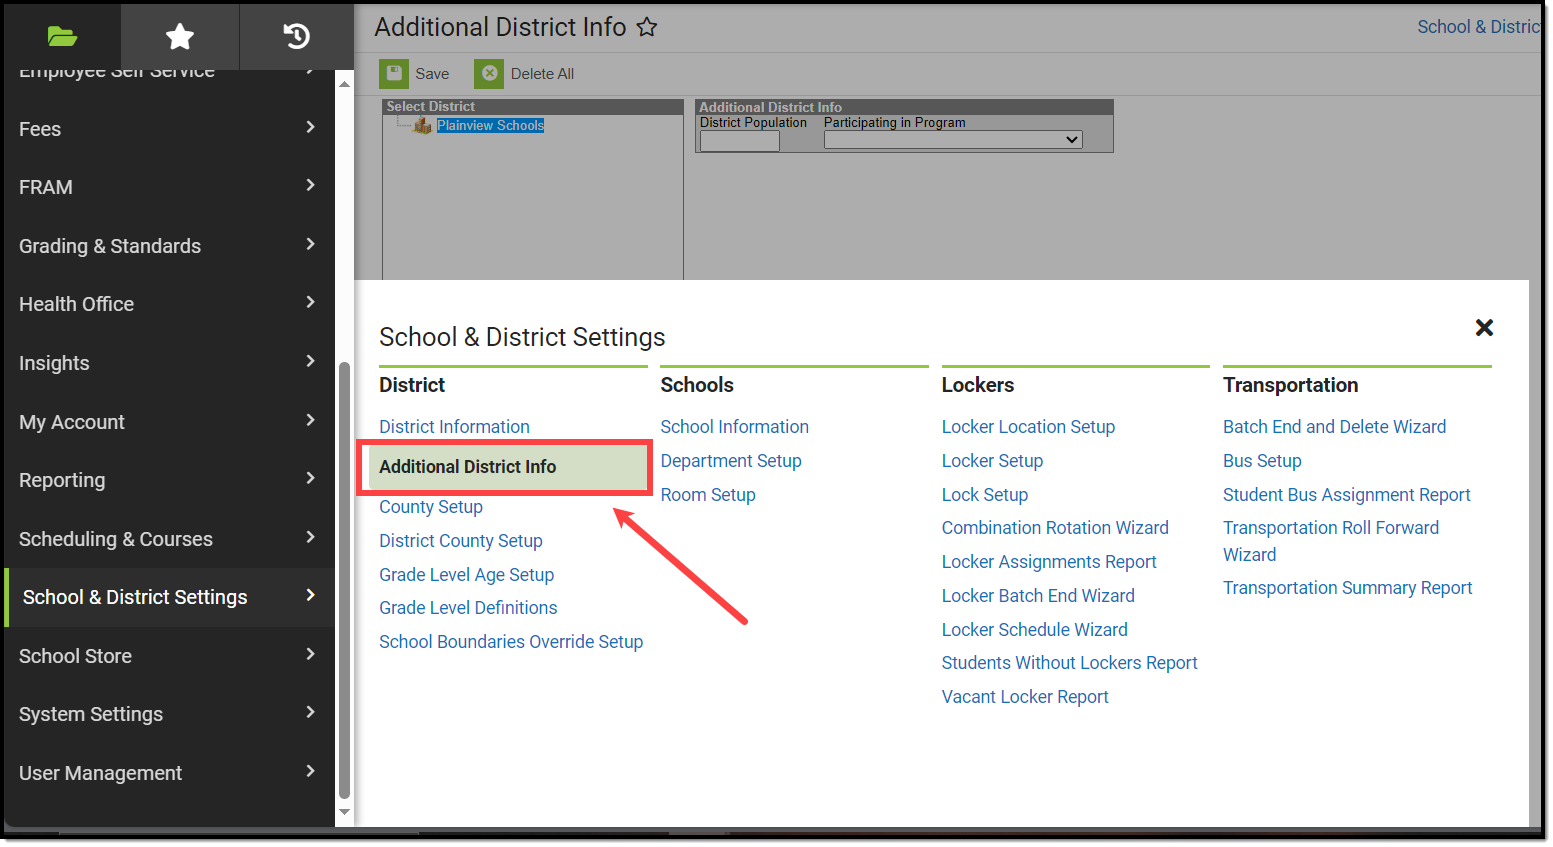
- If you created a URL Editor or URL Link, you are finished, and users can now access this link within Infinite Campus. If you created a tool, move on to Step 2 below.


Step 2. Define Custom Tool Attributes
Now that your custom tool has been created, custom attributes need to be added so you can designate which fields it contains and what information it will gather.
- Navigate to the Custom Attribute/Dictionary tool.
- Click the New icon. The Campus Attribute Detail editor will appear below.
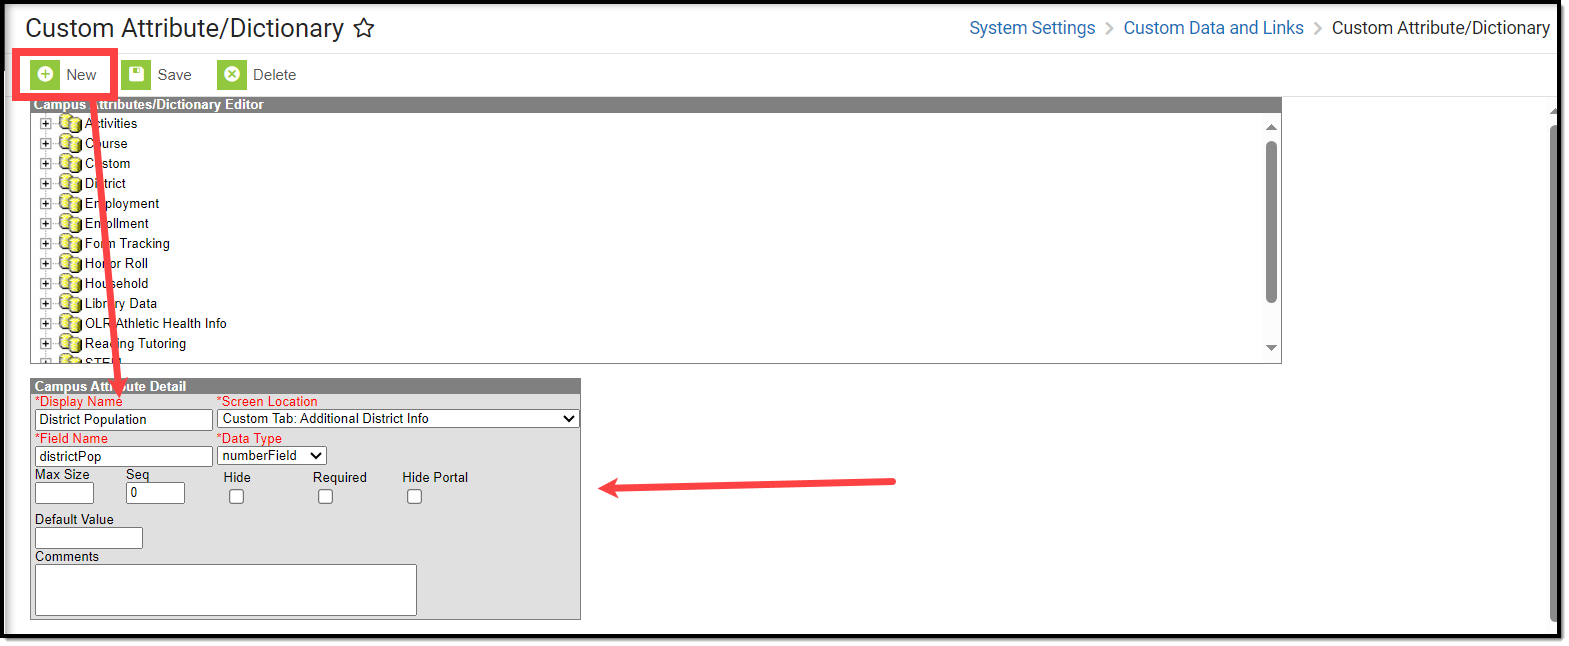
- Enter the Display Name of the field you would like to add. This is the name that appears in the UI for the field.
- Select the Screen Location. This is where you would select the custom tool you just created. For example, the Additional District Info tool is selected since it was created in the previous steps.
- Enter the Field Name. This is the name used to identify the field in the database.
- Select the Data Type. This determines the type of field presented to users. See the table below for more information.
Data Type Details textBox Creates a text box.
Users are allowed to enter up to 255 alphanumeric and special characters.
drop-down list Creates a dropdown list.
Limited to 15 alphanumeric characters.dataField Creates a date field.
Users must enter the date in MM/DD/YYYY, MM-DD-YY or MMDDYY format.
numberField Creates a number field.
Only numeric characters (no decimals) are allowed. Max default value is 10.
floatField Creates a float field.
Only numeric characters are allowed with one decimal point.
Max default value is 10. The value can be without a decimal point. If the default value has a decimal, only 2 numbers to the right of the decimal are allowed.timeField Creates a time field.
Users must enter values in HH:MM AM/PM or HH:MM military time. Values should include a semicolon.
ssnField Creates a field for Social Security Number input.
Users must enter a number pattern of XXX-XX-XXXX where X = a numeric value between 0-9.
When entering Social Security numbers, dashes should be included. There are 11 characters total (this includes the dashes between numbers).phoneField Creates a field for entering phone numbers.
Users should enter phone values in (999)999-9999 or (999)999-9999x9999 format, where:
- 9 = a numeric value between 0-9
- x = the delimiter for entering an extension number
emailField Creates a field for entering an email address.
Users must enter email addresses in XXXXX@XXXX.XXX where:- X = any alphanumeric or special characters
- Users may enter multiple periods
- The total number of characters does not surpass 100
- @ is required
moneyField Creates a field for entering a monetary value.
Users must enter a value between 0-9. One decimal point is allowed but only two numbers right of the decimal point is allowed. Values entered can contain the $ special character but is not required.checkBox Creates a checkbox. - Enter any additional information. See the table below for more information about these fields.
Fields Description Default Value The default value that auto-populates in the field when a new record is created.
Note that default values are NOT saved in the database tables.
Max Size The maximum number of characters allowed for entry in the field. Seq The order of the field within the tool.
For example, Field A has a seq of 1, and Field B has a Seq of 2. Field 1 will be listed first, followed by Field 2.
Fields are displayed in numeric or alphabetic order if no sequence is indicated.Required If marked, this checkbox indicates that the field must be filled out (or checked) for the user to be able to save a record for the custom tool. The field name displays in red text (instead of black) and is followed by an asterisk (*) to indicate that it is required. Copies Forward When marked, the data associated with the attribute is copied forward into the calendar for the next school year.
This option applies to things that are cloned or rolled forward from year to year. For example, calendars are copied from one year to the next, courses are copied forward, and enrollments are copied forward.
People are not tied to a calendar; therefore, attributes associated with people are not copied forward, even when this checkbox is marked.
This option is not available for data fields assigned to a custom tab.
Hide Portal If marked, this checkbox indicates that the custom field will not be displayed in the Student or Parent Portal. It will also be hidden in the Student and Parent Portal if no associated data is saved in the database for the selected individual.
This field does not apply or appear to state-level users.
Comments Any comments related to the custom field. These comments do not display for users interacting with the field. - Click Save. The field has now been added to your custom tool.
- If the field you added to your custom tool, such as a dropdown field, requires values for selection, locate and select it in the list at the top of the screen.
For example, in the image below, a dropdown list called Participating in Program was added to the Additional District Info custom tool. The tool was located in the list, and the Dictionary link was selected, opening an editor at the bottom of the screen where field values can be entered.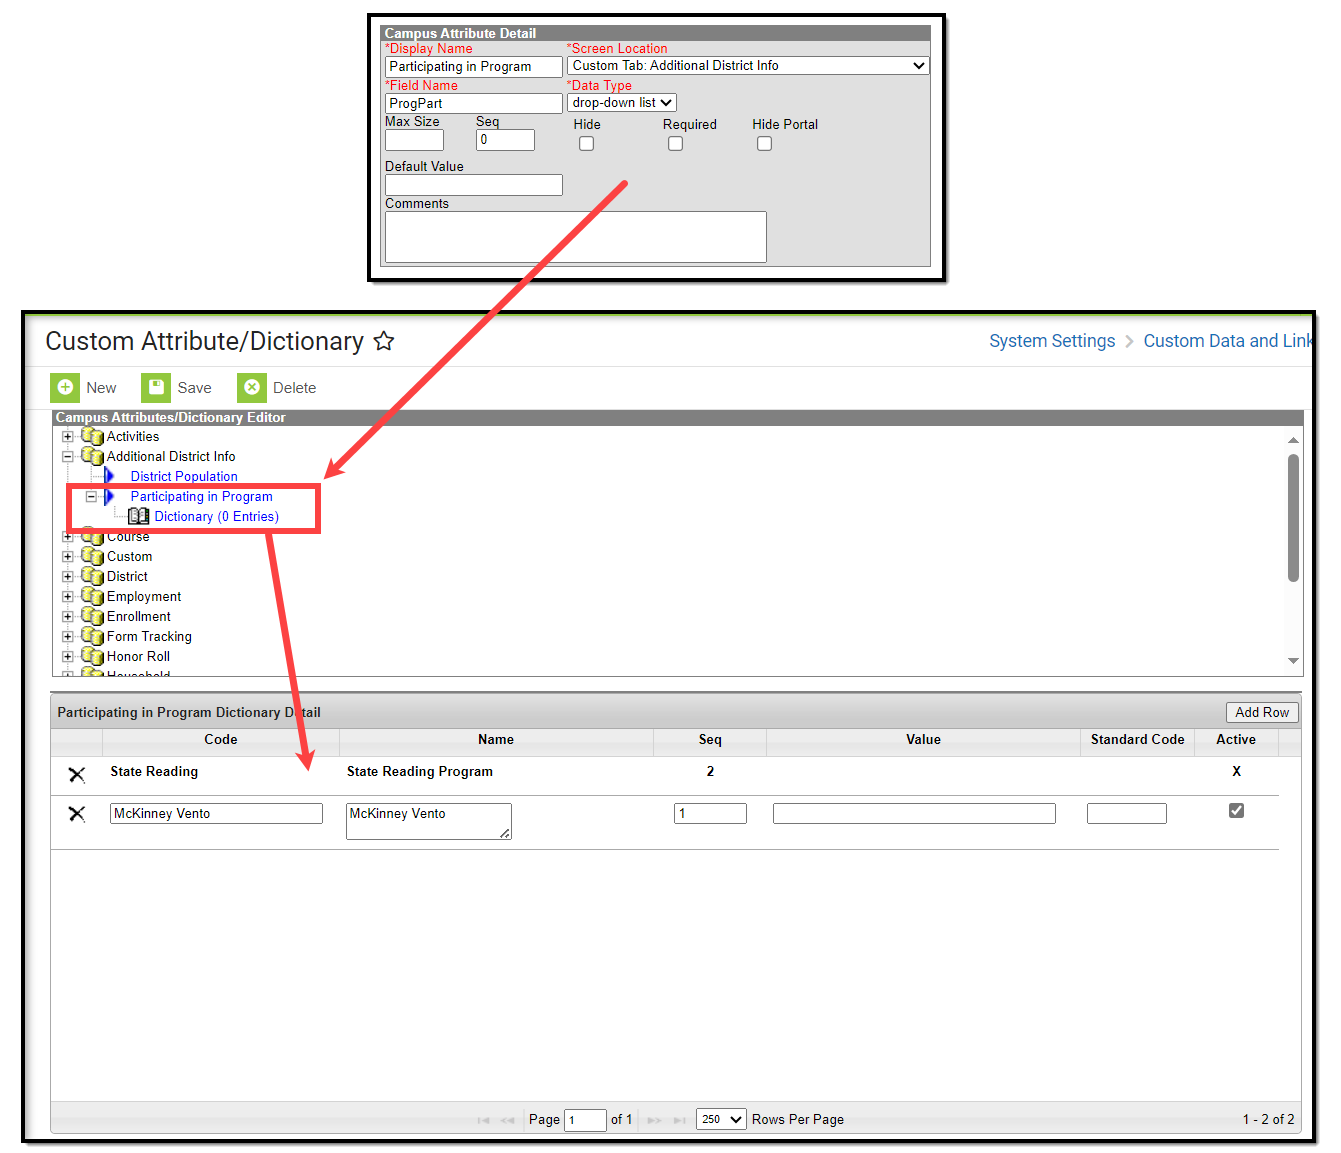
- Enter all necessary field values, and once finished, click Save. Your custom field is now available in your custom tool, and values are available within this field.
- Repeat steps 1-10 until all fields have been added to the tool. Once all fields and field values have been entered, move on to Step 3 below.


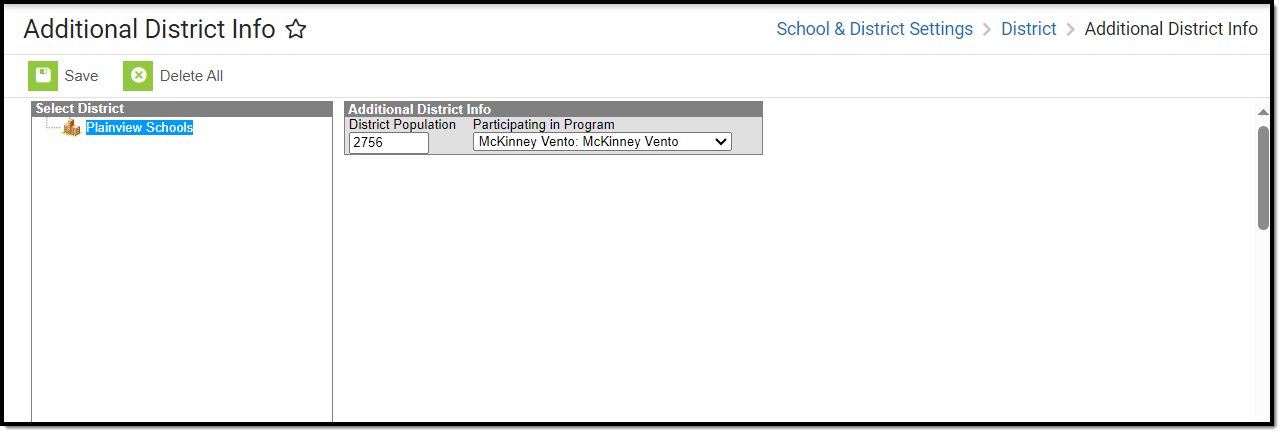
Step 3. Add Data to the Custom Tool
Once your custom tool has been created, fields have been added, and attributes have been added to fields, you are now ready to add data to your custom tool.
For example, in the image below, the user navigated to the Additional District Info tool created in the steps above and entered data within the added fields.
Step 4. Publish the Tool to Districts - State Edition Only
For users in a State Edition of Infinite Campus, you can publish custom tools and links down to DIS-linked districts.
To do this:
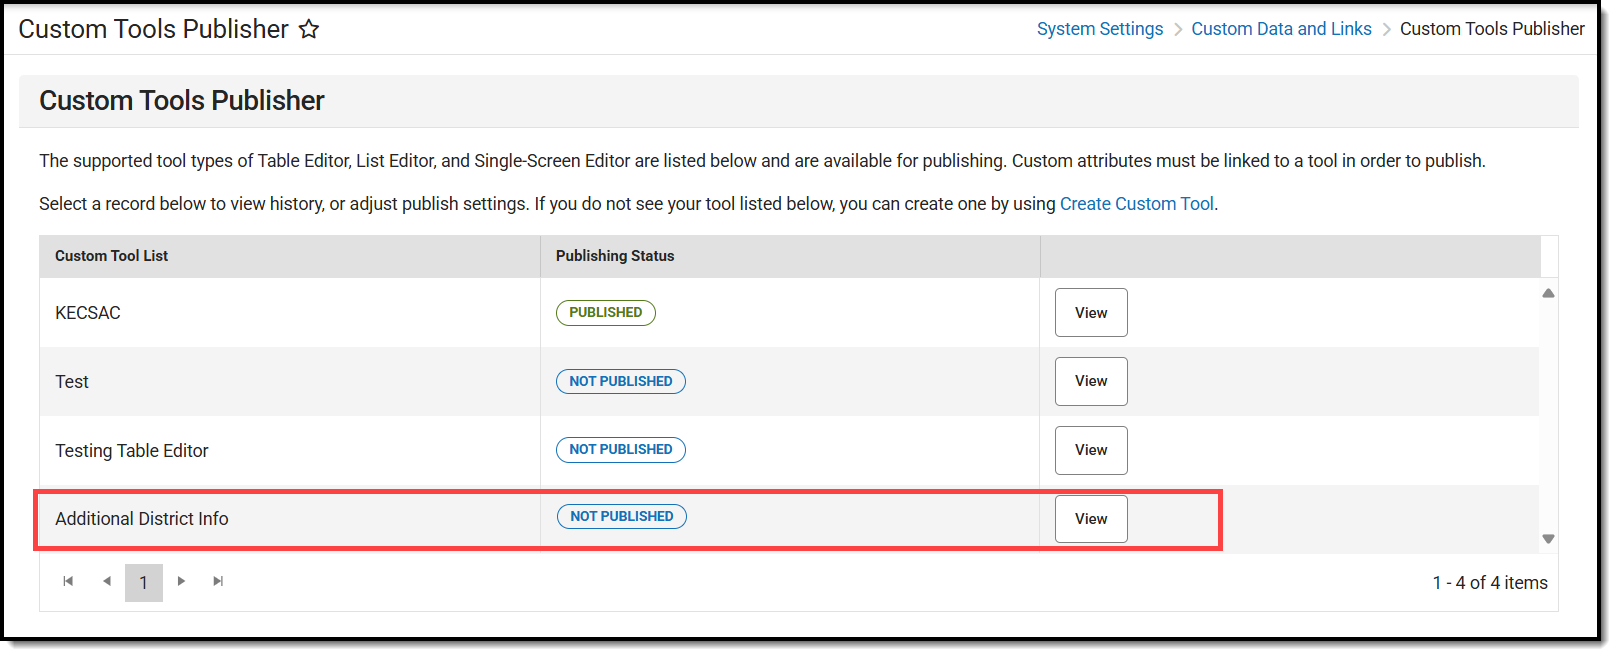
- Navigate to the Custom Tools Publisher.
- Click View for your custom tool in the Custom Tool List. In the example below, the Additional District Info tool will be selected.
- Select the Tool Status:
- If set to Active, the tool will appear as available to DIS-linked districts once you complete the publish process.
- If set to Inactive/Visible, the tool will still appear for district users but will not be available for use.
- If set Inactive/Hidden, the tool will not appear nor be available for any district users.
- Determine which districts will receive the tool by selecting an Ad Hoc Filter or selecting a district in the Unselected Districts window and clicking the
 button.
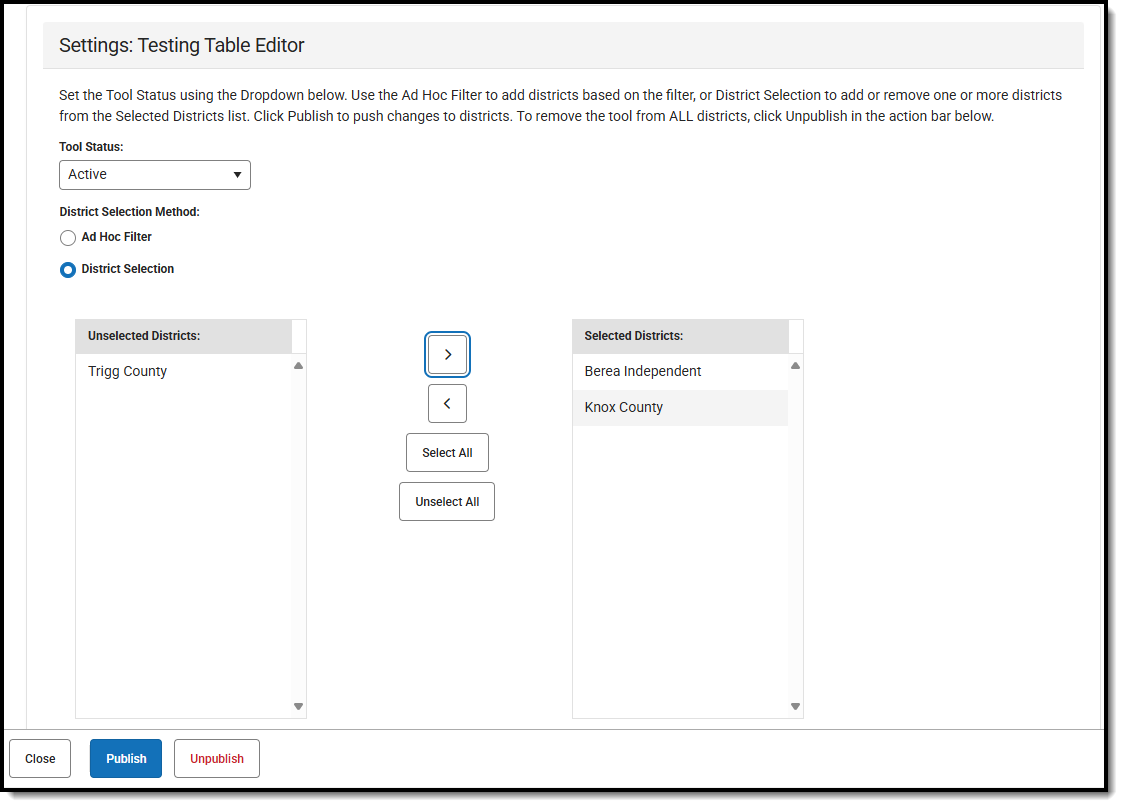
- Click Publish. The tool has now been published to the location defined for the custom tool.


Once a tool is published, a checkmark will appear in the Published column in this tool and the Custom Tool Setup tool.

Review and Modify Existing Custom Tools/Links
You can quickly locate an existing tool or link by utilizing the search fields at the top of each column of the Custom Tool Editor. These search fields dynamically filter results, meaning as you continue to enter characters, the list of tools/links continues to get refined to match what is entered.
For example, in the image below, entering 'test' in the Tool Name search field narrowed the results to just tools with the word 'test' somewhere in the name.

Each column also provides filtering options, which can be applied to the entered search text by clicking the  icon and selecting a filter parameter.

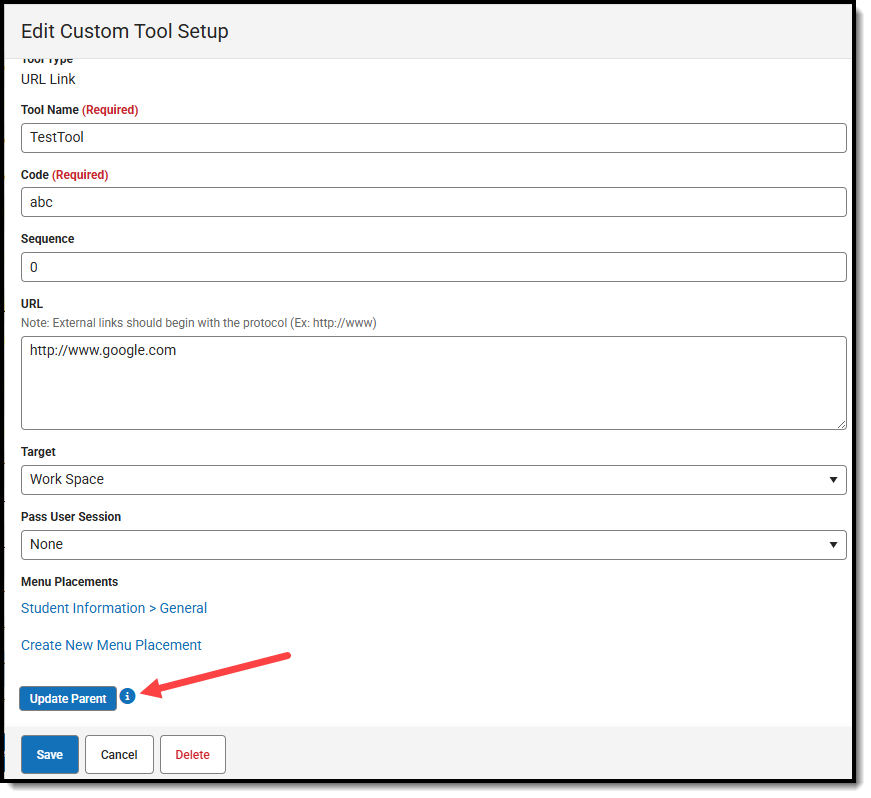
If your custom tool is assigned to a child tool ID within Classic Campus, an Update Parent button will appear. This button should be selected to assign the tool to a parent ID and ensure it appears properly within the UI and is available within Ad Hoc Reporting tools.
NOTE: The Update Parent button is not available for tools set to a Tool Type of URL Link or URL Editor or those with a Search Option of District or School.