Tool Search: Positive Attendance Import Wizard
The Positive Attendance Import Wizard imports records from a separate Learning Management System (LMS) or other external source (Excel file, etc.). This wizard can be used daily, weekly, monthly or even on an irregular schedule.
This tool is not available for Kentucky users.
This wizard only imports positive attendance data; there is no option to update existing records. If positive attendance records need to be updated, use the Attendance Wizard Positive Attendance option or modify records from the student's Attendance record.
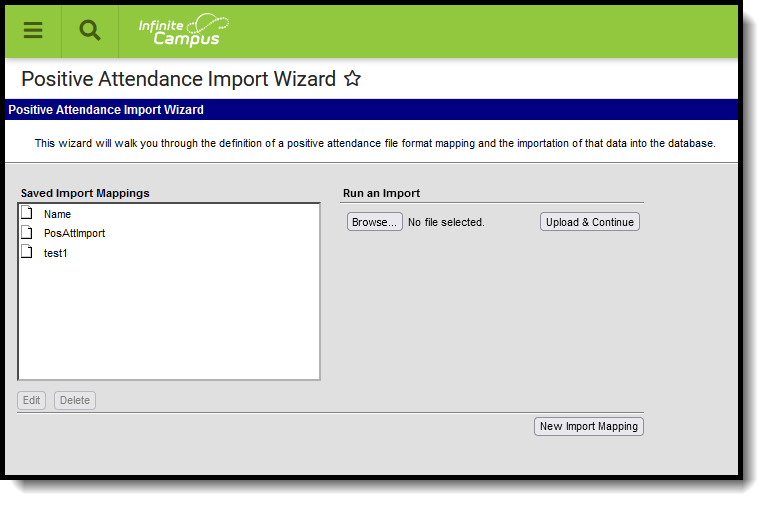 Positive Attendance Import Wizard
See the Positive Attendance Import Wizard Tool Rights article for information about rights needed to use this tool.
The following import file Types are supported:
| Format | Definition |
|---|---|
| Fixed-Width | This format is usually in the form of a file that has an allotted amount of space for each item. Column widths are static and characters may be padded to meet the formatting restrictions, Data is also left- or right-aligned. The file is often in a TextPad or NotePad document. |
| Comma Delimited | This format separates the data by commas. These files can often be opened in spreadsheet form, causing each comma separation to be a new column. |
| TAB Delimited | This format separates the data by using tabs. |
Be aware of the following logic for the recording of time in Positive Attendance tools:
- Times must be in HH:MM format, either in military time or in 12 hour time format.
- Negative durations are not allowed:
- Time In cannot be after the Time Out.
- Time Out cannot be before the Time In.
- The total time entered must equal a value greater than zero (Time In cannot be the same as Time Out).
- The Time In and Time Out for a section may not overlap the Time In and Time Out for another record for the same section.
- The Time Out value for one record can be the same as the Time In value for a different record.
- In order to enter a total duration of 24 hours (1440 minutes), the user can enter 12:00 AM as the Time In and 12:00 AM as the Time Out. This is the only exception from the rule above.
Create a New Import
- Click the New Import Mapping button.
- Enter the Name of the import file. This is the name of the import mapping and is visible from the Saved Import Mappings list. Names must be unique from other mappings.
- Select the Calendar for which this data applies. Only calendars where the Positive Attendance Preference is set to Yes are included.
- Select the File Type form the dropdown list.
- Select the fields in the data file that map to Student Identifiers. At least one option needs to be selected. Options are:
- State ID
- Student Number
- Person ID
- Last Name, First Name, Birth Date
- SSN
- If the file includes headers, mark the Yes button. If there are no headers, mark the No button.
- Location the import file by selecting the Browse button. Follow the instructions in the pop-up window for locating and opening the file.
- When found, click the Upload and Continue button.
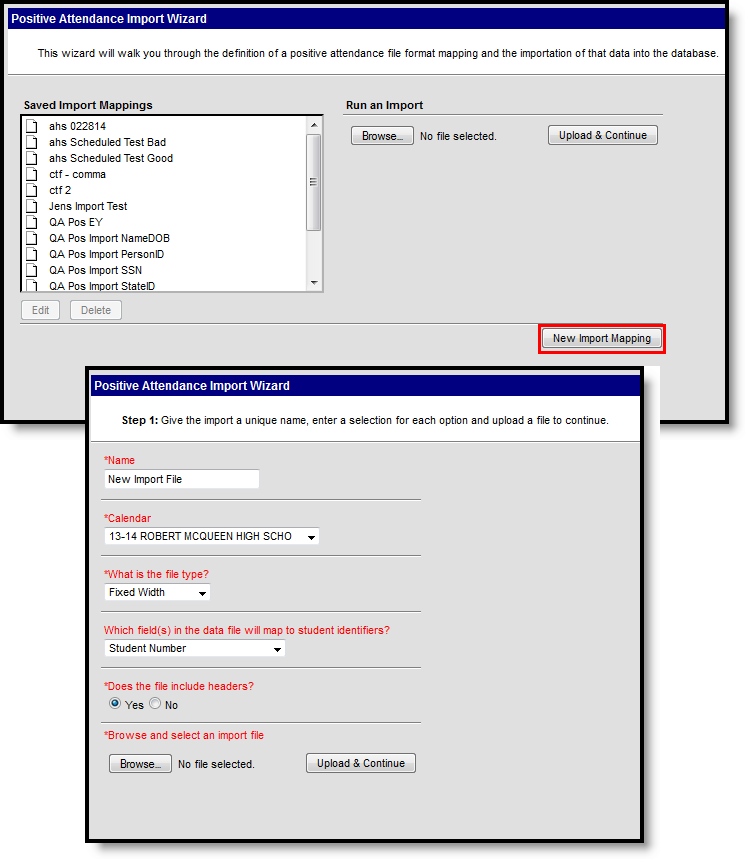 New Mapping Fields
Map Import Data Columns to Database Fields
The Raw Data File Sample frame displays columns from the import file. Users need to map the fields in the raw data file sample (the file that was uploaded) to appropriate fields in the user interface. Meaningful data items should be chosen here - last name, first name, student identifiers, etc.
Options vary based on the selected File Type.
If File Type is Fixed Width:
The list of imported fields displays in the Raw Data File box. Hover over these column names to see the file positions.
- Enter the Start Position of the mapped field.
- Enter the length of the mapped field in the Characters Long field.
- If desired, mark the Strip Leading Zeros checkbox.
- Click the Map Field(s) button. This displays the selected column in the Mapped Data Field(s) box.
- Click the Next button.
To modify selected changes, click the Previous button and begin again.
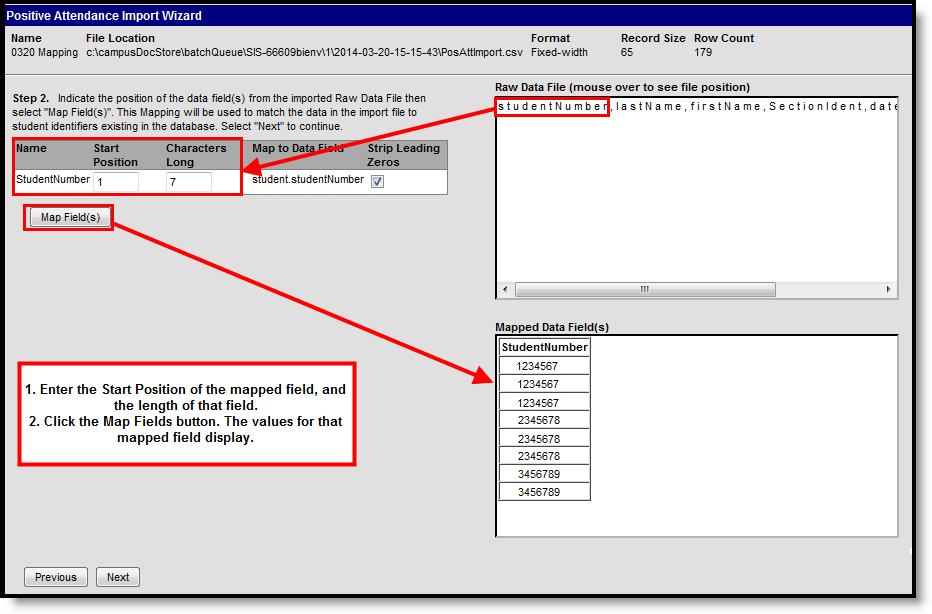 Fixed Width Column Mapping
If File Type is Comma Delimited:
A bold number displays at the top of each column, for identification purposes. This number should be entered in the Seq in Data File field when the data from that column is mapped to Campus.
- The value selected on the previous page to which the data maps displays on the left hand side of the screen. Enter the Seq(uence) in the Data File value for this column. A sample of the Raw Data File displays to the right.
- If desired, mark the Strip Leading Zeros checkbox.
- Click the Map Field(s) button. This displays the selected column in the Mapped Data Field(s) box.
- Click the Next button.
To modify selected changes, click the Previous button and begin again.
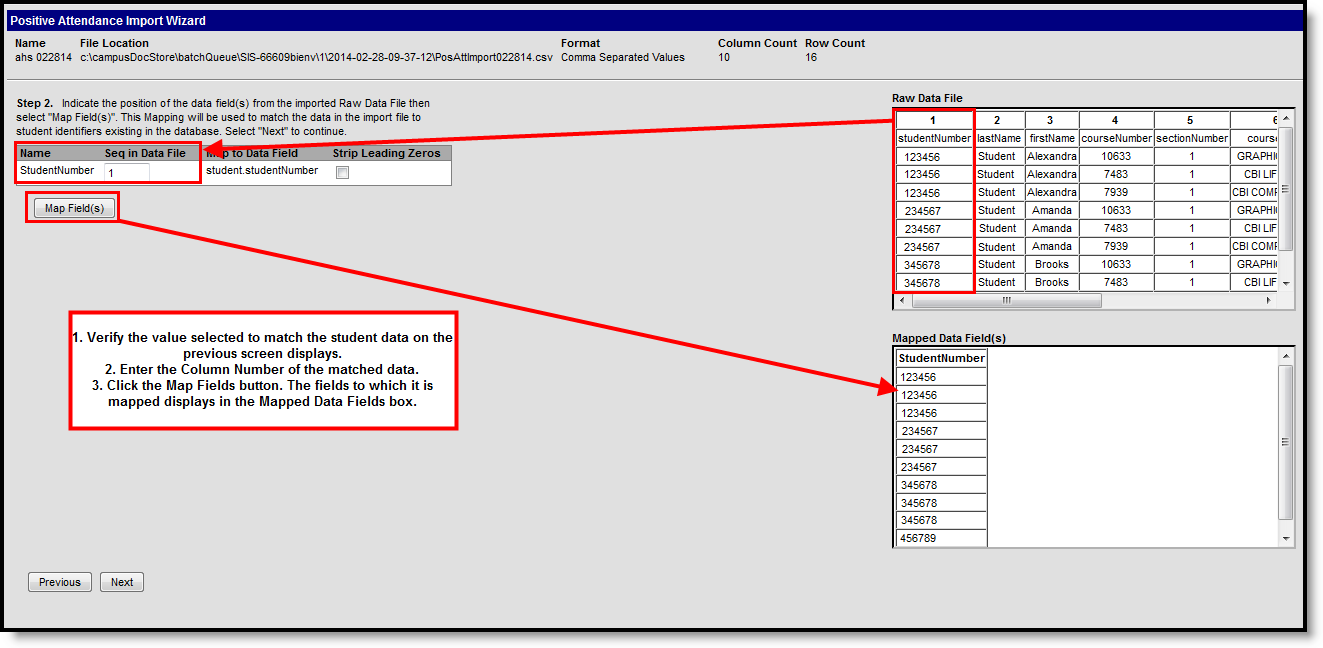 Comma Delimited Column Mapping
If File Type is TAB Delimited:
A bold number displays at the top of each column, for identification purposes. This number should be entered in the Seq in Data File field when the data from that column is mapped to Campus.
- The value selected on the previous page to which the data maps displays on the left hand side of the screen. Enter the Seq(uence) in the Data File value for this column. A sample of the Raw Data File displays to the right.
- If desired, mark the Strip Leading Zeros checkbox.
- Click the Map Field(s) button. This displays the selected column in the Mapped Data Field(s) box.
- Click the Next button.
To modify selected changes, click the Previous button and begin again.
 TAB Delimited Column Mapping
Map Imported Fields
- Indicate which fields to map from the imported Raw Data File to a field in the database by choosing Yes or No to the following fields:
- Section
- Date
- Time In
- Time Out
- Click the Next button.
Set the Location
- For each of the fields that are mapped, enter the column number in which they appear in the Raw Data File.
- For values that are the same for all students (dates, section numbers), select the value for each entry by clicking the Set Value button. Click the Save button on the Field Map when finished.
- Click the Next button when finished.
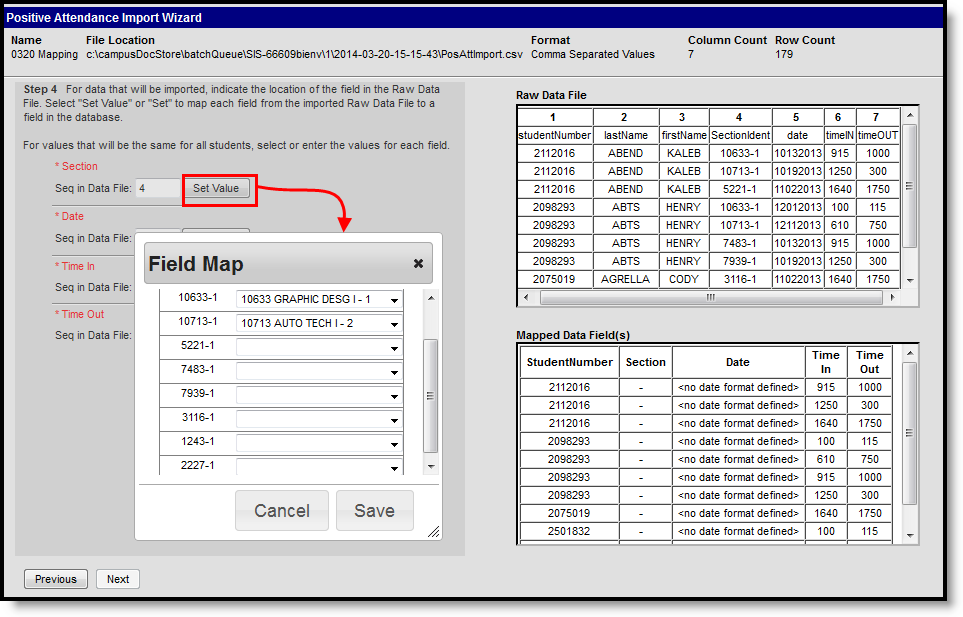 Setting Mapped Values
Import Data
Review the selected options, verifying the mapped data fields and columns are correct. After reviewing the selected information, the data can now be imported.
- Determine the Import Mode - either Test or Import.
- Determine the Output Format - HTML or CSV (test only).
- Choose the following:
- If the Import Mode is Test, options are Test or Batch Test. Test displays results immediately; Batch Test uses Batch Queue functionality to determine when results are imported.
- If the Import Mode is Import, options are Import or Batch Import. Import immediately imports the data; Batch Import uses Batch Queue functionality to determine when results are imported.
It is advised that the import be tested (select the Test Import Mode) before importing the data.
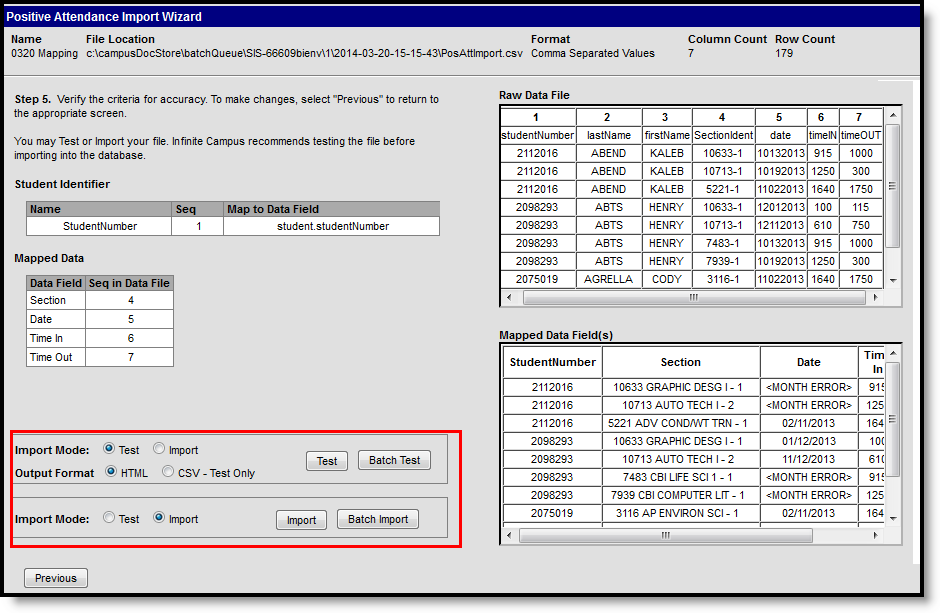 Importing Data
An Import Results Summary displays. This lists the import results and a count of errors and warnings. See the Positive Attendance article for a description of the Time Validation and Saving and Import Logic used.
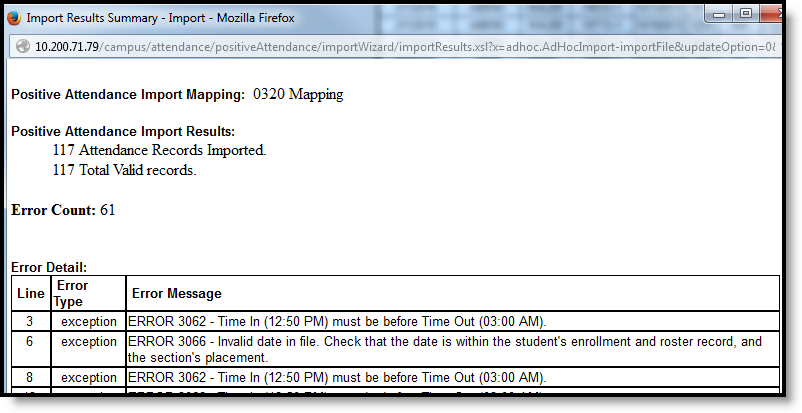 Import Summary Results
The Import process is now complete.
