Tool Search: Generate Section Templates
The Generate Section Templates tool allows users to create Section Template Groups and Section Templates, and assign those templates to periods and days in the Section Schedule Placement grid based on set parameters.This Template Wizard can be used instead of manually creating the Section Templates. Or, use the Section Template tool to create Template Groups and use the Section Template Wizard to create and assign Section Templates.
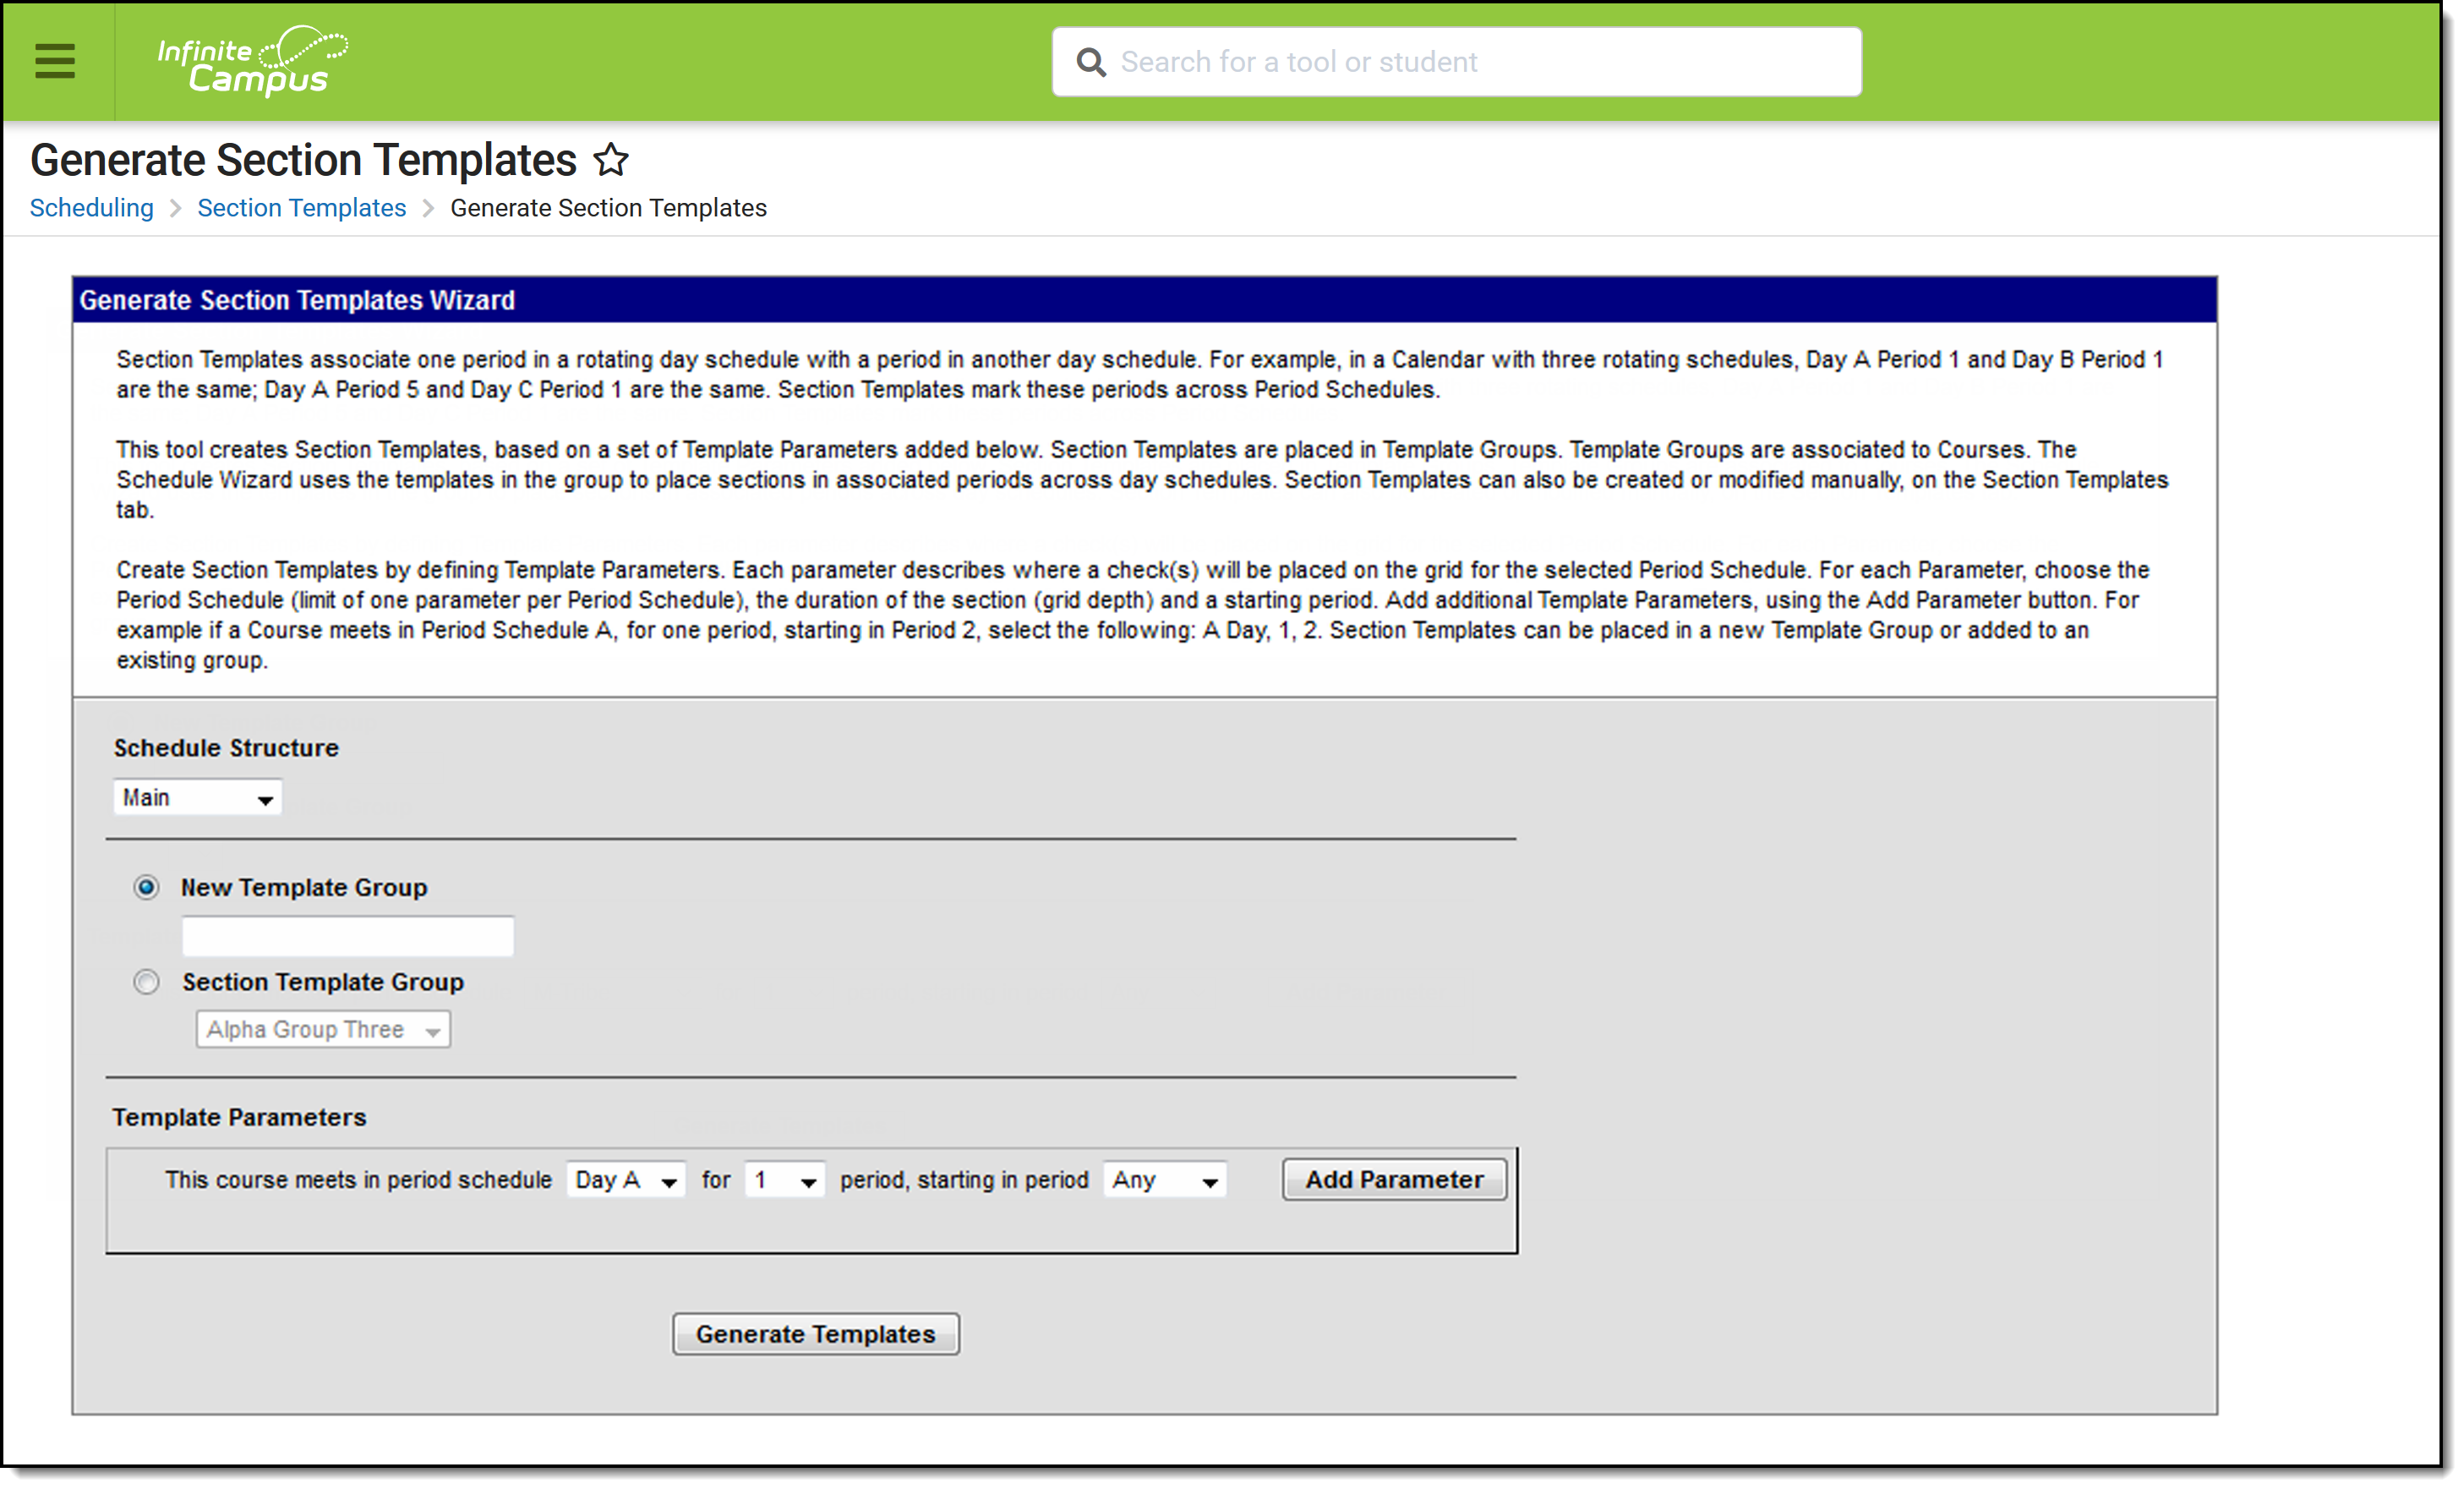 Generate Section Templates Wizard
See the Generate Section Templates Tool Rights article for information about rights needed to use this tool.
Create Template Groups
- Verify the correct School Year and Calendar are selected in the Campus toolbar.
- Select the Schedule Structure for the selected calendar.
- Enter the name of the Template Group in the New Template Group field.
- Select the correct parameters for where the section templates should be marked. Add multiple parameters by choosing the Add Parameter button.
- Click the Generate Templates button. A message displays indicating the new group was created and associated templates were created.
To verify, navigate to the Section Templates tab and view the newly created group.
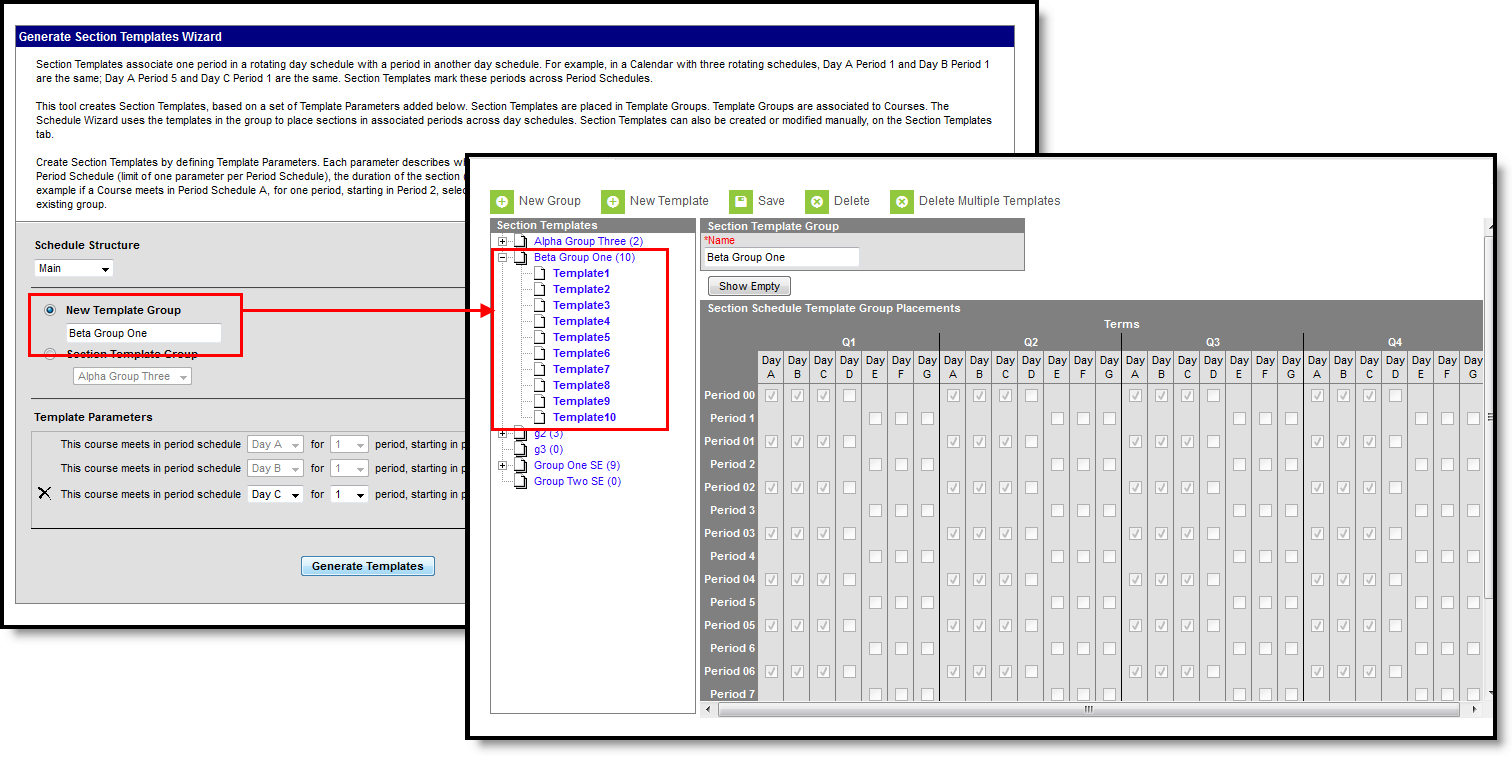 Verification of Newly Created Templates
Set Parameters for Section Templates
The Template Parameters place the checkboxes in the Section Placement grid. For each parameter, choose the Period Schedule (Day A, Day B, etc.), the duration of the section (number of periods long), and in which starting period. For example if a Course meets in Period Schedule A, for one period, starting in Period 2, select the following: A Day, 1, 2. Section Templates can be placed in a new Template Group or added to an existing group.
Each parameter builds off of the previous parameter.
- Only one parameter can be assigned for a period schedule.
- The total number of parameters cannot exceed the total number of period schedules. If there are seven period schedules, only seven parameters can be added.
- To remove parameters, begin with the last entered parameter.
- If the Period Schedule option is set to All, a period length and starting period cannot be set.
- Select the Schedule Structure to which these templates belong, based on the selected calendar in the Campus toolbar.
- Select to which Section Template Group these parameters apply.
- Choose the parameters for each day schedule, length of period, and the starting period. Any, Next, Same and Previous can be selected.
- Click the Add Parameter to add additional parameters. The parameters are applied to the groups. Verify their placement by viewing the Section Templates tab.
In a calendar with seven period schedules and the templates are assigned to periods in sequential order, the Template Parameters would look like this:
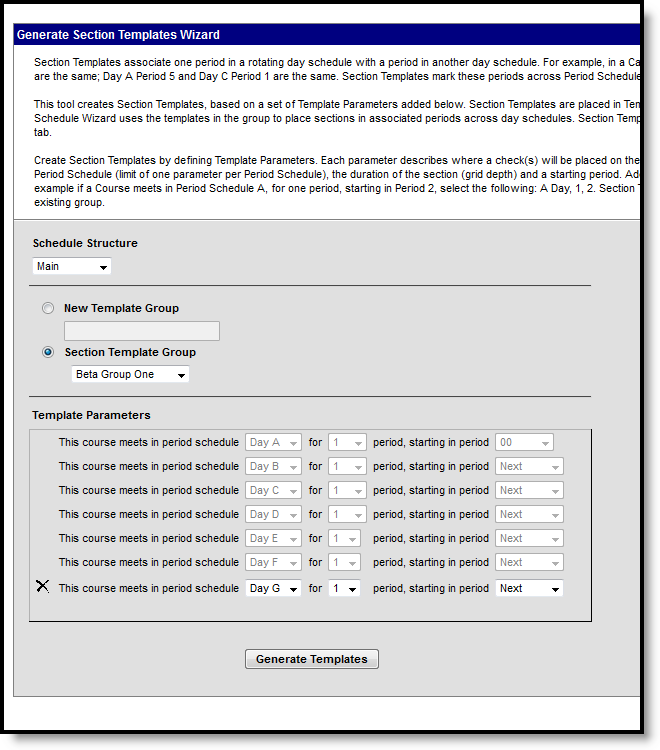 Set Parameters for Seven Period Schedules
Next Steps
- Mass Assign Section Templates to Courses
- Manually Assign Section Templates to Courses
