Tool Search: Ed-Fi
The Connection Config tool is used to establish a data connection between Campus and the Ed-Fi system.
Once a successful connection is made, Resource Preferences are selected, and Ed-Fi ID's are assigned to users, data will flow properly from Campus to Ed-Fi.
This document is specific to Michigan for establishing the Ed-Fi Connection Configuration.
Ed-Fi Connection Config
Prerequisites
- Ed-Fi functionality must be enabled via the Enable Ed-Fi System Preference.
Tool Rights
In order to modify and save Ed-Fi Connection Configuration values, you must have at least R(ead) and W(rite) tool rights values.
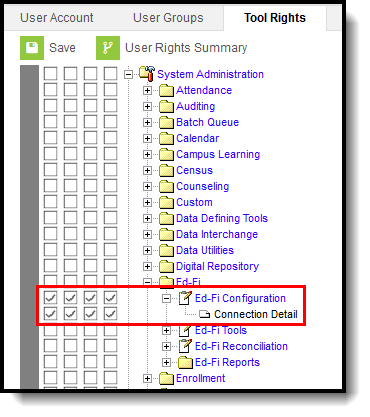
Connection Detail Tool Rights
Understand and Enter Ed-Fi Configuration Values
Ed-Fi Configuration values are supplied by the State and should be coordinated with Campus in order to ensure the connection between Campus and Ed-Fi is working correctly. If information provided by your state does not make a successful connection, work with Campus Support to troubleshoot your issues.
Scope Year Logic
- Districts will need to create a new connection each year when the state opens the ODS for a given school year.
- If the state closes a connection for a previous year, they should delete the configuration for that year.
- It is possible to have multiple years connected at the same time.

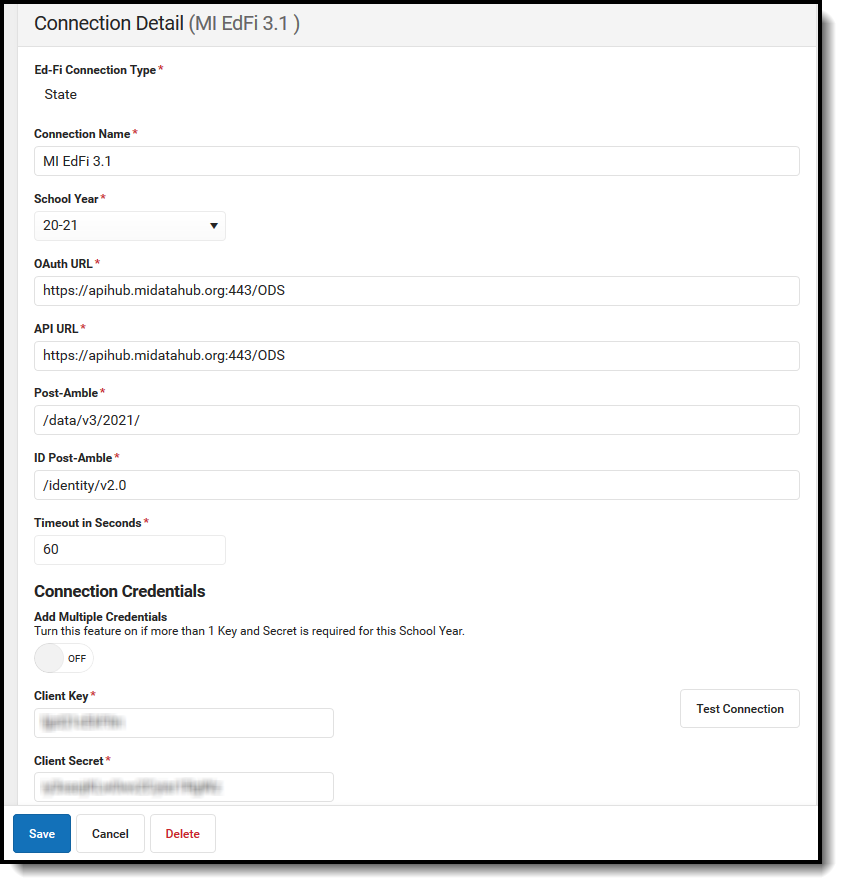
Entering Connection Config Values
To enter Ed-Fi Configuration values:
- Click the Connection button. The Configuration Detail editor displays.
- Enter the Connection Name.
- Select the School Year.
- Enter the O-Auth URL.
- Enter the API URL.
- Enter the Client Key.
- Enter the Client Secret.
- Enter the Post-Amble.
- Enter the ID Post-Amble.
- Enter the Timeout in Seconds (or leave the default value of 60).
- Select the Save icon.
- Click the Check Connection button to ensure configuration values were correct and a connection to Ed-Fi was made. If a proper connection is made, a message saying "Connection is Valid" displays.
The following describes each Ed-Fi Configuration field:
| Field | Description |
|---|---|
| Test Connection | Click the Test Connection button to ensure configuration values were correct and a connection to Ed-Fi was made. If a proper connection is made, a message saying "Connection is Valid" displays. |
| School Year | The school year scoped for the configuration values entered. Start Date and End Date values should be entered for the school year in the School Years editor. Otherwise, a default Start Date of 7/1/XXXX is used and a default End Date of 6/30/XXXX is used to determine what year to send data (where XXXX = the Start Year and End Year values entered on the School editor). |
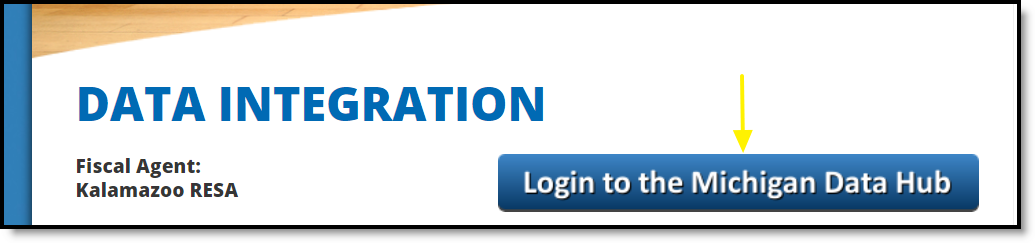
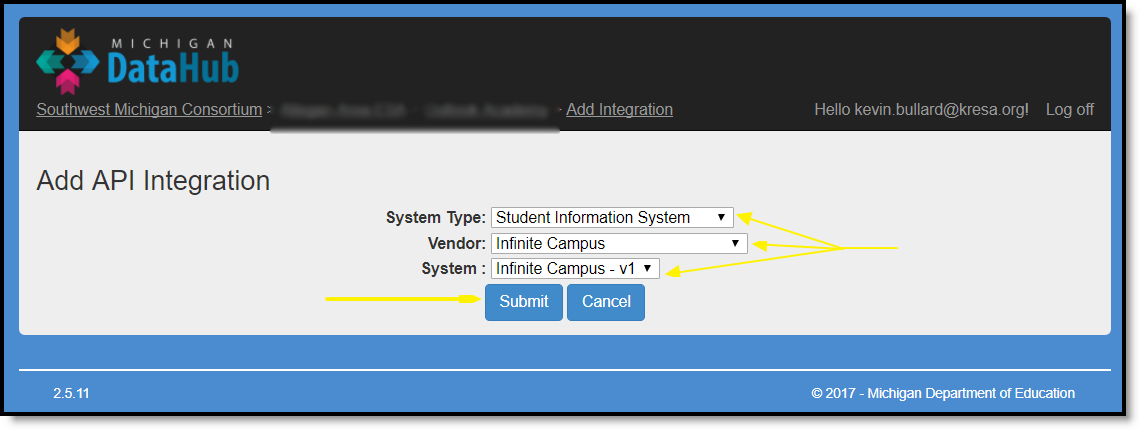
| Creating the API Integration between Infinite Campus and the Michigan Data Hub (ODS) | Step 1: Log in to your Data Hub cockpit by following the url below and clicking the “Login to the Michigan Data Hub” banner. URL: www.midatahub.org
Step 2: Upon logging in to the landing page, select your district by clicking the Data Cockpit (if no Data Cockpit app appears, please refresh the page).
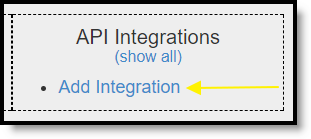
Step 3: Create the API integration by selecting the following parameters: System Type – Student Information Systems Vendor – Infinite Campus System – Infinite Campus – v1 Click the Submit button upon filling this screen out.
Step 4: You will now be on the Data Hub cockpit landing page and will need to navigate back to the API integration you just created above.
If you have any issues or questions on configuring the API integration, please email the Data Hub helpdesk at support@midatahub.org. |
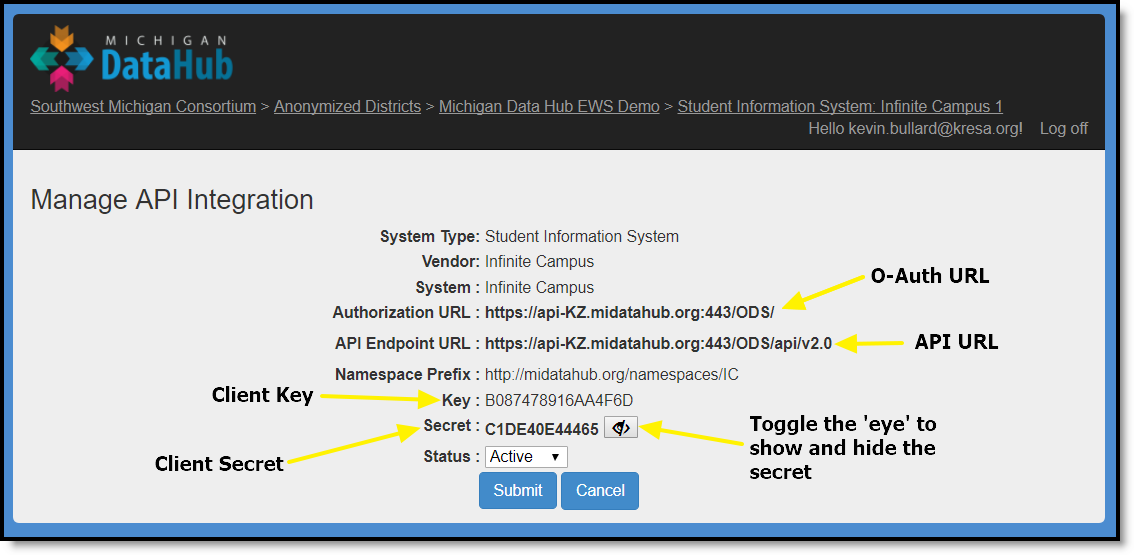
| O-Auth URL | The base URL of the endpoint to retrieve an OAuth Token. Navigate to www.midatahub.org and log in to your district’s Cockpit. Navigate to the bottom right of the Data Hub Cockpit and select the Infinite Campus API Integration. This page displays the Authorization URL or O-Auth URL (See screenshot above for location of the this url). https://apihub.midatahub.org:443/ODS |
| API URL | The base URL of the API. Navigate to www.midatahub.org and log in to your district’s Cockpit. Navigate to the bottom right of the Data Hub Cockpit and select the Infinite Campus API Integration. This page displays the API Endpoint URL or API URL (See screenshot above for location of the this url). https://apihub.midatahub.org:443/ODS |
| Client Key | The client key. There could be multiple APIs attached to one given URL. They are demarcated based on a key. Navigate to www.midatahub.org and log in to your district’s Cockpit. Navigate to the bottom right of the Data Hub Cockpit and select the Infinite Campus API Integration. This page displays the Client Key (See screenshot above for location of the Client Key). |
| Client Secret | The secret that goes along with the above key. This is used to generate the OAuth token. Navigate to www.midatahub.org and log in to your district’s Cockpit. Navigate to the bottom right of the Data Hub Cockpit and select the Infinite Campus API Integration. This page displays the Client secret (See screenshot above for location of the Client secret). |
| Post-Amble | The URL for Ed-Fi resources and Ed-Fi Identities is generally different, so this parameter is used to store the URL segment for resources (this is appended on to the API URL). This value will need to be updated for each new connection created in this tool. This field controls what year's ODS the connection is pointing to. Enter the End Year of the Scope Year for this connection. Use the following formula to fill in the Post-Amble. If the Ed-Fi Version has not changed, it can be left the same as the previous year. Each new school year will require the End Year of the scope year to be entered on the configuration. /data/Ed-Fi Version/End Year of Scope Year/ |
| ID Post-Amble | The URL for Ed-Fi resources and Ed-Fi Identities is generally different, so this parameter is to store the URL segment for identities (this is appended on to the API URL). This parameter is used in states that use Ed-Fi to generate State ID’s. In Michigan, this parameter is not directly used but is required to be entered. Use the following formula to fill in the ID Post-Amble. If the Ed-Fi Version has not changed it can be left the same as the previous year. /identity/Ed-Fi Version |
| Timeout in Seconds | This field determines (in seconds) the amount of time allowed to pass before the connection between Campus and Ed-Fi is considered timed out and Ed-Fi events are not processed. These Ed-Fi events are then reprocessed the next time a quartz job runs. This field is defaulted to a value of 60 seconds but can be modified if desired. |
Next Steps
Now that Ed-Fi has been configured and verified to be working correctly, the following steps can now be taken:
- Ed-Fi data resources need to established via the Resource Preferences tab.
- Ed-Fi data can be monitored for errors and manually synced via Ed-Fi Tools.
- Ed-Fi IDs can be assigned to users via the Demographics tab.
