Tool Search: Enrollment Status Report
The Enrollment Status Report displays all enrollment information for a certain student within a certain calendar. If a student is enrolled, and then leaves the district but moves back, both enrollments are included on the report.
BIE users: Select the BIE version of this report which reports data based on BIE Start and End Status values.
Kentucky users: This report SHOULD NOT be used to find students with a start status of No Show. Instead, use the Dropout Report.
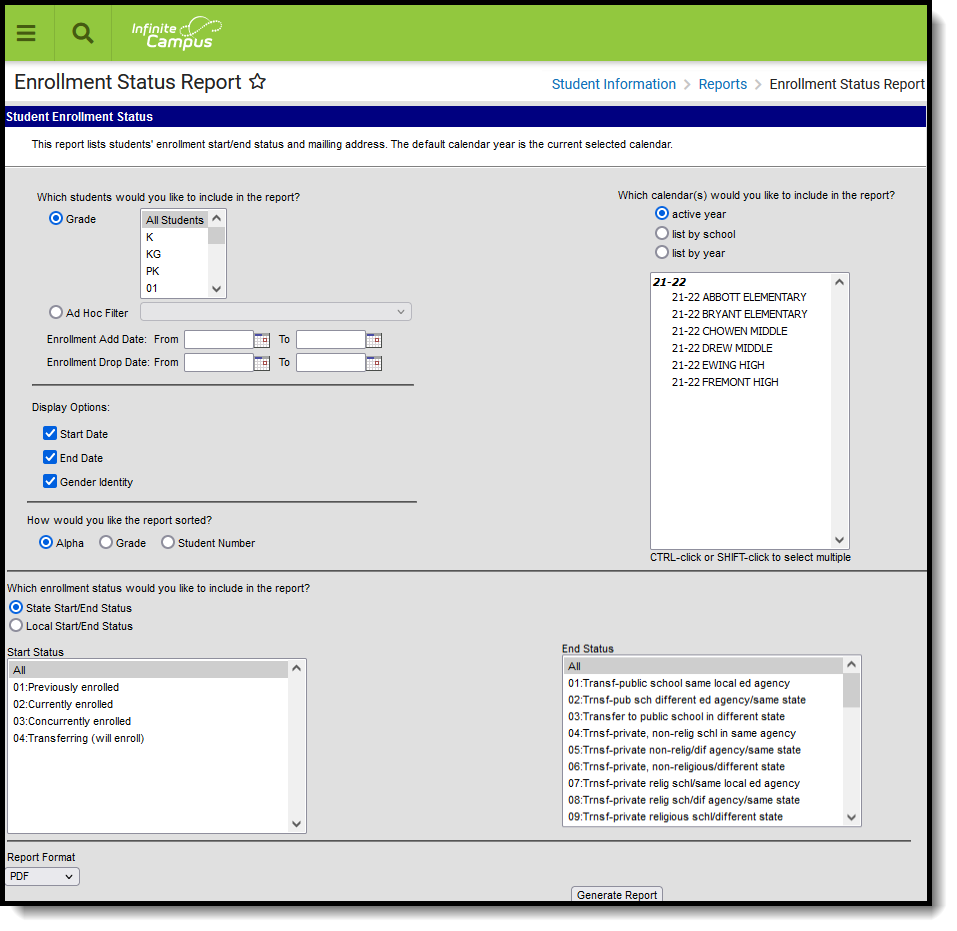
 Enrollment Status Report
See the Student Information Reports Tool Rights article for the tool rights needed to generate this report.
Report Editor
The following information defines the fields available on the Enrollment Status Report.
| Options | Description |
|---|---|
| Student Selection | Select students either by a Grade level or an Ad hoc Filter.
Enrollment date ranges (Enrollment Add Date, Enrollment Drop Date) are used to further narrow the students included in the report. These dates are not needed to generate the report, but could be helpful when a report is needed to see enrollment gains and losses for a particular period of time. The report can also be generated using just Enrollment Add Dates or only Enrollment Drop Dates. Dates are entered in mmddyy format or can be chosen by selecting the calendar icon. |
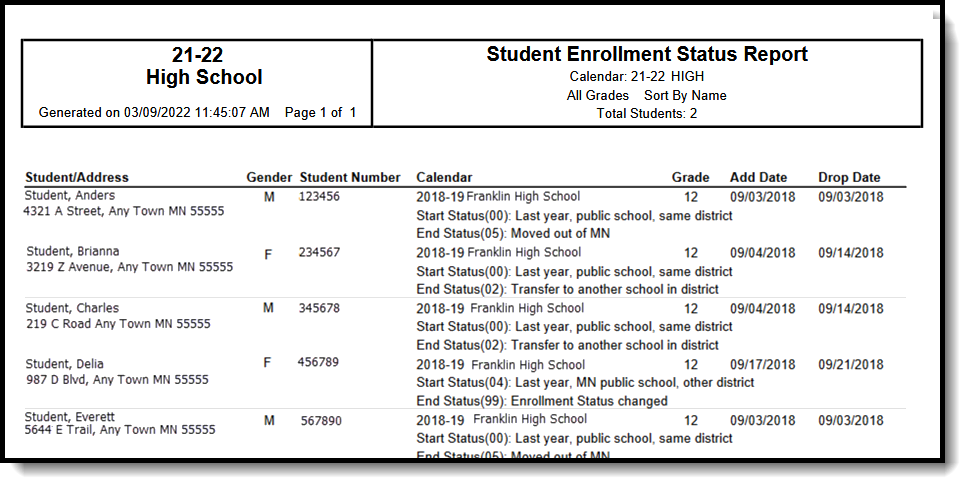
| Display Options | The following options can be included in the report.
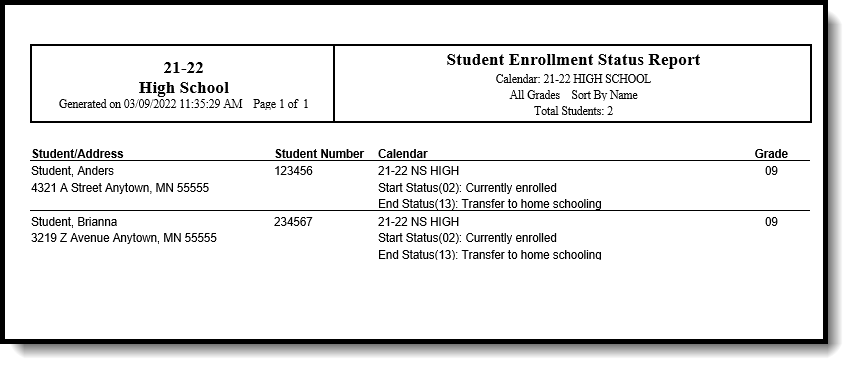
When these options are NOT marked, the report includes just the student's name, student number, calendar of enrollment (includes enrollment start/end statuses) and grade level. |
| Sort Options | The report can be sorted one of three ways:
|
| Calendar Selection | Select the calendar(s) to include on the report. The calendar selected in the Campus toolbar is automatically selected. The report can be generated for one school at a time, or a set of schools at a time (all elementary schools, for example). At least one calendar needs to be selected. It is recommended that users do not select all schools in the district at one time. Calendars can be listed by the Active Year, by School name or by Year. |
| Enrollment Statuses | Determine whether to use State Start and End Statuses or Local Start and End Statuses. This selection may change the list of available enrollment statuses. Then, select which Enrollment Statuses to include in the report. See the Enrollment End Status Setup and Enrollment Start Status Setup articles for information on using State or Local start/end statuses. When selecting start and statuses, note that the All option is automatically selected for both start and end statues. To see which students may have dropped enrollment for a particular reason, selecting just that particular end status may be helpful. Or, to see which students are enrolled in multiple schools, select just that start status. When generating the report for multiple calendars, it is helpful to choose specific statuses. Attention Bureau of Indian Education Users BIE users should select the BIE radio button at the top of the report editor in order to report BIE Start and End Status values. Attention Kentucky Users To see a list of students who have No Show as an enrollment status, use the Dropout Report. |
| Report Format | Select one of the following formats in which the report should generate:
|
Generate the Enrollment Status Report
- Select the students to include in the report by selecting either a Grade level or an Ad hoc Filter.
- Select the calendar(s) to include in the report.
- Enter an Enrollment Add Date range to find students who enrolled in the school AFTER the first day of school.
- Enter an Enrollment Drop Date range to find students who dropped enrollment in the school BEFORE the last day of school.
- Select the Display Options to include in the report.
- Determine how the report should be sorted - Alphabetical by student Last Name, by ascending Grade level or by ascending Student Number.
- Determine whether to use State Start and End Statuses or Local Start and End Statuses, then select the desired statuses to include in the report.
- Select the desired Report Format to determine the format in which the report generates.
- Click the Generate Report button. The report displays in the selected format.
When one calendar is selected, the left side of the report header displays the name of that calendar.
When more than one calendar is selected, the left hand side of report headers displays the name of the district. The selected calendars are listed on the right side of the report header.
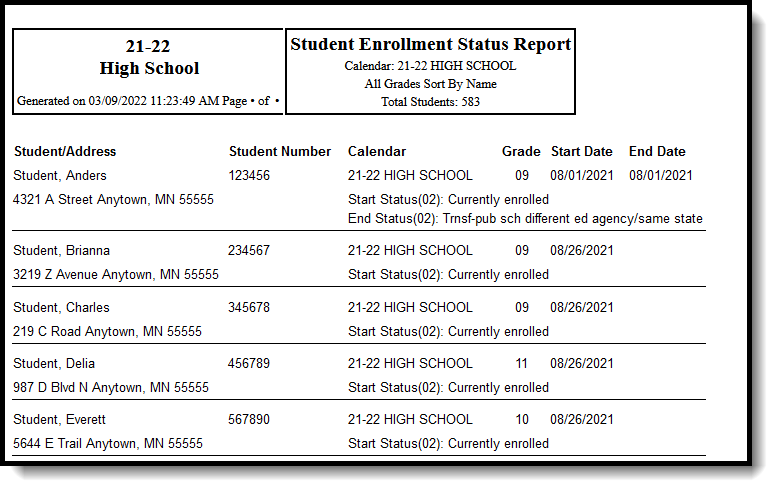
 Enrollment Status Report, No Gender Identity Display - HTML Format
 Enrollment Status Report, No Display Options Included - DOCX Format


