This article shows how to use the Campus Mobile Payments app to process credit/debit card payments on a device such as a tablet or smartphone.
If a card is chip-enabled, it must use the chip (insert or tap) first. Only after three failures to read the chip is the swipe enabled for that card. If a card does not have a chip installed, you can swipe it as expected.
- Launch the Campus Mobile Payments app on the device.

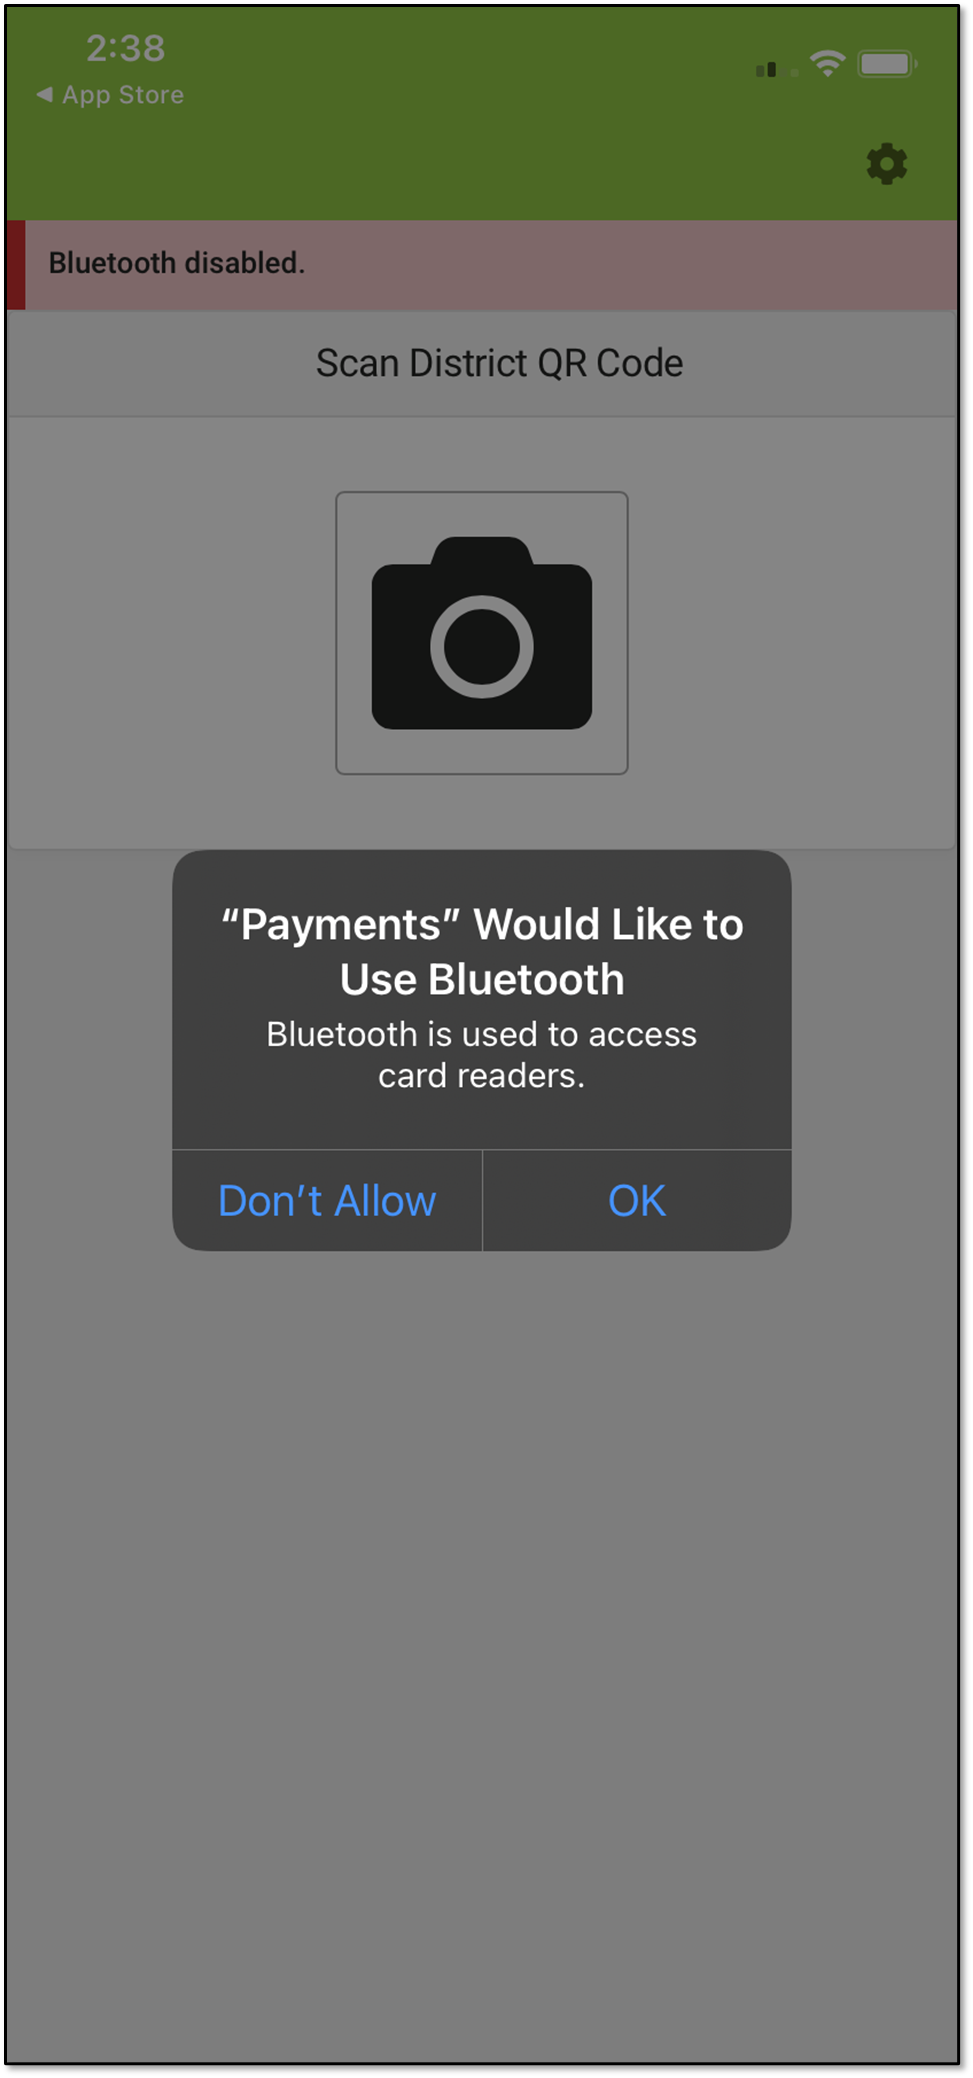
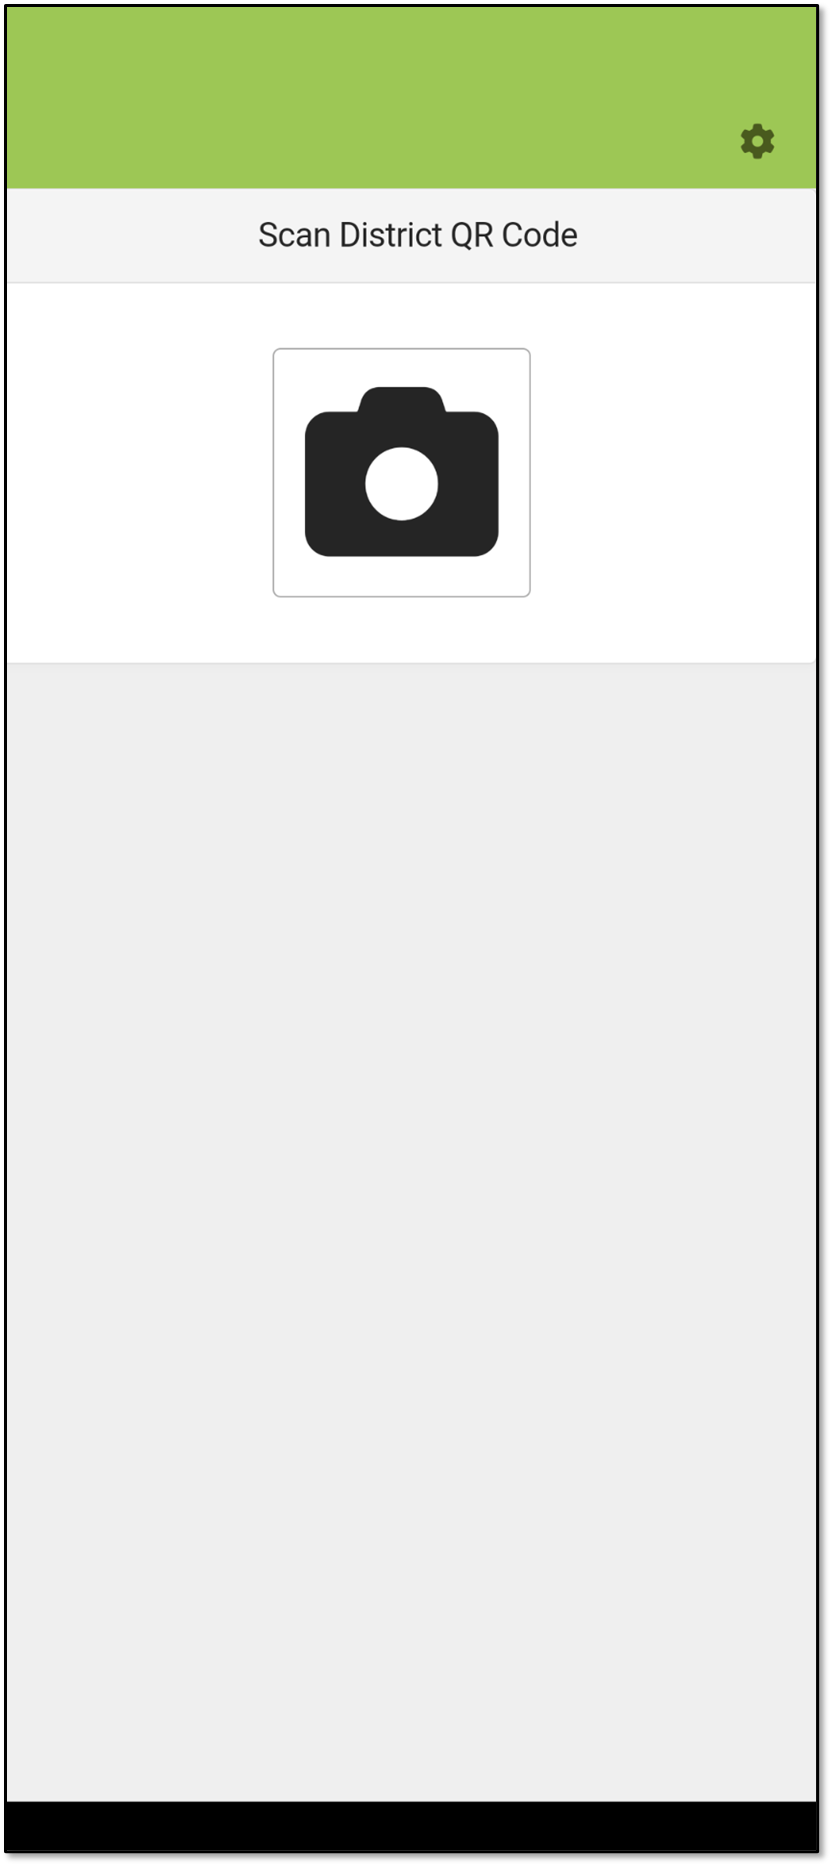
- Depending on your device, you may be asked to access Bluetooth. Tap the OK button. You will see the Scan District QR Code screen or the Card Reader Management screen.
- If you see "Scan District QR Code," contact the school's technical person to register the device.
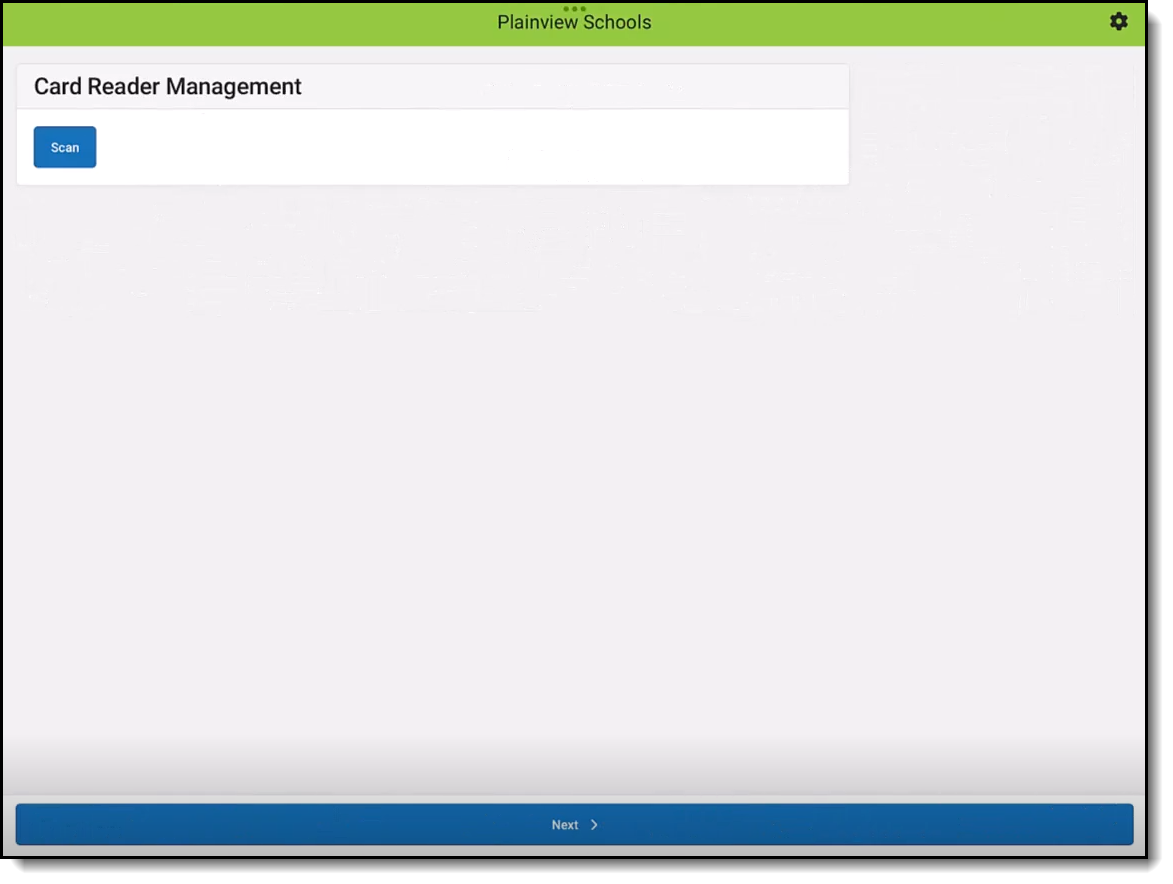
- Turn on the card reader and place it next to the device, and then tap Scan.
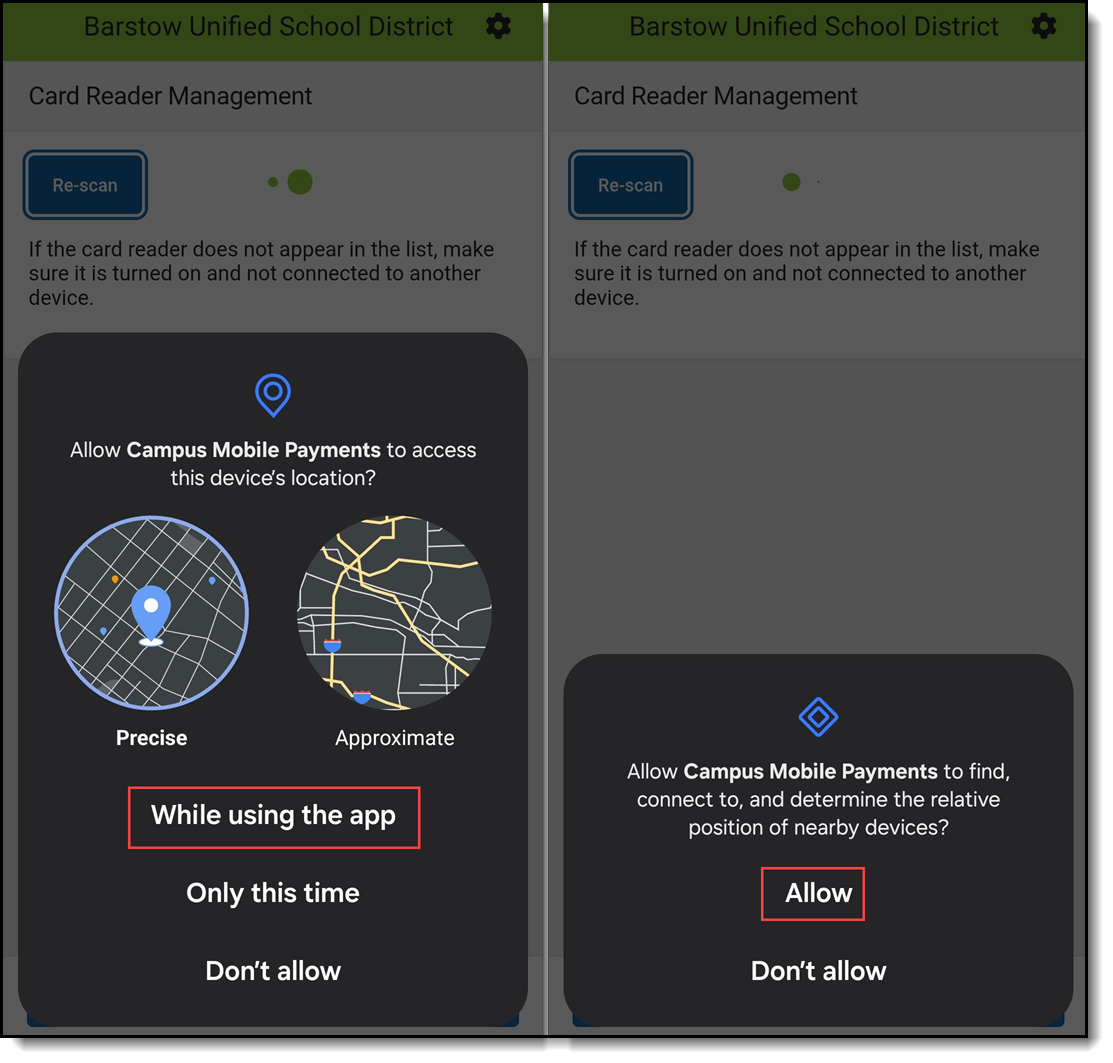
- Depending on your device, you may see one or both messages below. Select the response(s) in the orange box(es). Location and Bluetooth pairing must be enabled to use the app.
- A list displaying one or more serial numbers for card readers appears. Compare the serial number on the back of the card reader with the list.
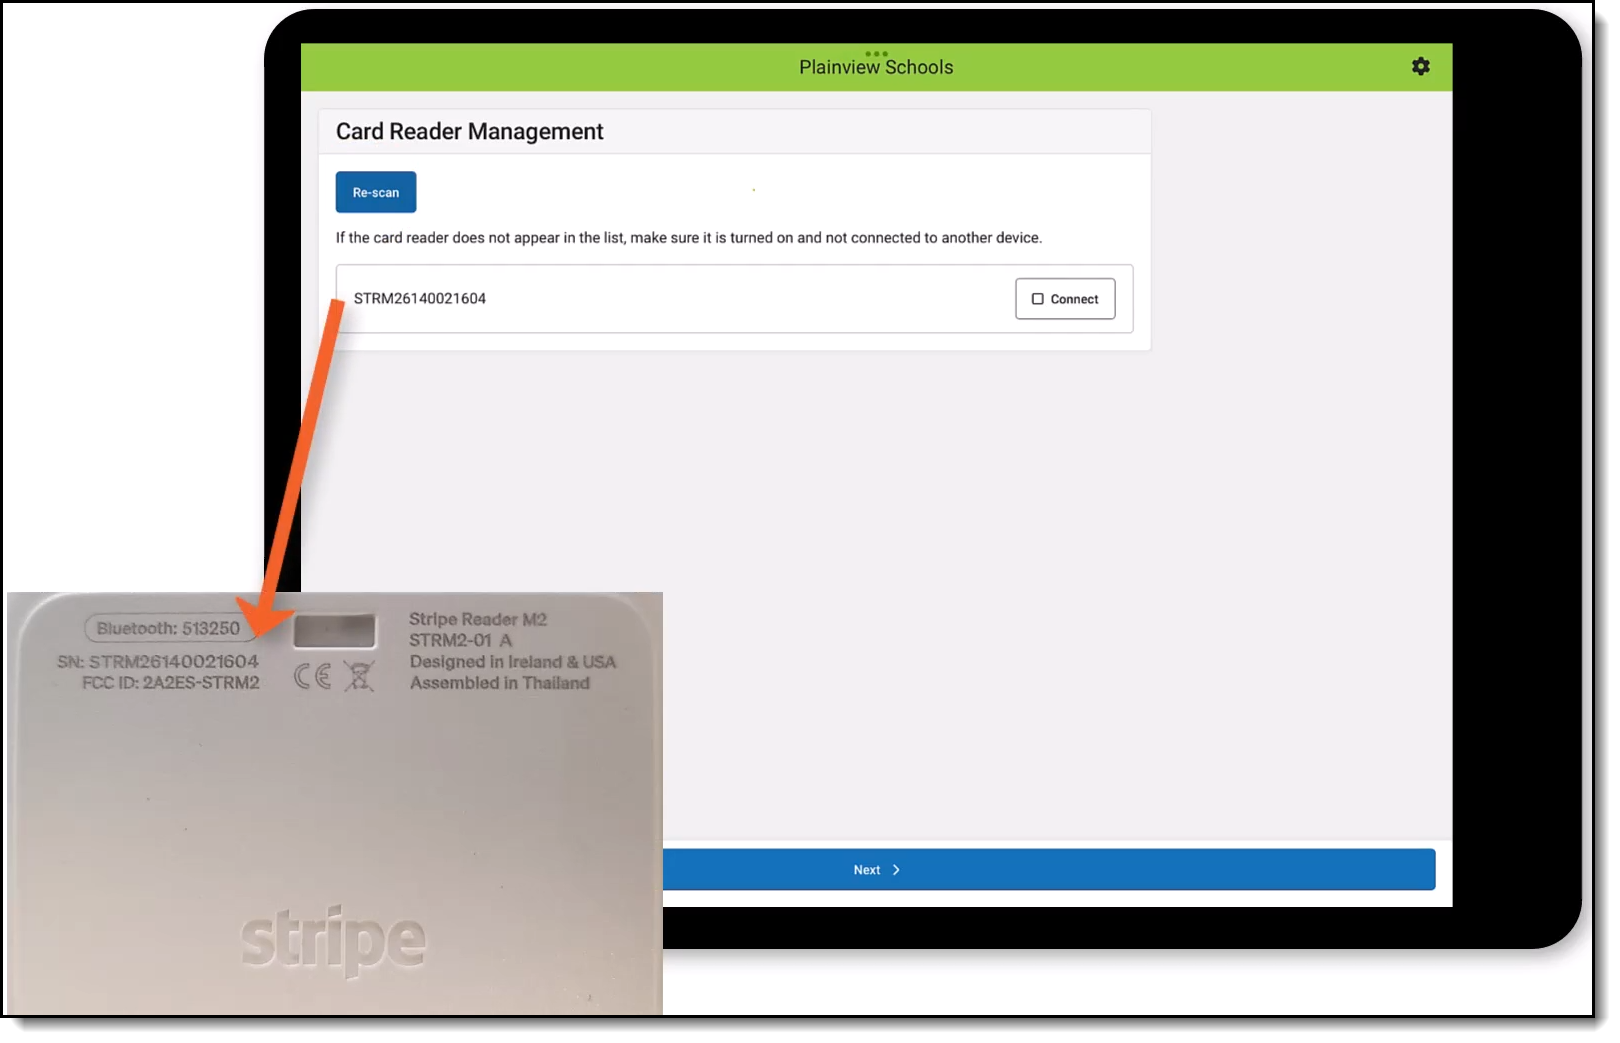 Serial Number and Passkey
 - Tap the Connect button for the serial number that matches your card reader.
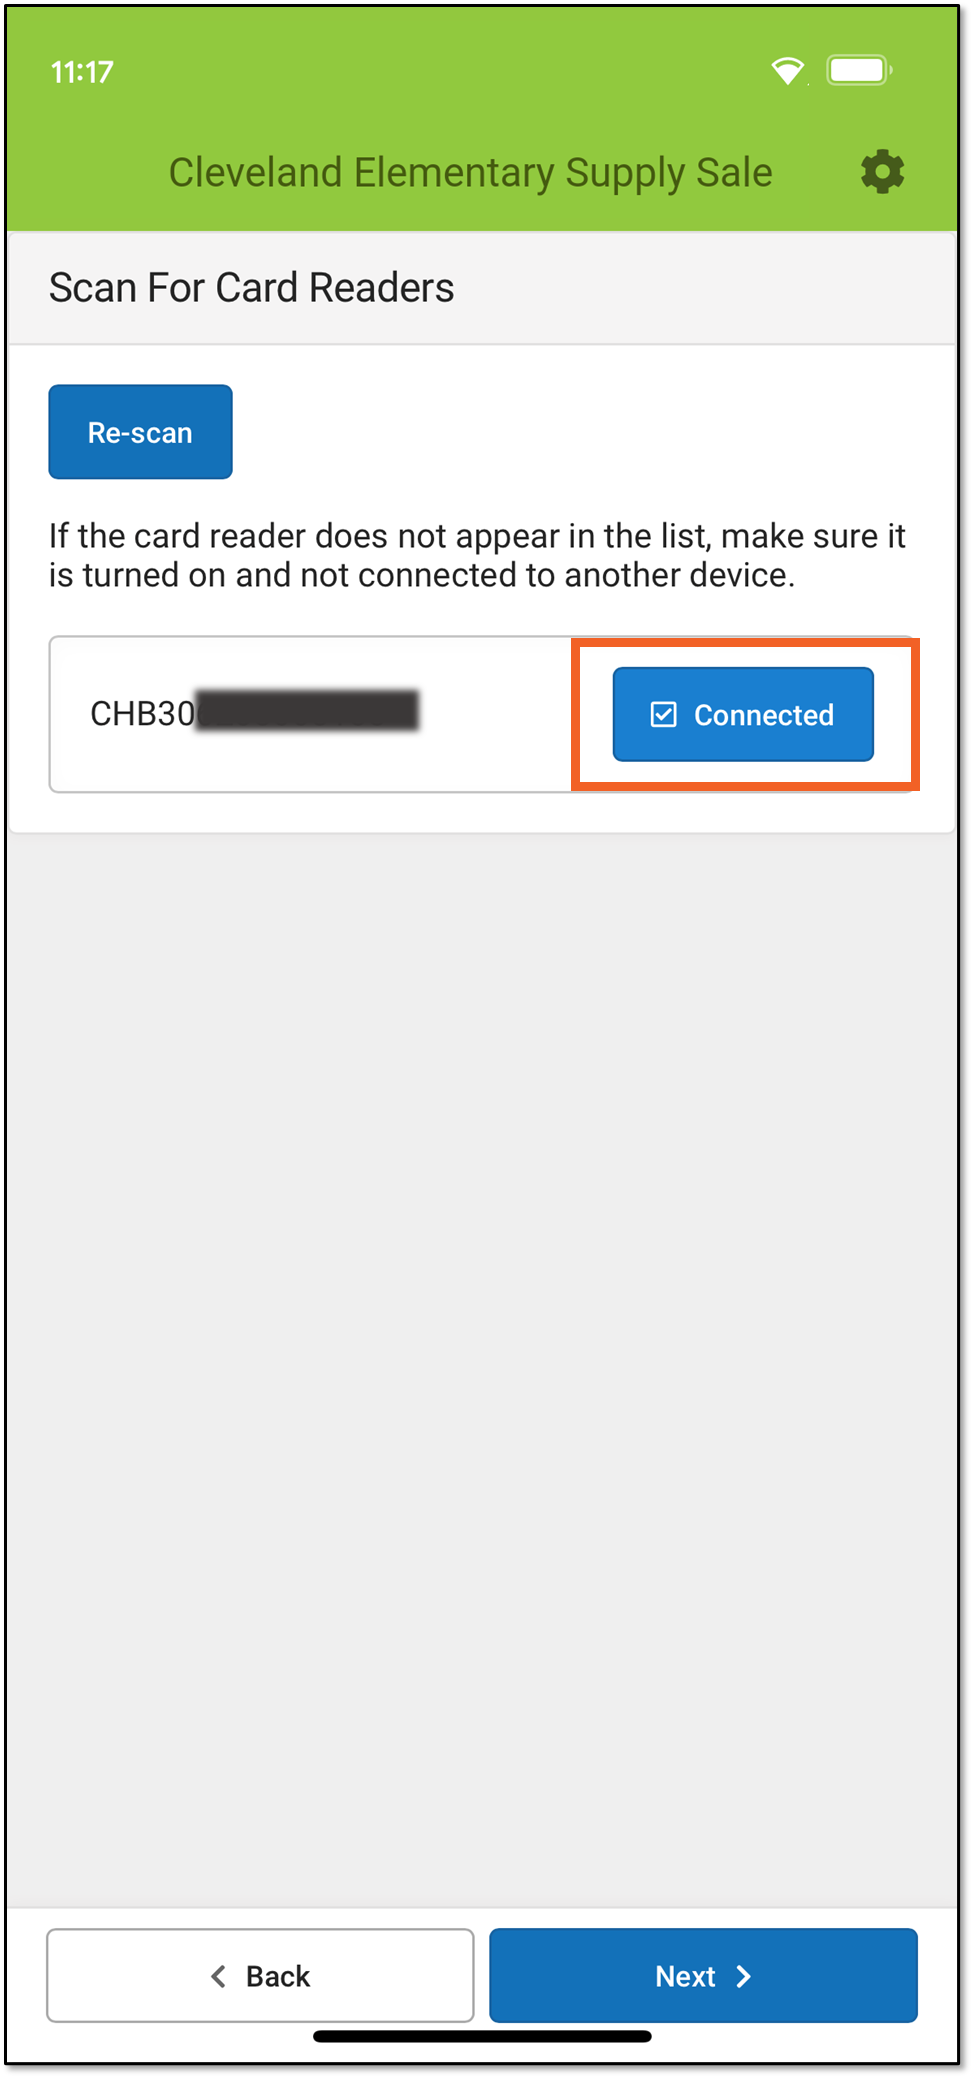
- When the green dots stop displaying and you see the Connected message next to the serial number, tap Next.
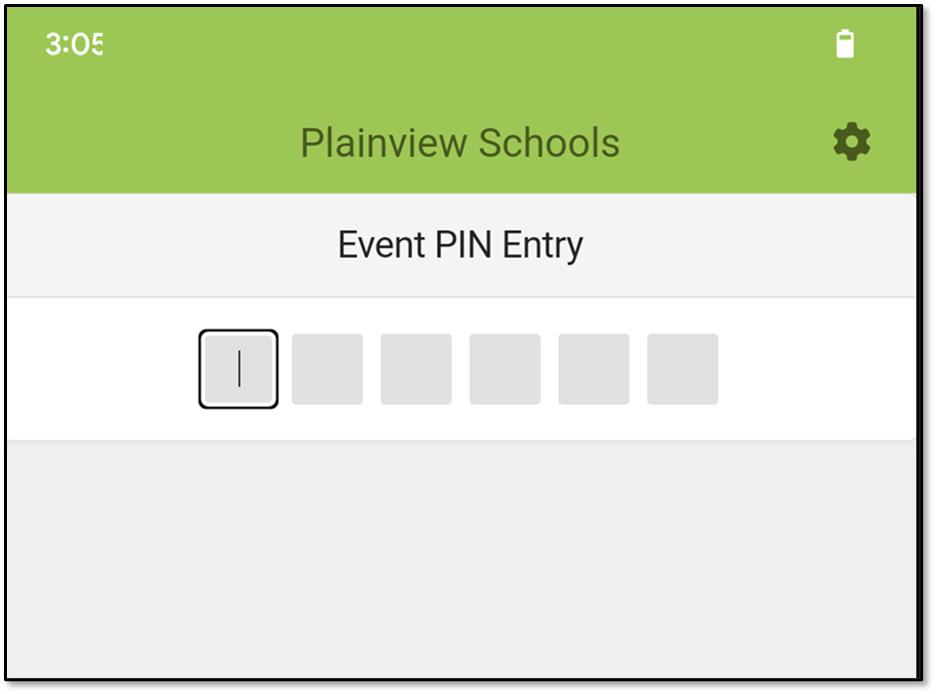
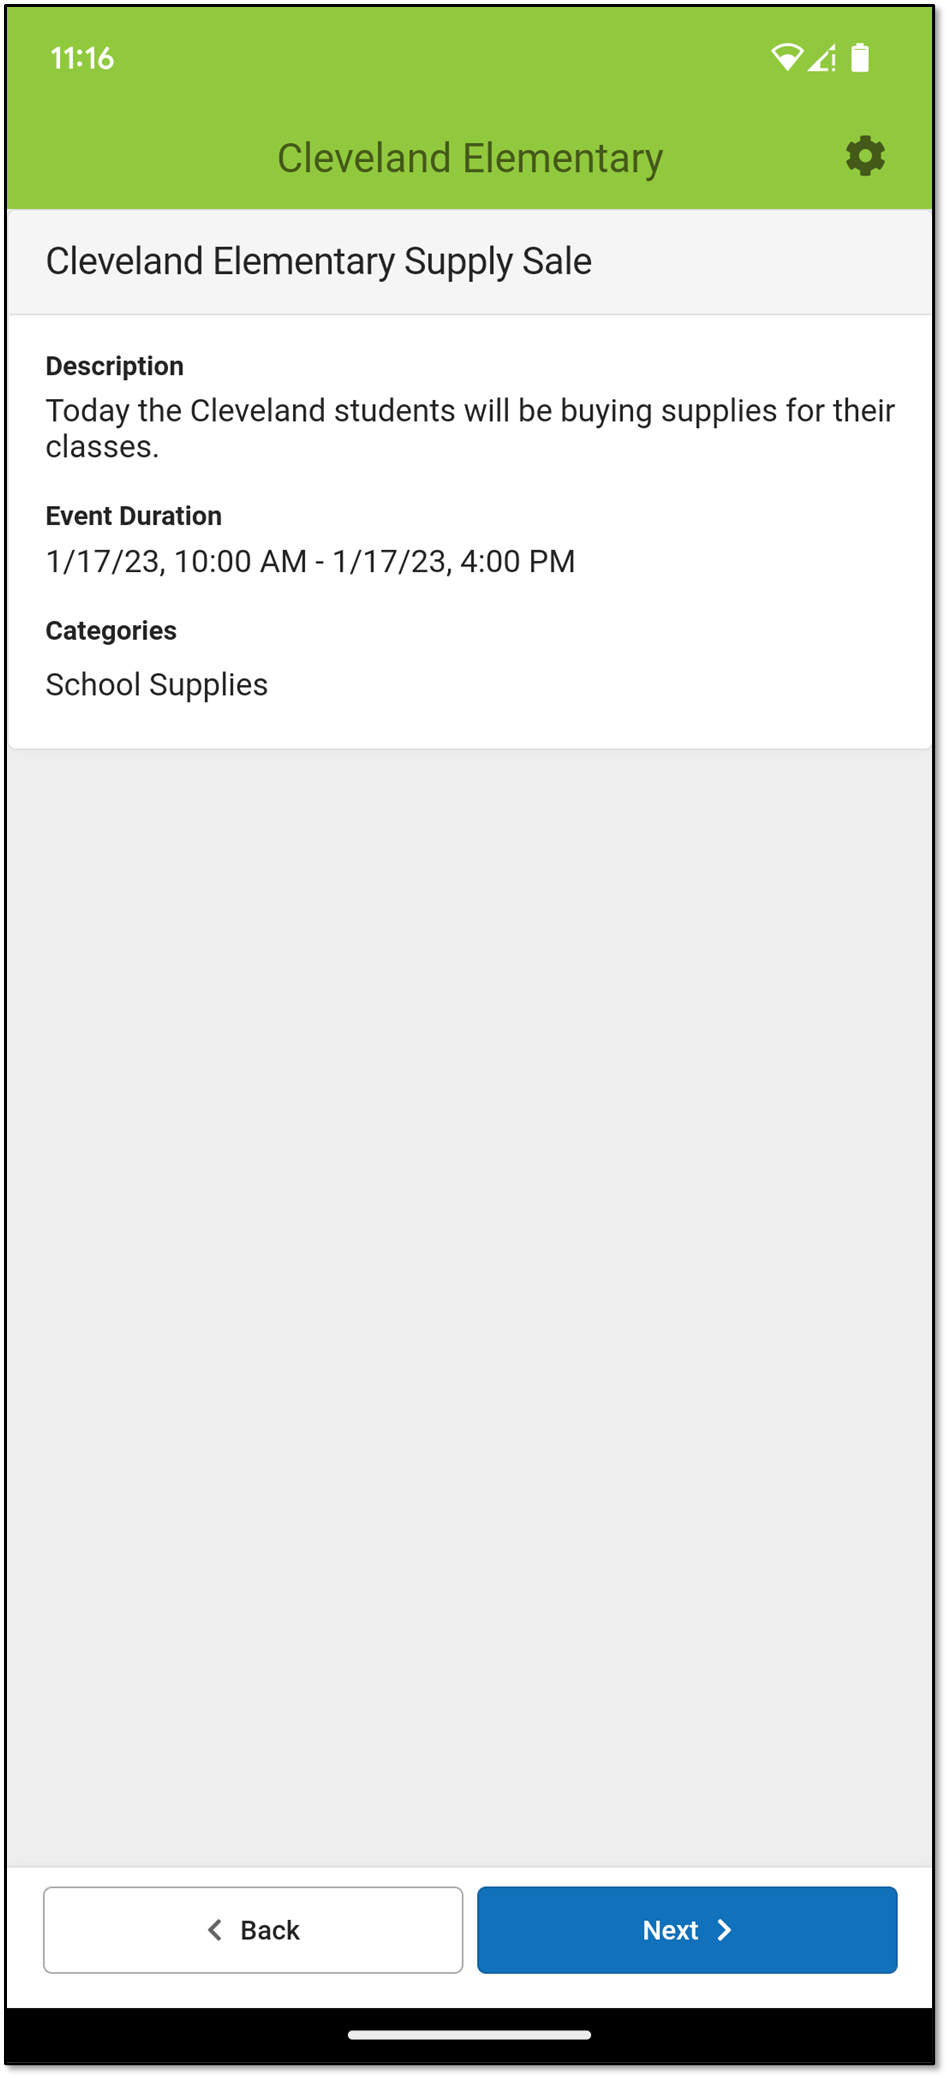
- Depending on device settings, Campus Mobile Payments can be used at Events, or for in office payments.

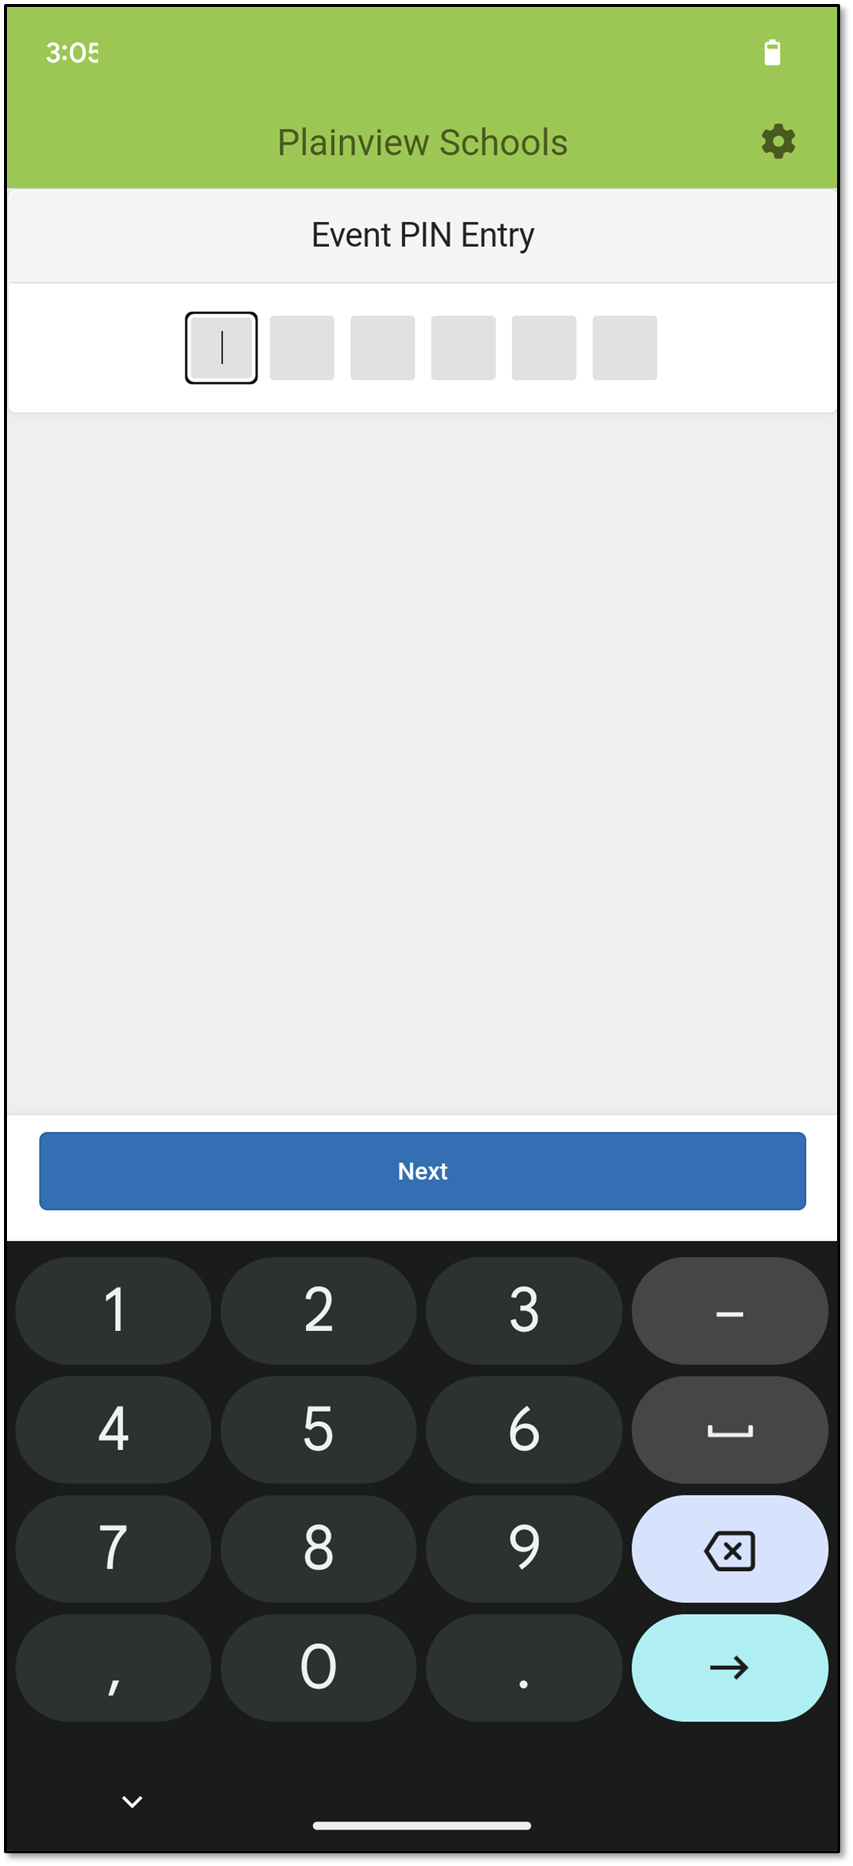
- When Events is selected, enter the cashier PIN (provided by your event coordinator) in the Event PIN Entry boxes and tap Next. Information about the event displays.
- Verify this is the correct event and then tap the Next button. The Scan for Card Readers screen displays.
- The categories (in the orange box) appear, and its products appear below. Tap the category you need. When you see the products, tap the one that has the purchasable items. After selecting the product, the items that can be purchased are displayed.
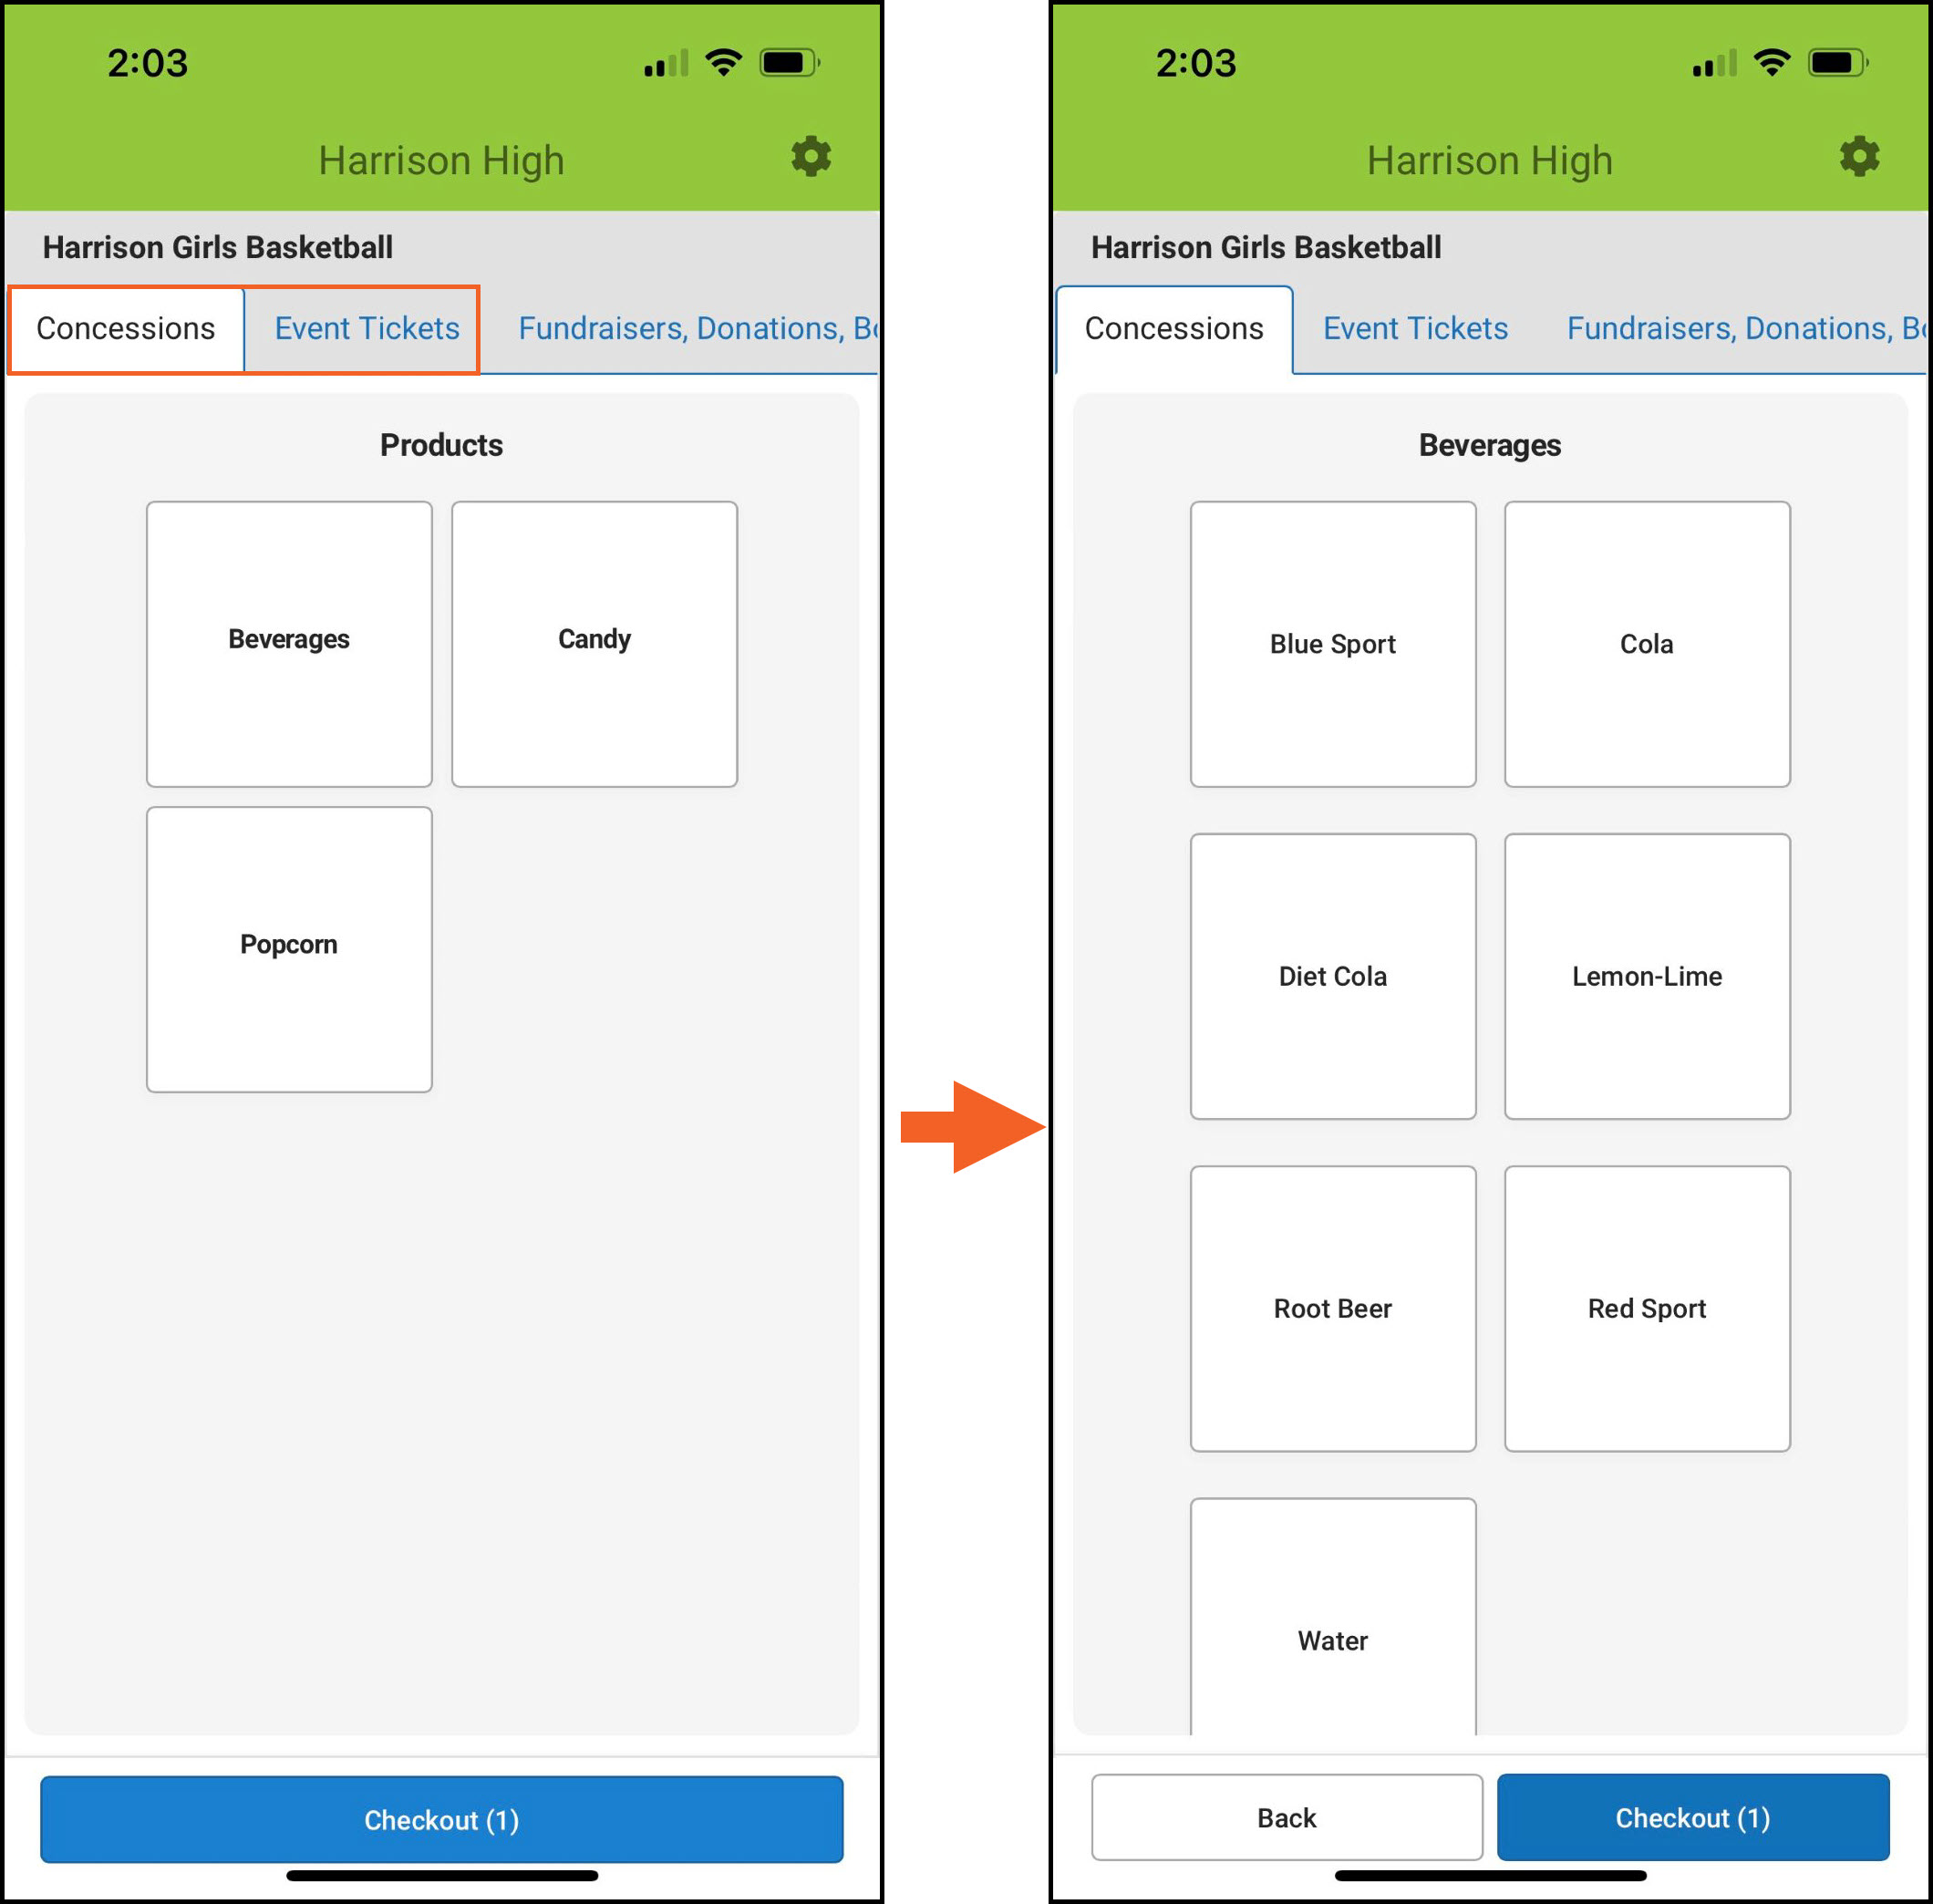 Select a Category and Product Purchasable Items Display After Selecting a Product
 - Select the item being purchased.
- A student number may be required for this purchase, or it can be optional.
- In Figure 1, the Student Number is required, as indicated with the red asterisk.
- In Figure 2, the Student Number is optional, and it can be omitted by tapping the Skip button.
After entering the Student Number, tap Confirm.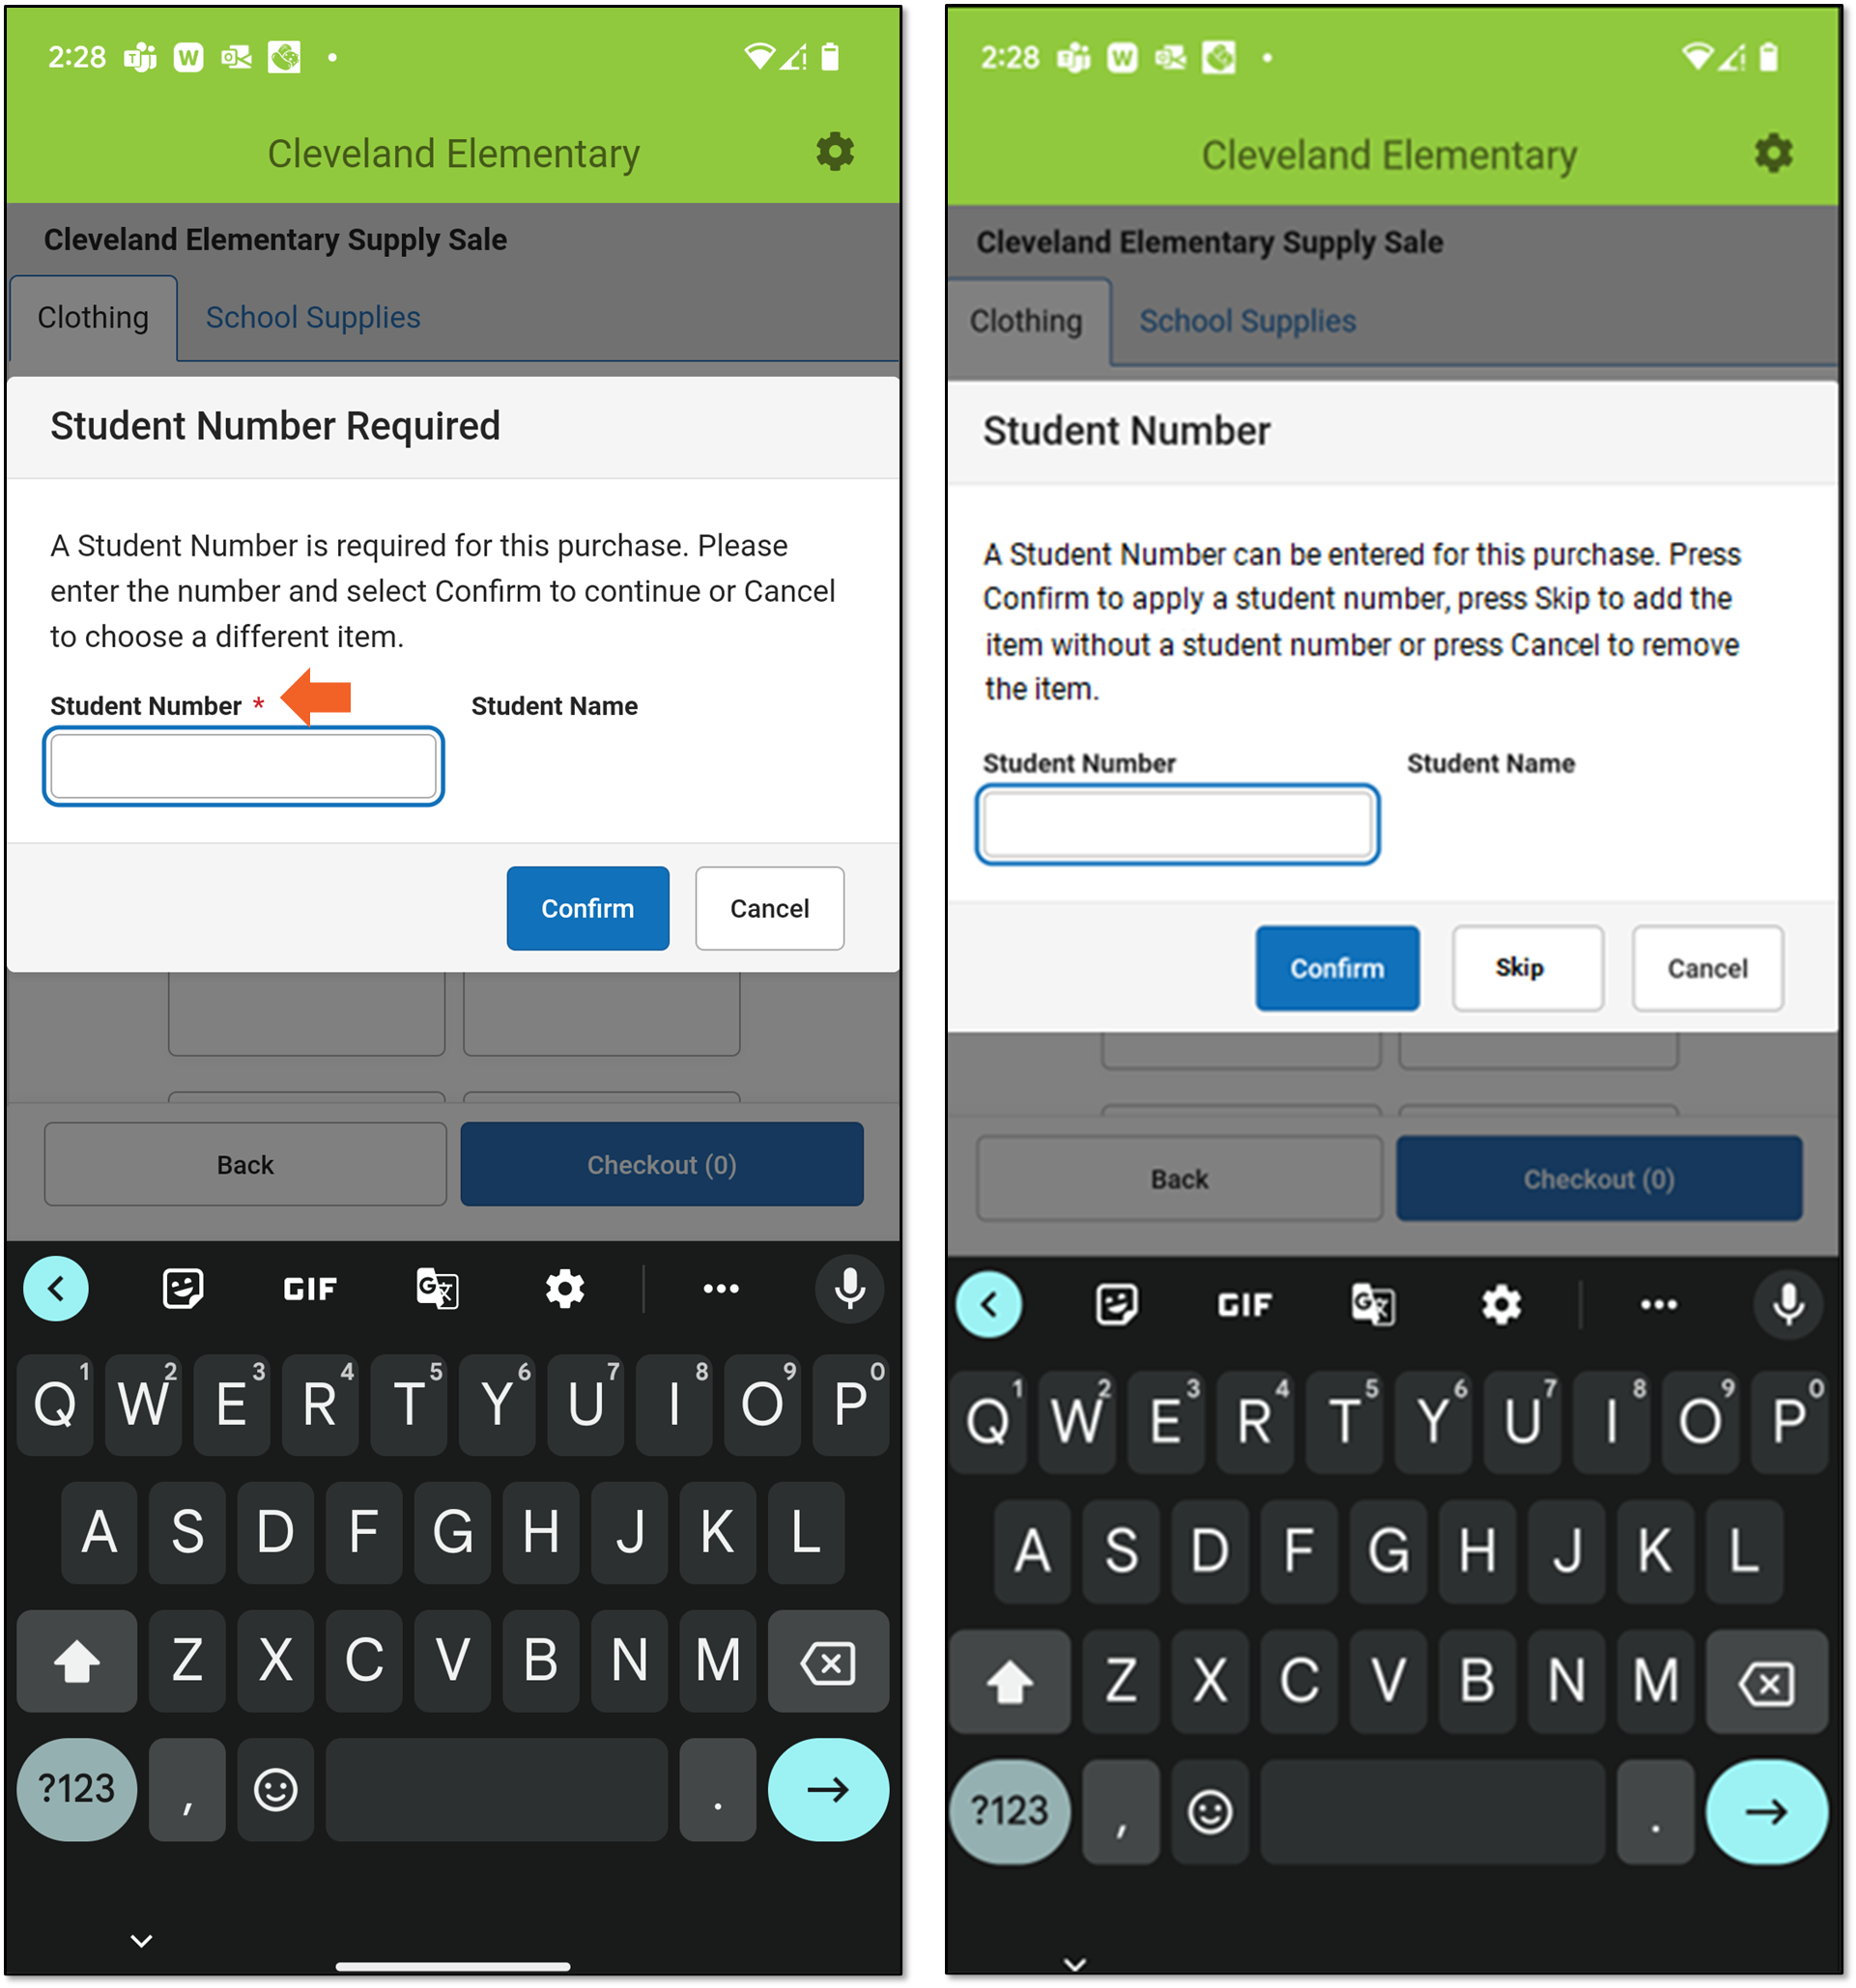 Figure 1 Figure 2
- As items are being selected, a number next to it indicates the quantity being purchased.
- Tap the item again to increase the quantity or tap the to remove it.
- Tap the red minus sign ( ) to decrease the quantity.
- The number on the Checkout button is the total number of all items purchased.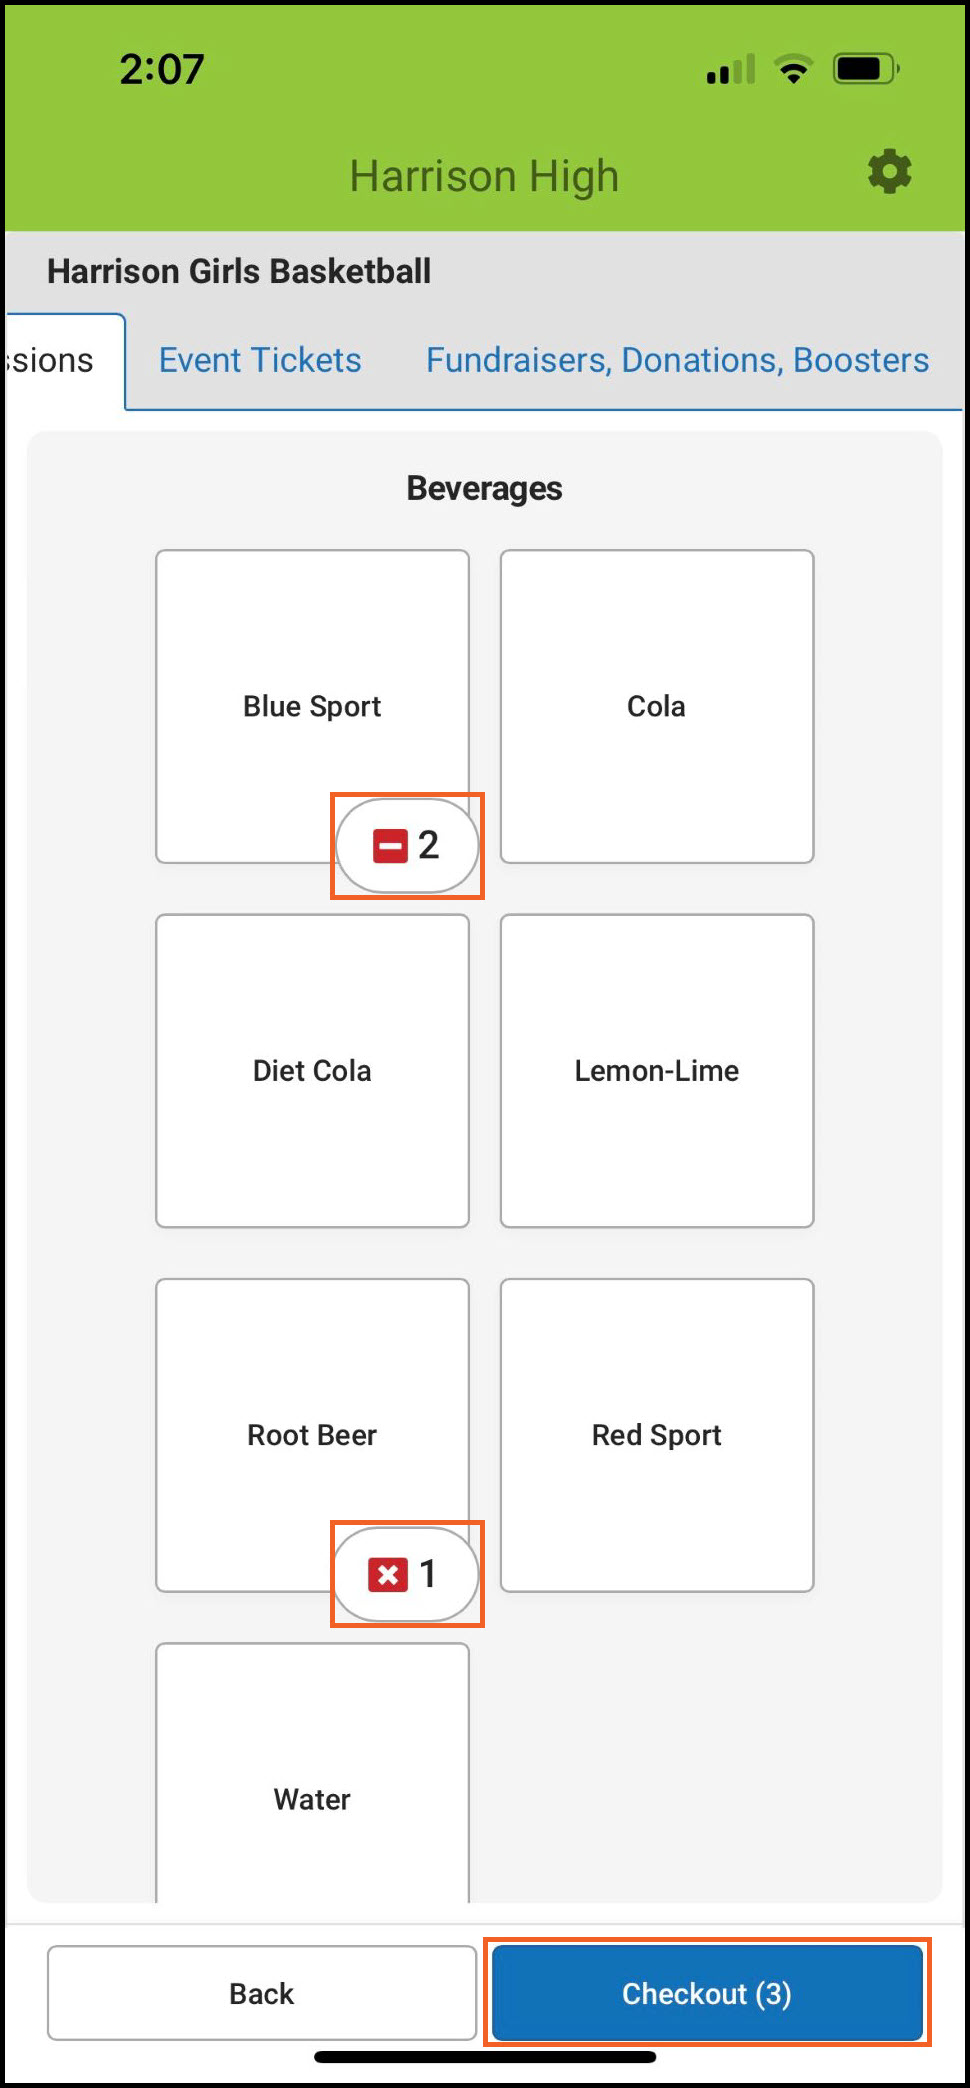
-
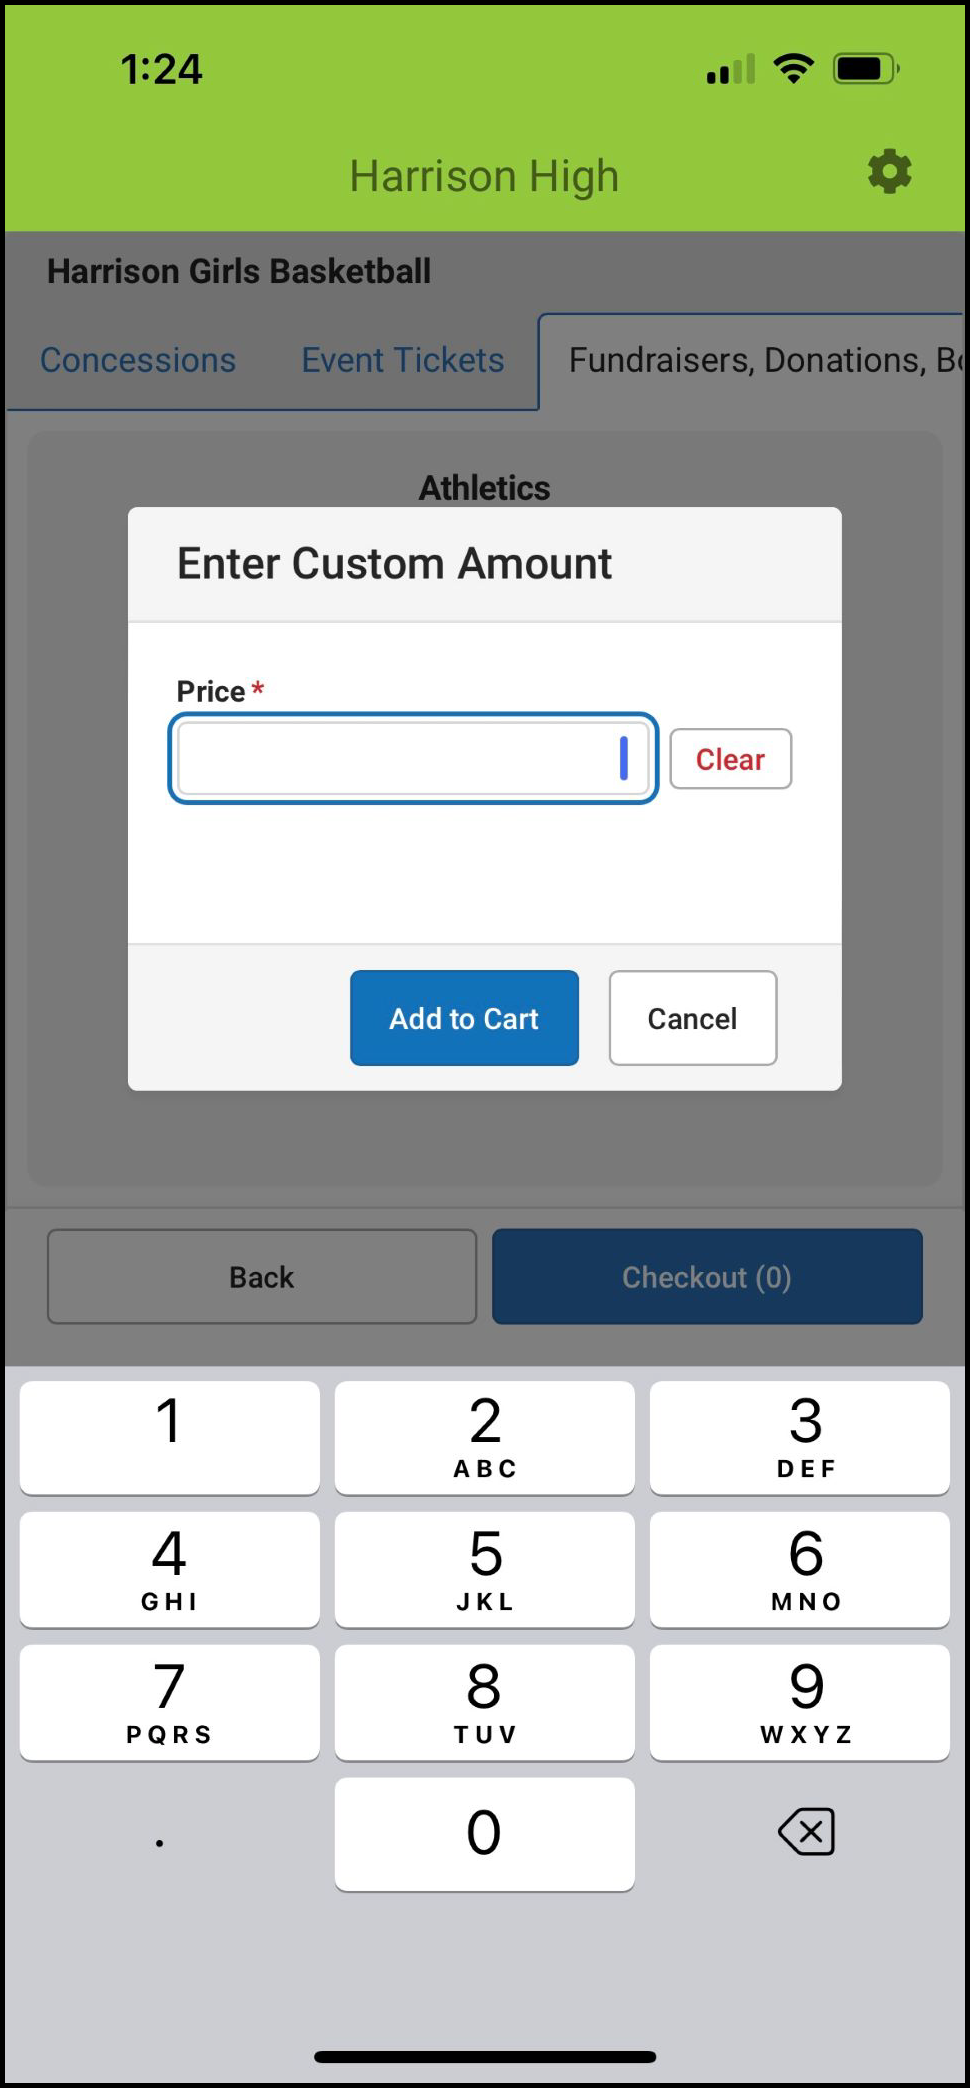
If the item selected has a custom price, enter an amount in the Price field and tap Add to Cart.
- When you are ready to accept payment, tap Checkout. The items in the cart display.
- Verify the items are correct.
a. The quantity can be increased or decreased.
b. An item can be removed.
c. The receipt can be emailed by providing an email address.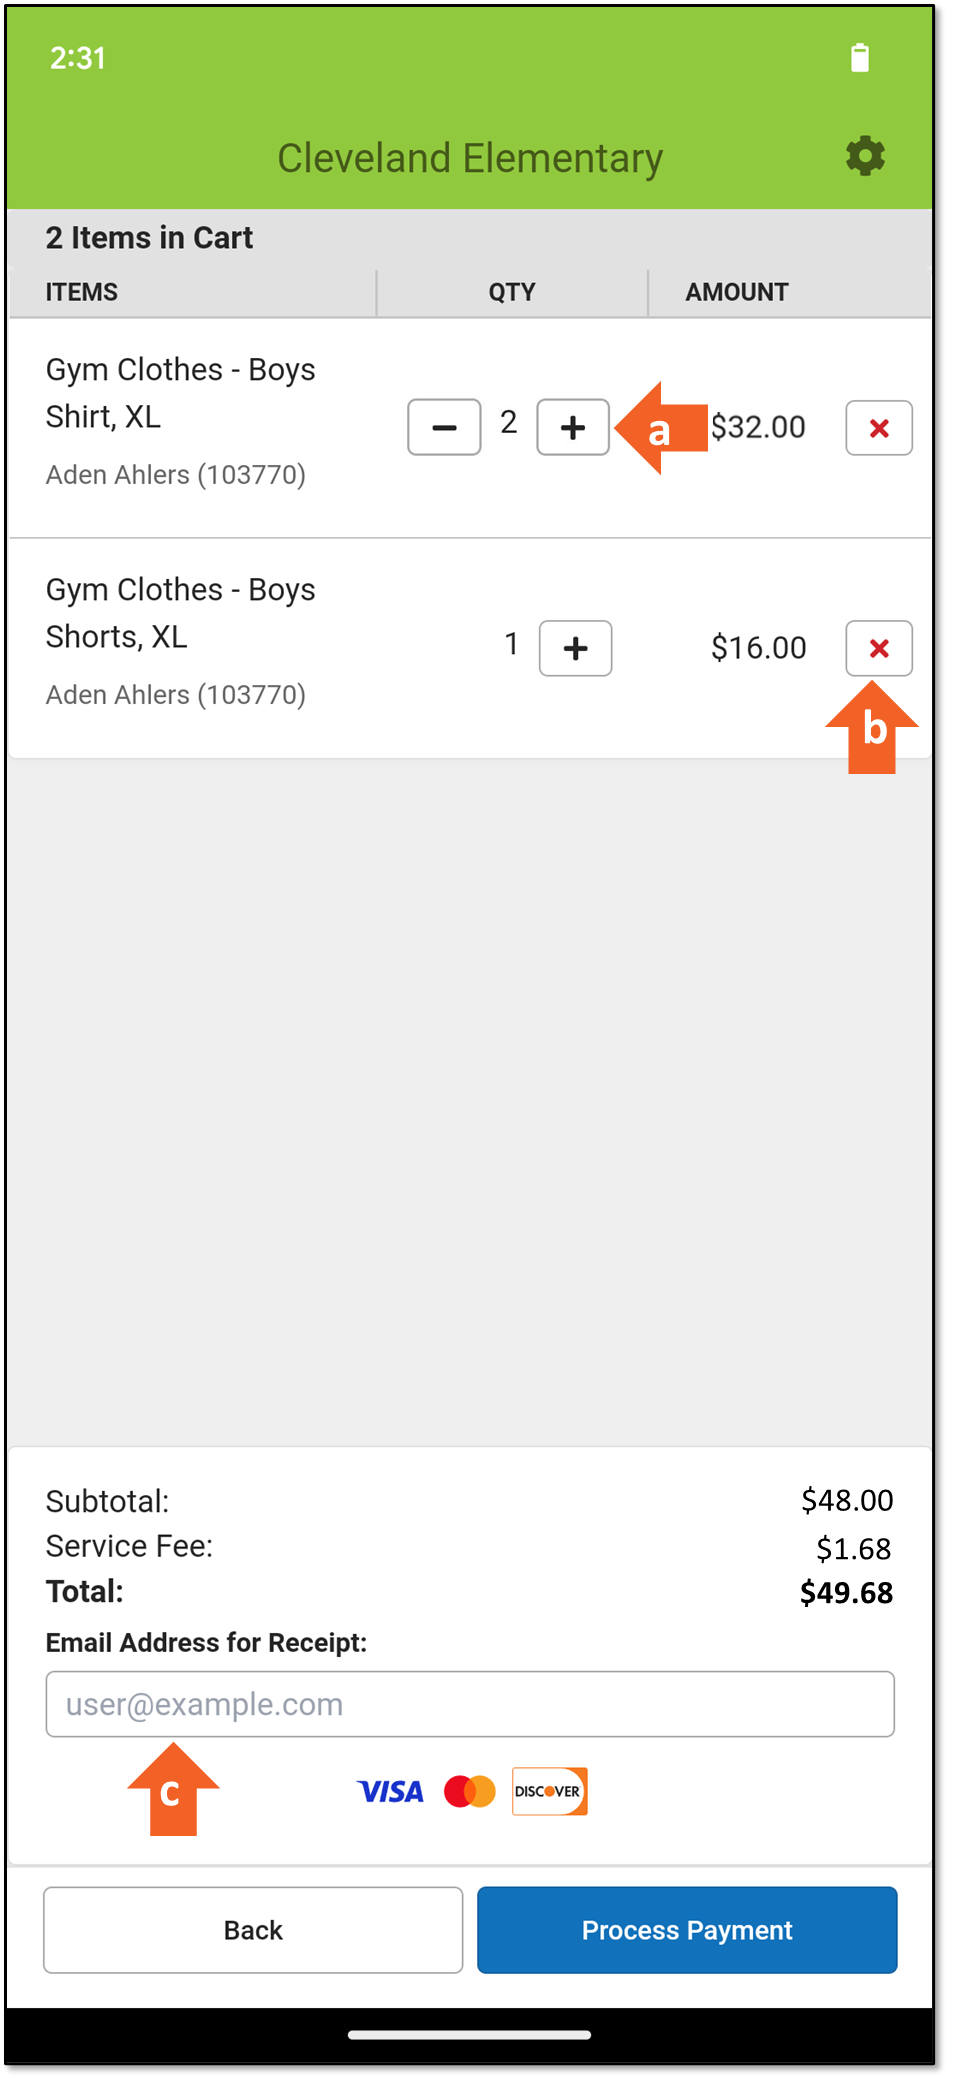
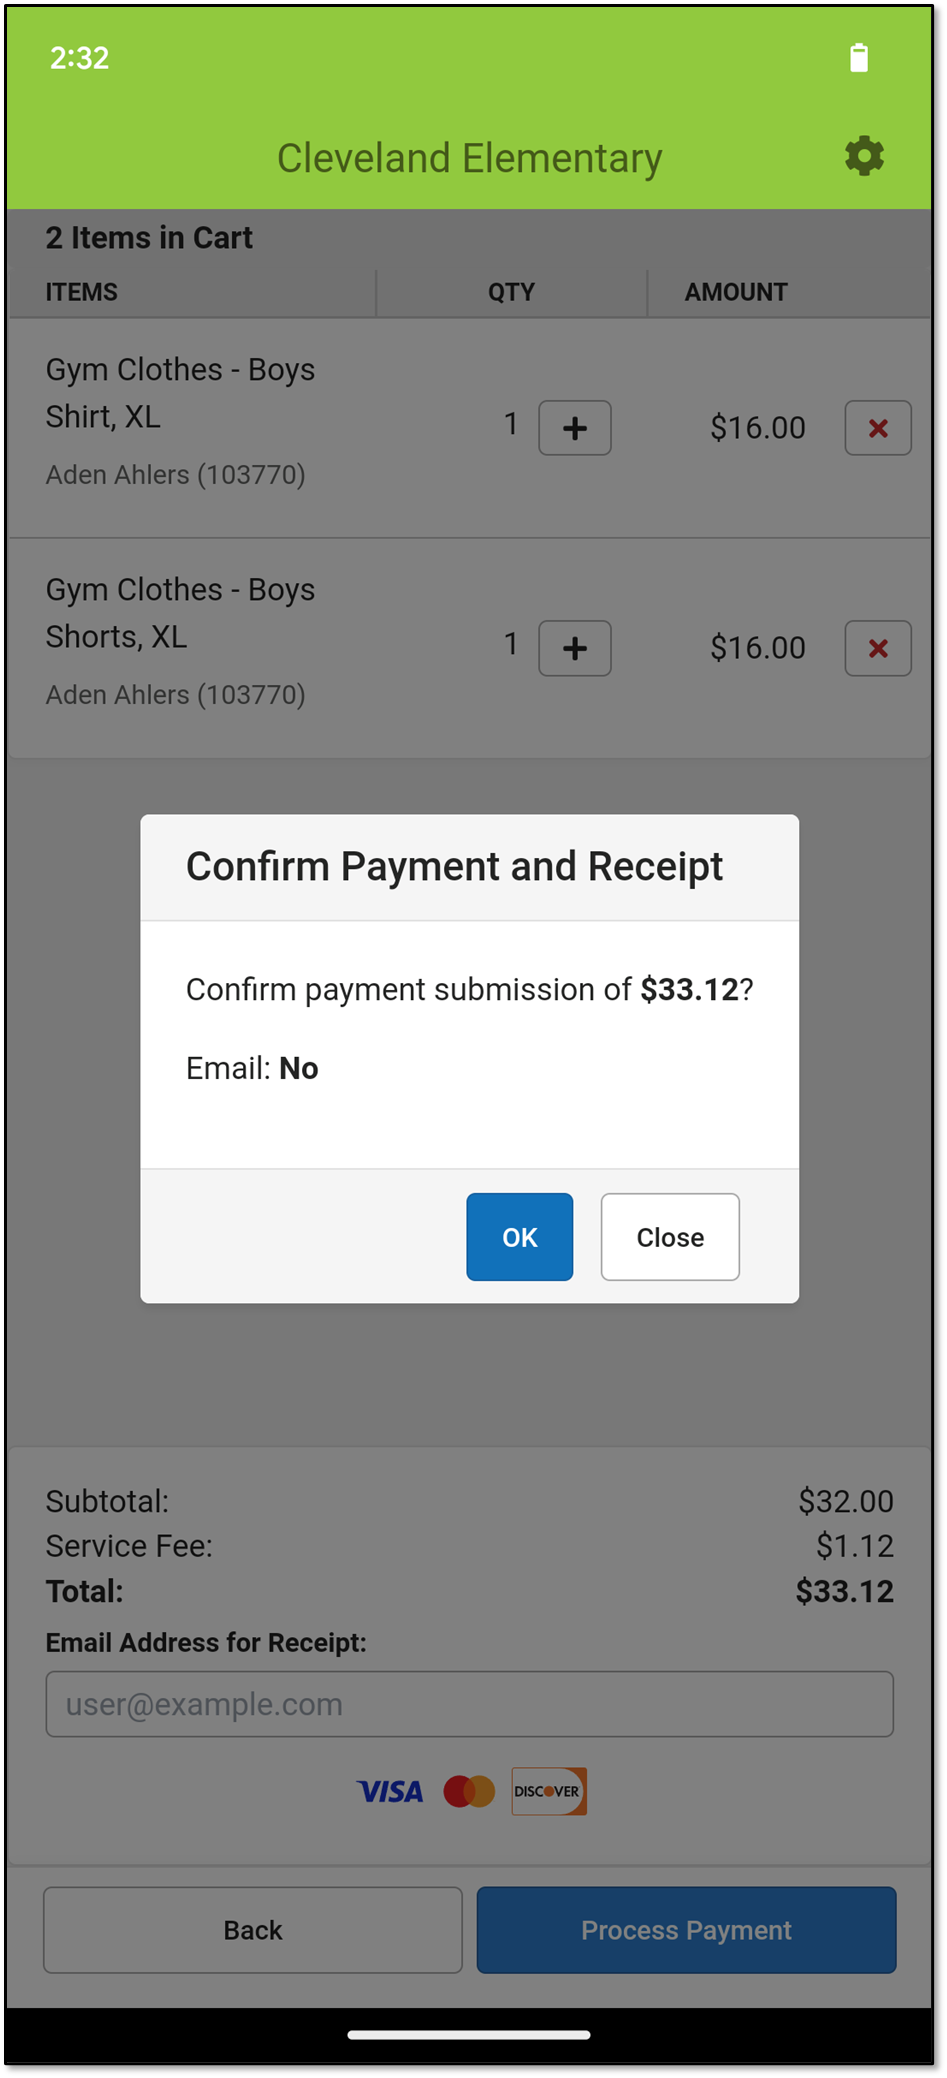
- If everything looks correct, choose Process Payment or Manual Credit Card Entry. The Confirm Payment and Receipt (Process Payment) or the Credit/Bank Card Processing (Manual Credit Card Entry) screen displays.
- If Manual Credit Card Entry was chosen, enter all of the required credit card information, then tap Submit Payment
- Tap the OK button to continue. The Insert, Tap, or Swipe Card message displays.
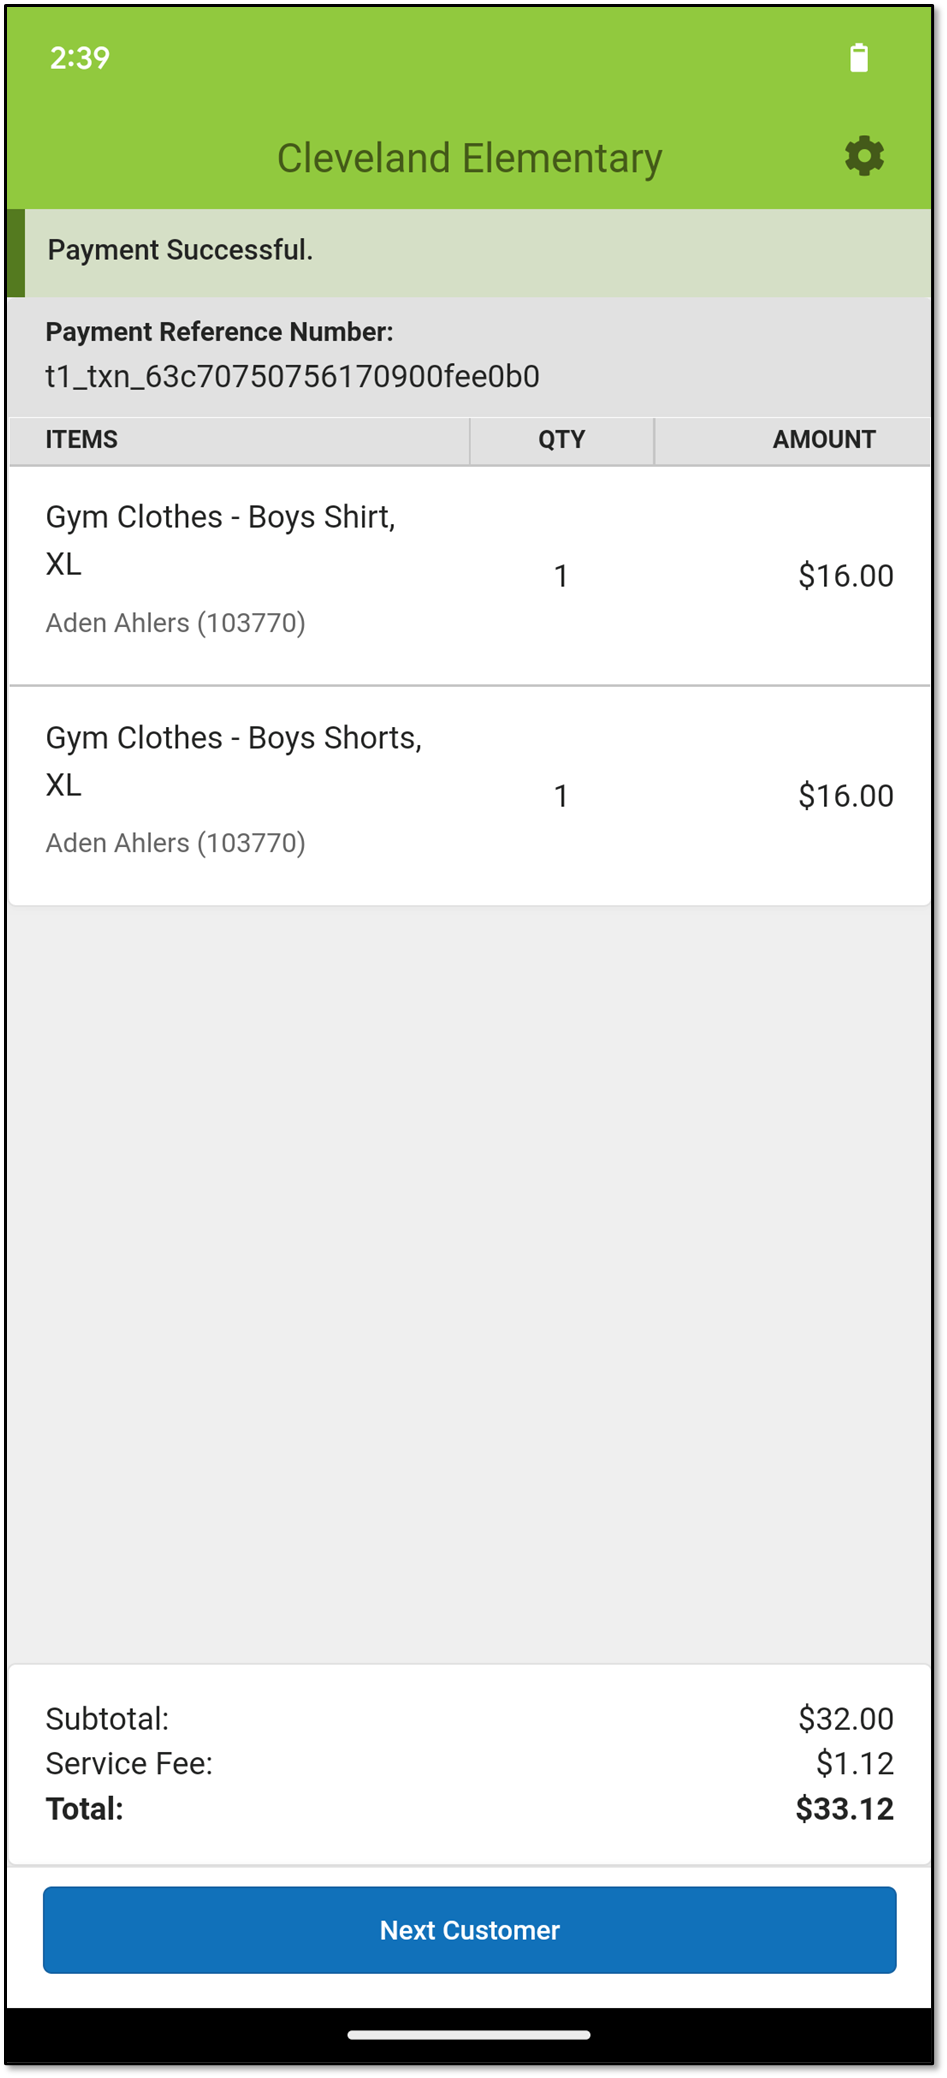
- Insert, tap, or swipe the credit/debit card in the card reader. The Payment Successful screen displays.
Note: Insert or tap must be used if the card is chip-enabled.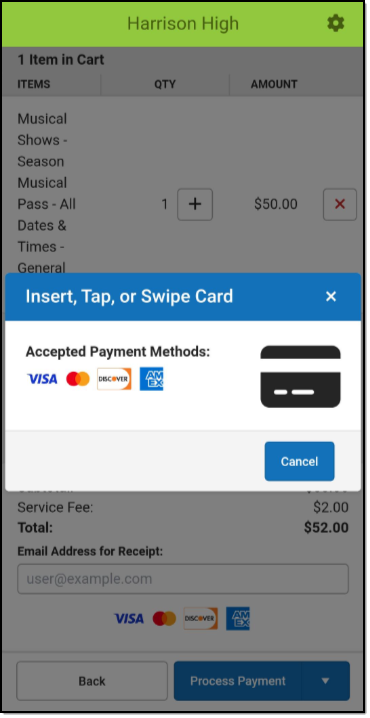
- Tap the Next Customer button to start a new transaction.
-
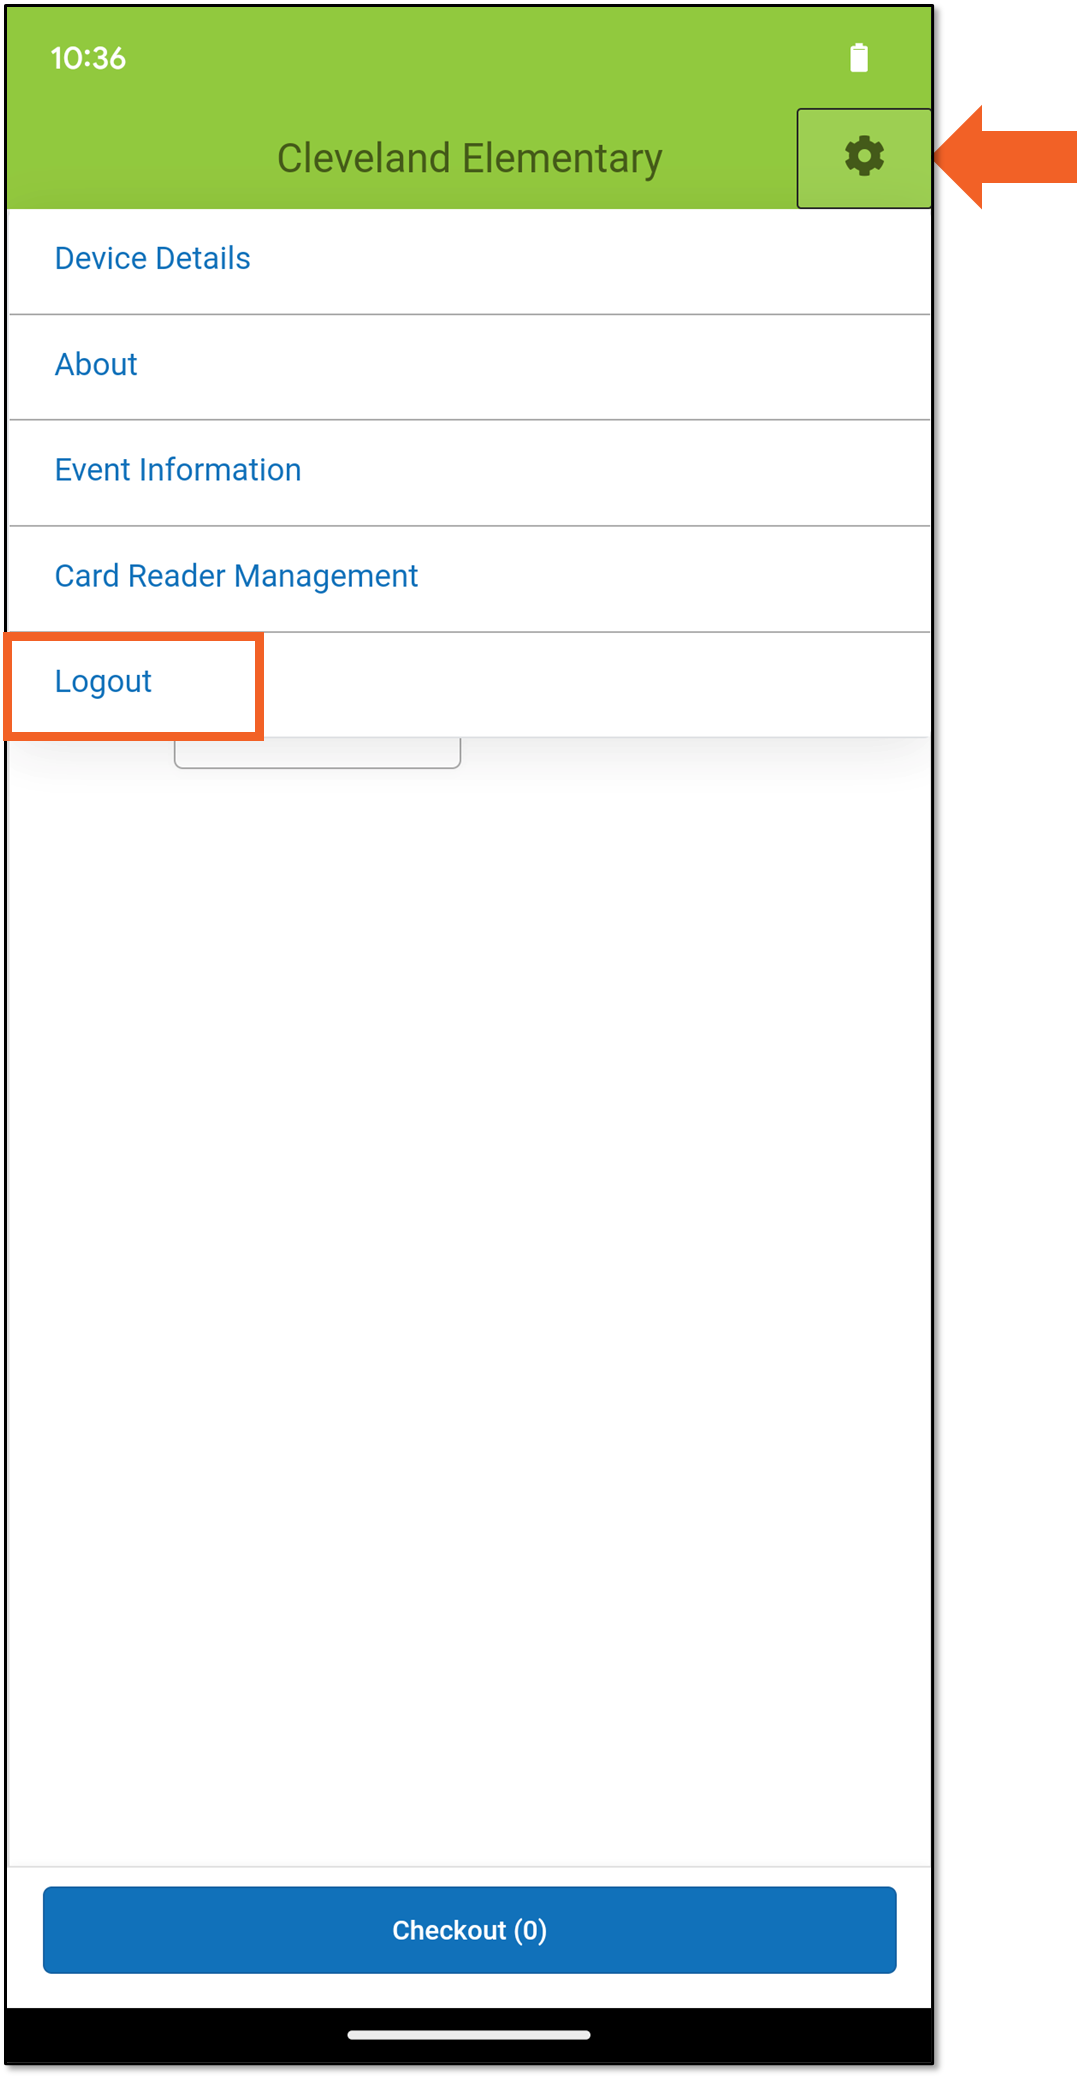
Continue to process transactions. When the event is over, tap the Gear icon and choose Logout.
 You will be returned to the Event PIN Entry screen.


 to remove it.
 ) to decrease the quantity.


 You will be returned to the Event PIN Entry screen.

The Gear Icon
The menu for the Gear icon changes depending on where you are within the app. Below are the descriptions for all of the menu options.
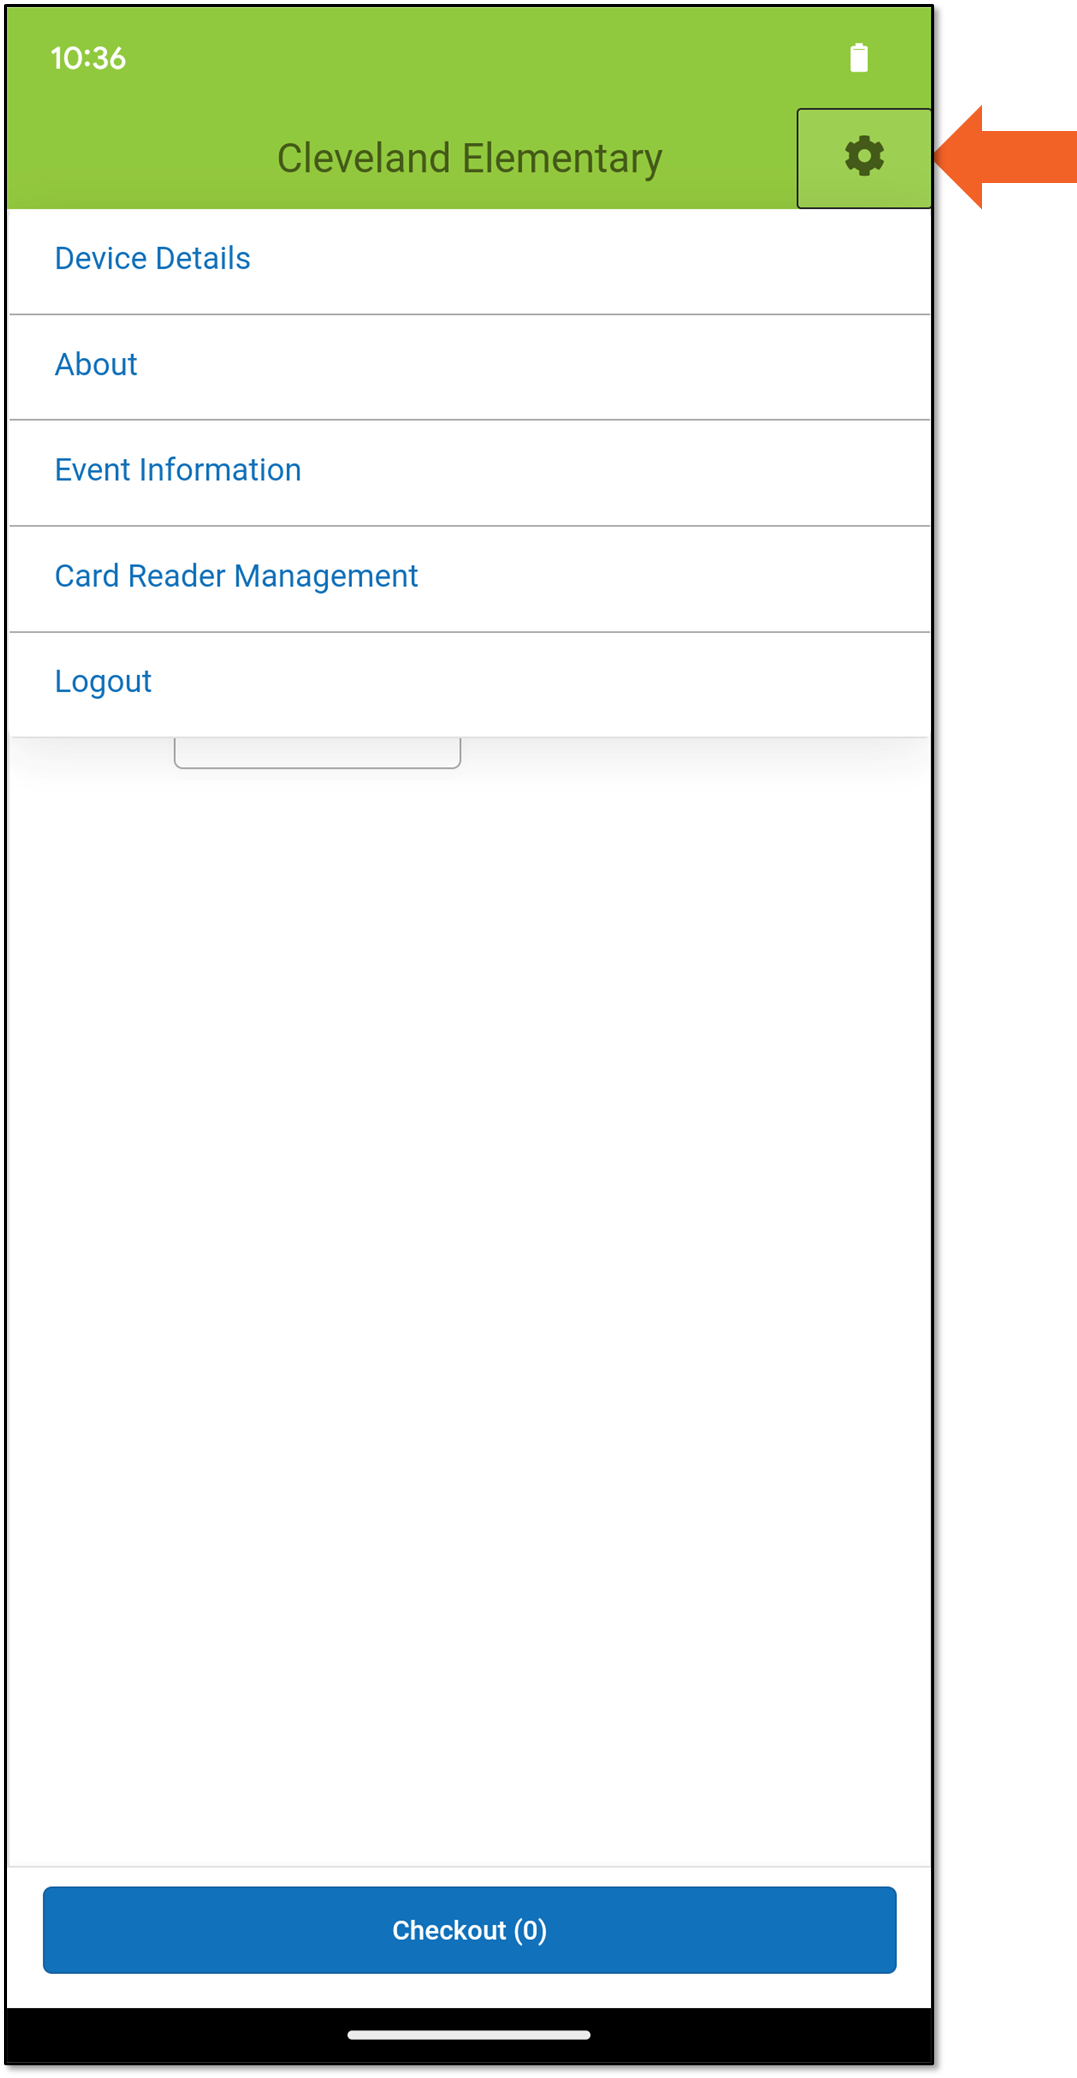
Device Details
Device Details gives the app version and the name of the device being used. The name is the one given in the Device Management tool.

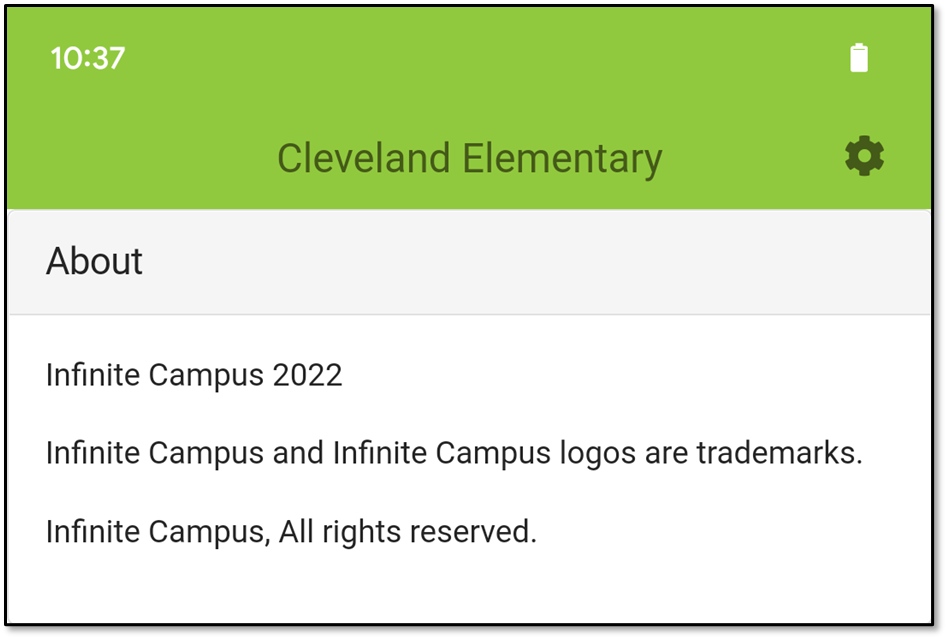
About
The About screen displays the rights and trademarks for the Campus Mobile Payments app.
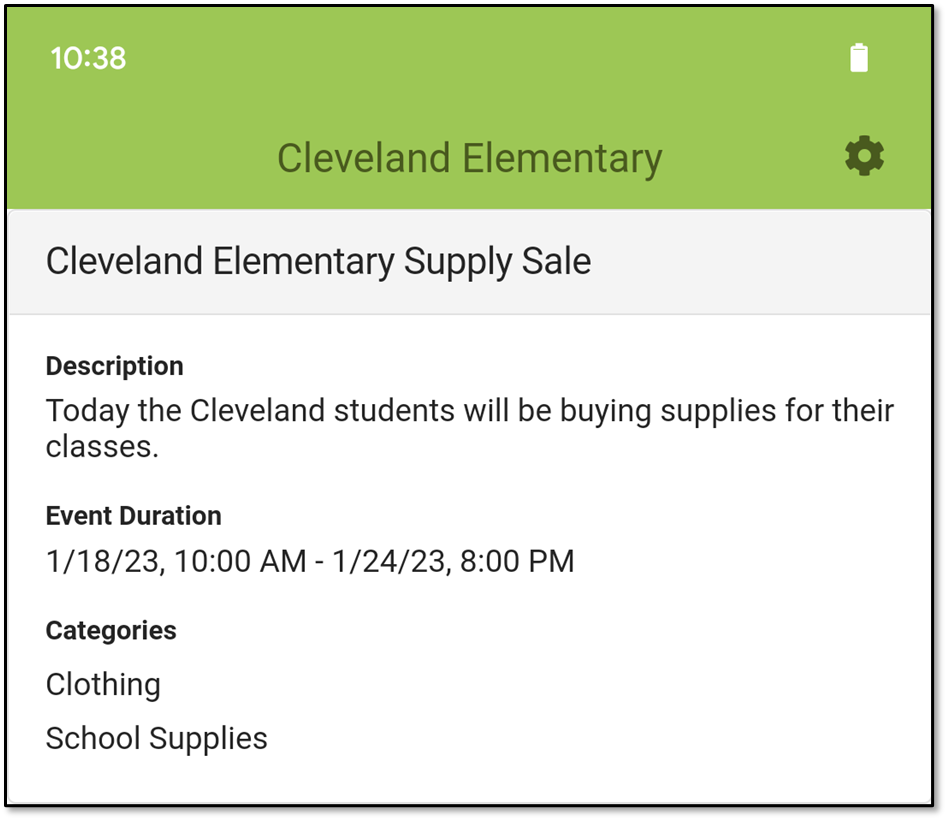
Event Information
Choose Event Information to get the details about the event taking place.
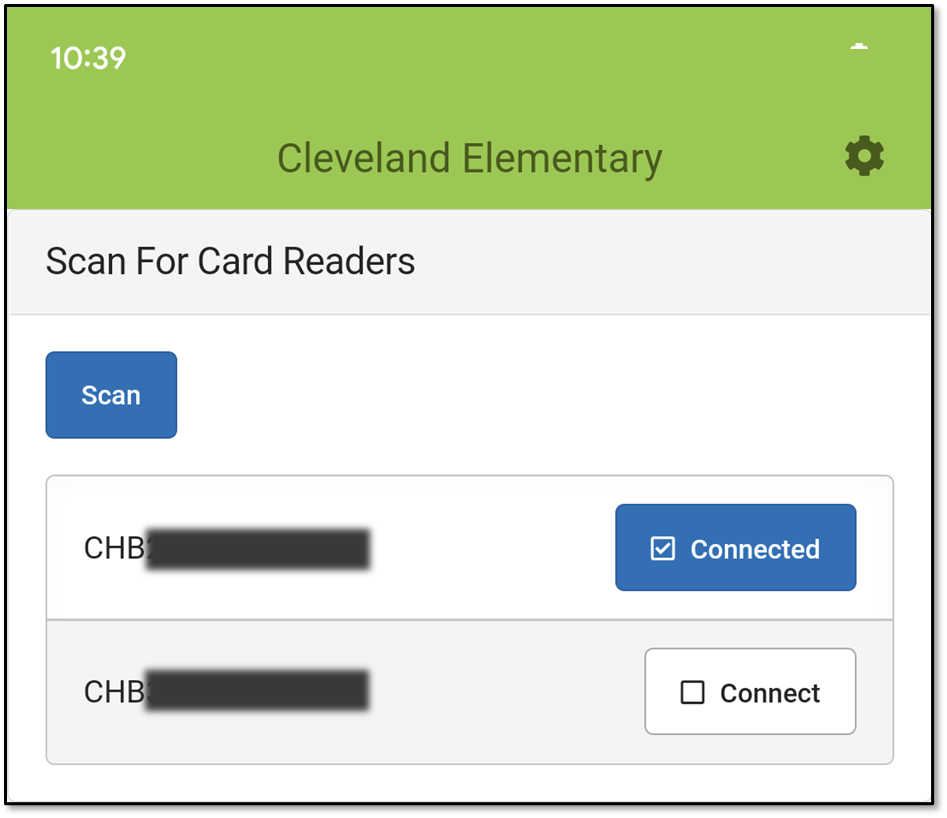
Card Reader Management
Choose Card Reader Management to see which devices are being used at this event. The card reader you are using should say Connected.
Logout
When an event is over, choose Logout to get logged out of Campus Mobile Payments. You will be returned to the Event PIN Entry screen.