Tool Search: Report Setup
A student schedule is a list of courses and course sections for which the student is scheduled (appears on the teacher's roster) during a particular day. This course listing may vary from day to day, or term to term, depending on the school and the student’s needs. Campus provides a schedule report for schools to print, or schools can create a schedule report with the options on this page. Saved schedules can be printed from the Schedule Batch Report and the student's Schedule.
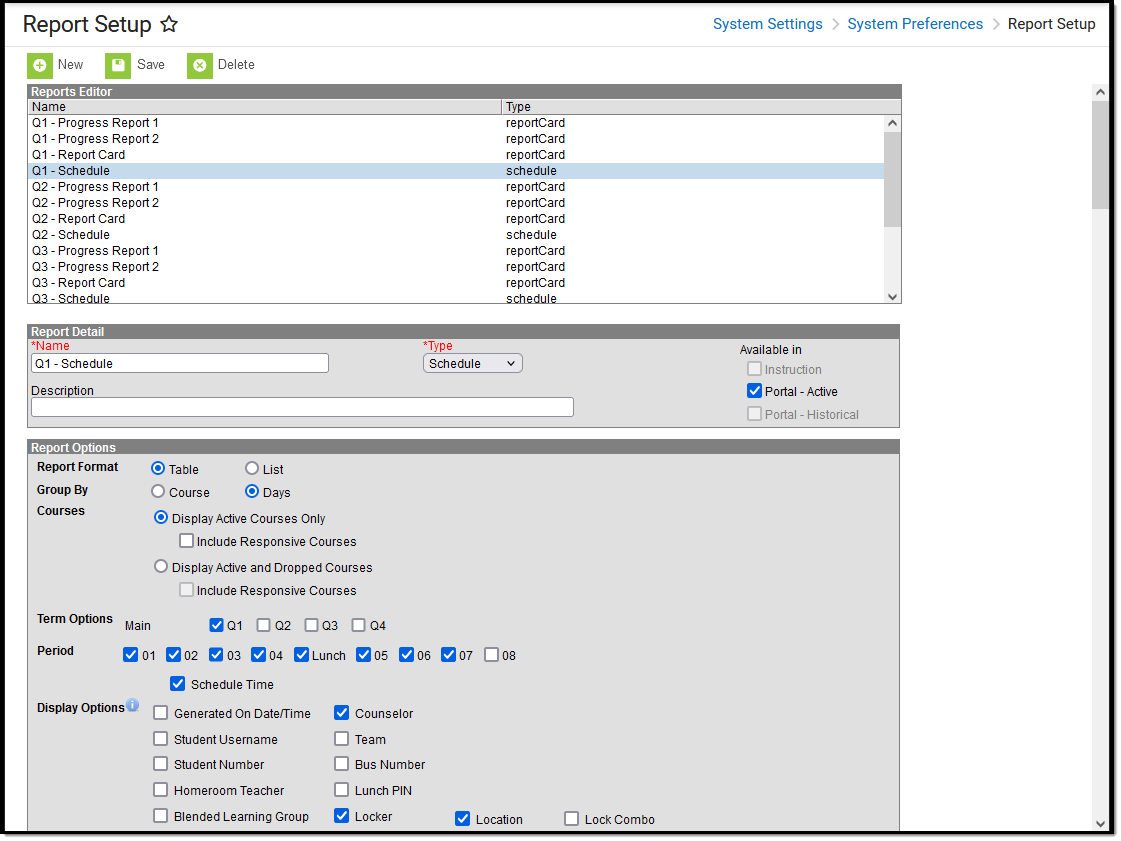 Report Setup - Schedule Preferences
Create a Schedule Report
- Select the New icon. A Report Detail and a Report Options table appears.
- Enter a Name for this schedule. This name should reflect the type of schedule it is so that users can quickly generate the correct report.
- Select the Schedule option from the Type dropdown list.
- Determine whether or not this report should be available in Campus Parent/Campus Student. If so, mark the Portal checkboxes for Available In.
- If desired, enter a Description for this schedule.
- Select the appropriate Report Options for the schedule. Refer to the sections below for more information.
- Click the Save icon when finished. The new schedule is listed in the Reports Editor and can also be selected on the Schedule Batch and on the student's Schedule.
Report Options for Schedules
| Option | Description |
|---|---|
| Report Format | The schedule can be printed in a Table Format or a List Format.
|
| Group By | The Schedule can be grouped by Course or Days. The Days option is useful for schools with rotating schedules (A/B Days, etc.), where all courses for that day's rotation are listed in a separate grid.
|
| Courses | Only the courses the student is currently scheduled in can be printed by selecting Display Active Courses Only. Or all courses, both actively scheduled ones and those the student has dropped, can be displayed by selecting the Display Active and Dropped Courses. For both options, determine if responsive courses should also be displayed by marking the Include Responsive Courses checkbox. When marked, courses that are considered responsive also print on the report (Responsive Courses do not automatically display). An Active Course is defined as a course that is not yet dropped, which has one of three impacts, depending on the context of the course:
Responsive courses follow the same logic for Active vs Dropped. |
| Term Options | Select all terms to print on the report, or some terms. For some schools, printing schedules at the start of each term is easier than printing schedules at the beginning of the year, depending on how often students switch courses, drop courses, etc. Terms cannot be selected when the Report Format is List. |
| Period | Select which periods to print on the schedule. Often, non-instructional periods (zero period, after school activity periods, etc.) can be left off the schedule. The Period Sequence cannot be selected when the Report Format is set to List.
|
| Display Options | Choose the following options to print on the schedule:
|
| Mailing Label Options | Determine how the schedule prints for mailing by choosing one of the following:
Selecting a mailing address option does not format the Schedule into an addressed letter format suitable for direct mailing; address information is printed as part of the report header only. |
| Orientation | The schedule can be printed in either Portrait or Landscape format. Additional space for terms can also be added, if desired. This option is recommended for more than five terms in a year. |
| School Comment | The School Comment field allows users to include a comment that appears at the top of all printed schedules. School comments can be modified at any time and should be relevant to the individuals receiving the schedule. |
Sample Schedule Reports
Example 1: List Format
This example uses the List format type and courses are grouped by Days. Both Active and Dropped courses are displayed, and all Display Options are included. Counselor Name, Username, Lunch PIN, Team Name, Bus Information, Locker Information print AFTER the schedule grid (see Example 4: Display Options).
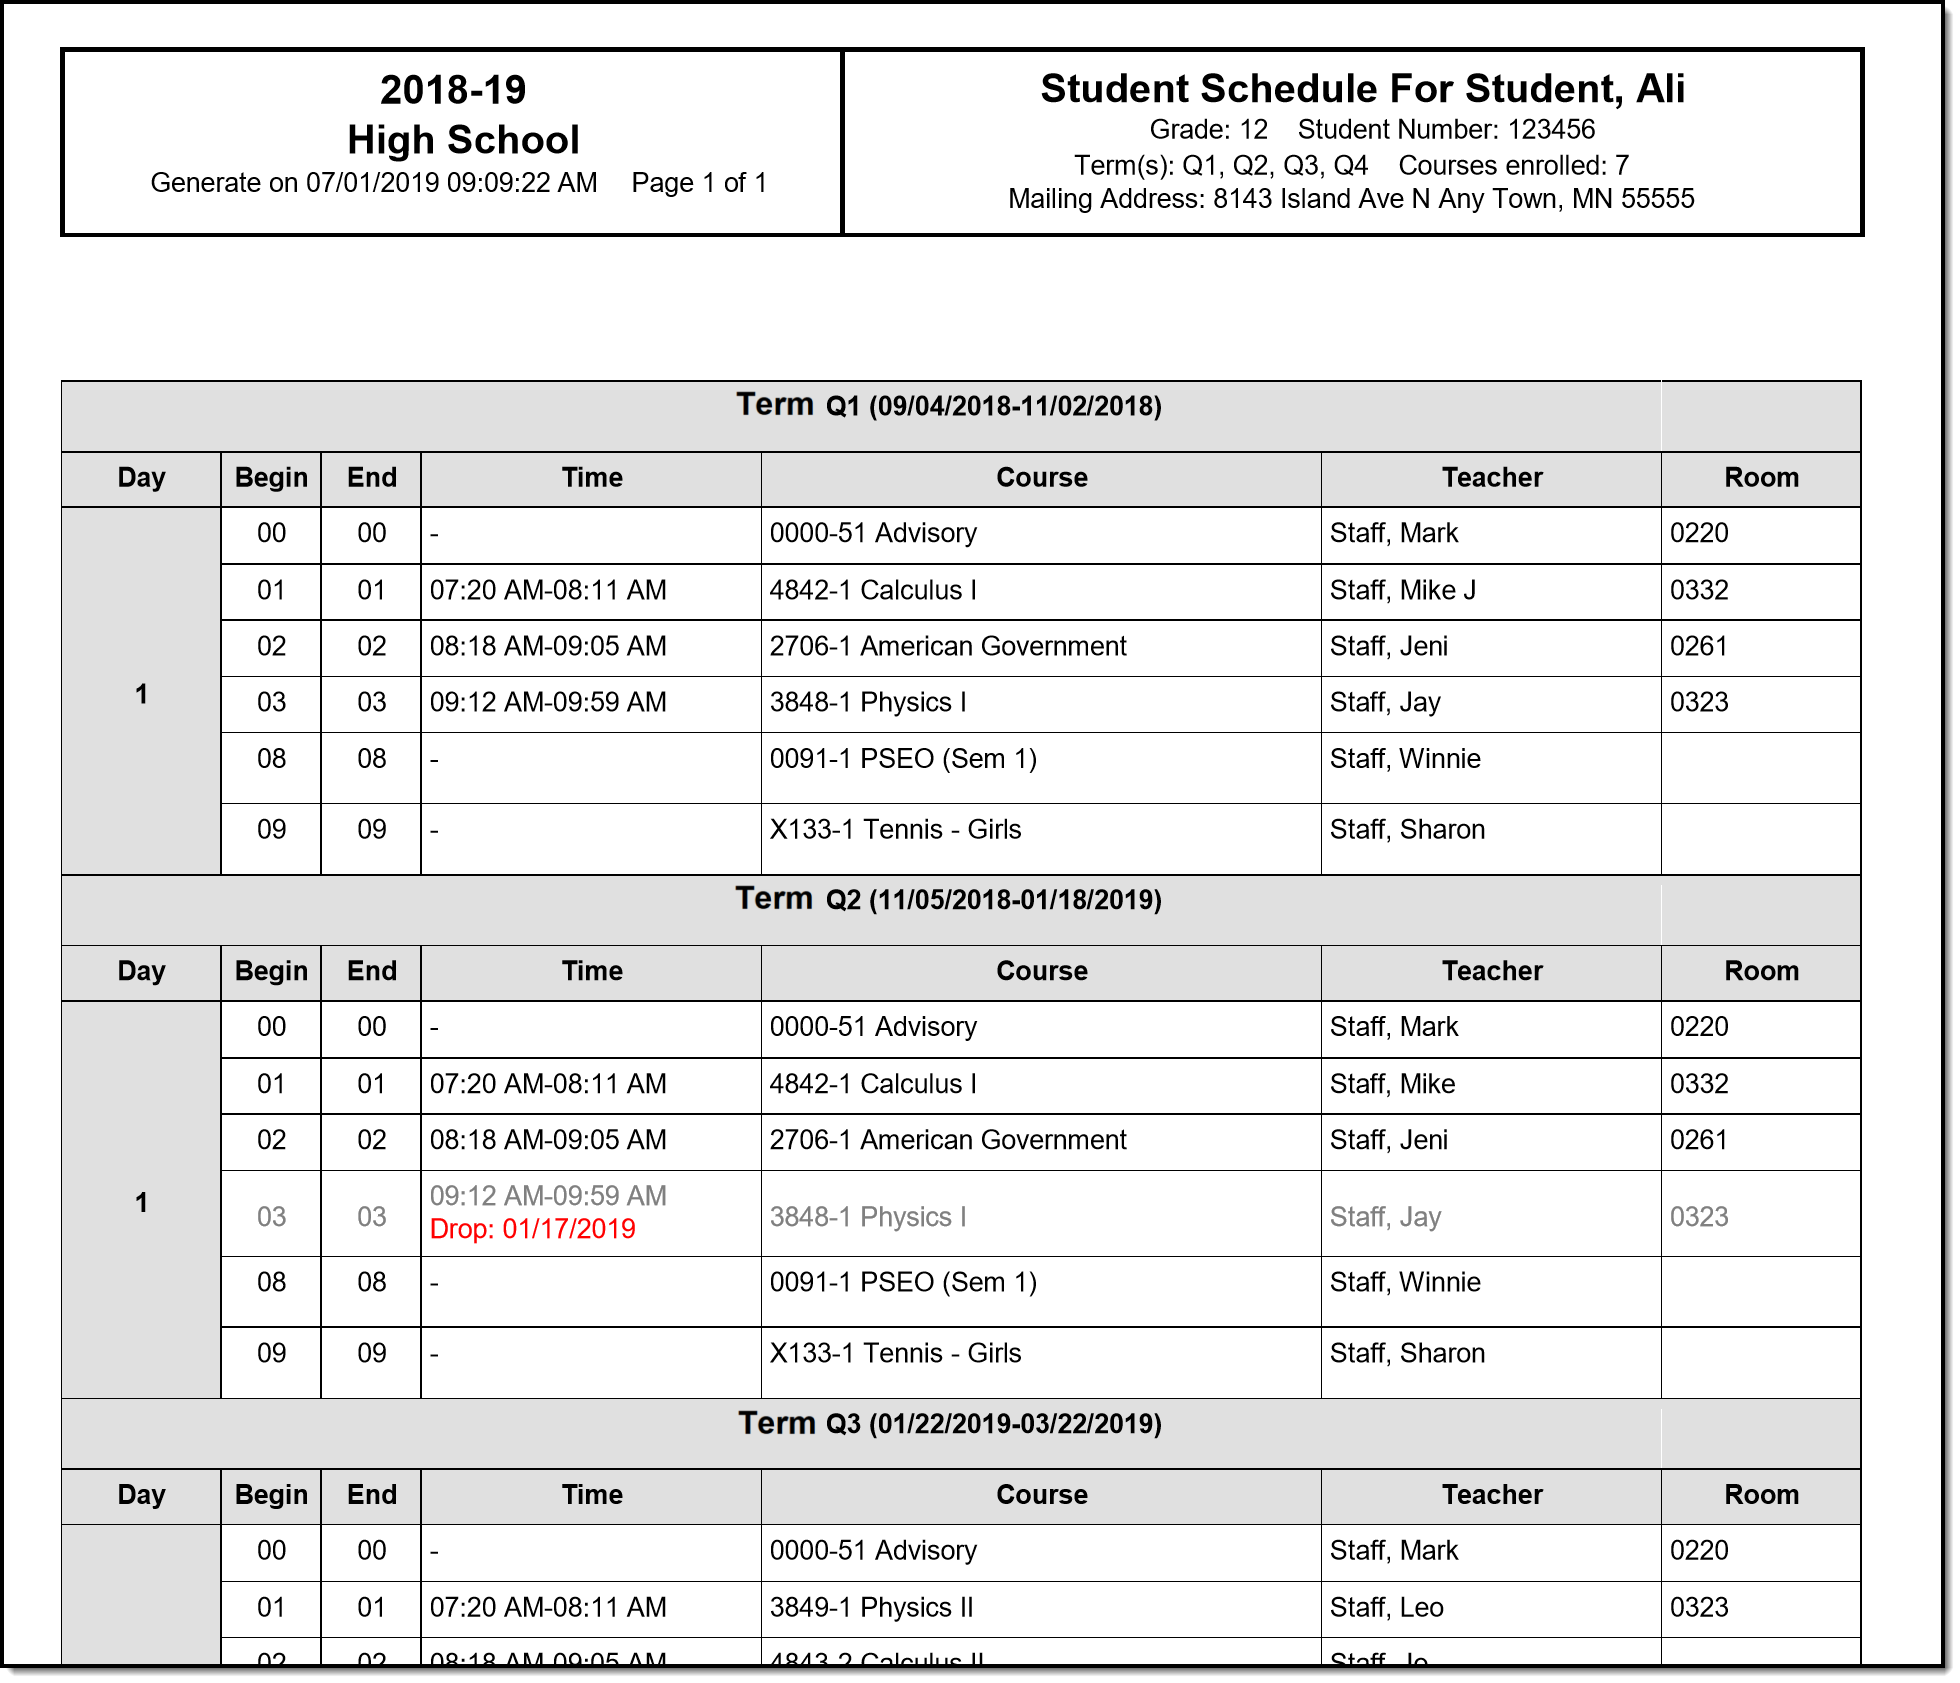 Schedule Print View - List Format
Example 2: Table Format
This example uses the Table format type and courses are grouped by Course. Only Active courses are displayed, and no Display Options are included. No address information is selected to print, but a school comment prints on all schedules, and the Generated On Date/Time does not display.
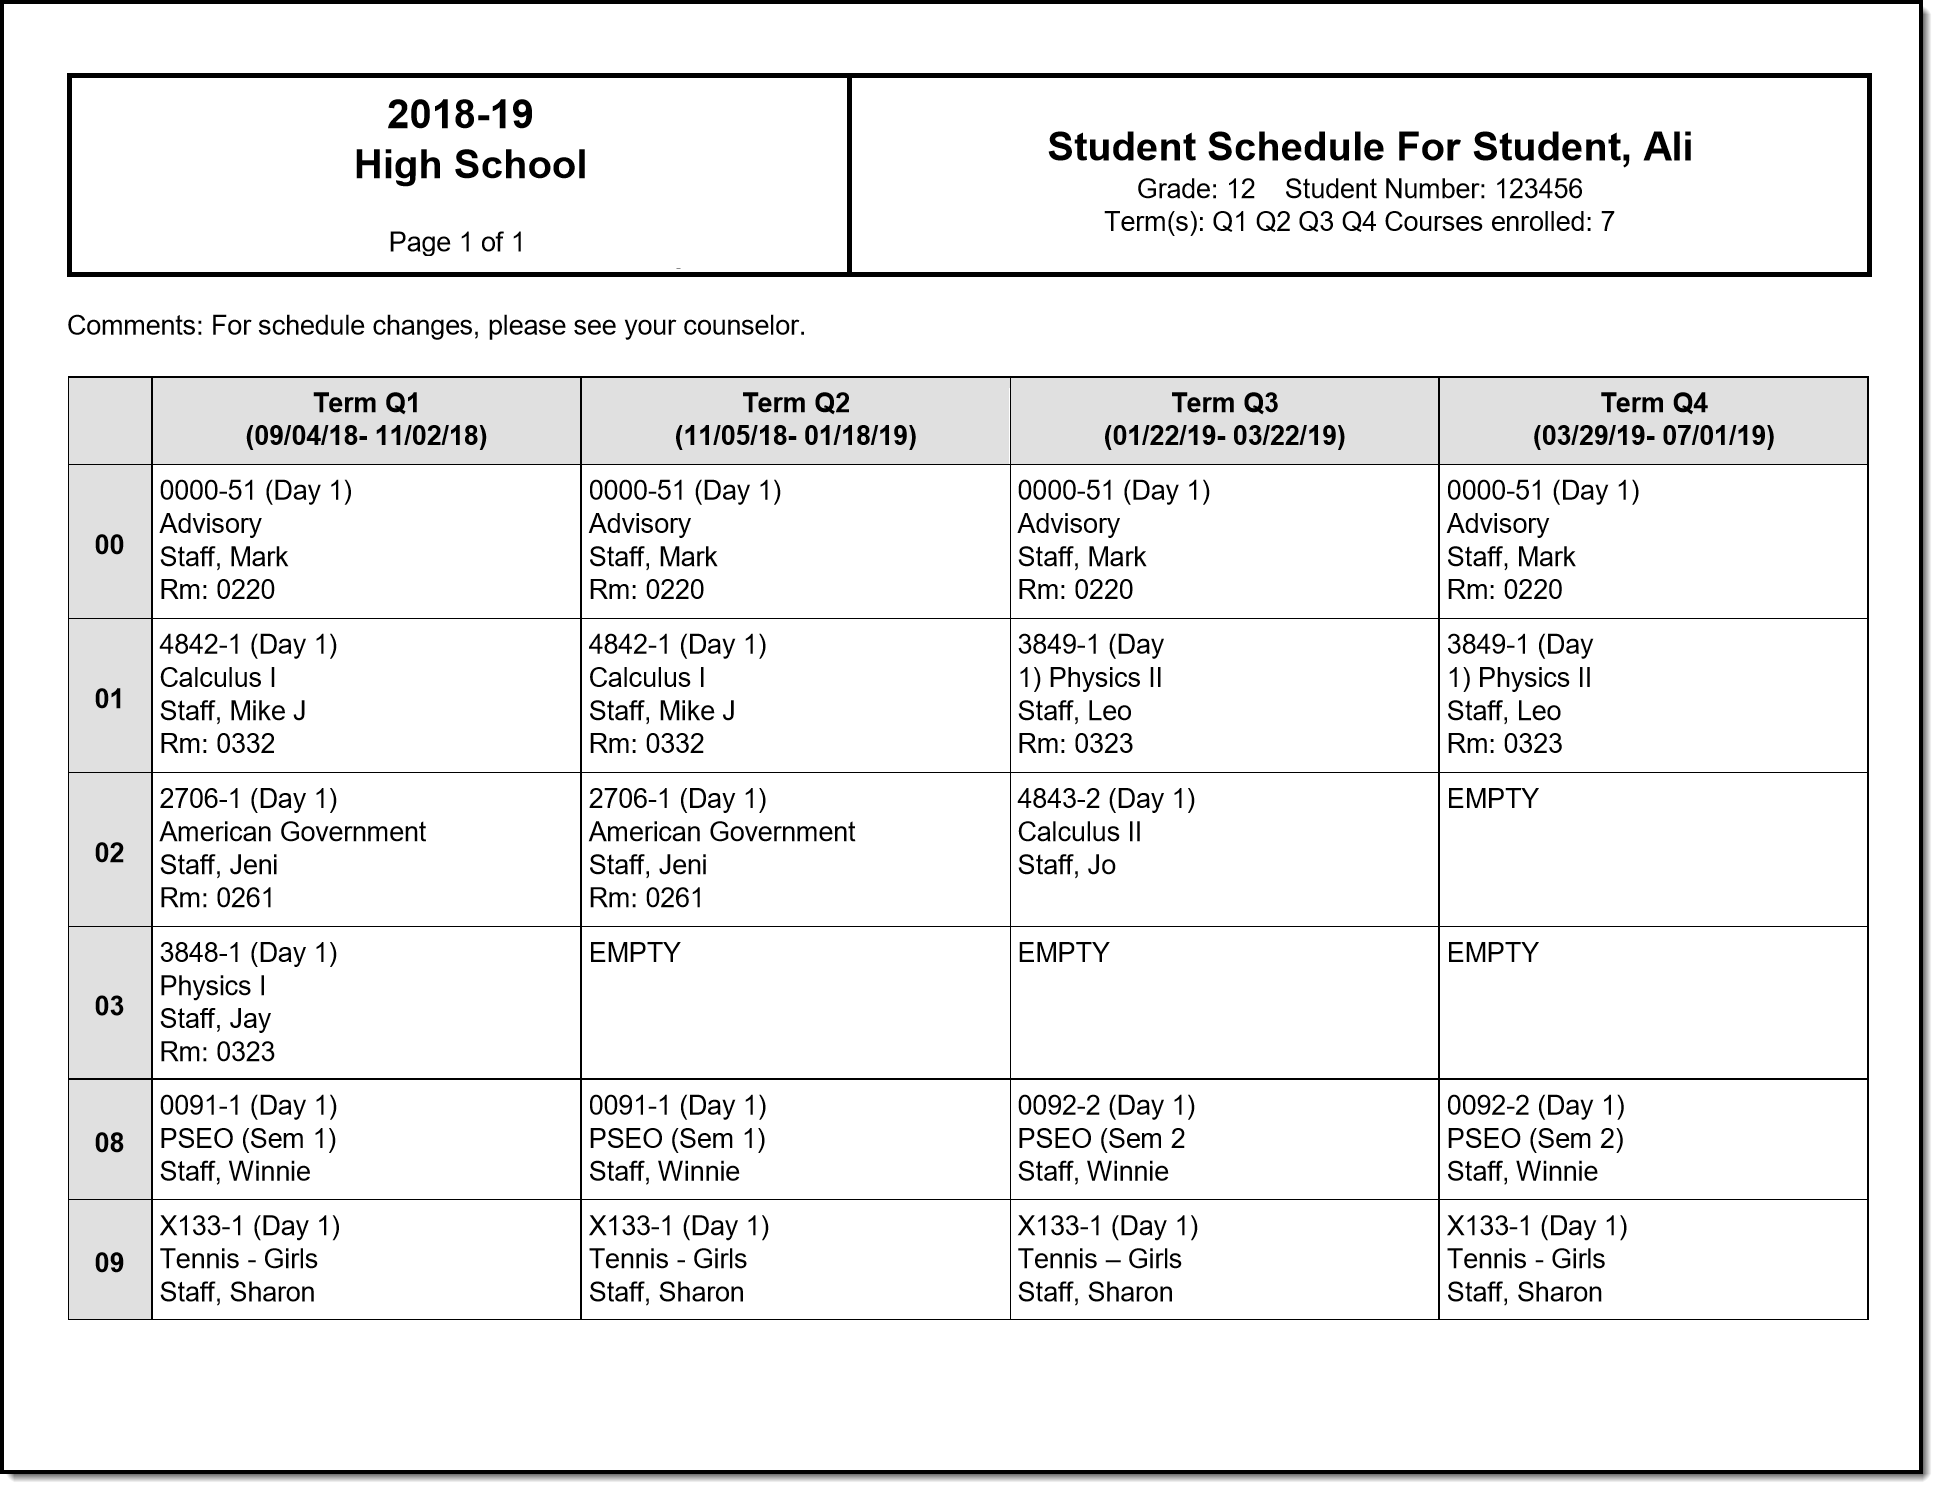 Schedule Print View - Table Format
Example 3: Display Options
Some of the Display Options print after the schedule grid of the last term chosen to print. These options include the Homeroom Teacher, Counselor name, the student's Username and Lunch PIN, the Team Name, Bus Number (as Transportation Information), and Locker details.
 Scheduling Report Display Options