This article explains the general workflow for setting up and using Data Validation and Certification. Select links within each step for detailed information about the tools described throughout the workflow.
Data Integrity Tools are only available in State Editions of Campus and districts connected to a State Edition of Campus.
Pre-Data Validation/Certification Setup
Prior to using Data Validation and Certification, the following must be set up:
- Ensure Email Messenger is Enabled and Configured
- Assign Data Integrity Tool Rights
- Assign Filter Designer Tool Rights
- Ensure Users Have a Valid Email Address
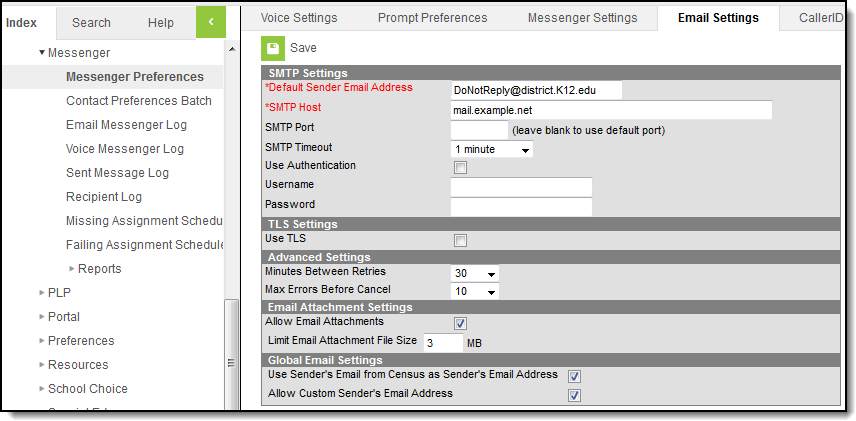
Ensure Email Messenger is Enabled and Configured
PATH: System Administration > Messenger > Messenger Preferences > Email Settings
Users must ensure Email Messenger is enabled and configured for the state. As Data Certification Events and Types are published and approved, state users receive email notifications.
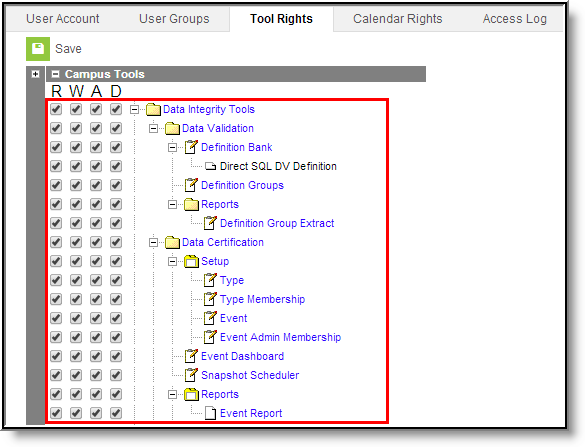
Assign Data Integrity Tool Rights
PATH: System Administration > User Security > Users > Tool Rights
For state users to properly set up, view and approve events, they must be given tool rights to the appropriate Data Integrity Tools. See the Data Integrity Tool Rights page for more information.
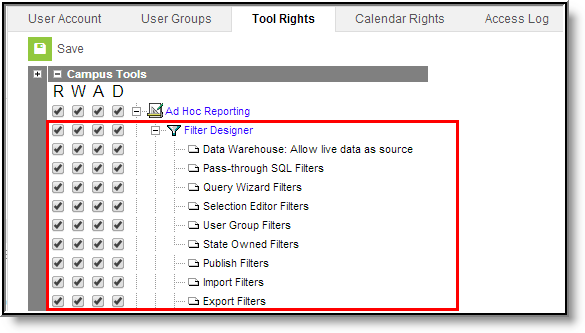
Assign Filter Designer Tool Rights
PATH: System Administration > User Security > Users > Tool Rights
To create Ad Hoc filters used in an event for pulling a defined set of data, users must have tool rights to the Filter Designer and related sub-rights.
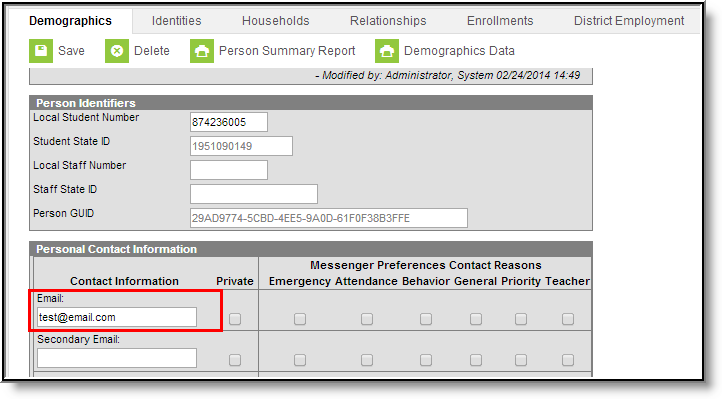
Ensure Users Have a Valid Email Address
PATH: Census > People > Demographics > Email
For users to receive email notification about data certification event activity, they must have a valid email address entered on the Demographics tab.
Data Validation Setup Workflow
The following steps define the basic workflow for setting up Data Validation tools so that users can begin to validate state and district data.
- Step 1. Establish Data Validation Definitions
- Step 2. Create Data Validation Groups
- Step 3. Review Data Validation Groups
- Step 4. Publish Data Validation Groups to Districts
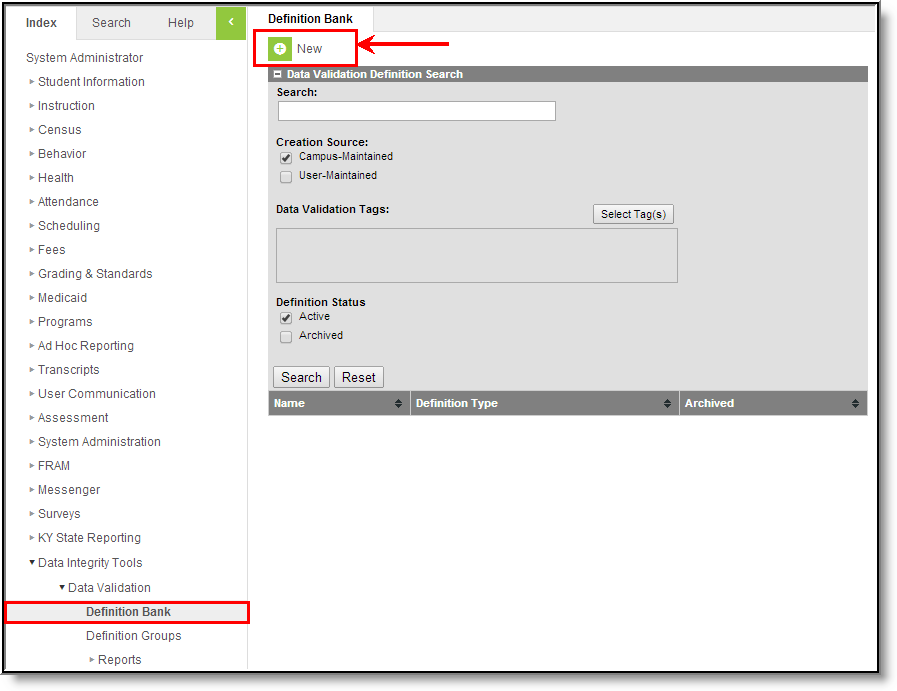
Step 1. Establish Data Validation Definitions
PATH: Data Integrity Tools > Data Validation > Definition Bank
For state and district users to validate data, data validation definitions need to be established. Data validation definitions define how data is audited during the validation process. Users can create their own validation rules and/or use the preexisting rules provided by Campus.
Archiving a definition makes it unavailable for use in data validation groups; however, the definition can still be used to preview data and existing data validation groups containing the definition can still be run. Archived definitions can be reactivated for use in data validation groups.
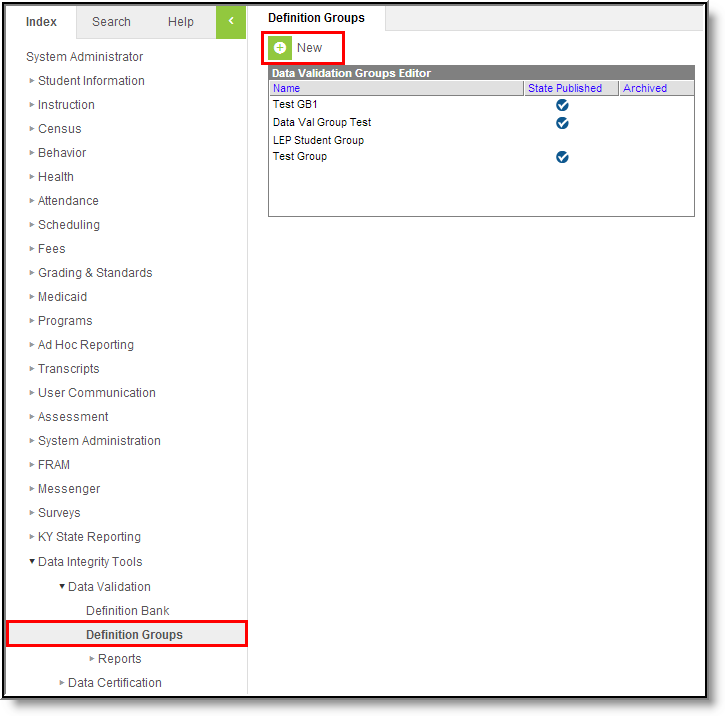
Step 2. Create Data Validation Groups
PATH: Data Integrity Tools > Data Validation > Data Validation Groups
Once data validation definitions have been created, data validation groups need to be established. Data validation groups are sets of validation definitions grouped together so users can easily audit data for a specific area or process within Campus. Users can add user-created and Campus-created definitions to validation groups.
For example, a user might create a validation group called "Student Graduation Validations" and include several validation definitions pertaining to graduation information.
Archiving a group makes it unavailable for use in Data Certification, however the definition can still be used to preview data and existing data validation groups containing the definition can still be run. Archived groups can be reactivated for use in Data Certification.
Step 3. Review Data Validation Groups
PATH: Data Integrity Tools > Data Validation > Reports > Definition Group Extract
Once data validation groups are created, users should run each validation group and review reported data via the Definition Group Extract tool.

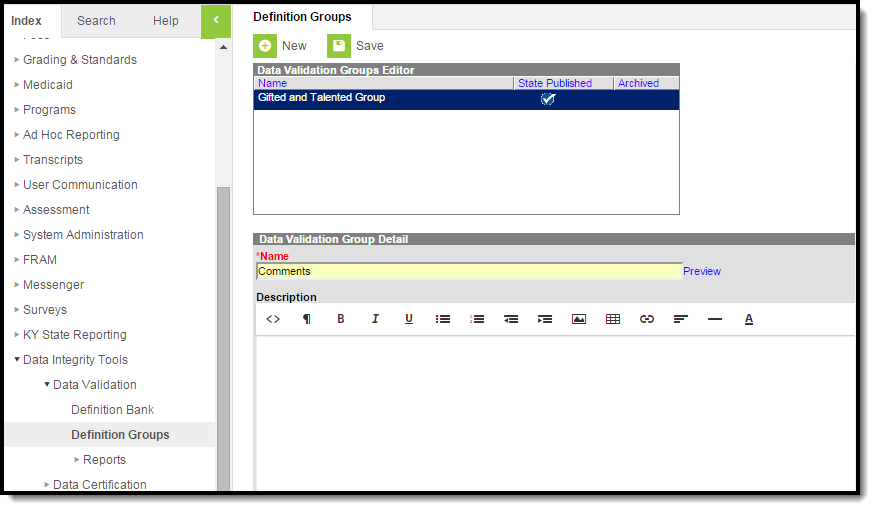
Step 4. Publish Data Validation Groups to Districts
PATH: Data Integrity Tools > Data Validation > Definition Groups
Once data validation groups are established, users need to publish these groups to districts so district users can begin using them for validation. To publish a validation group, select the group from the Data Validation Groups Editor window and click the Publish Group button.
An archived group that has never been published cannot be published to districts.
Data Certification Setup Workflow
The following steps describe the basic workflow for setting up Data Certification tools so that users can begin to create and approve data certification events.
- Step 1. Create Certification Types
- Step 2. Publish Certification Types to Districts
- Step 3. Add Members to Each Certification Type
- Step 4. Create Data Certification Events
- Step 5. Assign Event Admin Memberships
- Step 6. Publish Data Certification Events to Districts
- Step 7. Schedule a Snapshot
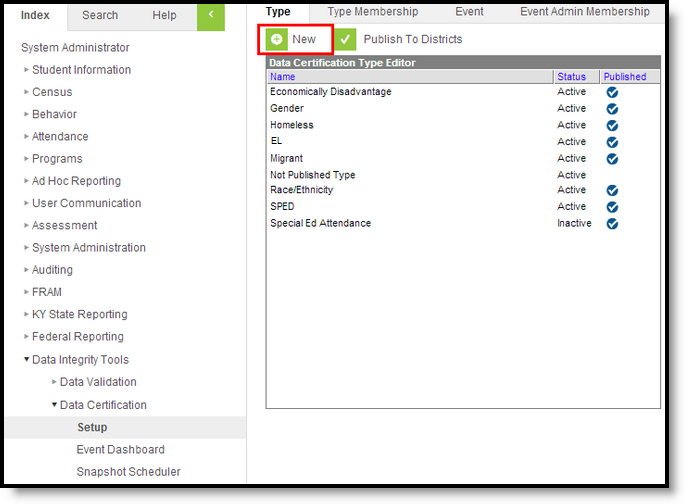
Step 1. Create Certification Types
PATH: Data Integrity Tools > Data Certification > Setup > Type
Before events can be created, data certification Types must be created. Data certification types indicate what type(s) of information is being certified in the data certification event (i.e., Special Ed, English Learners (EL), etc) and which state and district users are allowed to view and certify an event.
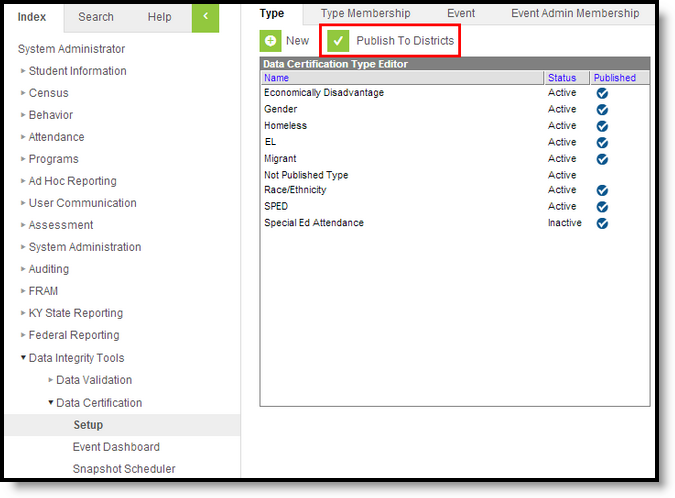
Step 2. Publish Certification Types to Districts
PATH: Data Integrity Tools > Data Certification > Setup > Type
Once data certification types have been created they must be published to districts via the Publish to Districts button. Publishing data certification types allows district users to be assigned to type memberships and ensures the appropriate district users are allowed to certify events based on the type of data certification event.
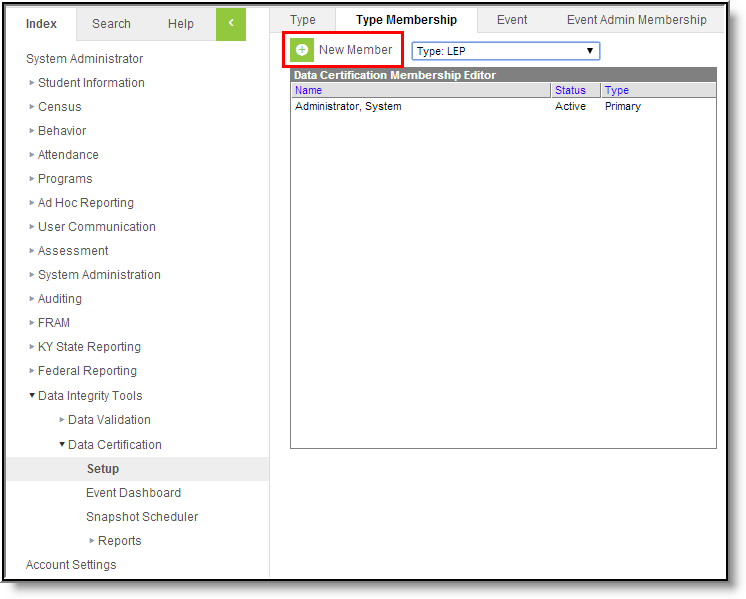
Step 3. Add Members to Each Certification Type
PATH: Data Integrity Tools > Data Certification > Setup > Type Membership
Once Types have been created and published, state users must be assigned Type Memberships for each available type. As data certification events are created and published to districts, state users receive notification of published events and have the ability to certify events tied to their Type Membership(s).
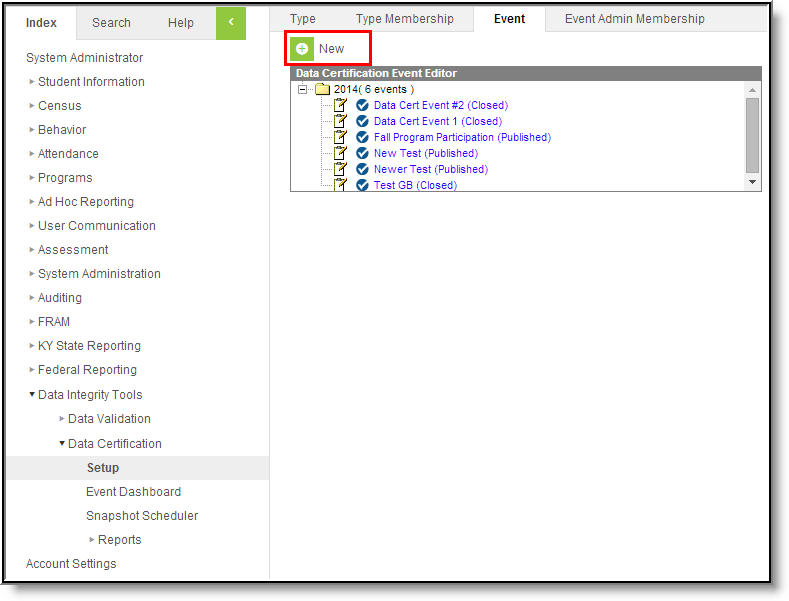
Step 4. Create Data Certification Events
PATH: Data Integrity Tools > Data Certification > Setup > Event
Once Types are created and published and Type Memberships are assigned, data certification events can be created via the Events tool.
Do not publish events until Event Admin Memberships are assigned. Only event admins can view unpublished and closed events.
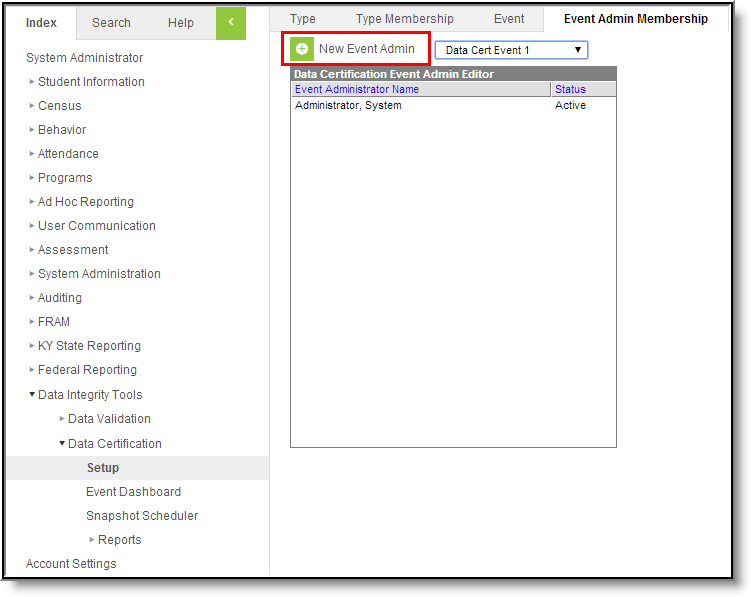
Step 5. Assign Event Admin Memberships
PATH: Data Integrity Tools > Data Certification > Setup > Event Admin Membership
Once Events are created, Event Admin Memberships must be assigned. Event Admins are those users who are responsible for reviewing state and district certified events before the event is considered complete and closed.
Unlike Type Memberships, Event Admin Memberships are event-specific, meaning regardless of the user's Type Membership(s) and the Data Certification Type values entered on the event, event admins can view, process and close any and all events in which they have memberships.
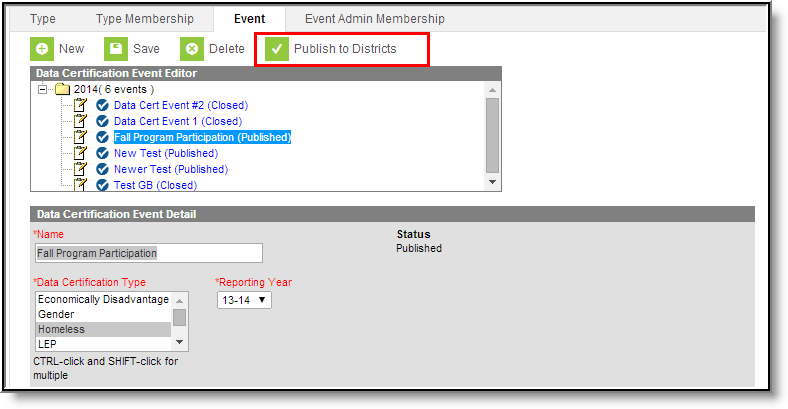
Step 6. Publish Data Certification Events to Districts
PATH: Data Integrity Tools > Data Certification > Setup > Events
Once Event Admin Memberships are assigned, events should be published to districts via the Publish to Districts button on the Event tab. Once an event is published, districts can view and certify the event.
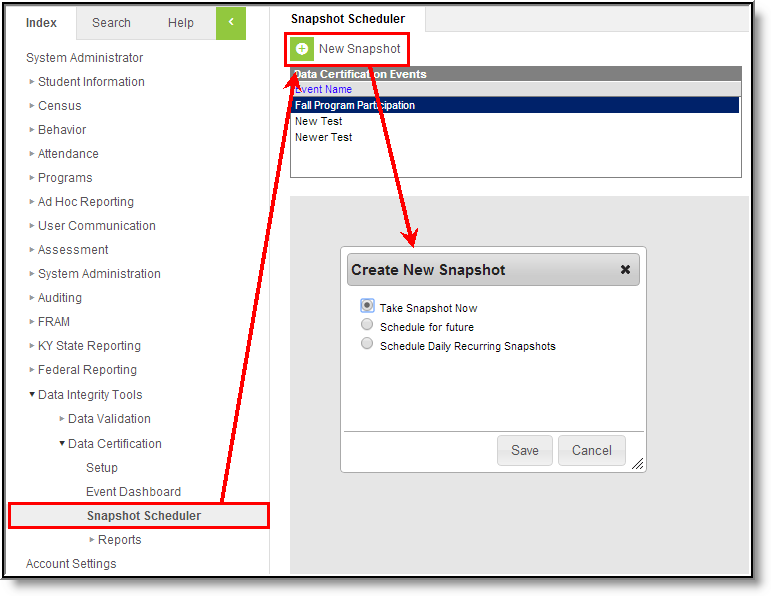
Step 7. Schedule a Snapshot
PATH: Data Integrity Tools > Data Certification > Snapshot Scheduler
If Snapshot functionality is enabled, a snapshot needs to be taken or scheduled. Daily recurring snapshots will always overwrite the previous snapshot for a district until the district certifies the event.
Snapshot functionality is manually enabled by Campus and requires a setup fee. Please contact Infinite Campus for more information.
Approving Data Certification Events
Now that Data Certification tools are properly set up and data certification events are published to districts, state users must approve data certification events certified and submitted by districts. The following describes the basic workflow involved in viewing and certifying data certification events.
- Step 1. Review Snapshot Data in the Event Dashboard
- Step 2. Run the Event Report
- Step 3. Approve or Request Recertification of Events
- Step 4. Close Events
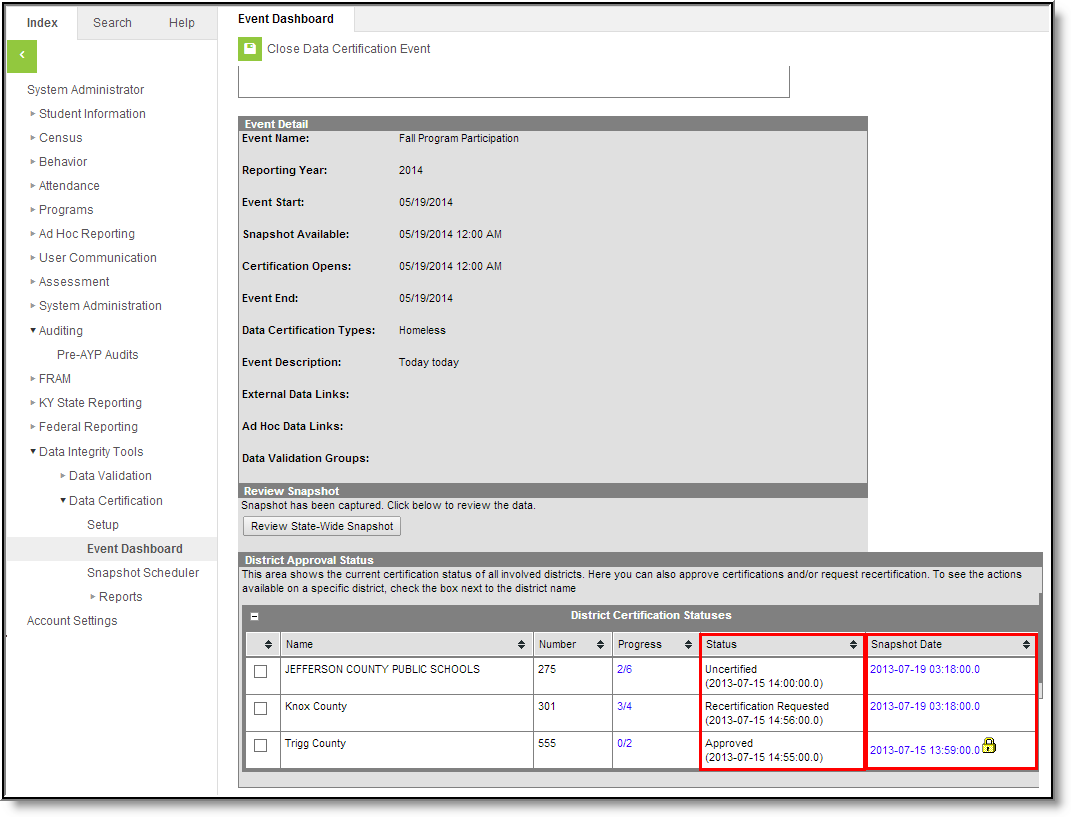
Step 1. Review Snapshot Data in the Event Dashboard
PATH: Data Integrity Tools > Data Certification > Event Dashboard
If snapshots were taken for the event, you should review the state-wide snapshot, as well as each district's snapshot while keeping in mind their current status.
If snapshot functionality is not enabled, move on to Step 2.
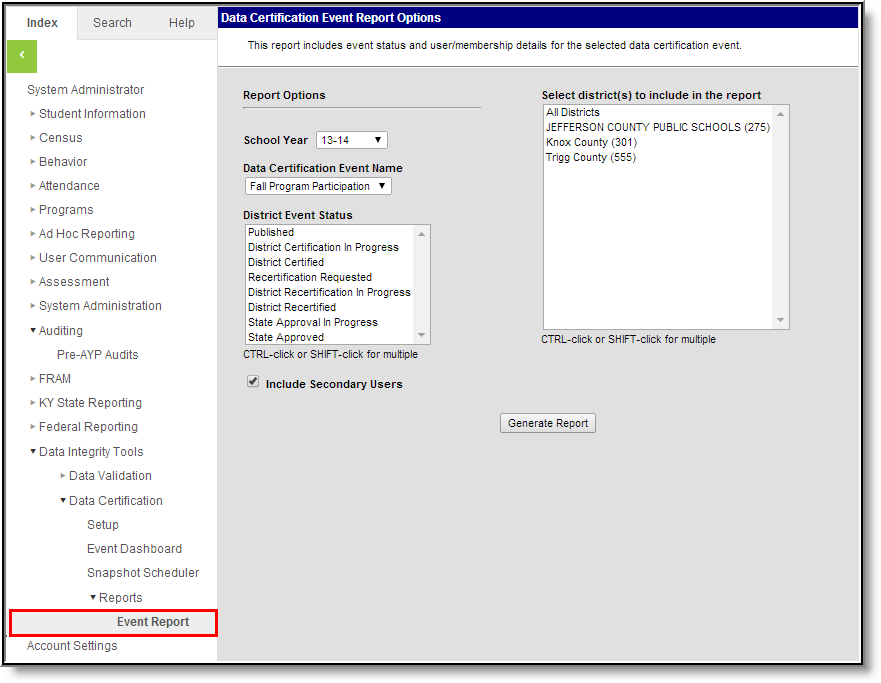
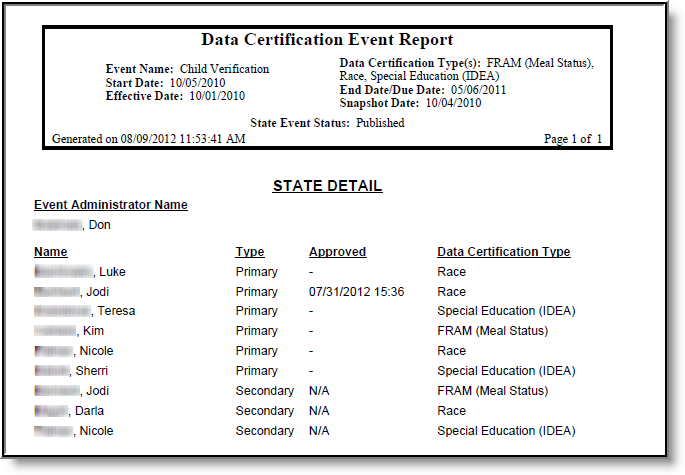
Step 2. Run the Event Report
PATH: Data Integrity Tools > Data Certification > Reports > Event Report
To do a general review of the event status per district, school year and event, generate the Event Report. This report will help you understand specifically which districts are ready to be approved.
For example, you could run the report for districts with a status of Certified for a particular event.
This step is considered informative and is not required in order to approve events. Events can also be reviewed within the Event Dashboard.
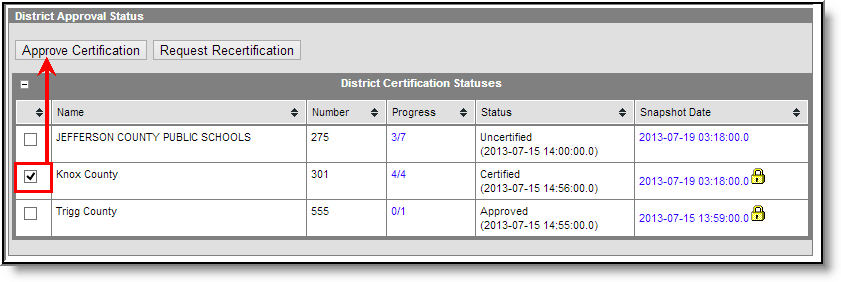
Step 3. Approve or Request Recertification of Events
PATH: Data Integrity Tools > Data Certification > Event Dashboard
After the state has reviewed districts who have certified an event and deems them ready for state approval, each district must be selected and approved via the Approve Certification button in the Event Dashboard tool.
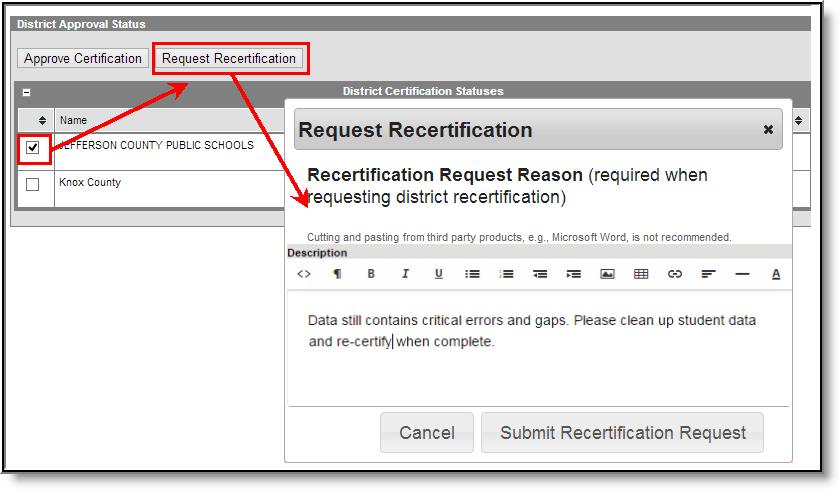
If the state disagrees with a district's certification for an event, the state can request re-certification of the data via the Request Recertification button in the Event Dashboard tool.
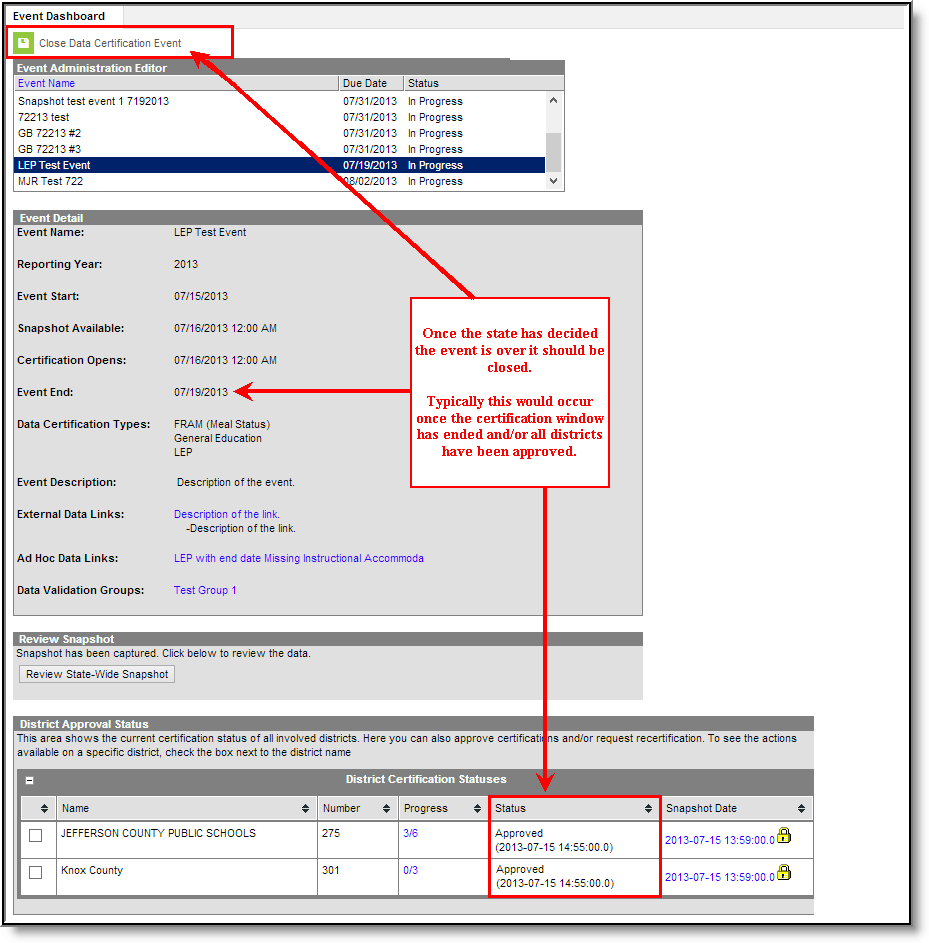
Step 4. Close Events
PATH: Data Integrity Tools > Data Certification > Event Dashboard
Once all districts have certified their data for an event and each district has been approved, the event should be closed via the Event Dashboard tool.
Select the event from the Event Administration Editor and click the Close Data Certification Event button.