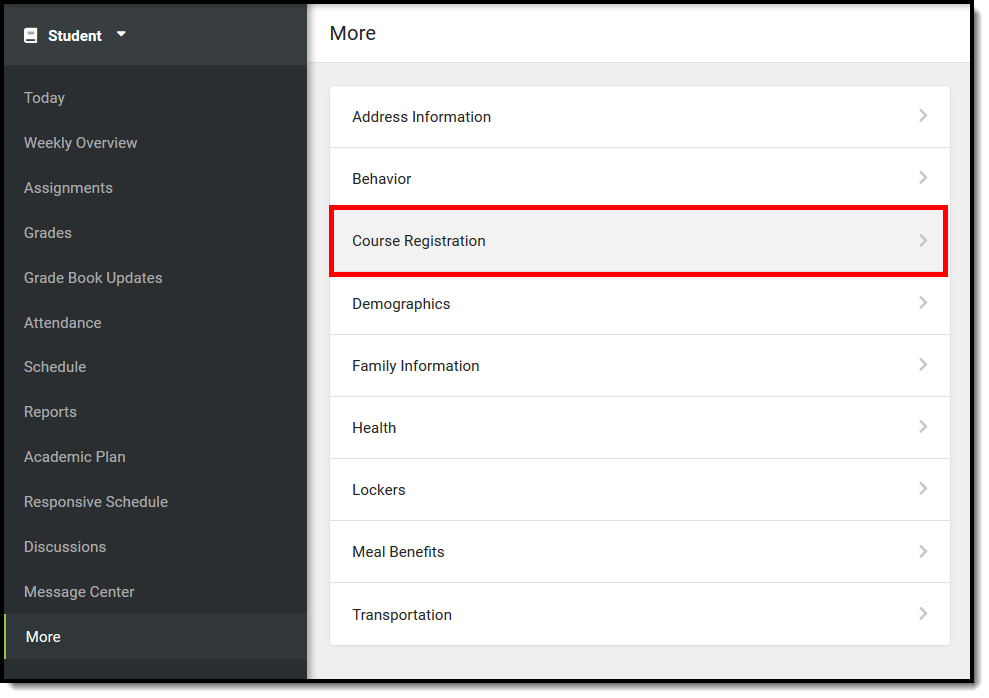
Location: Campus Student > More > Course Registration
Course Registration allows students enrolled in next year's calendar (or any future calendar) to select which courses they would like to take. This is just a course request process; it does not guarantee placement into a course. Parents can also request courses for students using this same process.
- If you do not see the Course Registration after selecting More from the Index, contact your school (Counselor, etc.). They may need to review correct setup has been done and verify you have an enrollment record for a future school year.
- If you do not have access to Campus Student or Campus Parent, contact your school.
- If you do not know where to access Campus Student or Campus Parent, contact your school.
 Campus Student Course Registration
School and District users: To find instructions and prerequisites for using this tool, see the Portal Display Options article.
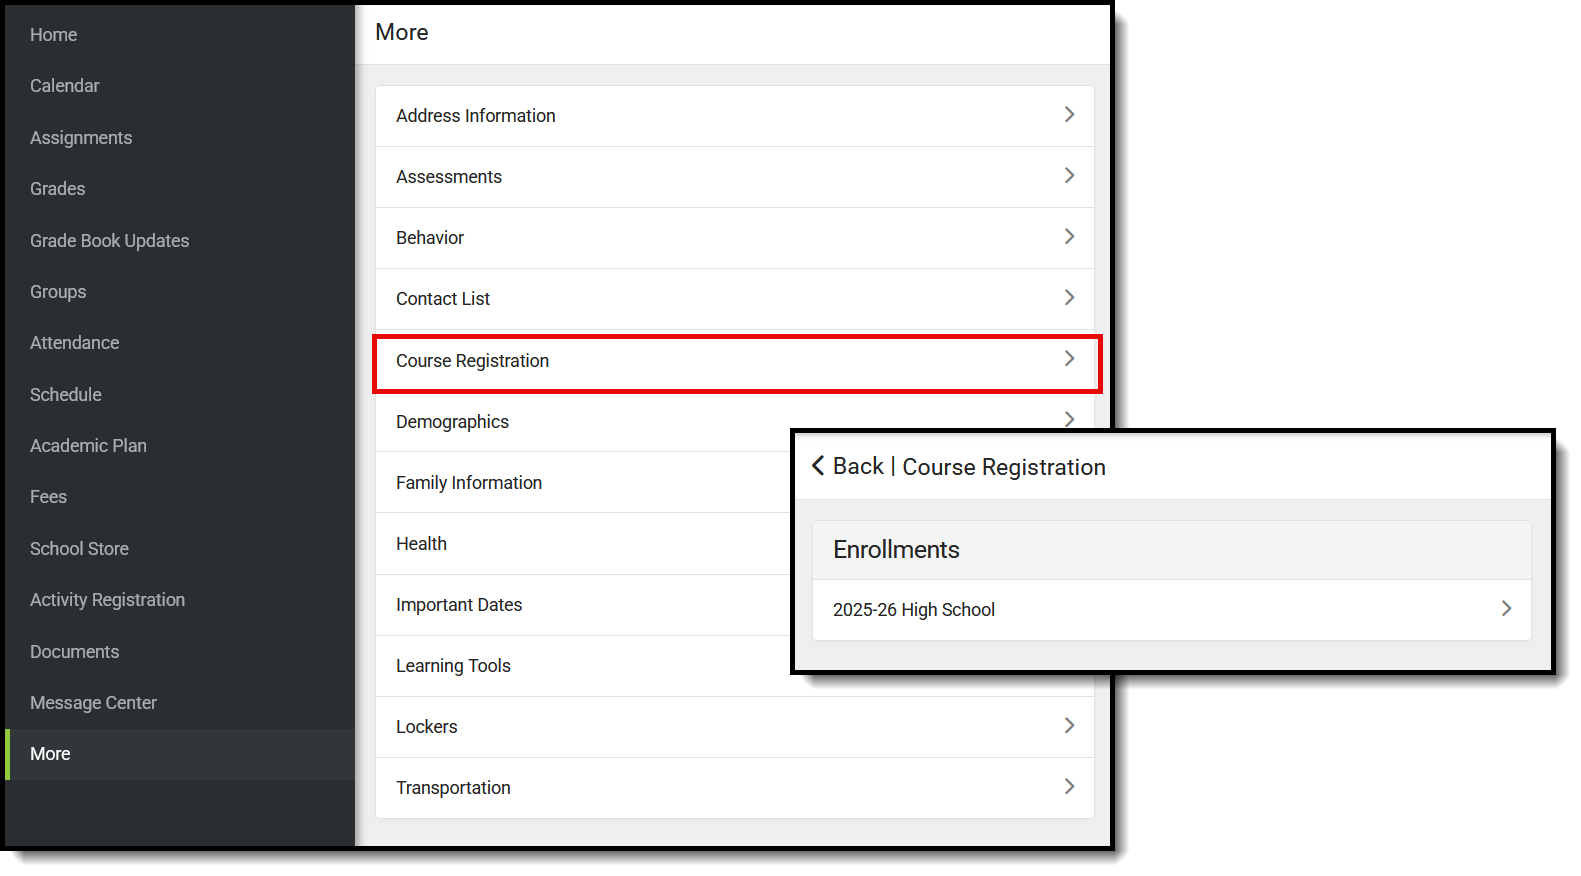
Select Enrollment
- After logging in to Campus Student/Campus Parent, select More from the Index. Then select Course Registration. A list of Course Registration Enrollments displays.
- Select the desired enrollment. This is usually the next school year's enrollment (if the current school year is 2024-25 High School and you are currently in Grade 10, the next school year's enrollment is 2025-26 High School, where you will be requesting courses for Grade 11).
 Course Registration Enrollment Selection
Note that multiple enrollments may be listed. Perhaps you have an enrollment in one high school in your district, and also take a course at another high school in the district. In this instance, two enrollment options for the same school year are listed.
You are now ready to enter Course Requests. When there are currently no course requests, a screen like the image on the left below displays. If some course requests have been entered, a screen like the image on the right displays.
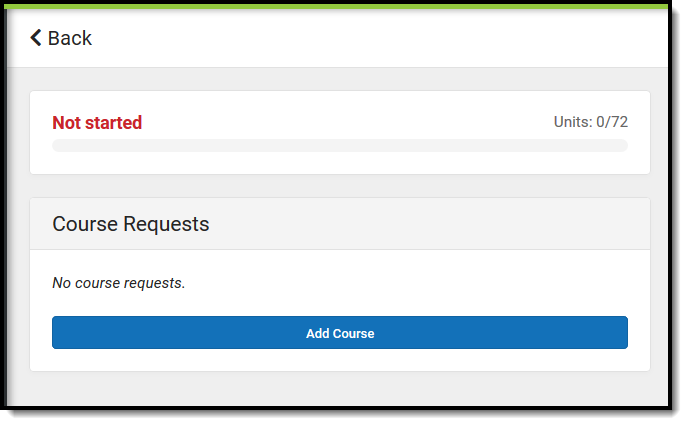 No Existing Course Requests
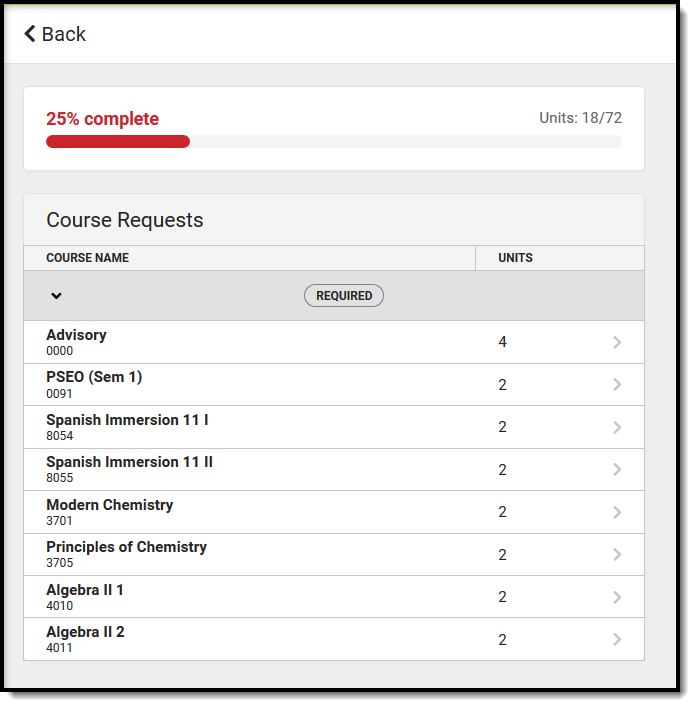 Existing Course Requests
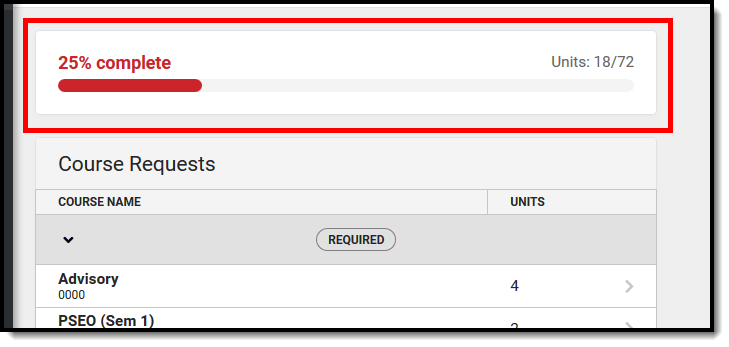
Required, Requested, and Alternate Courses
- Courses that your counselor added display as Required. You cannot change these requests (but you can discuss these choices with your counselor).
- Courses you request display as Requests. These requests can be modified (changed to alternates, removed, etc.)
- Courses you request as alternates display as Alternates. These requests can be modified (changed to requests, removed, etc.)
- Change a course request to an alternate by selecting it from your list of courses and clicking the Convert to Alternate button,
- Delete a request by clicking the red X from the Search Results or by selecting the course and clicking Delete Request.
When your counselor begins adding courses to student schedules, requested courses and required courses are given a higher priority for placement on your schedule. Alternate course requests are placed when the requested or required courses cannot be placed.
Course Units
The Course Units total indicates how complete your schedule is. In this example, the student has a full schedule when they have requested 72 units.
- The first number (in this example, 18) indicates how many units the students have requested.
- The second number (in this example, 72) indicates how many total units are needed.
 Course Units, Completion Value
This number is based on how the school calendar is set up. The progress bar's color changes depending on the number of units requested, as does the circle's total completion.
- A complete schedule (100%, top number is the same as bottom number) is green.
- A schedule that is between 67% and 99% completed is yellow.
- A schedule that is between 34% and 66% completed is orange.
- A schedule that is between 0% and 33% completed is red.
Request as many courses as instructed by your counselor. If you cannot request that many courses, work with your counselor to complete the process. If you have a course plan, refer to that when requesting courses.
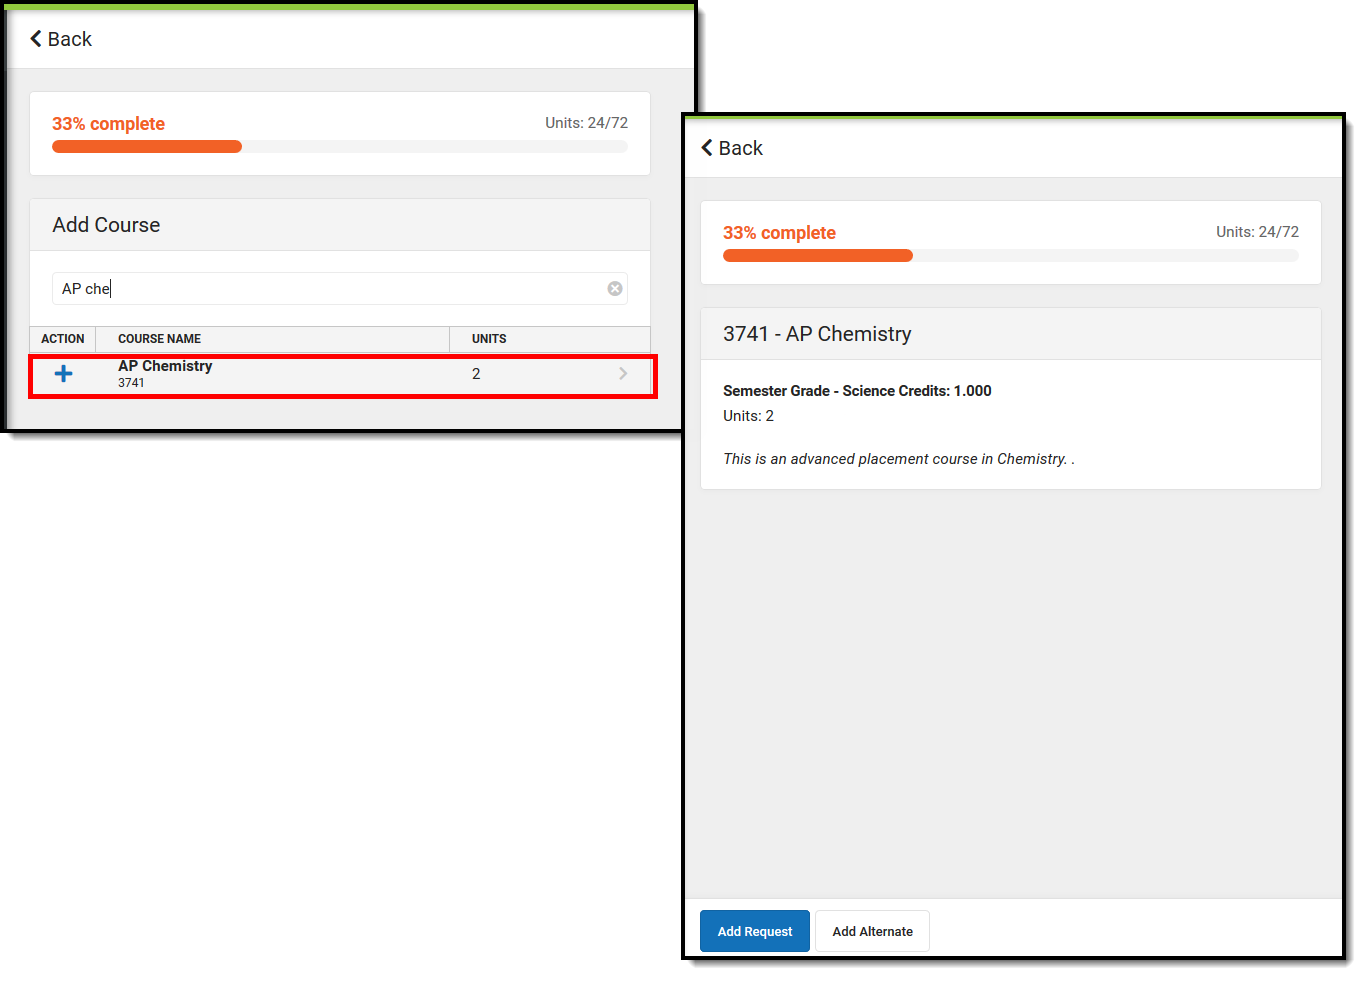
When you locate and select a course that you have already taken in previous school years, the Course Detail displays Course History details of the year and grade level you took the course, the term you took that course in, and the score you received.
Request Courses
- Click the Add Course button. A list of courses available for selection displays.
- Begin typing the name of the course in the Search field. Matching results display below the search field.
- Select the desired Course. Information about that course (how many units and a description of the course) displays.
- Add the course by clicking Add Request or clicking the Add Alternate button. This adds the course as an alternate course in case you cannot be scheduled into other courses.
- Return to the Add Course screen by clicking Back.
Repeat these steps until you have a complete or near-complete schedule.
 Add Course Requests
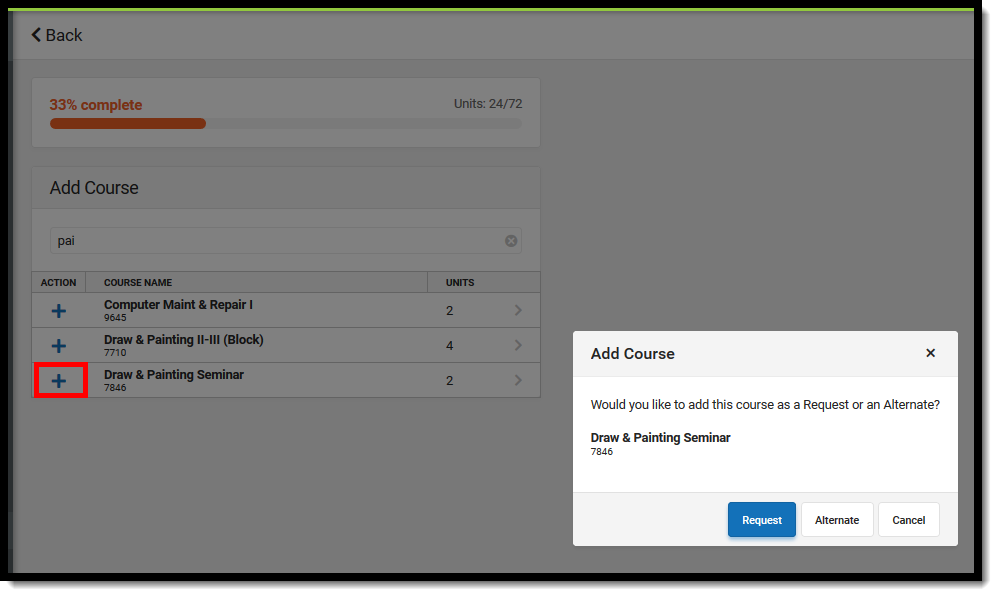
For a faster way to request courses:
- Search for the course.
- Click the blue plus sign on the left.
- In the popup message that displays, select Request, Alternate or Cancel.
 Add Course
Review Course Requests
When finished requesting courses, review the requests you have made and make adjustments as needed.
If you are satisfied with your requests, click the Print button. This generates a PDF of your required and requested courses.
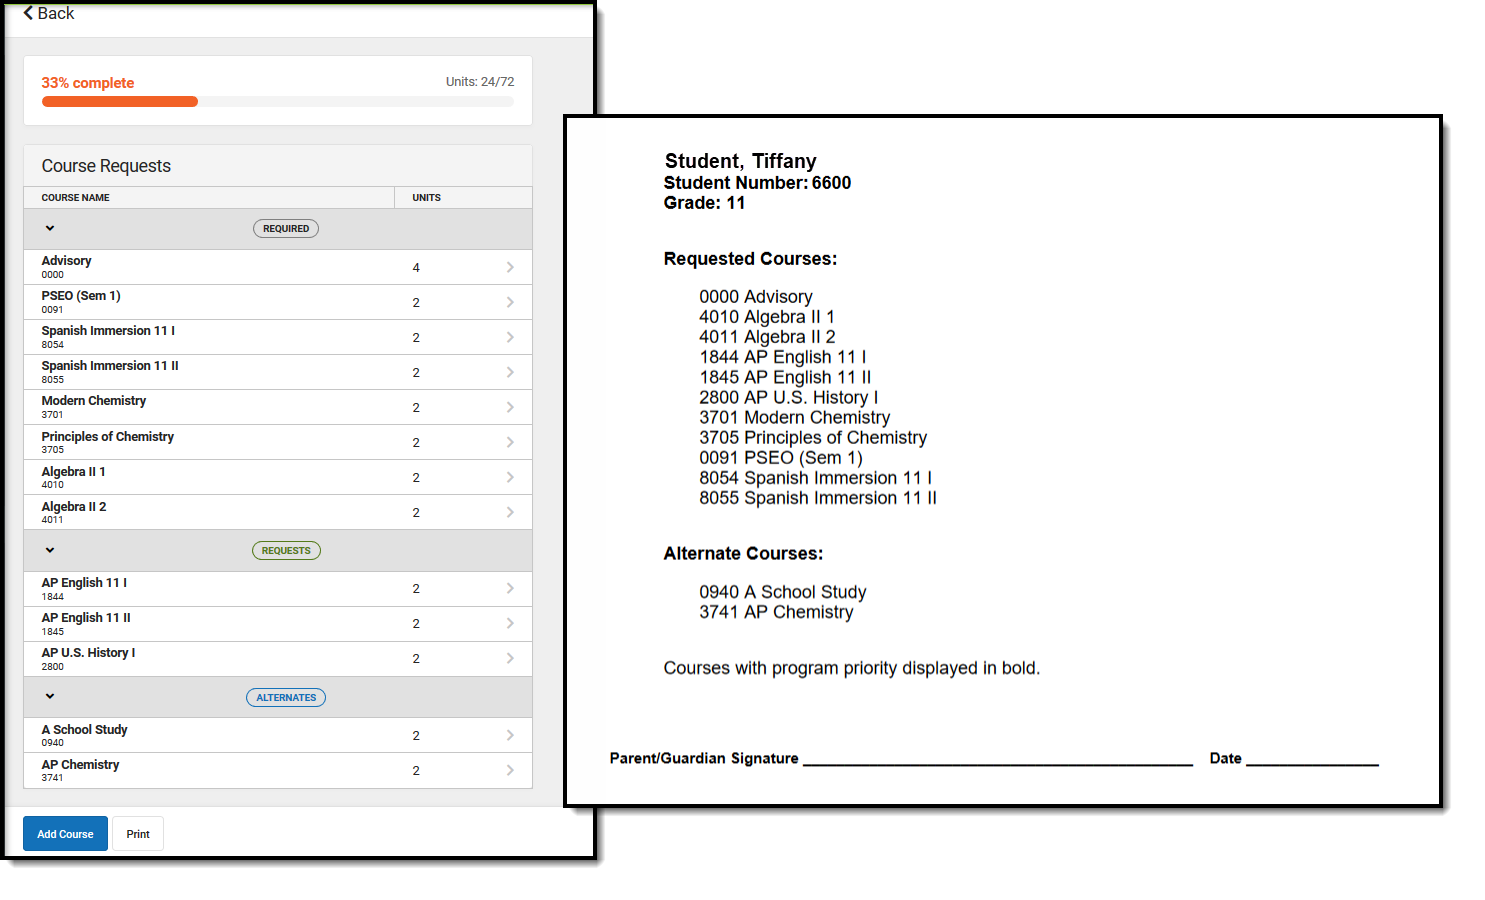 Completed Course Requests, Printed View
