Tool Search: Events
The Campus Mobile Payments app is used to pay for purchases using a credit or debit card at school or district-hosted events, such as a basketball game or bake sale. The purchase and payment can be recorded on a mobile device such as a smartphone or tablet.
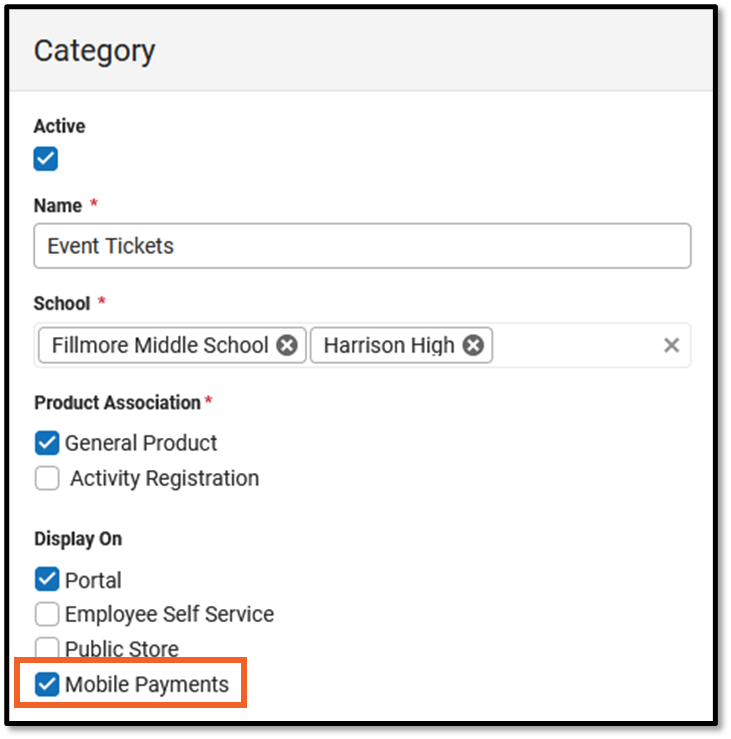
These events are created using the Events tool. Before you can create an event, make sure the Mobile Payments checkbox is marked in Categories and General Product.

Write - View and modify existing events.
Viewing Events
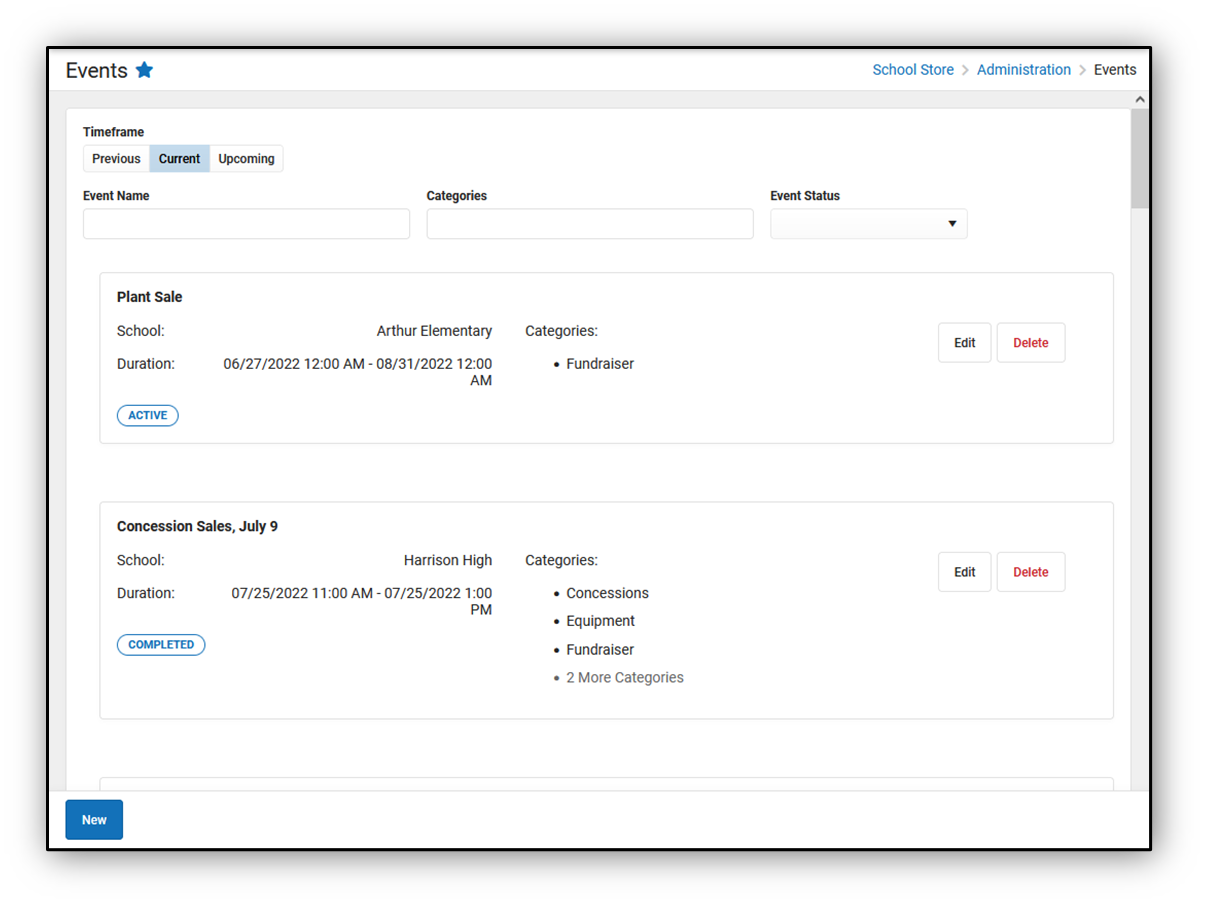
The initial view of the Events tool is a summary list of all events. This summary list provides a preview of the event's information and its status.
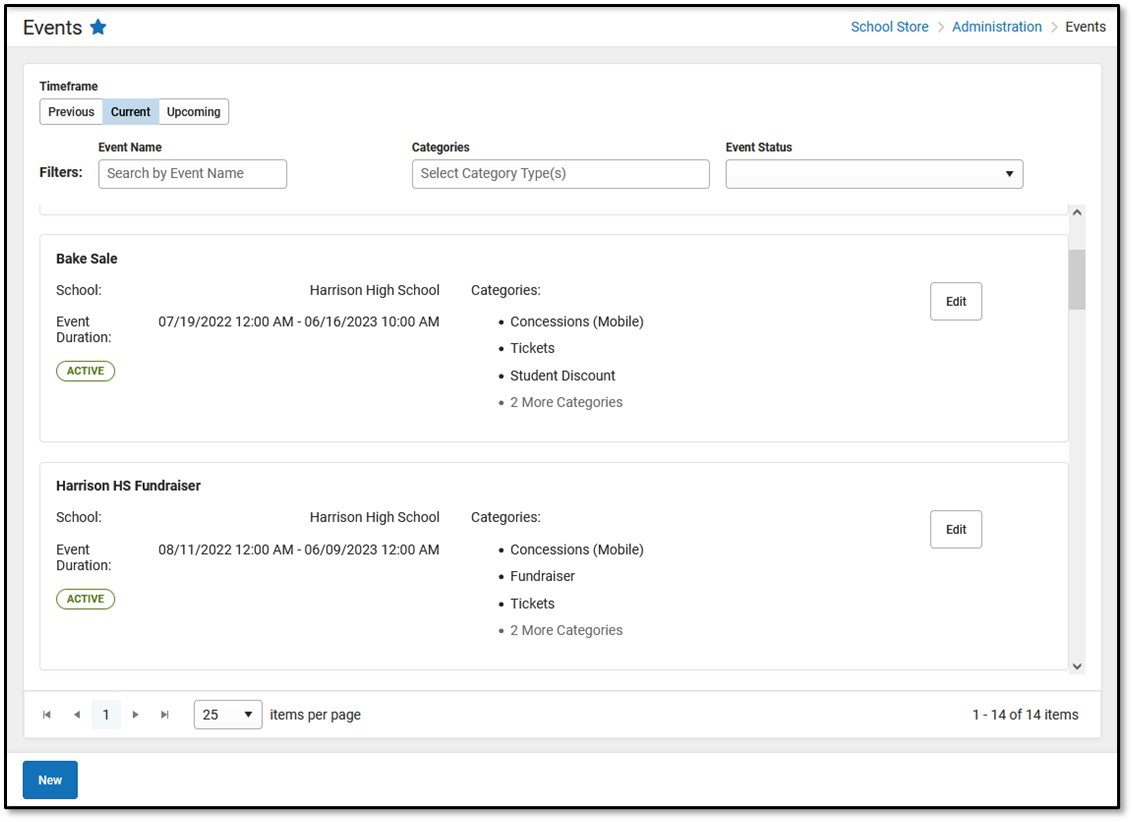
The Timeframe and Filters fields are used to display certain events.
| Option | Description |
|---|---|
| Timeframe | Events can be viewed based on the time they occur.
|
| Filters | You can further narrow the number of events that display by using the following filters:
|
Step 1- Create an Event
Events, such as a basketball game or a bake sale, must be set up using the Events tool. If a staff member has access to all schools, they can set up and view events for any school within the district. If they have access to certain schools only, they can set up and view events for just those schools.
The first step to creating an Event is to define the parameters. To add an event, click the New button.
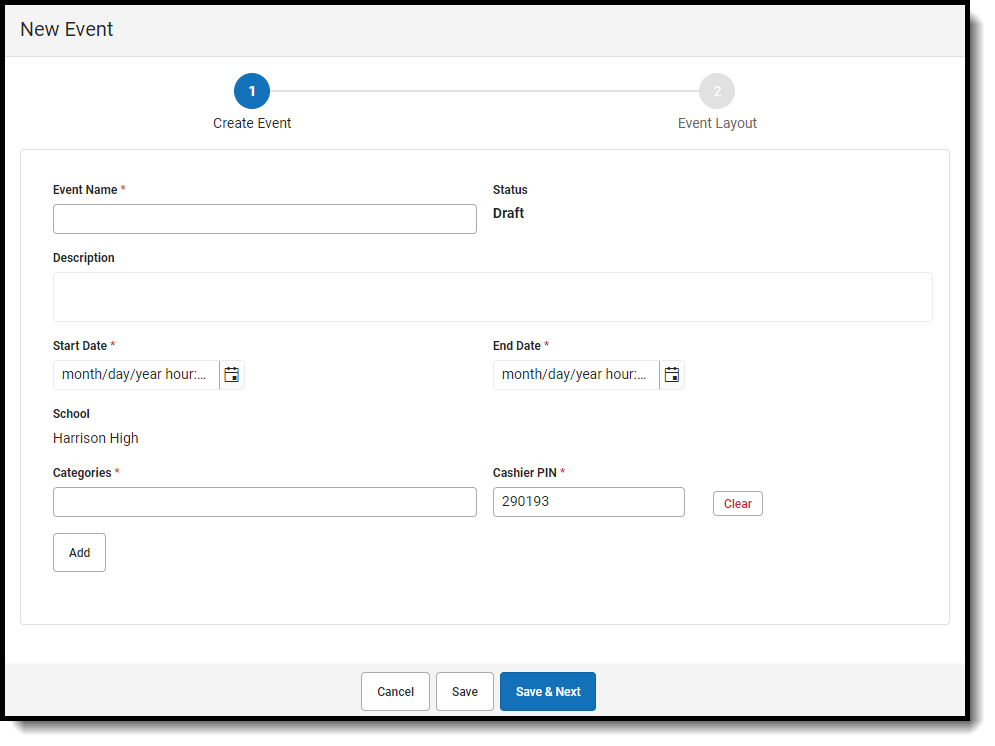
Field Descriptions
| Field | Description |
| Event Name | Required. The name of the event with a maximum of 50 characters. |
| Status | The Status of an event will vary depending on the current date and whether Step 1 Create an Event and Step 2 Event Layout have been completed.
Events with a Timeframe of Previous, Current, or Upcoming may have one of the statuses listed below:
|
| Description | A description of the event with a maximum of 500 characters. The Description displays in the Mobile Payments app after the Event PIN is entered. |
| Start Date | Required. The date the event begins. If the Start Date is in the future, it will appear in the Upcoming timeframe. |
| End Date | Required. The date the event ends. If the current date is after the End Date, the event will appear on the Previous timeframe. |
| School | Required. If the Context Switcher is set to a specific school, that school will display in the School field and it cannot be changed.
If All Schools is selected in the Context Switcher, the school must be selected from the School dropdown list. |
| Categories | Required. Categories are how similar products are grouped in the School Store. Categories assigned to the School selected appear on the dropdown list. Multiple Categories can be selected. |
| Cashier PIN | Required. The Cashier PIN is a six-digit number attached to the Categories previously selected. When a person enters the Cashier PIN on the Mobile Payments app, that person accesses the event and can enter purchases on the device they're using.
|
| Clear/Remove | Click Clear or Remove to delete a Category and its Cashier PIN.
|
| Add | Click Add to assign different categories to different cashier PINs. Categories selected in a previous row can be used again IF a different Cashier PIN will be assigned. |
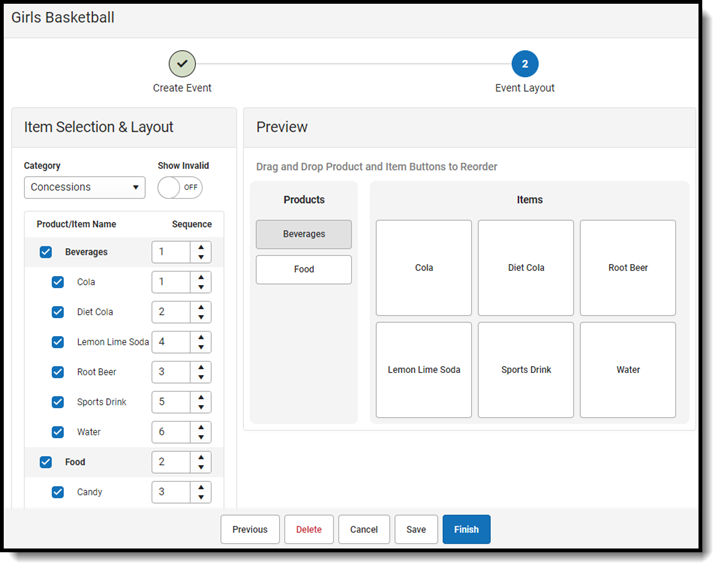
Step 2 - Event Layout
The second step to creating an Event is entering the items to be sold and building the layout in which the items are to be displayed in the Campus Mobile Payments app.
The Item Selection & Layout section lists the Category. Below the selected Category are the related Products/Items that can be sold. If an item will be sold, the checkbox is marked and a Sequence number is assigned. This number determines the way the item is displayed in the Preview section. The Preview shows how the items will appear on the device used during the event.
Categories, Products, and Product Items must be set up first before completing this step.
Field Descriptions
| Item Selection & Layout Fields | Description |
| Category | The options appearing on the Category dropdown list are based on the Categories selected in Step 1: Create Event. |
| Show Invalid | If you set the Show Invalid toggle to ON, inactive Products and Items that were active/valid at the time the event was set up also display. Otherwise, when the toggle is set to OFF, only active Products and Items display. Categories with invalid or inactive Products or Items will appear with a  . .
If a Category with invalid or inactive Products or Items is selected, they will not display in the Campus Mobile app. Users will need to go to General Product to reactivate the product(s) in order for them to display. |
| Product/Item Name | The bold-faced name under Product/Item Name is the Product. The Product Items appear below the Product. They are indented and in alphabetical order. The Product and Product Items displayed are based on the Category selected. |
| Sequence | Products and Product Items are listed in alphabetical order. A Sequence number can be entered to change the order in which the Products and Product Items will be displayed in the Campus Mobile Payments app. |
| Preview Fields | Description |
| Products | The Products buttons that are previewed are based on the selections made on the left-hand side under Item Selection & Layout. The Sequence numbers determine the order of the Products buttons. The Products buttons can be moved by dragging them to their new location. The Sequence numbers get updated accordingly. |
| Items | The Sequence numbers also determine the order of item buttons within Campus Mobile Payments. The Items buttons can be moved by dragging them to their new location. The Sequence numbers get updated accordingly.
If an Item is tracking inventory and there are 5 or less items remaining, or it is out of stock, a LOW INVENTORY or OUT OF STOCK will label appear. |
| Alerts | Description |
Inactive |
A Category, Product, or Item will display as Inactive if the Active checkbox is unchecked within its respective setup. |
Invalid |
A Category, Product, or Item will display as Invalid if the Mobile Payments checkbox has been unchecked within its respective setup men. |
| Labels | Description |
Low Inventory |
This alert will appear next to an item if there are 5 or fewer items still available for purchase. |
Out of Stock |
This alert will appear next to an item if there are none left for purchase. |
Editing Events
If users have the rights, Events on the Previous, Current, or Upcoming timeframes can be edited regardless of the status.
- Select School Store > Administration > Events.
- Select a Timeframe: Previous, Current, or Upcoming.
- Events with a status of Draft or Completed display when the Previous button is clicked.
- Events with a status of Draft or Active display when Current is clicked.
- Events with a status of Draft or Ready display when Upcoming is clicked.
- Click the Edit button.
- Make changes to any of the fields on the screen or add more Categories.
If All Schools appears in the Context Switcher, the School field can be modified.Changing the Start Date and End Date to current or future dates overrides the original event upon saving. Purchases made during the original event are retained to ensure historical data is accurate. - Click the Save & Next button.
- Make any changes to Step 2 - Event Layout.
- Click the Finish button.
Depending on the Start Date and End Date, the edited event will appear when the Current or Upcoming buttons are selected in the Timeframe.
Deleting Events
If users have the rights, Events on the Previous or Upcoming timeframes can be deleted regardless of the status. Events with a Current timeframe can be deleted with a status of Draft.
Previous and Upcoming Events
- Select School Store > Administration > Events.
- Select a Timeframe: Previous or Upcoming.
- Events with a status of Draft or Completed display when the Previous button is clicked.
- Events with a status of Draft or Ready display when Upcoming is clicked.
- Click the Delete button.
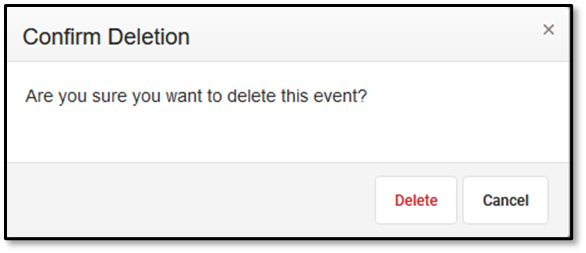
- Click the Delete button to continue to permanently remove the event.
Click the Cancel button to cancel the operation and keep the event.

Current Events
Events on the Current timeframe can be deleted if the status is Draft. If the status is Active, it can be deleted, but it requires an extra step.
Events with a Draft Status
Events with a timeframe of Current AND a status of Draft can be deleted.
- Select School Store > Administration > Events.
- Click the Current button in the Timeframe button group to display Events with a status of Draft or Active.
- Locate the event to be removed and click the Delete button.
- Click the Delete button to continue to permanently remove the event.
Click the Cancel button to cancel the operation and keep the event.
Events with an Active Status
Events with a timeframe of Current AND a status of Active cannot be deleted, but they can be moved to the Upcoming timeframe by modifying the Start Date and End Date to a future date. It can then be deleted after it has been moved.
- Select School Store > Administration > Events.
- Click the Current button in the Timeframe button group to display Events with a status of Draft or Active.
- Click the Edit button for the event to be modified to open the Event side panel.
- Change the Start Date and End Date to a future date.
- Click the Save & Next button to advance to the Event Layout screen.
- Click the Delete button.
- Click the Delete button to remove the event or Cancel to keep it.

