Tool Search: Messenger
Recipients Screen - Field Descriptions
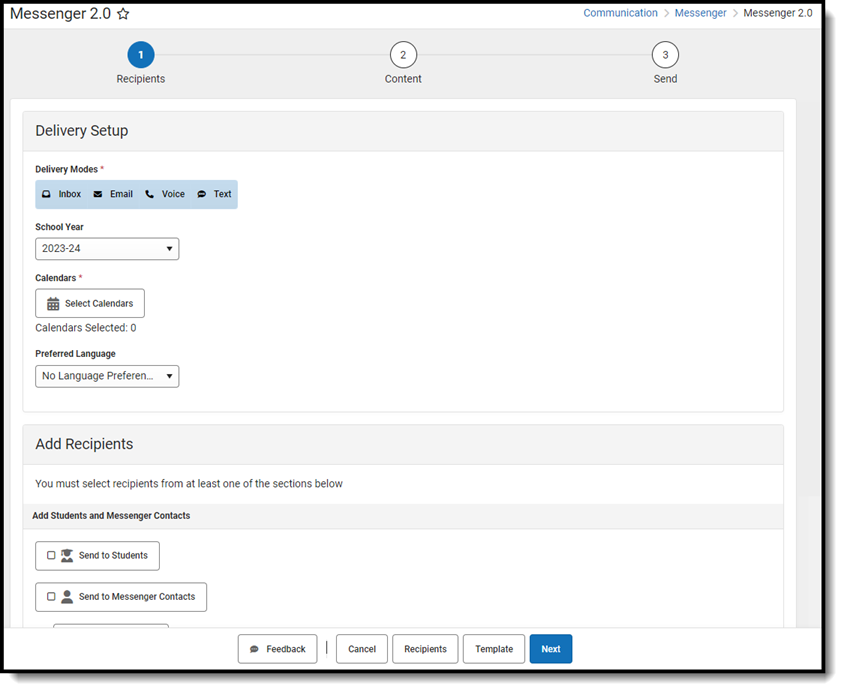
This section provides field descriptions for the Recipients screen. Functionality for many of the fields is the same as Messenger 1.0. However, new fields are available to help simplify the message-building process.
| Field | Description | ||||||||||||||||||||||||||||
|---|---|---|---|---|---|---|---|---|---|---|---|---|---|---|---|---|---|---|---|---|---|---|---|---|---|---|---|---|---|
| Delivery Mode | Allows you to select the delivery modes to which you want to send the message.
Messenger Settings allow you to select the delivery modes that are automatically selected each time you send a new message. 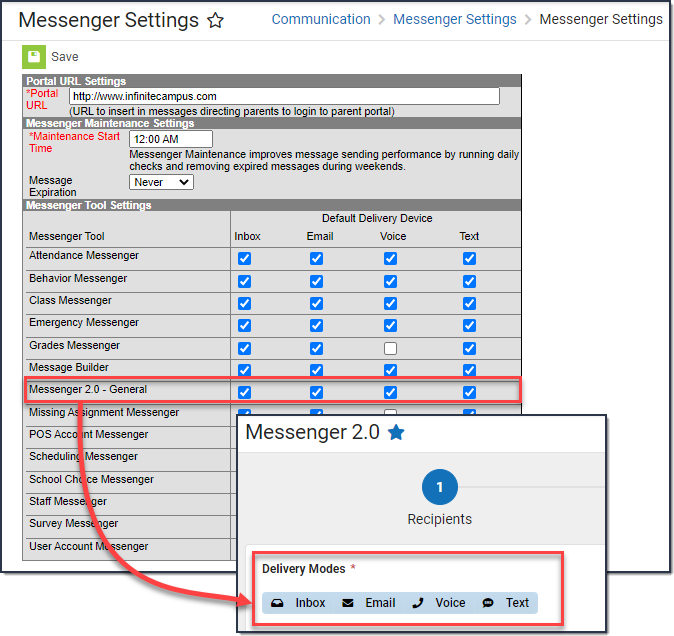
| ||||||||||||||||||||||||||||
|
School Year
|
The default selection is the year selected in the Campus toolbar. If the current school year is selected in the toolbar, options for School Year will only include:
| ||||||||||||||||||||||||||||
|
Calendars
|
The calendar selected in the Campus toolbar is automatically selected unless All Schools and All Calendars is selected. Click the Select Calendars button to display the Calendars panel.
The Calendars panel gives you the option to mass select or individually choose which schools and calendars to include in the message. Only calendars to which you have calendar rights display in the list. Tips
| ||||||||||||||||||||||||||||
| Preferred Language | Filters the message to only send to recipients whose Preferred Language in the Personal Contact Information section of Demographics matches the language selection made here. | ||||||||||||||||||||||||||||
|
Add Recipients |
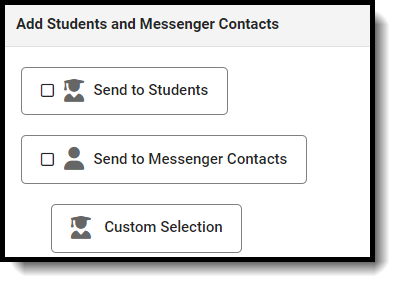
Allows a message to be sent to specific recipients: Students, Messenger Contacts, Staff, Individual Recipients, and Non-Campus Recipients.
 Student Filtering Options Student Filtering OptionsThe following filtering options are available under Custom Selection to limit who receives the message. A selection here is required for Student and Messenger Contacts messages.
Add Individual Recipients These individuals exist within the Infinite Campus SIS product and have not been filtered by Calendars, School Year, or Preferred Language. Individuals can be filtered within the Add Individual Recipients side panel by School Year, School, Calendar, and Search Type. Once filtered, users can be clicked to be selected as recipients and added by clicking the Add Recipients button.
Add Non-Campus Recipients
The email addresses and phone numbers of people who do not have an account within the Infinite Campus SIS product can be added to messages via Add Non-Campus Recipients. These emails, voice, and text messages can be entered within the Add Non-Campus Recipients side panel. Multiple email addresses and phone numbers must be separated by a comma, semicolon, or line break. Recipients cannot be added if an email address or phone number has been entered twice. | ||||||||||||||||||||||||||||
|
Cancel |
Closes and reverts back to the Messenger home screen. | ||||||||||||||||||||||||||||
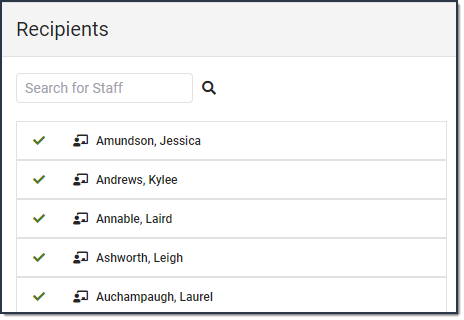
|
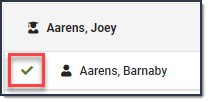
Recipients |
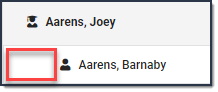
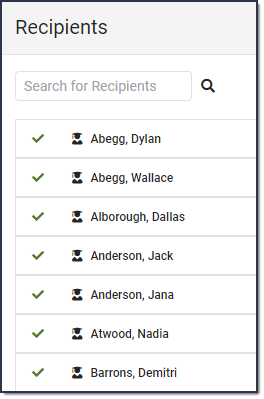
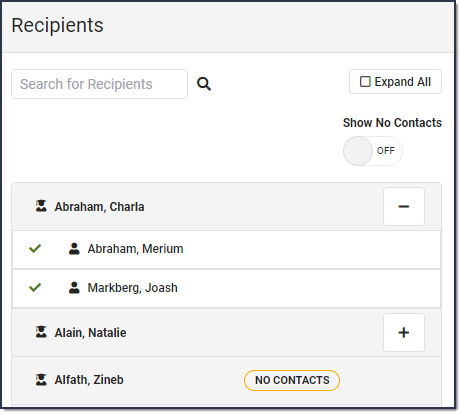
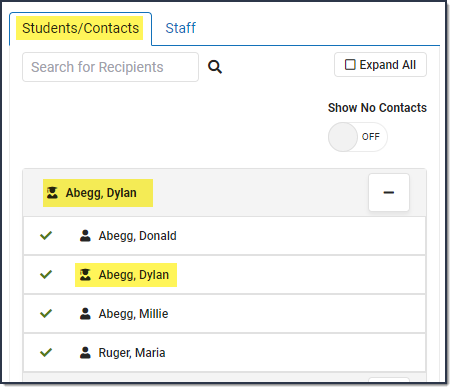
Displays a side panel to review the recipient list. By default, all recipients are automatically selected to receive the message. Click the person's name to remove them as a recipient of the message.
| ||||||||||||||||||||||||||||
|
Next |
Select this button to proceed to the next screen in the message building workflow. | ||||||||||||||||||||||||||||


Content Screen - Field Descriptions
This section provides descriptions for each of the fields in the Content screen of Messenger 2.0. Functionality for many of the fields has remained the same.
Fill out all required fields before navigating to the next screen.

Prior to adding a hyperlink or URL to a message, clear the formatting of the message before adding the hyperlink or type the URL directly into the message body. Copying and pasting a hyperlink or URL can have varied results and may not send properly.
 Inbox
Inbox
 Inbox
InboxThe following options display when you select the Inbox Delivery Mode on Step 1. Recipients.

If you are also sending an Email message, the text you enter in the Message Body will be used for the email message too.

| Field | Description |
|---|---|
| Message Subject | This field determines the text that displays in the Subject field of the email message. The Message Subject can also be used to search or filter results in the Sent Message Log. |
| Message Body | This field contains the text of the message. The message body uses a new WYSIWYG editor that handles copy/pasting from third party products better than past versions.
When copy/pasting from Microsoft Word, select Keep to retain the current format or Clean to get rid of it. Copying from Microsoft Word is the only time the WYSIWYG tool prompts you to Keep/Clean formatting when copy/pasting into the editor. See the WYSIWYG Editor - Field Descriptions & Tips for more information.
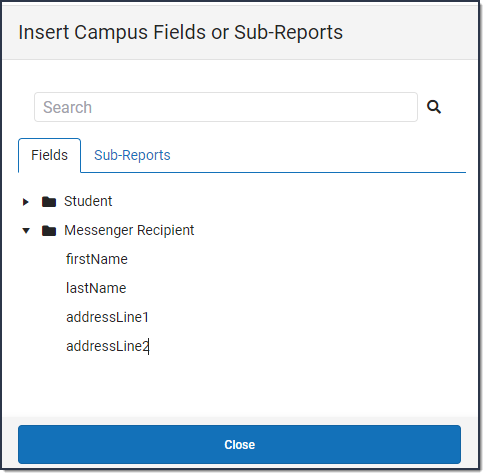
Inserting Campus Fields or Sub-Reports: Sub-Reports are only available for messages being sent to Students/Messenger Contacts and only when one calendar is selected. |
 Email
Email
 Email
Email The following options display when you select the Email Delivery Mode on Step 1. Recipients.

| Field | Description |
|---|---|
| Message Subject | This field determines the text that displays in the Subject field of the email message. The Message Subject can also be used to search or filter results in the Sent Message Log. |
|
Reply to Email |
This field displays the email address that is automatically included in the message body for message recipients to reference. To reduce the chance an email is flagged as spam, avoid using "no reply" or "do not reply" in the Reply to Email. |
|
Sender Display Name |
Entries to this field will display in the recipient's email inbox for easier sender identification. |
|
Message Body |
This field contains the text of the message. The message body uses a new WYSIWYG editor that handles copy/pasting from third party products better than past versions.
When copy/pasting from Microsoft Word, select “Keep” to retain the current format or “Clean” to get rid of it. Copying from Microsoft Word is the only time the WYSIWYG tool prompts you to Keep/Clean formatting when copy/pasting into the editor. See the WYSIWYG Editor - Field Descriptions & Tips for more information.
Inserting Campus Fields or Sub-Reports: Sub-Reports are only available for messages being sent to Students/Messenger Contacts and only when one calendar is selected. |
| Attach Content | This field allows you to attach one file to an email message.
This option only displays when the Allow Email Attachments option is marked in the Email Settings tool. See the Email Settings article for more information about this option and other options like setting size limits for email attachments.
|
| Test | |
|
Email / Send Test Email |
To view a message in the manner it will be delivered to recipients, enter a valid email address in the Email field and click Send Test Email. Up to five email addresses can be entered and email addresses must be separated by a comma. Infinite Campus strongly recommends testing messages before delivering them.
|
 Voice
Voice
 Voice
Voice
The following options display when you select the Voice Delivery Mode on Step 1. Recipients.
| Field | Description | ||||||
|---|---|---|---|---|---|---|---|
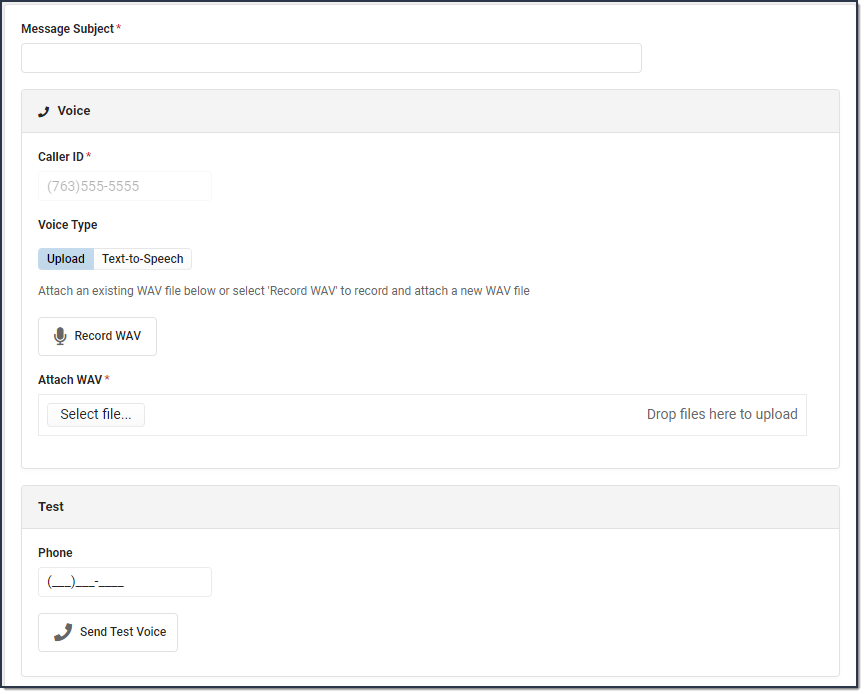
| Message Subject | The Message Subject can be used to search or filter results in the Sent Message Log. | ||||||
| Caller ID | This is the number shown to recipients of this phone message. This number is set up in CallerID Preferences and can only be modified on this screen if the Allow Custom Caller ID option is selected in the Voice Settings tool. | ||||||
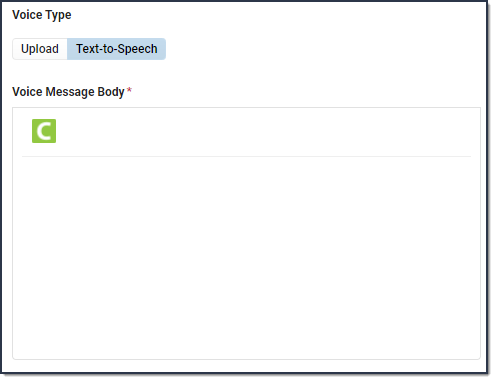
| Voice Type |
| ||||||
| Test | |||||||
| Phone
Send Test Voice |
To hear a test message, enter a valid number in the Phone field and click Send Test Voice.
Infinite Campus strongly recommends testing messages before delivering them. A message is sent in the exact manner it is delivered to recipients.
| ||||||
 Text
Text
 Text
Text
The following option displays when you select the Text Delivery Mode on Step 1. Recipients.

| Field | Description |
|---|---|
| Message Subject | The Message Subject can be used to search or filter results in the Sent Message Log. |
| Text Message Body | his field contains the text contained in the text message.
|
| Test | |
| Cell Phone
Send Test Message |
To view a test message, enter a valid cell phone number in the Cell Phone field and click Send Test Message.
Infinite Campus strongly recommends testing messages before delivering them. A message is sent in the exact manner it is delivered to recipients.
|
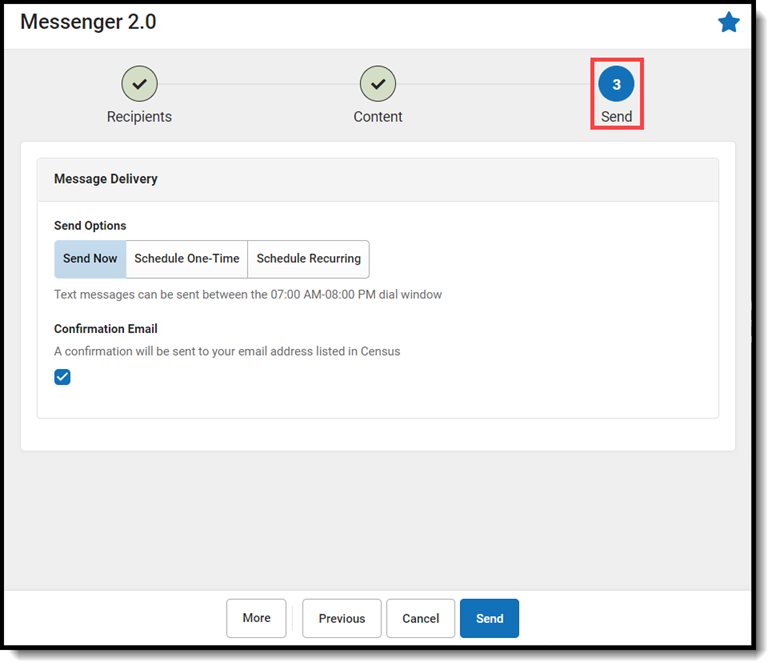
Send Screen - Field Descriptions
This section provides descriptions for each of the fields in the Send screen. This is the final step in the messaging process.
Best Practices
- Wait for the message to finish processing before navigating away. This allows you to correct any errors that prevented the message from sending and Send Again.
- Send test messages to an email account and or cell phone number to which you have access. This allows you to view how the message will display for recipients and identify any adjustments that might be needed
| Field | Description |
|---|---|
|
Send Now |
Select this option for sending messages immediately. This is the default selection for messages during the district-wide dialing window.
This option is not available if you are trying to send a text/voice message outside of the district-wide dialing window.
The district-wide dialing window is the time during which a general or priority message - either a voice message that is NOT an emergency message or text message - may be sent. The district-wide dialing window is set up in the Voice Settings tool. |
|
Schedule One-Time |
Select this option for sending a message once at a future date/time. Enter the desired date/time you wish for your message to be sent and press ‘Send’. |
| Schedule Recurring | Select this option to schedule a message to be sent on a recurring basis. Enter the desired date/time you wish for your messages to be sent, choose which dates the messages will recur, and press ‘Send’. |
|
Date |
Today's date or a date in the future when the message should be sent. Schedule One-Time must be selected to enter a date. |
|
Inbox/Email Time |
A time in the future the email message should be sent. Schedule One-Time or Recurring must be selected to enter a time. |
| Voice/Text Message Time | A time in the future the text and/or voice message should be sent. Schedule One-Time or Recurring must be selected to enter a time. |
| Day(s) of the Week |
Select this option for setting up a recurring message that will go out on each day in one, two, three, or four week increments during the chosen start and end dates. Schedule Recurring must be selected to enter days. Messages will begin sending on the first day that occurs on or after the selected Start Date. |
| Select Day(s) |
Each day a message will be sent out based on the frequency that is selected. |
| Frequency | Choose the weekly increments the message will be sent on. |
| Start Date | A date the recurring period starts on and messages will begin being sent. |
| End Date | Messages in this series will no longer be sent after the End Date. |
| Custom Dates | Select this option for setting up a recurring message that will be sent on the individual dates that are selected. Schedule Recurring must be selected to choose dates. |
| Select Dates | Calendar tool used to select the custom dates a message will be sent. |
|
Confirmation Email |
If selected, the sender will receive a confirmation email when the message processes successfully. The sender will always receive an email if the message did not process successfully. |
WYSIWYG Editor - Field Descriptions & Tips
Messenger 2.0 third-party tool for our WYSIWYG (What You See Is What You Get) Editor similar to the WYSIWYG Editor in the classic Messenger and other letter and messenger tools in Campus. Many of the same options and their functionality are available with ongoing development to Campus fields and sub-reports. All WYSIWYG editors have limitations with copy/paste/formatting due to differences in source programs.
Keep the following items in mind when using the WYSIWYG editor.
- The WYSIWYG editor does not support copy/pasting from third-party programs, but it does handle some third-party programs more favorably than it previously did.
- If you copy/paste from Microsoft Word, select Keep to retain the current format or Clean to remove formatting. We recommend using the Clean option as it typically produces better results.
- If copying/pasting from other third-party products, highlighting the pasted text and selecting Clear Formatting can improve how the formatting is handled when the email is sent.
- The WYSIWYG editor does not support copying/pasting from Google docs. When the Clear Formatting option is used, we have seen improvements. This includes using bullet points and numbered lists up to one level. However, when using bullet points and numbered lists beyond one level, we recommend composing the message inside of the WYSIWYG editor.

| Button | Description |
|
Button | Description |
|
|
Bold |
|
More paragraph Expand for additional options | |
|
|
Italic |
|
Campus Fields and Sub-Reports | |
|
|
Underline |
|
Insert Link | |
|
|
More Text Expand for additional options |
|
Insert Image Expand to upload images from your computer, add from a URL, or add from images that have already been uploaded to Campus. The Inbox/Email - Inline Images setting in the Digital Repository Preferences must be enabled to insert images. Until this is enabled, image files cannot be uploaded. | |
|
|
Align Left |
|
More Rich Expand to insert tables and special characters | |
|
|
Align Center |
|
Undo and Redo | |
|
|
Align Right |
|
More Misc When composing a message on a mobile device, select the full screen option for easier viewing. |


Campus Fields & Sub-Reports
A list of the most popular Campus Fields are available to help personalize messages. Sub-Reports are available only for messages sent to Students or Messenger Contacts, and only when a single calendar is selected.
Note: Some Campus Fields may not be suitable for use in Messenger messages.
The data pulled into the message body using Campus Fields can come from any of the available records, not necessarily the most recent or primary one. Campus Fields in Messenger function similarly to ad hoc fields but do not include filtering capabilities. If a student has multiple records, such as more than one enrollment during the current school year, Messenger does not have a way to determine which record to prioritize.
Sub-Report Options
The following table lists the sub-report options for each area.
| Area | Sub-Reports |
|---|---|
| Learner |
|
| Learner Planning |
|
| Attendance |
|
| Grading |
|
| Behavior |
|
| Student Portfolio |
|
| Health |
|
| Point of Sale |
|
When using sub-reports in letters, please note the following:
- All behavior data is included when adding either of the sub-reports.
- A field only displays if there is data for that field. If a field is chosen from the sub-report but there is no saved data for that student, information for that field does not display.
- A sub-report option only displays if the district/school records that data.
