Tool Search: Waiver
The Student Waiver tool allows schools to track a student's non-participation in something, or a variance in what the student receives. Some states could use this to track technology use or field trip permission, or perhaps non-participation in a science experiment. It is up to the district how this tab is used, if at all.
 Student Waiver
See the Waiver Tool Rights article for information about rights needed to use this tool.
Fields are added by the district on the Attribute/Dictionary and mimics the behavior of a custom tool.
Because there are other areas in Campus that track exemptions or waivers, it is best to not duplicate efforts. The following is a list of these areas.
- Health Waivers - these types of conscientious objections are noted when adding vaccinations to students on the Student Health Immunizations tab.
- Test Accommodations - (if available in your state) these types of waivers are part of state reporting extracts.
- ELL or other services the student may receive - these types of denial of service are tracked on the student's Programs or Special Education documents.
- Exempt Fees - if students are exempt from paying certain fees due to income restrictions, mark the fee as exempt on the student's Fees tab.
- FRAM Opt Out - check the FRAM Preferences tool for information on using Display Medicaid Opt Out and Display SCHIP Opt Out.
- Activities/Sports - track student eligibility for sports participation on the Athletics tab.
Student Waiver Information in Ad hoc Query Wizard
Waiver information is available in the Query Wizard for Student data types in the Learner > Waiver folder.
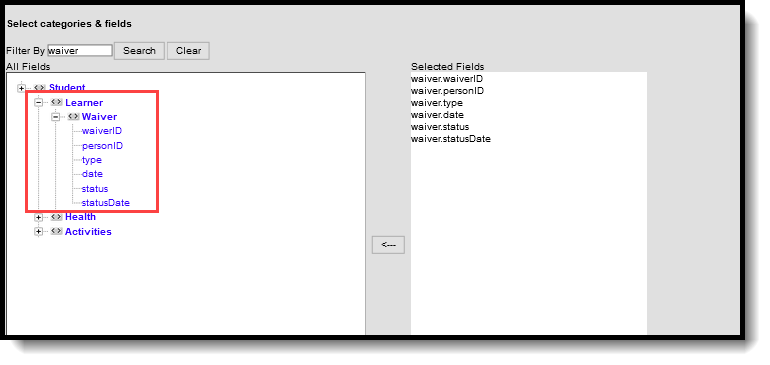 Student Waiver Ad hoc Fields
The field waiver.type returns the code/number assigned to the Waiver Name; the field waiver.status returns the code/number of the field Granted?.
Create Custom Waiver Fields
The options available when adding a new Waiver for a student depend on the items added in the Attribute/Dictionary. Additional fields cannot be added, but the Dictionary items (what is selected for the fields) can be modified.
Only new Dictionary items can be added. New fields cannot be added, and fields cannot be renamed or removed.
 Attribute/Dictionary Options
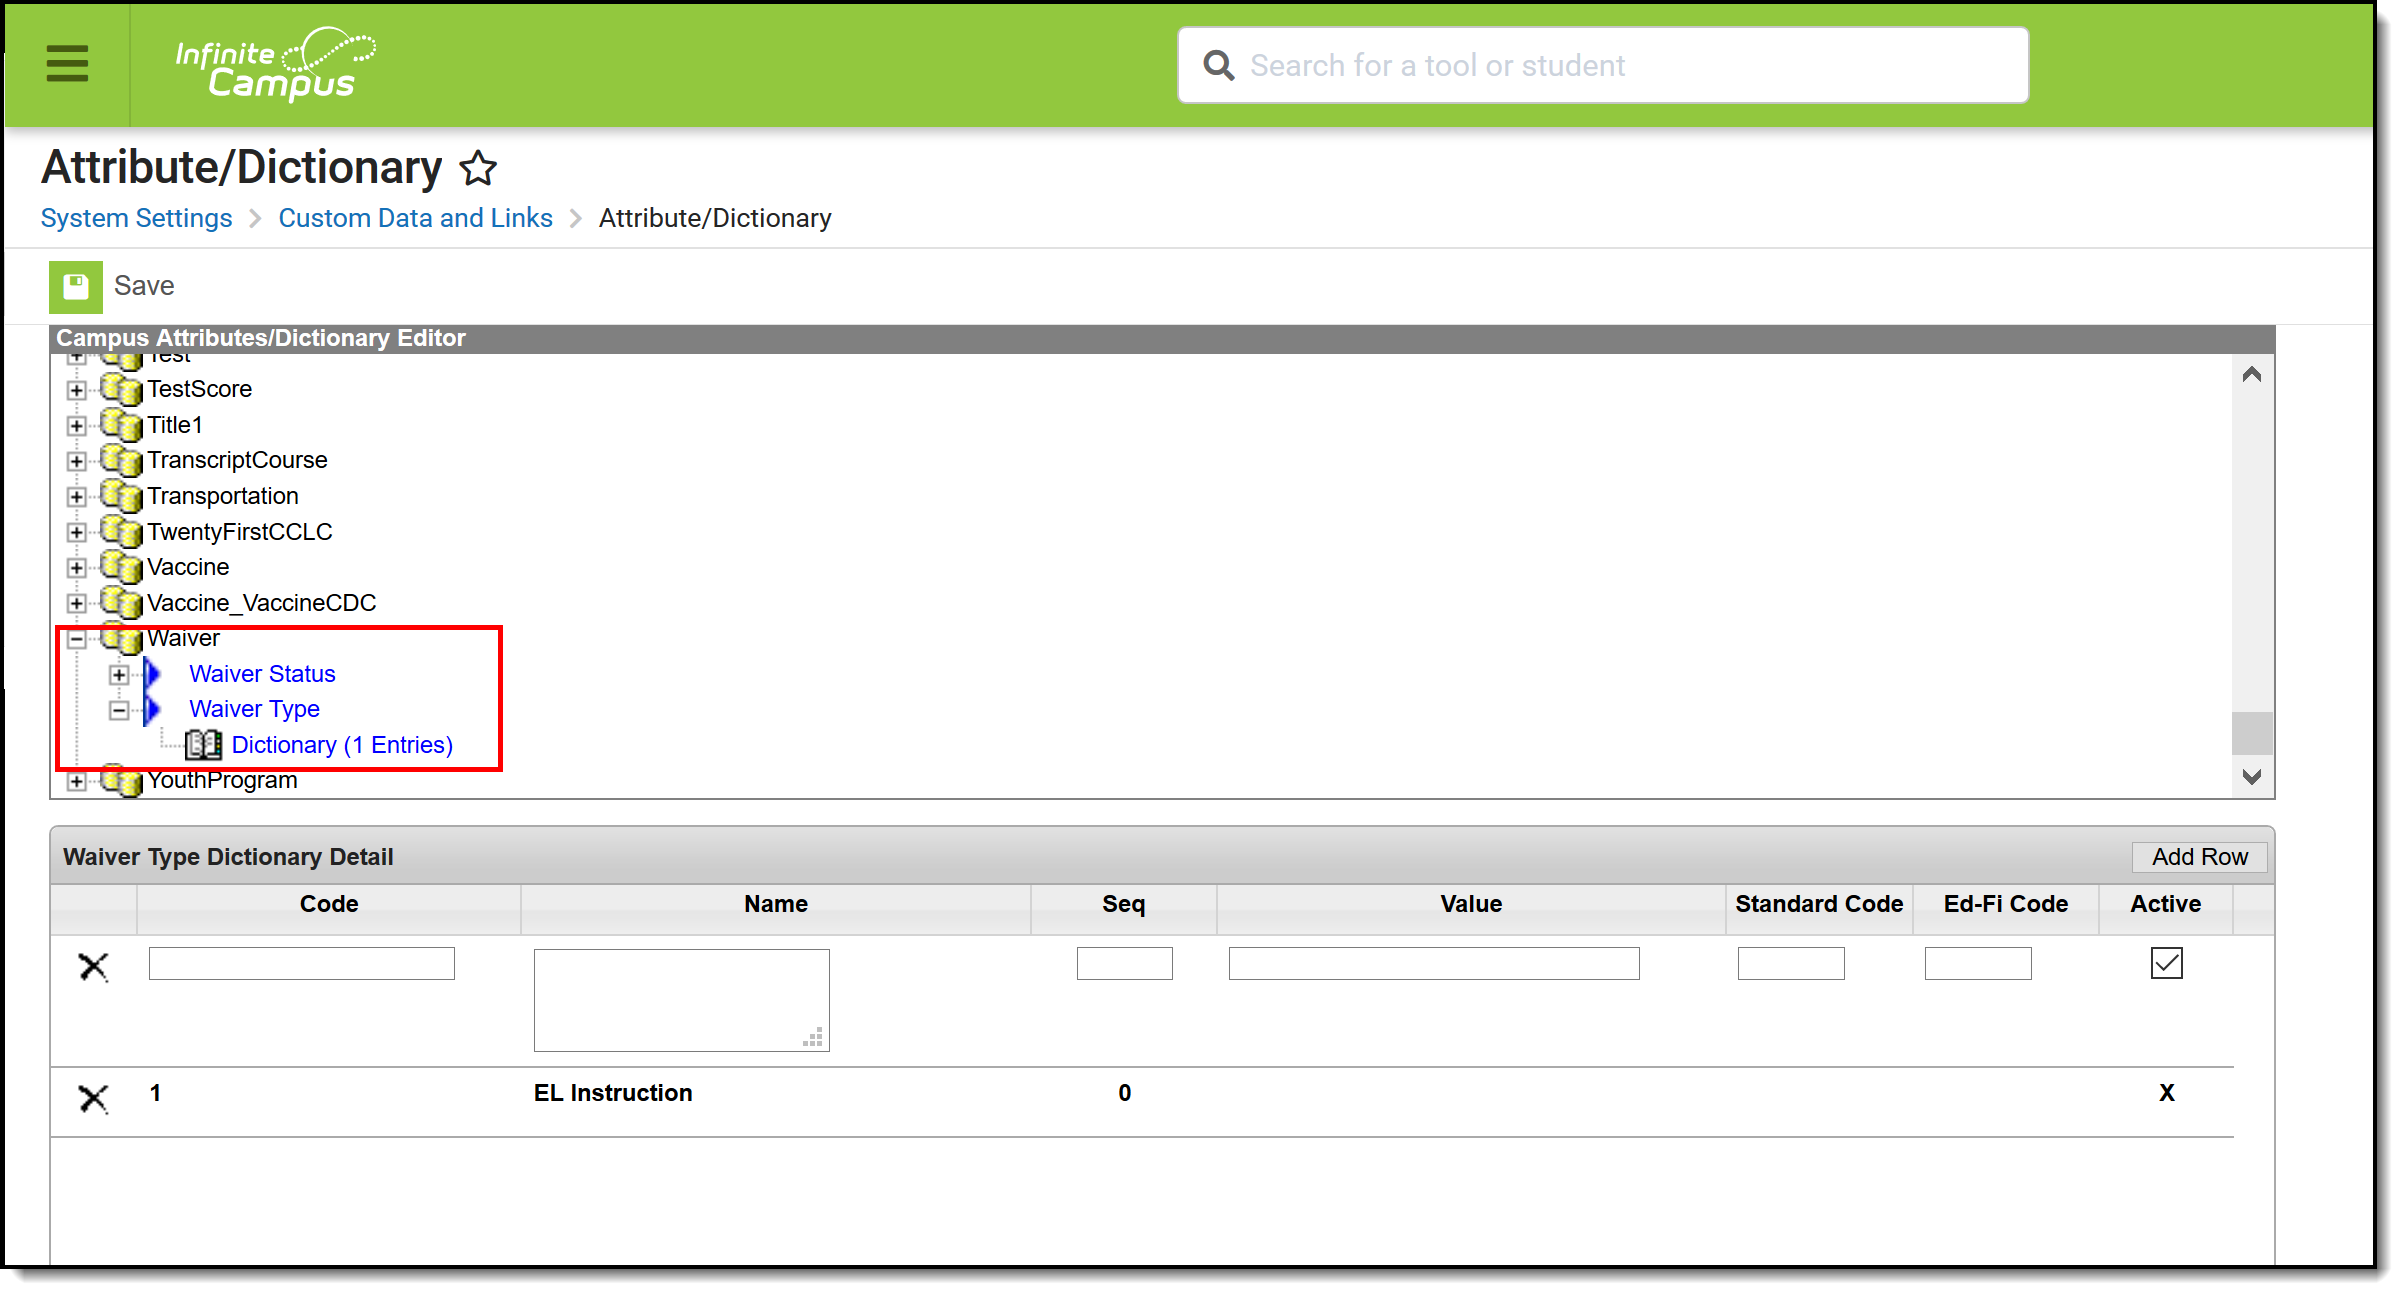
Add New Waiver Types
In addition to the current one available (EL Instruction), a new waiver is needed.
- Navigate to the Attribute Dictionary (System Administration > Custom > Attribute/Dictionary)
- Expand the Waiver option at the end of the scroll.
- Expand the Waiver Type item.
- Select the Dictionary list.
- Click the Add Row button in the right hand corner.
- Enter a Code and a Name for the new waiver.
- If desired, enter a Sequence, Value and Standard Code.
- Mark the new waiver as Active.
- Click the Save icon when finished.
Add as many waivers as needed by clicking the Add Row and populate the new fields as noted above.
The new Dictionary List includes the newly added waivers, and if they are marked Active, are available to select on the Waiver tab.
Add New Waiver Status
The Waiver Status (whether a waiver was accepted or denied) may need additional options as well.
- Navigate to the Attribute Dictionary (System Administration > Custom > Attribute/Dictionary)
- Expand the Waiver option at the end of the scroll.
- Expand the Waiver Status item.
- Select the Dictionary list.
- Click the Add Row button in the right hand corner.
- Enter a Code and a Name for the new waiver.
- If desired, enter a Sequence, Value and Standard Code.
- Mark the new waiver as Active.
- Click the Save icon when finished.
Add as many waivers as needed by clicking the Add Row and populate the new fields as noted above.
The new Dictionary List includes the newly added waiver status, and if they are marked Active, are available to select on the Waiver tab.
See the available Custom articles for more information on tailoring Campus fields and tools to meet the needs of a district.
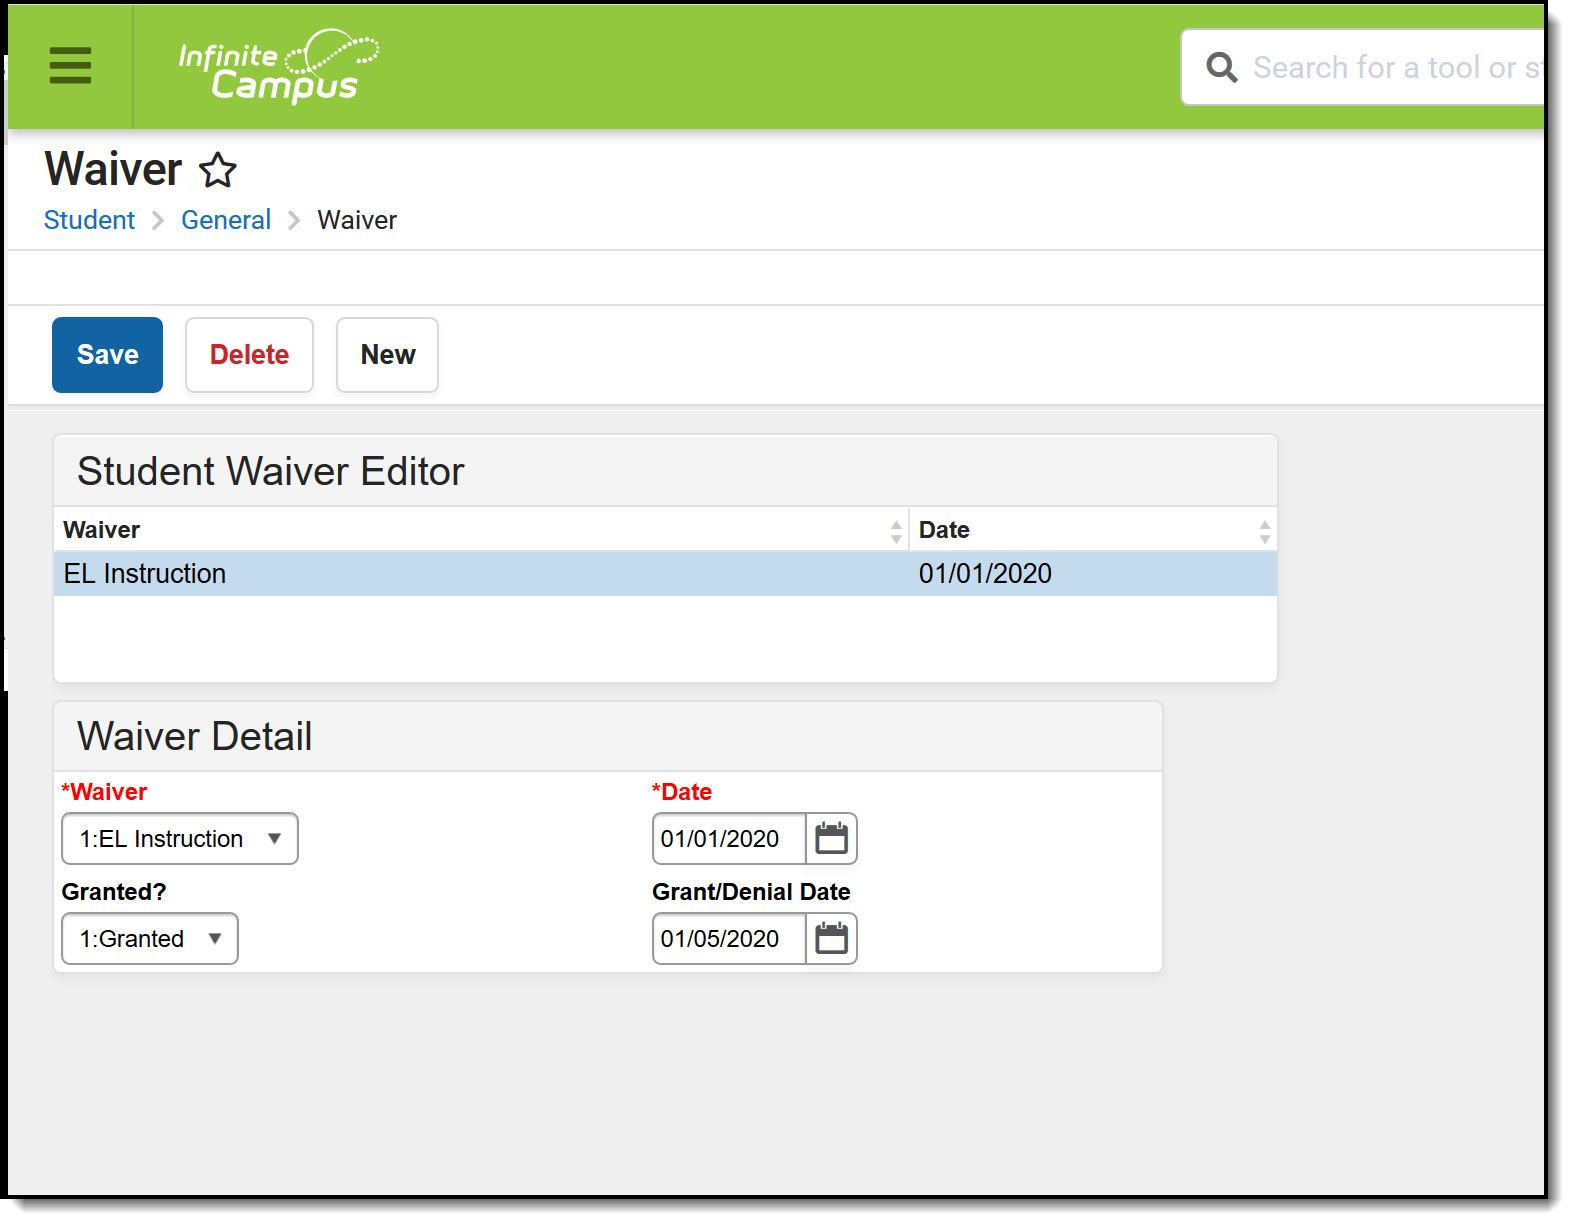
Add Student Waiver Data
Assign Waiver Information
- Select the New icon. A Waiver Detail editor displays.
- Select the desired Waiver from the dropdown list (required entry).
- End the Date the waiver was added (required entry).
Assign Waiver Status
- Select the appropriate option for whether the waiver was accepted or denied.
- Enter the date the waiver was accepted or denited.
- Click the Save icon when finished. The new Waiver is listed in the Waiver table in order of the date the waivers were assigned.
Documents
To view documents, click the Documents button on the action bar. See the Student Person Documents article for more information.
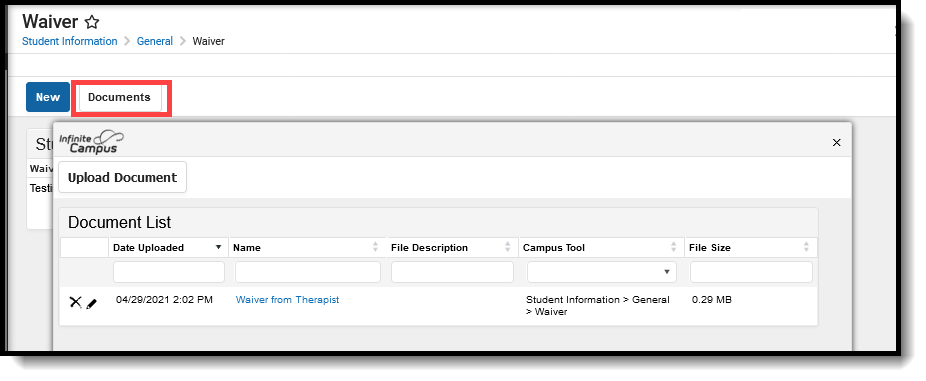 Waiver Documents
