Tool Search: Attendance Messenger Scheduler
Voice and text message features described in this article only apply to schools/districts that use Campus Messenger with Voice add-on functionality
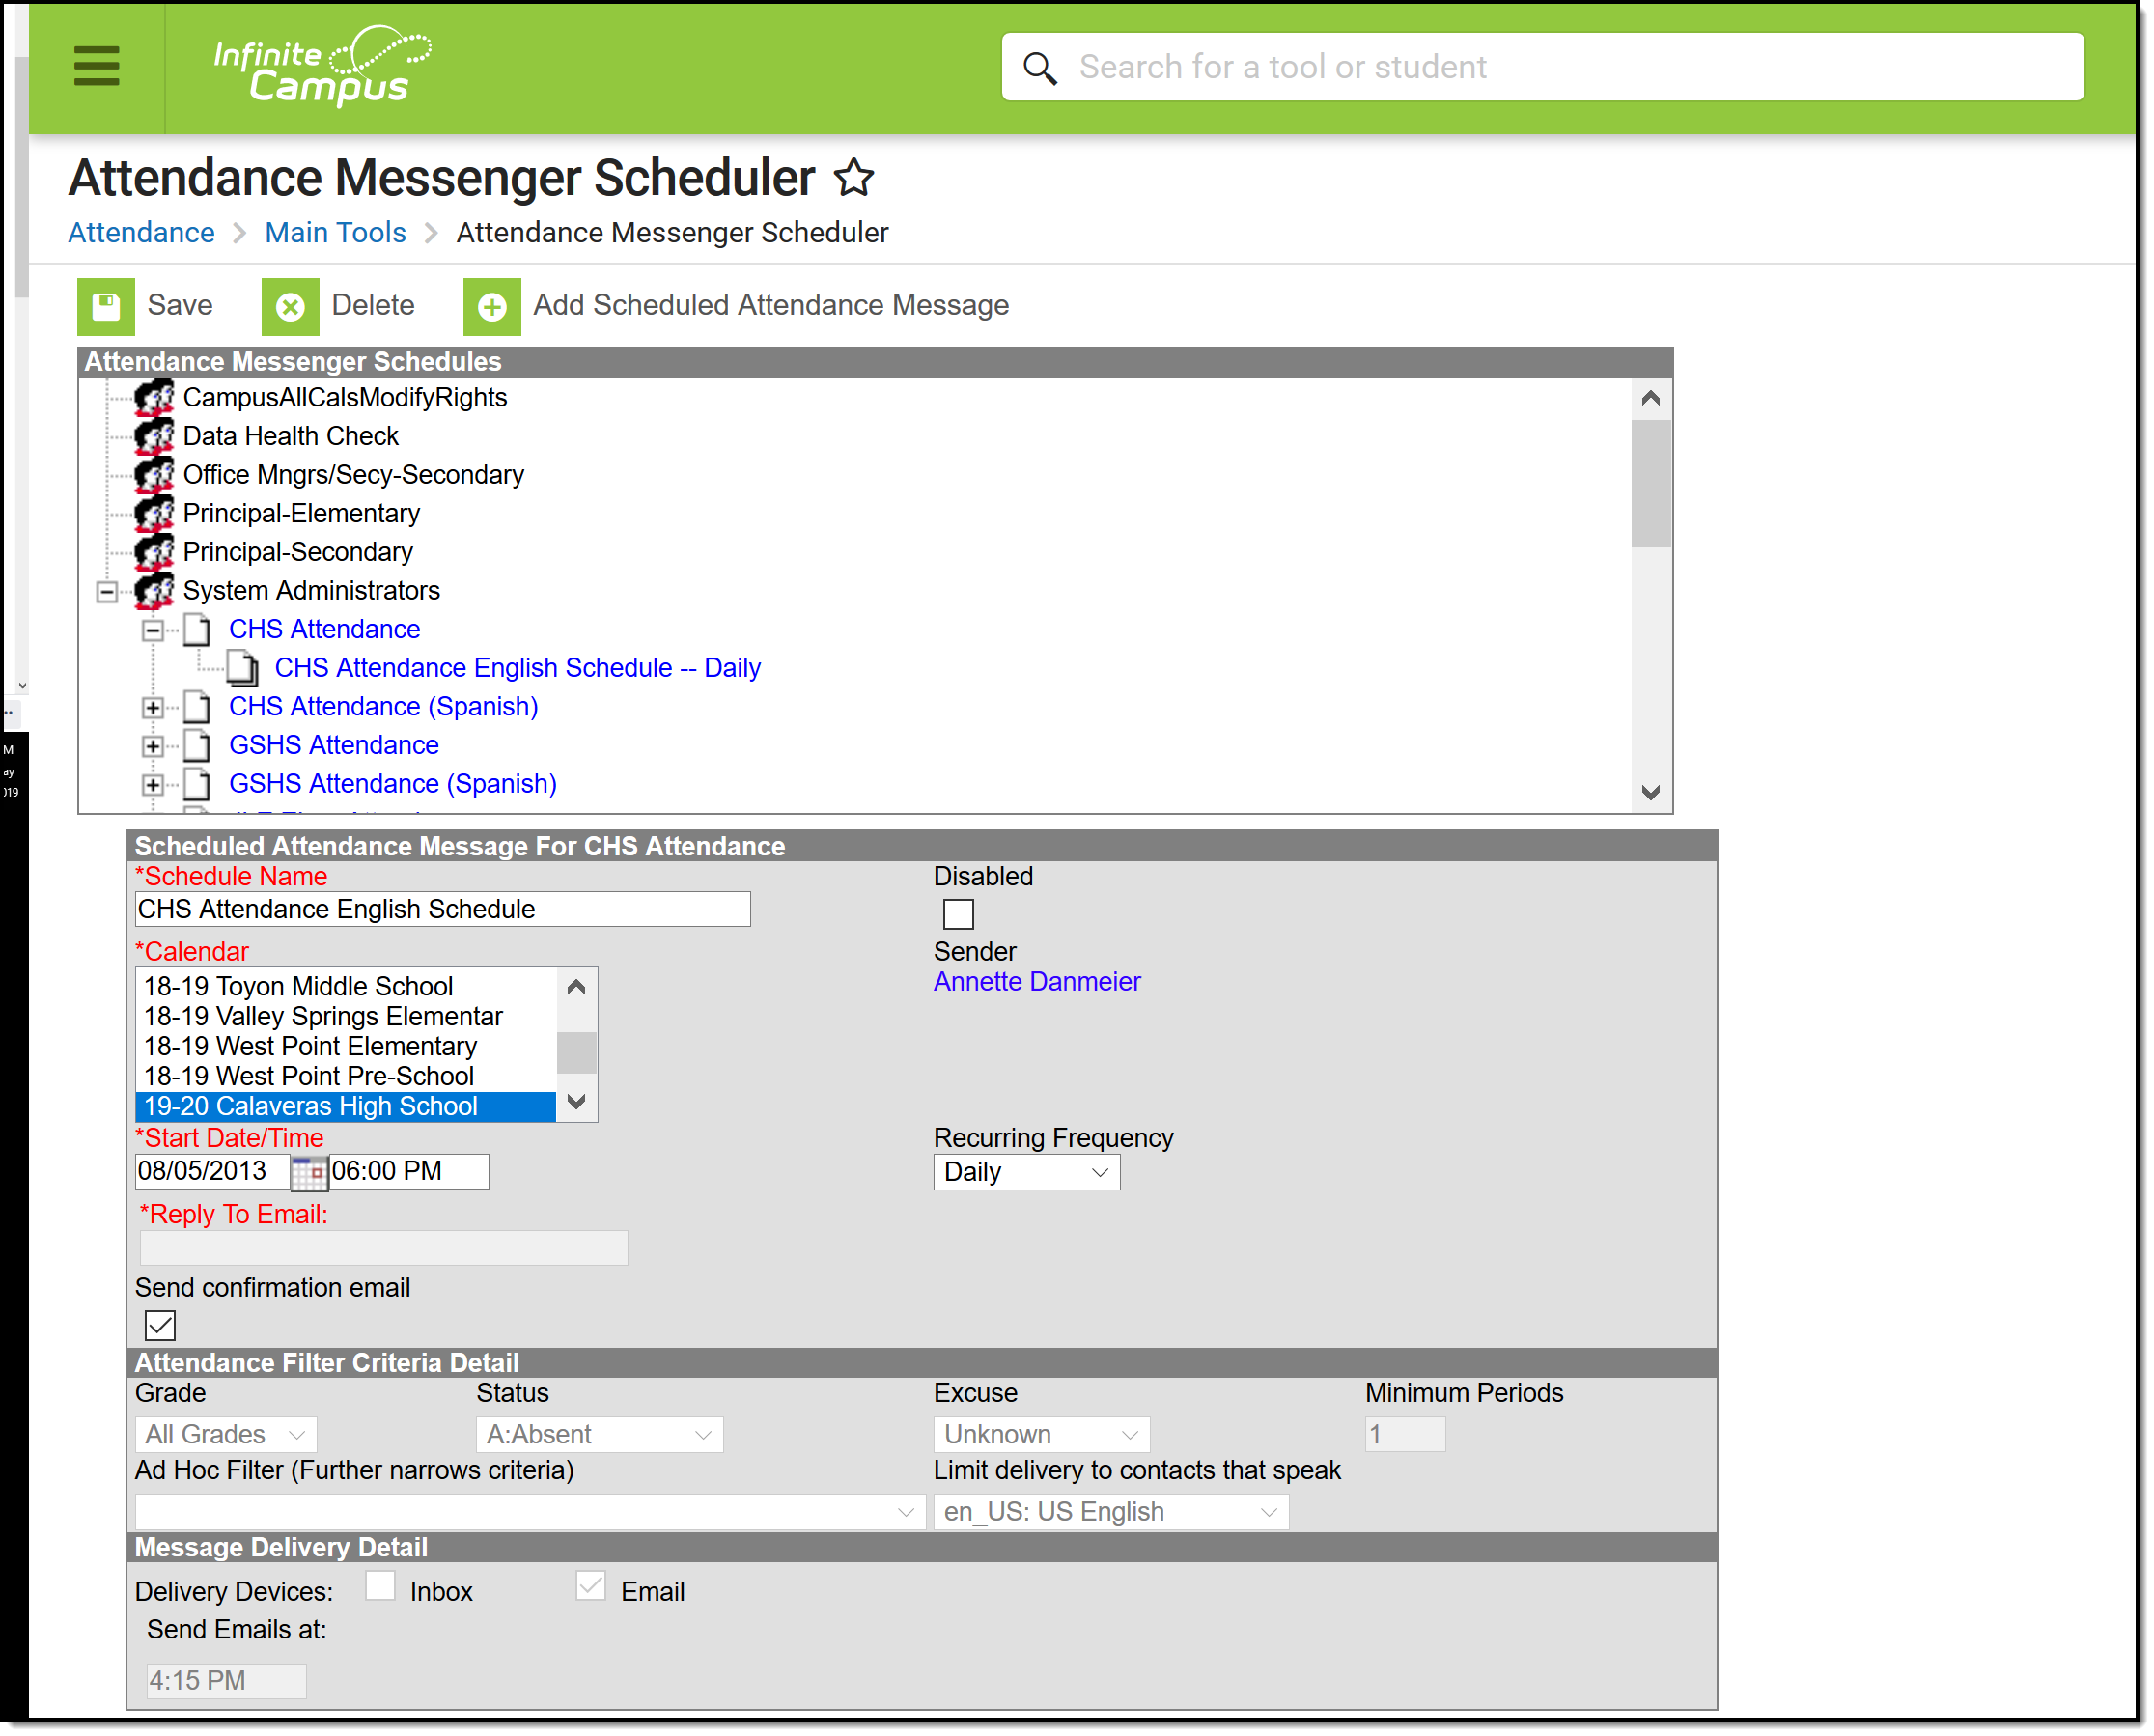
The Attendance Messenger Scheduler tool sets the dates and times for automatic delivery of attendance messages, according to a template first created in the Attendance Messenger tool.
The Attendance Messenger Scheduler will automatically generate messages based on the data available at that time. A confirmation email will be sent to the person that created the messenger schedule telling them that it has run and how many phones/email devices received the message. The person must have an email address entered on their Demographics tab.
Attendance Messenger Scheduler Tool
See the Attendance Messenger Scheduler Tool Rights article for information about rights needed to use this tool.
Schedule an Attendance Message
- Select a template from the Attendance Messenger Schedules table.
- Enter the Schedule Name.
- Select a Calendar. This option defaults to the calendar selected in the toolbar.
- Enter the Start Date in mmddyy format or click the calendar icon to select a date.
- Enter the Start Date/Time of the message.
If the time entered on the Scheduler is... Then the message will be sent... the same or later than the time entered on the Dial Window or Send Email field on the template at the time entered on the Scheduler. earlier than the time entered in the Dial Window or Send Email field on the template at the time set on the template. - Choose how often to send the message by selecting an option from the Recurring Frequency dropdown list.
- Enter the Schedule Time Window of the message.
The Schedule Time Window begins after the Start Date/Time entered on the Scheduler.
Example
If the Start Date/Time is.... And the Schedule Time Window begins as... Then the message is sent at... 9:00 AM 11:00 AM 11:00 AM 9:00 AM 8:00 AM 9:00 AM - Mark the Send Confirmation Email checkbox to receive an email when the message has been sent. A confirmation email will be sent to the person who set up the schedule.
- Select the Save icon when finished. The new schedule will appear below its respective template in the Attendance Messenger Schedules table.
Add more schedules by selecting the newly added schedule in the Attendance Messenger list and select the Add Scheduled Dial.
Troubleshooting
Ensure all settings in the message template created in Attendance Messenger are correct.
If a dial window has been set on the message template, messages will no longer be sent once that window is closed, even if they have not all been delivered. Also, ensure correct start and end times if a window has been added if messages are not delivered when expected.
Ensure recipients have the information needed in order for a message to be received set in Census > People > Demographics > Personal Contact Information.
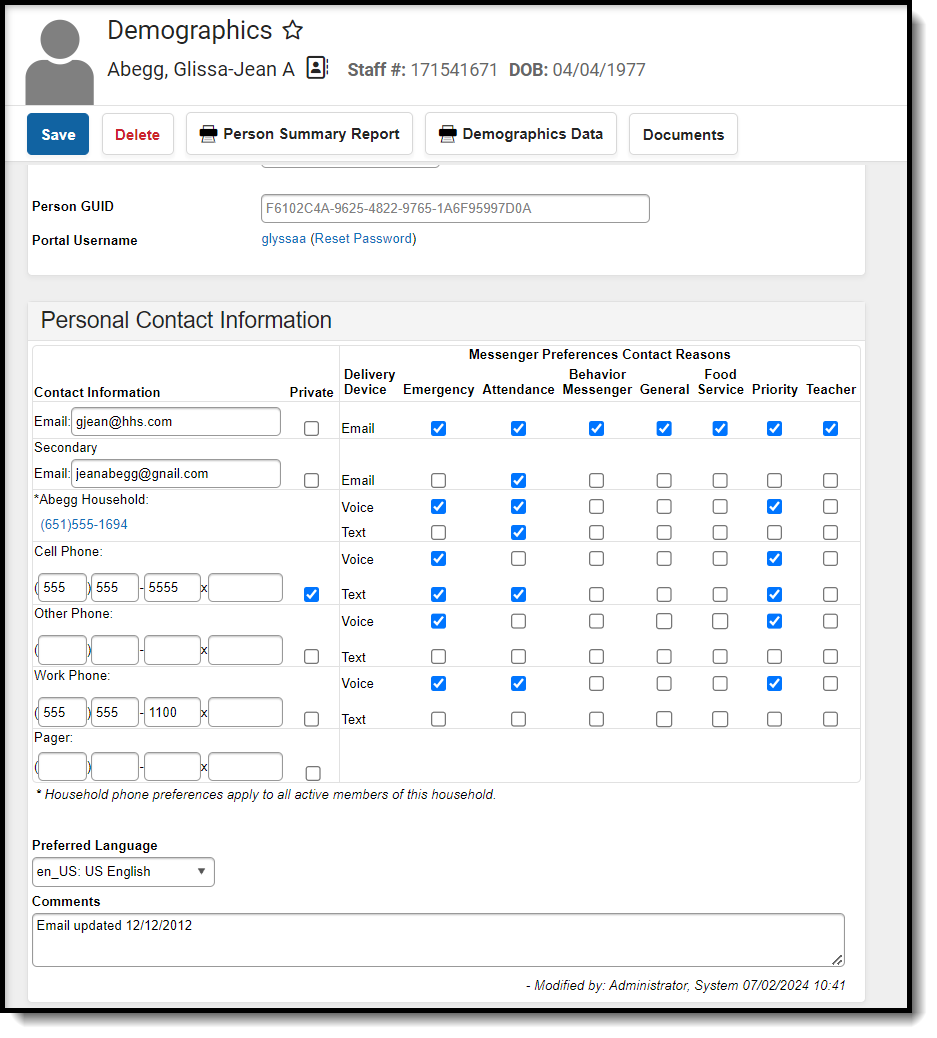 Demographics > Personal Contact Information