Tool Search: Room Setup
Room Setup houses all rooms in the school building. This includes classrooms, the gymnasium, the library, etc. Rooms are attached to Course Sections and appear in Scheduling tools such as the Scheduling Board, Staff and Course Planners, Walk-In Scheduling, etc., and are printed on student schedules.
 Room Setup
See the Schools Tool Rights article for information on available tool rights.
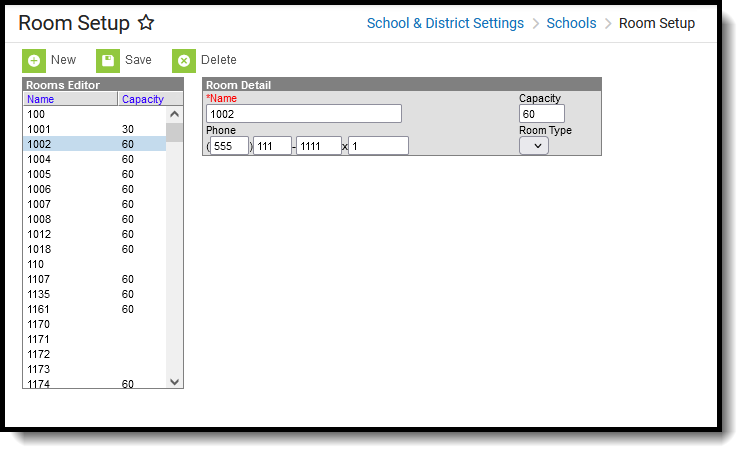
Room Setup field descriptions
| Field | Description |
|---|---|
Name Required |
Lists the room name (Library, Gym, Auditorium, etc.) or the room number (0112, 0113, etc.). This can be up to ten characters in length (alphabetical, numeric, special characters, etc.) |
| Capacity | Indicates the total number of individuals that the room can hold.
This is a reporting field only and does not impact the number of students who can be scheduled in that room at one time. The maximum number of students is set on the course or the section of the course. |
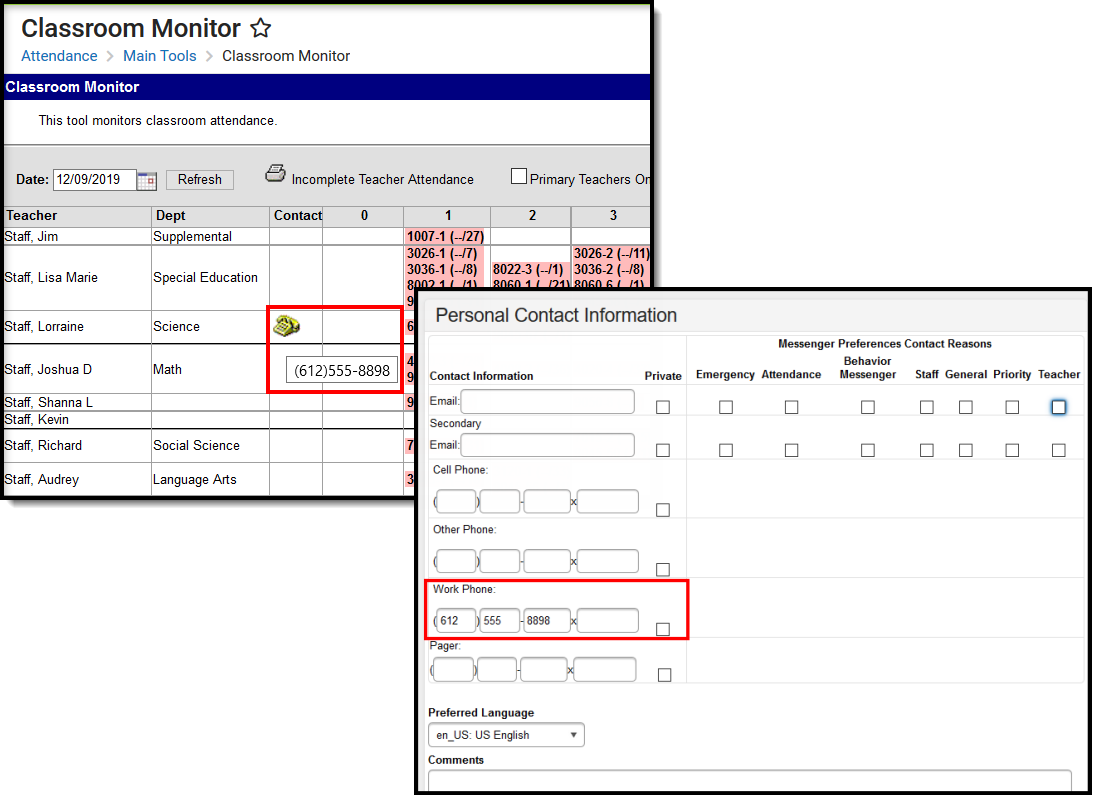
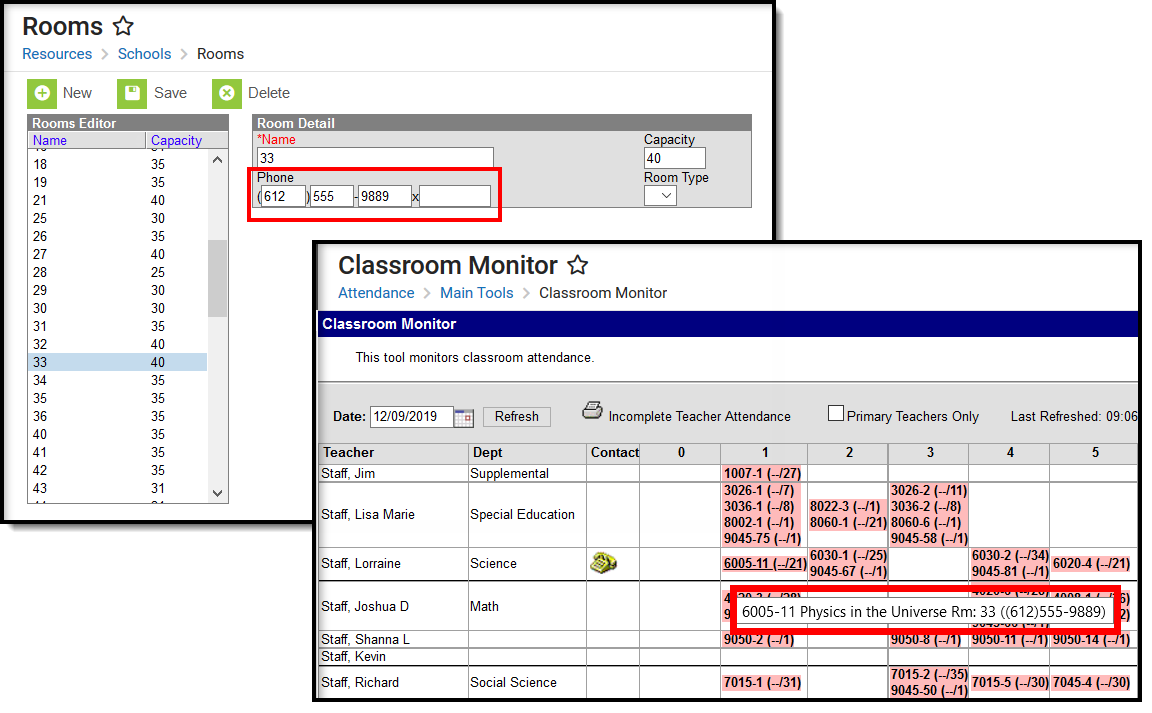
| Phone | Lists the contact number of the room. When entered, this displays contact information in the Classroom Monitor and is used one of two ways:
|
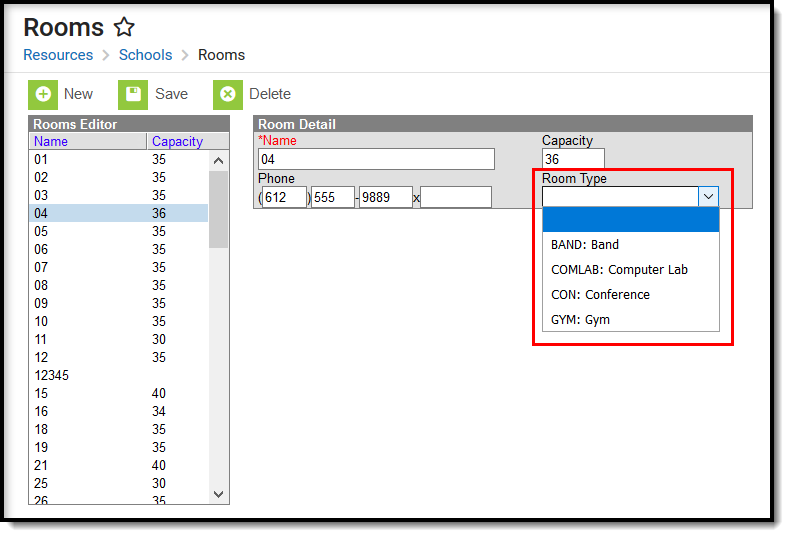
| Room Type | Describes the type of room (gymnasium, class room, auditorium, etc.) for room name.
District users are required to populate the options in the Attribute Dictionary that are available for selection. See the Attribute Dictionary for Room Types for more information. |
Create new Rooms
- Enter the Name or number of the room. This field is limited to ten characters.
- Enter the Capacity and Phone Number. (optional)
- Click Save.
To delete rooms, select the room to delete and choose the Delete option.
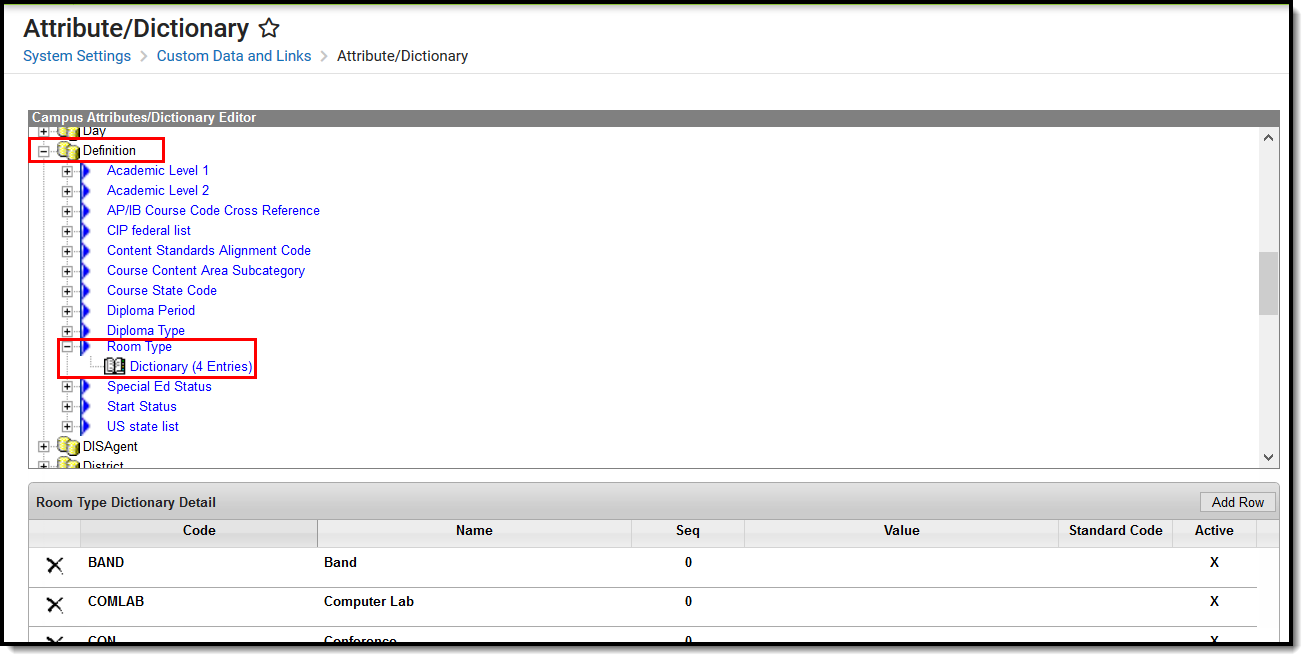
Add an attribute for Room Types
To populate the Room Type dropdown list with selections:
- Navigate to the Attribute/Dictionary.
- Locate the Definition folder and expand the Room Type detail. Select the Dictionary for Room Type to display the Dictionary Detail.
- Click the Add Row button on the right-hand side of the Detail editor. A new row with blank fields displays.
- Enter the Code, Name, Sequence, Value, and Standard Code for the new item.
- Verify the Active checkbox is marked. This makes the option available in the Room editor when creating rooms. If it should NOT be available, remove the checkbox.
- To add more dictionary items, click the Add Row button and repeat steps 4 and 5 as needed.
- Click the Save icon when finished adding dictionary items.
From here, you can also modify existing room types - change an active type to inactive (remove the active checkbox) or modify the entries for a particular type. Modifying an existing dictionary item immediately updates the information associated with that room type. If the Code or Name for GYM is changed to BBALL Court, the sections assigned to GYM become BBALL instantly. It may be best to deactivate GYM and add a new record for BBALL, and assign the appropriate course sections to BBALL as needed.
Once the Dictionary item is saved and is marked Active, it can be assigned to the room.The new dictionary item of Auditorium in the example above can be assigned to Room 0111 in the example below.
Assign preferred rooms
After creating the rooms and assigning room types as needed, courses can be assigned preferred room types. This assignment is used in the Scheduling process.
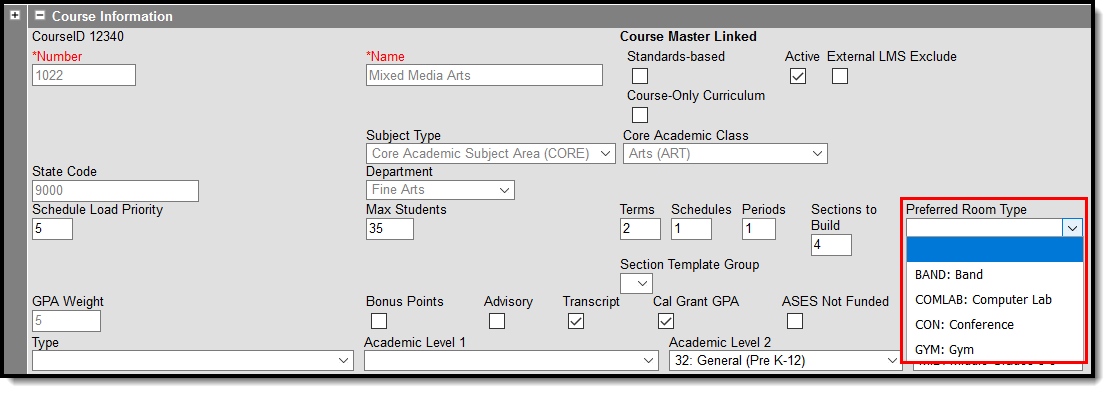
Course Editor and Course Master Editor
A Preferred Room Type can be assigned to the Course/Course Master to guide those responsible for scheduling courses. When populated, it provides a visual indication of where course sections should be assigned.
Scheduling Board
A Room Types column displays on the Course Planner. Courses can be assigned a preferred room type. When building the schedule, rooms assigned to that preferred room type are listed first when selecting a room for a course section. If one of the rooms in that preferred room group is selected for a course, that room is considered when the course is built.
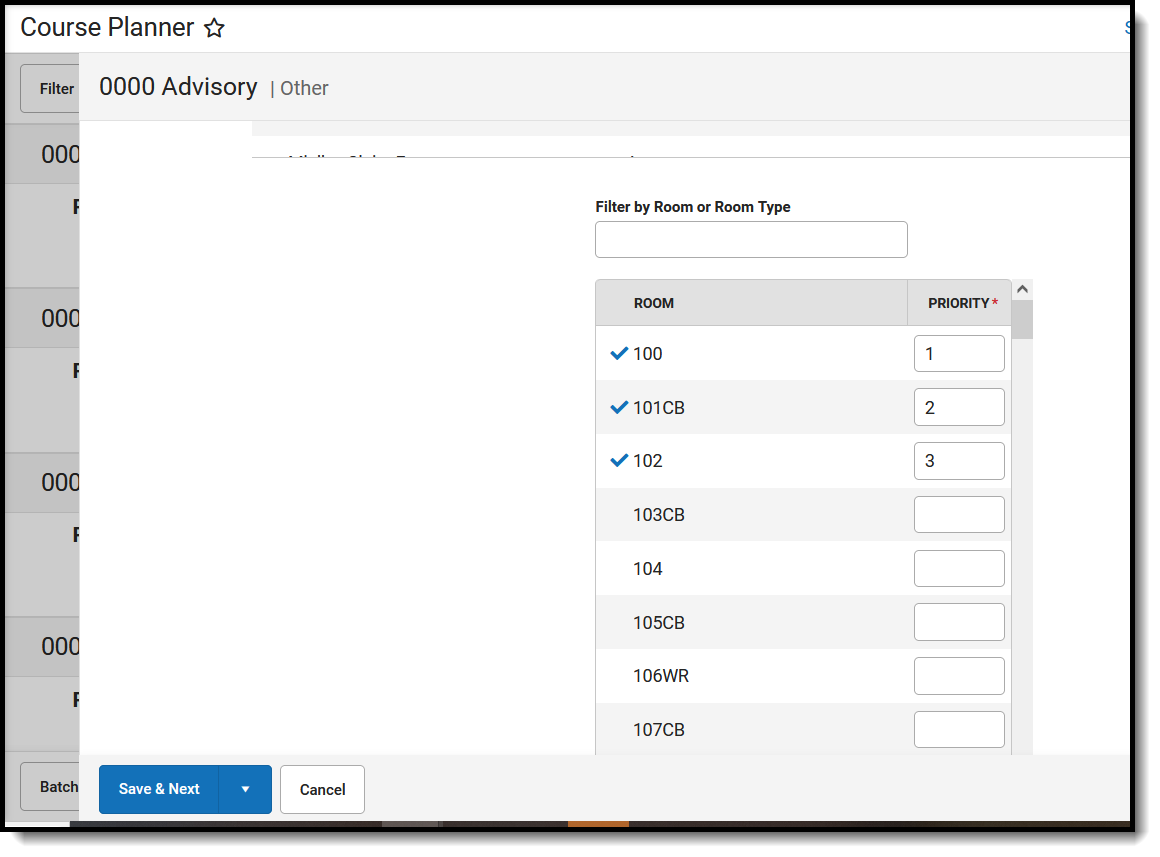
Rooms can also be assigned (and are sorted as noted above) when building a section, and when using the Staff Planner.
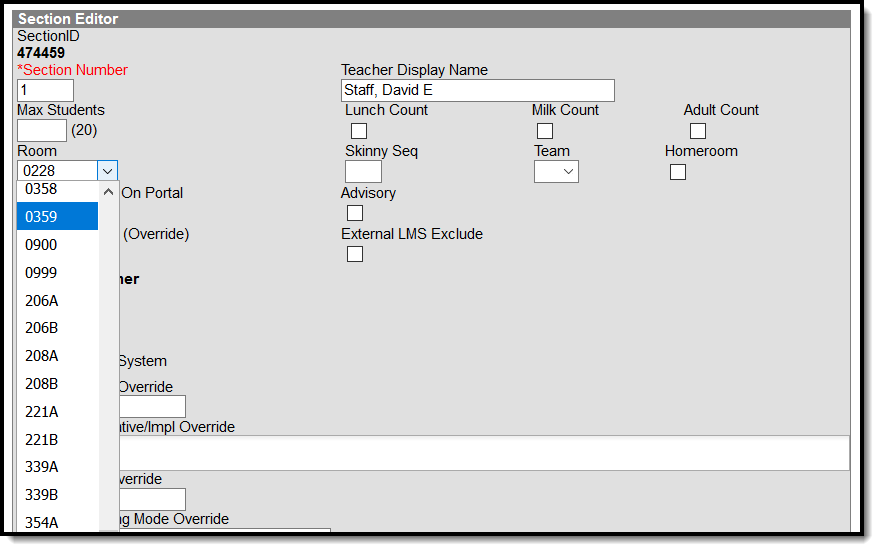
Section Editor
The Rooms dropdown list is organized by room numbers assigned a Room Type first, then room numbers not assigned a Room Type.
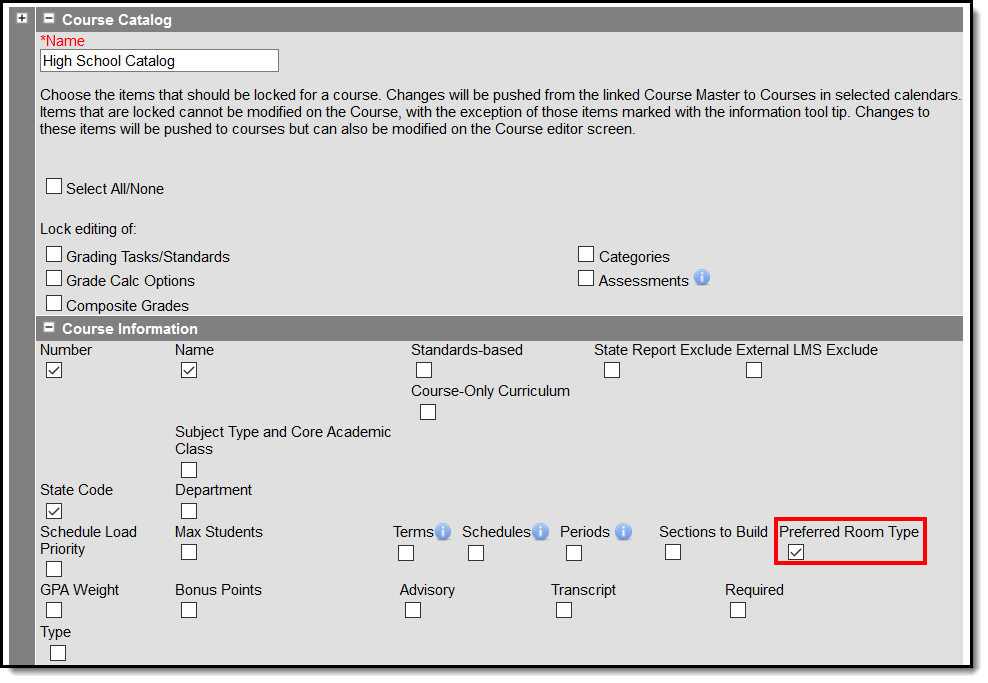
Course Catalog
Preferred Room Type can be marked as locked on the Course Catalog, which means the selection can only be changed on the Course Master.