The Scanning toolset is part of the Campus Workflow Suite.
Tool Search: Scanner Settings
System administrators can manage scanning preferences with the Scanner Settings tool. Click Save to apply changes.
School-Wide Scanner Settings
The following settings are available when a school is selected in the toolbar.
Classroom Attendance
To use any scanning tools in the Campus Workflow Suite, make sure all threshold fields are set under Classroom Attendance.
See Also: Classroom Attendance Kiosk
 Classroom Attendance Settings
| Field | Description |
|---|---|
| Tardy Threshold (minutes) Required |
The number of minutes after the period start time when the student is considered tardy. Attendance is NOT submitted at this time. Attendance submission is dependent on the Auto Submit Threshold number of minutes. |
| Absence Threshold (minutes) Required |
The number of minutes after the period start time when the student is considered absent. |
| Auto Submit Threshold (minutes) Required |
The number of minutes, in addition to the Tardy Threshold number of minutes, at which attendance is automatically submitted.For example, if the Tardy Threshold is set to 1 minute and the Auto Submit Threshold is set to 9 minutes, attendance is submitted 10 minutes after the period start time (1 minute Tardy Threshold + 9 minutes Auto Submit Threshold = 10 minutes). After this initial submission, the system continues to automatically sync and submit new scans every two minutes. |
Example:
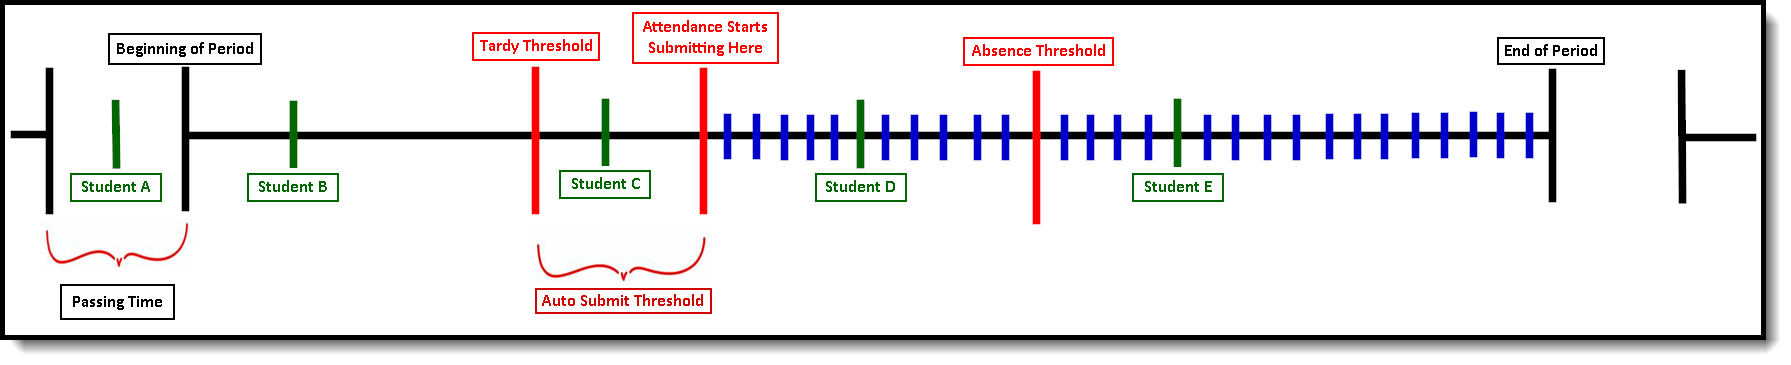
- Student A scans into class during Passing Time and is marked as Present.
- Student B scans into class just after the start of the period and is marked as Present.
- Student C scans into class and is marked as Tardy Unknown since they scanned in after the Tardy Threshold.
- The Attendance for Students A, B, and C will not be recorded or viewable in Infinite Campus until the Auto Submit Threshold is reached.
- Do note that due to this delay, the time on the Scan History Report and the time stamp on when the attendance was actually written to Infinite Campus may differ.
- This delay has no impact on whether the students will be marked Tardy Unknown/Absent Unknown.
- After the Auto Submit Threshold has been reached, attendance will begin syncing every 1 minute.
- This is denoted by the blue lines.
- Any student rostered in class who has not scanned in when Auto Submission begins will be marked as Absent Unknown.
- In the above example, Students D and E would have been marked Absent Unknown
- If a student was previously marked Absent Unknown by Auto Submission and scanned in prior to the Absence Threshold, their Absence Unknown will be changed to a Tardy Unknown.
- Student D is a great example of this.
- Student D was marked Absent Unknown at the time of the Auto Submission. After they scan into class, they will be marked as Tardy Unknown since they scanned in after the Tardy Threshold, but before the Absence Threshold. Their attendance is updated the next minute when the scanner syncs attendance.
- Student E was marked Absent Unknown at the time of the Auto Submission. After they scan into class, they remain marked Absent Unknown, since they scanned in after the Absence Threshold.
Alternate Identifier
See Also: Mass Assign Alternate IDs, Alternate ID Lookup 
Districts that use RFID tags and readers to have students scan in/out at scanners can select to use Alternate Identifier.
 Alternate Identifier Settings
| Field | Description |
|---|---|
| Enable Alternate Identifiers | Use this field to determine if and how Alternate Identifiers can be used for scanning in or out at scanners.
Options include:
|
| Expected Student identifier in Scanner Tools | This is the District-Wide setting that determines the expected Student Identifier. This is read-only and can be changed by swapping your context to All Schools instead of a specific calendar and navigating to Scanner Settings. |
Absence Requests
The Absence Requests checkbox, if marked, enables parents/guardians to submit absence requests for students enrolled in the calendar selected in the Context Switcher using the Absence Request tool in Campus Parent. Students enrolled in calendars where this checkbox is not marked will not display on the parent's Absence Request tool.
NOTE: In order for the Absence Requests tool to show up on the Parent Portal, you MUST also enable the district-wide Absence Request Portal Tab setting.
Scan Prevention
In order for Scan Prevention to work correctly with behavior resolutions, please ensure you are filling out the End Date and End Time on your behavior resolutions.
Scan Prevention gives schools the ability to configure behavior resolutions to add warnings or stop a student from scanning in if the student was not supposed to be in attendance. Stop/Warn will only look at behavior events for the currently selected calendar.
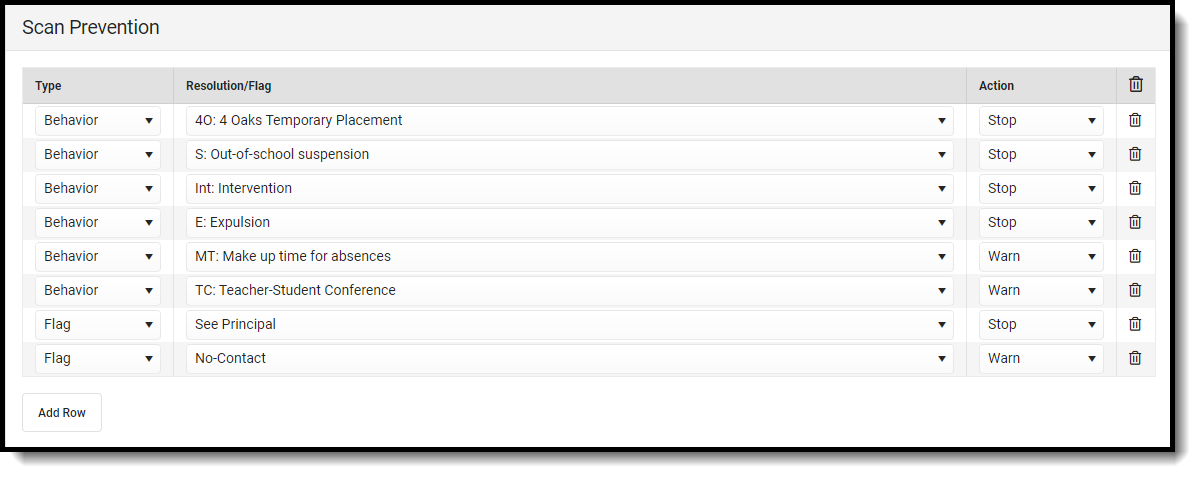
| Field | Description |
|---|---|
| Type | Determines whether Behavior Resolution or Flag options populate in the Resolution/Flag drop-down column. |
| Resolution/Flag | The Behavior Resolution or Flag will trigger a stop or warning message to appear when a student attempts to scan in. |
| Action | Determines what type of message will appear when a student attempts to scan in. Three types of actions are available:
|
Stop/Warn Enabled Stations
These are the stations where Stop/Warn messages can appear for Check In/Out scanners and custom scanners.
| Station | Attend | Kiosk |
| Nurse | No | No |
| Counseling | No | No |
| Hall Monitor | No | N/A |
| Check In/Out | Yes | N/A |
| Check In/Out Kiosk | N/A | Yes (Stop ONLY) |
| Custom Scanners | Yes | Yes (Stop ONLY) |
Check In/Out Kiosk
See Also: Check In/Out Kiosk 
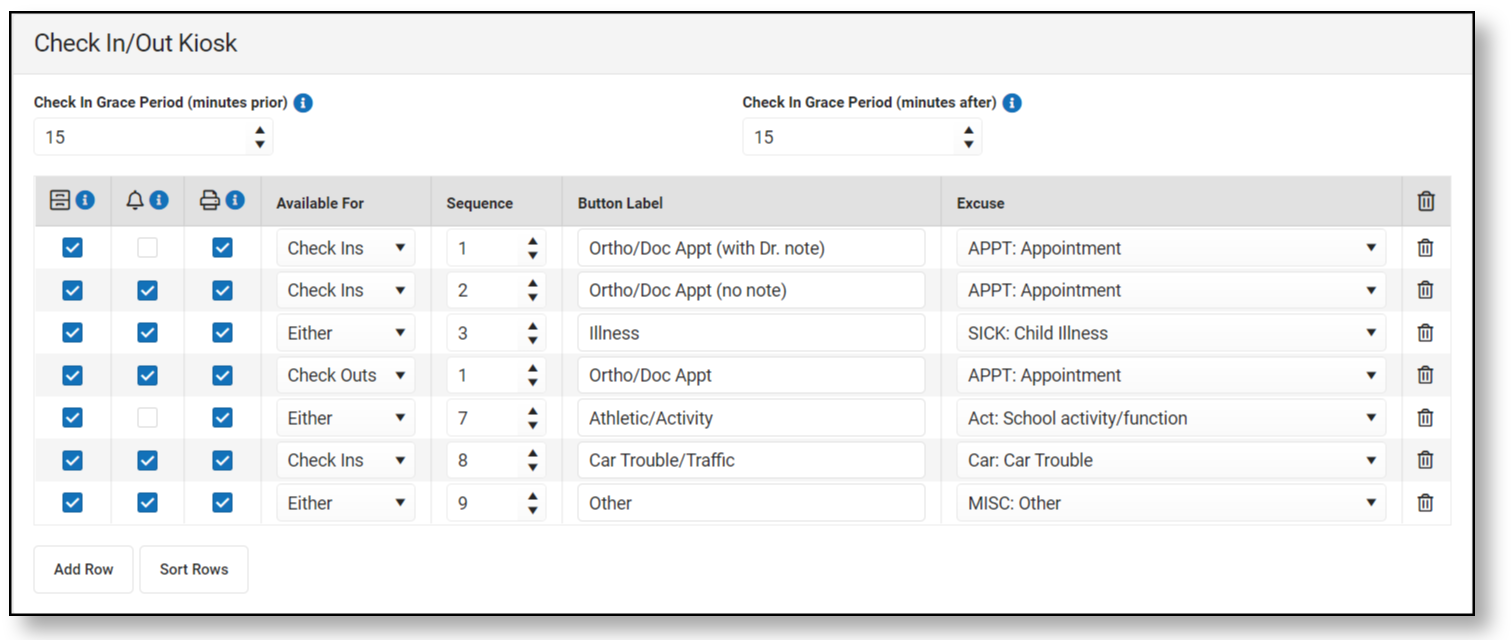
Check In/Out Kiosk is designed to be used by students (not attended by staff) to check in/out. After scanning in and selecting check in/out, students select a button for the reason. Options set for each button determines how the event is processed.
 Check In/Out Kiosk Settings
| Field | Description |
|---|---|
| Check In Grace Period (Minutes Prior) | The Grace Period works in conjunction with parent-entered absence requests. If a parent entered a late arrival request, and the student scans in within the grace period and selects a button linked to to the same excuse the parent entered, the scan in/out is matched up with the request and no other processing is needed. A hall pass is printed if selected.
If a student checks in/out outside of the grace period, the absence request is placed in an "Awaiting Parent Verification" status and parents are notified via Campus Parent that they need to review the absence request. Example: A parent entered an absence request for a student with the excuse "APPT: Appointment" The parent selected an arrival time of 9:15am. The Grace Period is set for 15 minutes before/after. If the student scans in between 9 and 9:30 am and selects a button where APPT: Appointment is selected as the excuse, the scan in is matched with the parent request and is considered complete. |
| Check In Grace Period (Minutes After) | |
 Request Processing Request Processing |
If checked, student scan in/outs are sent to Absence Request Processing to be processed by an attendance clerk. |
 Notify Parent/Guardian Notify Parent/Guardian |
If checked, parents receive a notification and will need to confirm the attendance request in Absence Request (Campus Parent). If unchecked, parents still receive a notification that their student has submitted an absence request, but no verification is required.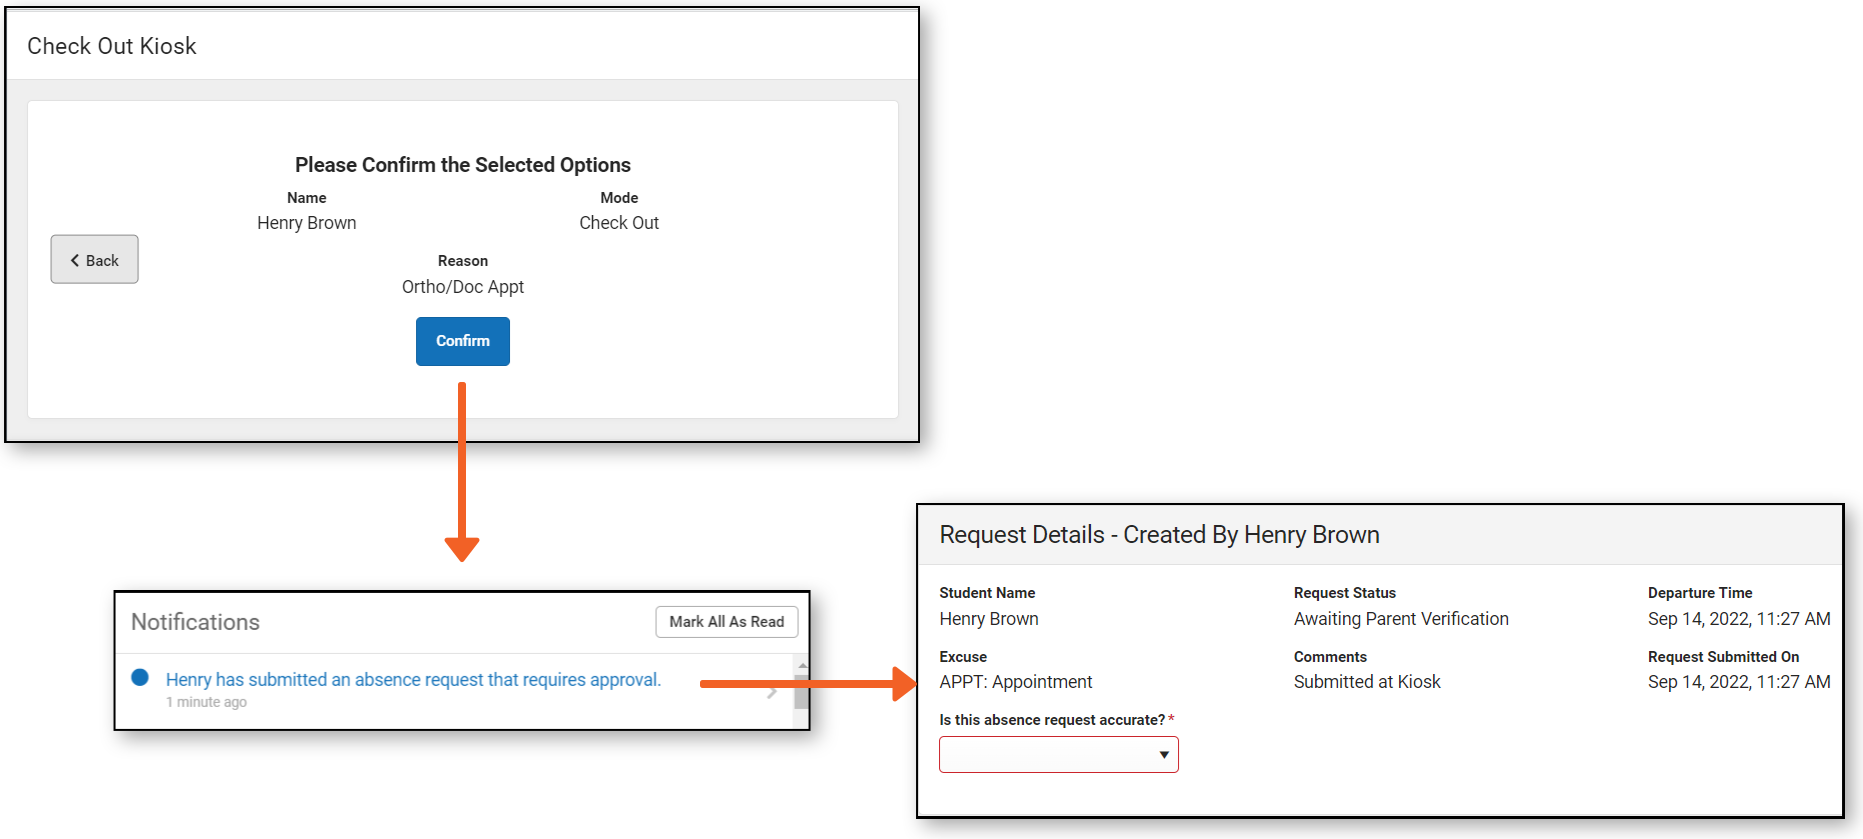 |
 Print Pass Print Pass |
If enabled, students will receive both a printed physical hall pass and a digital hall pass. To set up scanning printers, follow the instructions on Scanning Administration and Tool Rights. |
| Available For | Defines if the button is available for Check In, Check Out, or Either. |
| Sequence | The sequence the buttons will display on screen. |
| Button Label | Text label on buttons for students to select.
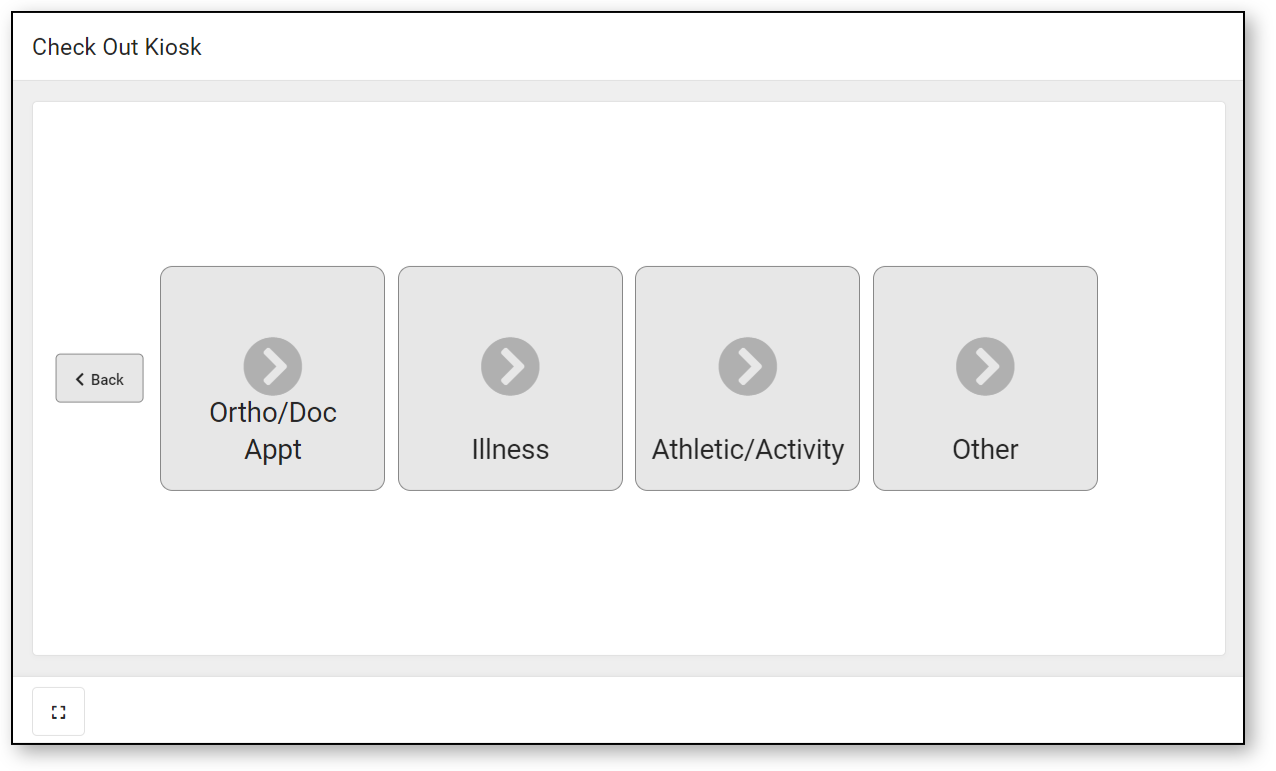 |
| Excuse | Excuse code recorded when the student selects the button.
Excuse options are defined as part of Absence Request processing and may be different from attendance codes. Excuse options are created and modified as the Absence Request option in the District Wide Scanner Settings. |
Additional Settings for Scanners
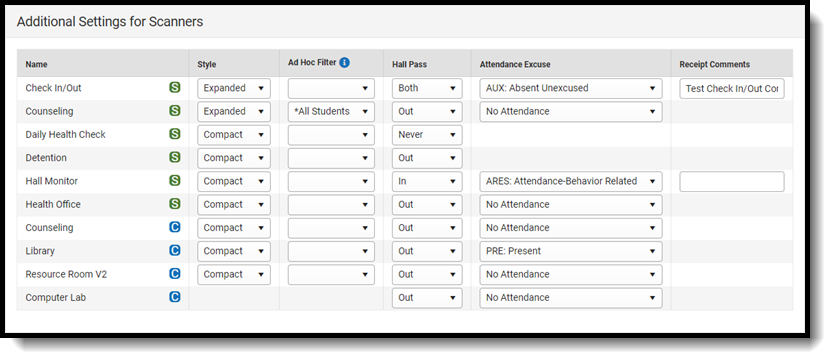
Additional fields can appear when students scan into standard or custom rooms based on an ad-hoc filter that is selected for that room. Fields on the selected ad-hoc filter will be displayed alongside the student's name, grade, and picture. The selected filter is not used to determine if a student can scan into a location.
| Field | Description |
|---|---|
| Type | The type of room, either Standard or Custom, that can have an ad-hoc information added to it. |
| Name | The name of the room where ad-hoc filter will be applied. |
| Style | How the ad-hoc information will be displayed when scanned in. |
| Ad Hoc Filter | The information defined on the ad-hoc filter will display with the student information when they scan in.
Note: If a user does not have rights to the filter configured for a scanner, the field will display, "You do not have rights to the filter."
When scanning in a student, a Rights Error will appear stating "You do not have rights to the filter configured for this tool." |
| Hall Pass | Create a physical and/or digital hall pass when signing in, signing out, for both, or never.
A printer must be set up for physical hall passes. To set up scanning printers, follow the instructions on Scanning Administration and Tool Rights. |
| Attendance Excuse | This is the default excuse code given to students when they scan into the scanner. The list of codes you can select from is determined by the scanner you are working with:
|
| Receipt Comments |
This is the comment that is printed on a physical hall pass for either the Check In/Out Manned Scanner or Hall Monitor Scanner. |
Lunch Config
 Example of Ignore lunch minutes in calculations checkbox - not marked |
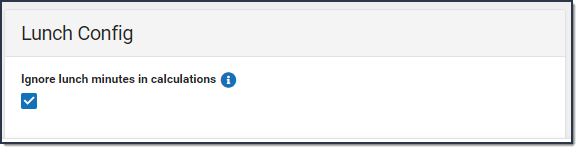 Example of Ignore lunch minutes in calculations checkbox - marked |
| Field | Description |
|---|---|
Ignore lunch minutes in calculations |
When this option is checked, Campus will disregard any minutes allocated to lunch periods in Scheduling & Courses > Calendar Setup > Period Setup. Student check-ins for classes are expected to occur promptly at the start of the period and the Tardy and Absence Thresholds will be calculated based on the Start of the Period.
When left unchecked, Campus will display all configured lunches in the calendar under Scheduling > Lunch or Scheduling and Courses > Build Schedules > Lunch Setup.
Once lunches are created, they also need to navigate to the course/section and select which lunch that section goes to. |
| Lunch at Beginning or End of Period | Allows you to identify whether lunch is at the beginning or the end of the period. This will determine where the Tardy and Absence Thresholds will be. Please see the example below explaining how the setting works.
|
Lunch Config Example

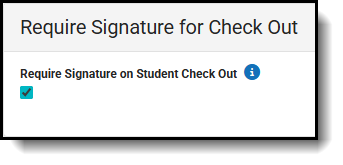
Require Signature for Check Out
The Require Signature for Check Out setting allows districts to require a signature from parents when checking their student out via the attended Check In/Out Scanner.
This setting is only used for the attended Check In/Out Scanner.
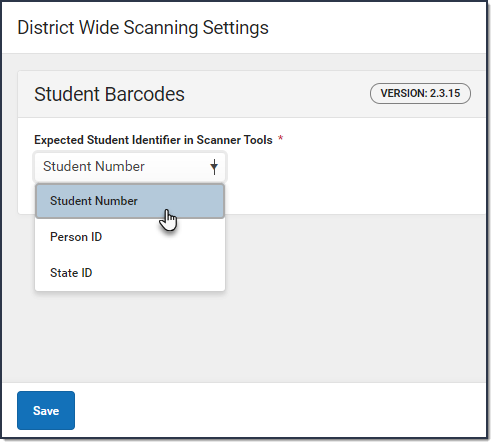
District-Wide Scanner Settings
The District Wide Scanner Settings are available when All Calendars is selected in the toolbar.
Student Barcodes
| Field | Description |
| Expected Student Identifier in Scanner Tools | The District-Wide setting that determines the expected Student Identifier scanners look for when students scan into them. Options include Student Number, Person ID, or State ID. |
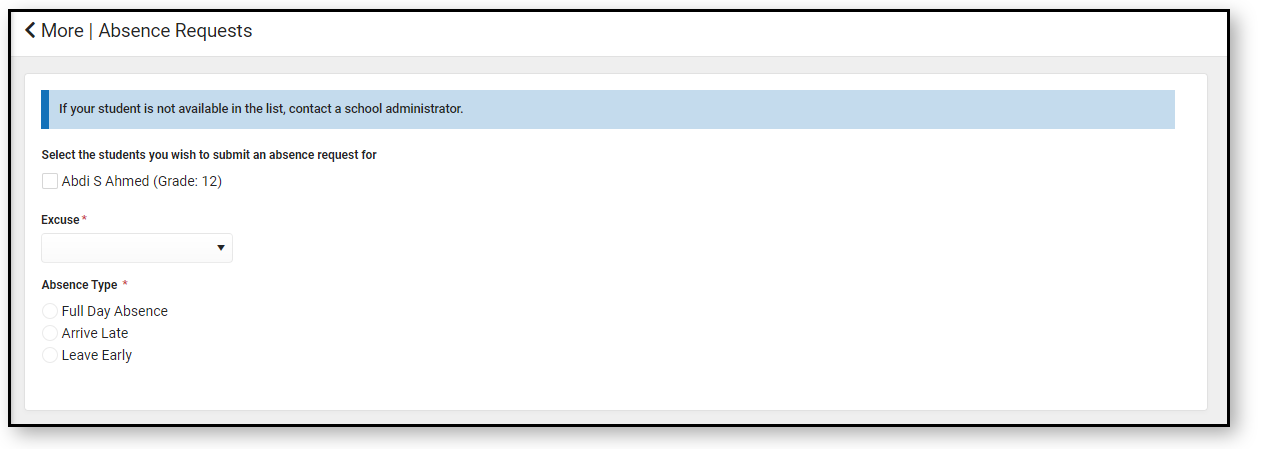
Absence Request: Excuse Code Settings
Districts can add, edit, and modify excuse codes from the Absence Request: Excuse Code Settings. The codes appear under More > Absence Request in the Campus Parent portal.

| Field | Description |
| Show Inactive Excuse Codes | Toggle On to show all excuse codes or toggle Off to only see active excuse codes. |
Excuse Code |
The internal code for the excuse. NOTE: Excuse Codes MUST be unique. |
Excuse Name |
The name of the excuse that parents will see on the portal when filling out their absence request. |
| Sequence | The order excuses will appear in the Excuse field. |
| Document Upload Required | Indicates whether a document upload is required when selecting the excuse.
Documents are limited to 2 MB. See Supported File Types for a list of accepted file types. If this is unchecked, the document upload button appears, but is not required. Parents may only upload one document per request. This means if the absence request has three students, all three students have the same document attached to their absence request, even if it does not pertain to them. |
| Active | If checked, the excuse is available for users to select. If unchecked, it is not available for users to select. |
| Delete | Remove the excuse from the Absence Request: Excuse Code Settings.
Excuse Codes cannot be deleted if they are associated with an Absence Request record or with a Check In/Out Kiosk button. These codes are denoted by a lock icon instead of a trashcan. |
