This article explains the general workflow for setting up and using Data Validation and Certification. Select links within each step for detailed information about the tools described throughout the workflow.
Data Integrity Tools are only available in State Editions of Campus and districts connected to a State Edition of Campus.
This article includes the following topics:
Pre-Data Certification Setup
Prior to using Data Certification, the following must be set up:
- Ensure Email Messenger is Enabled and Configured
- Assign Data Integrity Tool Rights
- Assign Filter Designer Tool Rights
- Ensure Users Have a Valid Email Address
Ensure Email Messenger is Enabled and Configured
Tool Search: Email Settings
Users must ensure Email Messenger is enabled and configured for the district. District users receive email notifications as Data Certification Events and Types are published and certified.

Assign Data Integrity Tool Rights
Location: User Management > User Account Administration > User Account > Individual Tool Rights > Modify Tool Rights
District users must be given tool rights to the appropriate Data Integrity Tools to view and certify events properly.

Assign Filter Designer Tool Rights
Location: User Management > User Account Administration > User Account > Individual Tool Rights > Modify Tool Rights
Users must have tool rights to the Filter Designer and State Owned Filters sub-right to view data certification event data sent by the state in Ad hoc filter form.

Ensure Users Have a Valid Email Address
Tool Search: Demographics
Users must enter a valid email address on the Demographics tab to receive email notifications about data certification event activity.

Data Validation Setup and Workflow
The following steps define the basic workflow for setting up Data Validation tools so that users can begin to validate state and district data.
Steps 1-3 relate to creating and managing your own district-level definitions. If you wish to use only State-defined, pre-populated definitions, please start with Step 4.
- Step 1 - Establish Data Validation Definitions
- Step 2 - Create Data Validation Groups
- Step 3 - Export Data Validation Definition/Group Data
- Step 4 - Run Data Validations at the State
Step 1 - Establish Data Validation Rules
Tool Search: Validation Rules
Data validation rules must be established for district users to validate data. Data validation rules define how data is audited during the validation process.
Users can create their own validation rules and/or use the pre-existing rules provided by Campus. State-linked district users may also receive definitions published (as part of a group) from the state, which can be run but not modified.

Step 2 - Create Data Validation Groups
Tool Search: Validation Groups
Data validation groups must be established once data validation definitions are created and tested. Data validation groups are sets of validation definitions grouped together so users can easily validate data for a specific area or process within Campus. Users can add user-created and Campus-created definitions to definition groups.
For example, a user might create a validation group called "Student Graduation Validations" and include several validation definitions pertaining to graduation information.
State-linked districts may also receive definition groups published by the state. These groups are read-only but can be generated and tagged locally.
Once data validation groups are established, users should generate each group locally and review results via the Definition Group Extract tool.

Step 3 - Export Data Validation Definition and Group Data
Tool Search: Data Validation Report
Once data validation groups have been reviewed, users should locally export the results of data validation groups or definitions via the Data Validation Report.

Step 4 - Run Data Validations Using State Data
Tool Search: Data Validation Report
Once data validation groups are validated locally, users should generate the extract for the group using state data.

Data Certification Setup Workflow
The following steps define the basic workflow for setting up Data Certification tools so that users can begin creating and approving data certification events.
- Step 1 - Assign Members to Each Certification Category
- Step 2 - Certify and Submit Data Certification Events
- Step 3 - Re-certify Data Certification Events
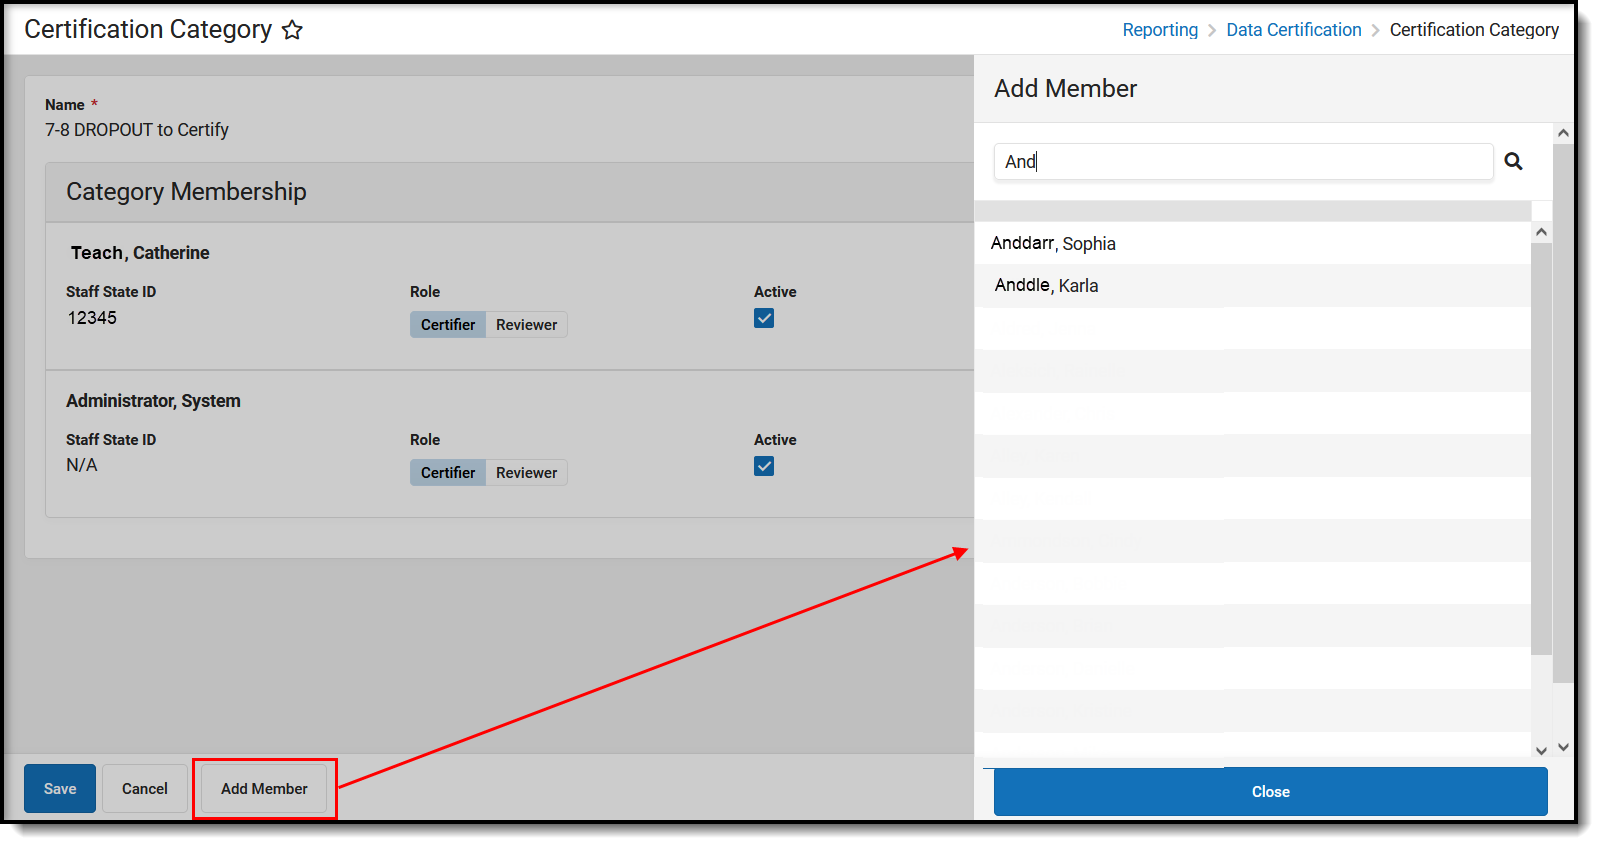
Step 1 - Assign Members to Each Certification Category
Tool Search: Certification Category
Once all precertification setup is complete, districts must assign members to each certification category sent from the state. This ensures district users can view and certify events sent from the state.
Step 2 - Certify and Submit Data Certification Events
Tool Search: Event Certification
As events are sent from the state, a district user with the appropriate tool rights and Type Membership(s) must certify and submit the event via the Event Certification tool.
From here, users can also view group validation data and review snapshot data for the event.
Users cannot select the Certify and Submit button unless the date is within the Certification Opens timeframe.

Step 3 - Re-certify Data Certification Events
Tool Search: Event Certification
Once a district has certified an event, the state reviews the event and determines if the event should be approved. If the state does not approve of the certified data for a district, they can request a re-certification of the event. When this occurs, users with the appropriate Type Memberships receive an email and Process Inbox message indicating the event requires recertification.
If an event is sent back for recertification, any recurring snapshots established by the state will continue to overwrite existing snapshot data until the district certifies the event.

Once the event has been reviewed and all necessary data changes are made at the district level, the district should then certify and submit the event back to the state via the Event Certification tool.

