Login Page Preferences

Tool Search: Login Page Preferences

The Login Page Preferences tool allows users to determine the text and options that display on login pages, including information specific to Campus Parent and Student Portals.

screenshot of the login page preferences tool

Users must have a Student Information System (SIS) Product Security role to access this tool.

Forgot Password & Forgot Username

If a district has enabled Password Reset, the options for Forgot Password and Forgot Username will be displayed below the login button.

See the Managing User Account Passwords page for more information about the Password Reset workflow and related processes.

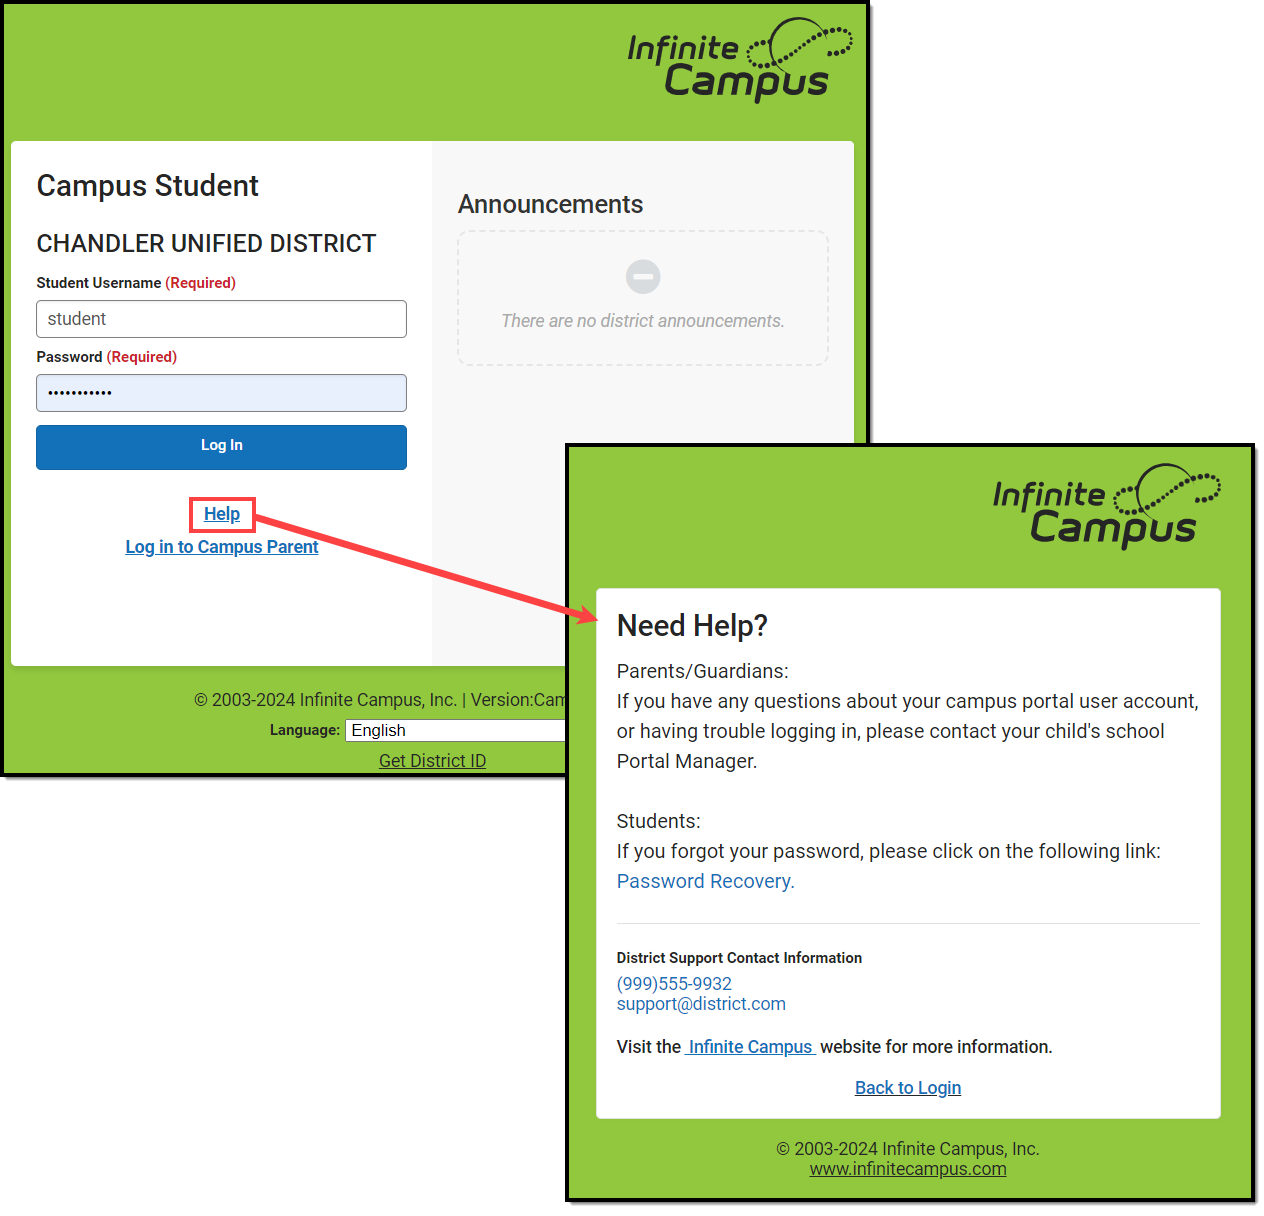
Help (All Login Pages)

Mark the Show link to the Help page checkbox to display options. This content is displayed on all login pages - staff, parents, and students.

screenshot of the login page preferences available

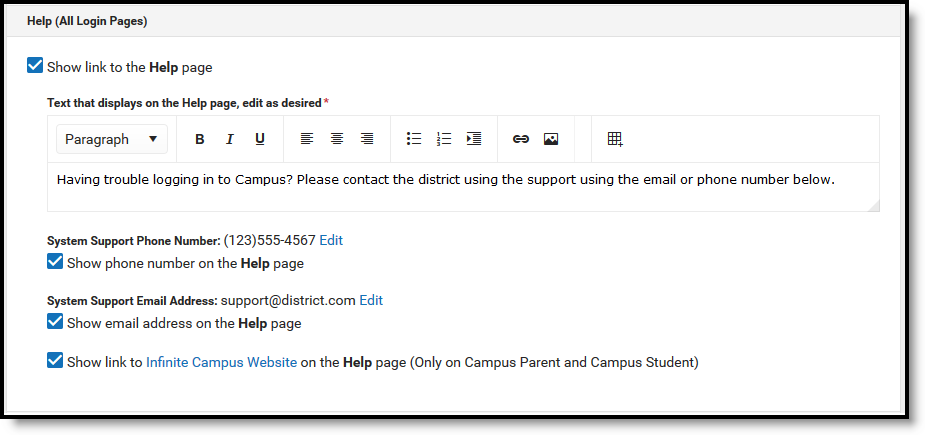
Users access Help content from the link on the login page. Enter text as desired, based on district policy.

The System Support Phone Number and Email Address populate from the Support Contact Information tool.

The link to the Infinite Campus Website provides basic troubleshooting guidance to Campus Student and Campus Parent users.

screenshot of selecting help on the login screen and viewing help information enabled

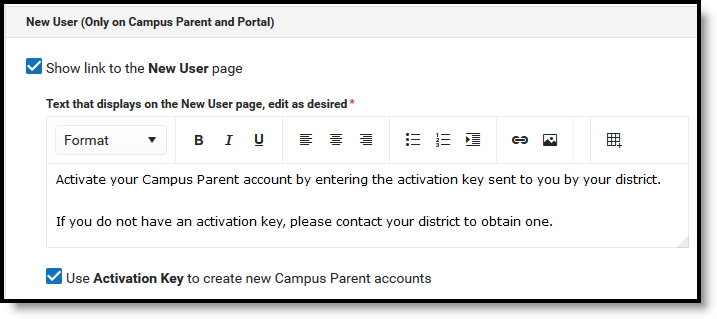
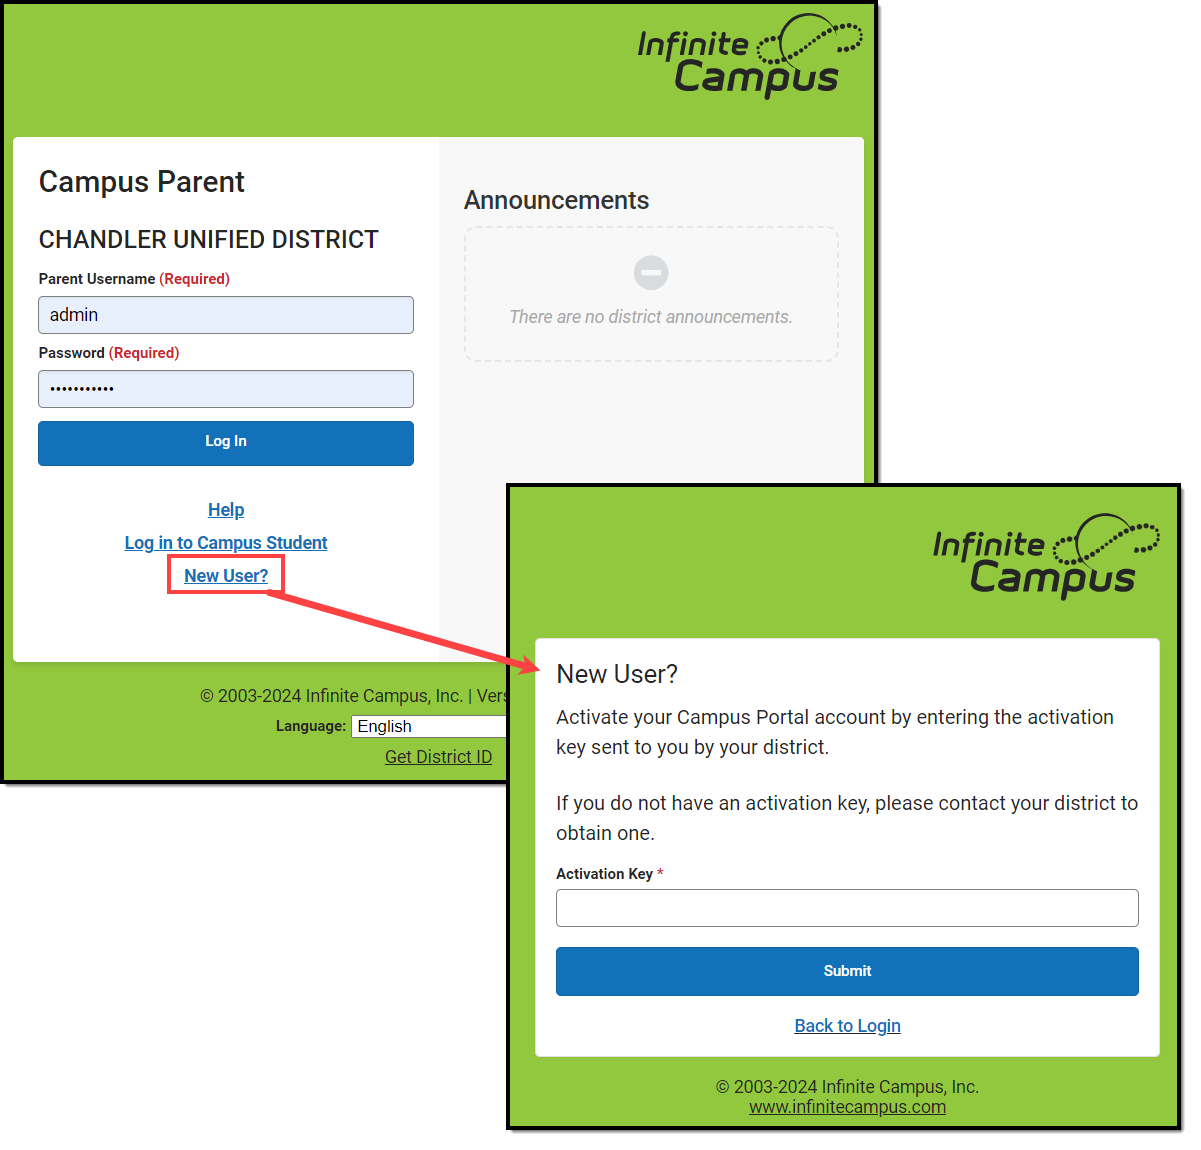
New User (Campus Parent and Portal)

Mark the Show link to the New User page checkbox to allow Campus Parent and Portal to access a New User area. This screen can contain instructions for new users, and allow users to create their own user accounts if the Use Activation Key option is also marked.

To use this option, districts should send activation keys to parents and enable the option to use an Activation Key to create new accounts. Parents can then enter the key given and create their own account by entering a username and password. See the Providing Activation Keys section below for more information.

If not using this option, use the text field to provide instructions to parent users explaining how to contact your district to receive an account, based on your district's policies and practices.

screenshot of the show link to the new user page and activation key options selected

New parent users can click New User from their login screen to review district-provided text or to enter their activation key and activate their account if enabled.

screenshot of clicking new user and being presented with an activation key field

Providing Activation Keys

Districts can allow parents to create their own accounts by providing them with an activation key. This number is the person's GUID (Global Unique Identifier), found on the person's Demographics or Summary tab. The GUID is an alphanumeric identification number assigned to each person within Infinite Campus.

To facilitate the distribution of GUIDs, use the Ad hoc Filter Designer to generate a report of users' first and last names and GUIDs and then distribute that information to parents after they have returned the district's Acceptable Use Policy.

Click here to expand...

Creating an Ad hoc Filter Report for Contact (guardian) GUIDs

Tool Search: Filter Designer

  1. Navigate to the Filter Designer tool. 
  2. Select the Filter Type of Query Wizard and the Data Type of Student.
  3. Click the Create button. 
  4. Enter a name for this report in the Query Name field.
  5. Select the following fields (more options can be chosen, but only these are necessary):
    • Student.firstName (Student > Demographics > firstName)
    • Student.lastName (Student > Demographics > lastName)
    • Student.grade (optional) (Student > Learner > Active Enrollment > Core Elements > Grade
    • Student.stateID (optional) (Student > Demographics > Identity History > State ID History > stateID
    • Contacts.lastName (Student > Census > Household Contact Summary > lastName)
    • Contacts.firstName (Student > Census > Household Contact Summary > firstName)
    • Contacts.contactGUID (Student > Census > Household Contact Summary > contactGUID)
    • Contacts.guardian Student > Census > Household Contact Summary > guardian)
    • contact.addressLine1 (Sort set to 1) (Student > Census > Household Contact Summary > addressLine1)
    • contact.addressLine2 (Sort set to 2) (Student > Census > Household Contact Summary > addressLine2)
    • contact.mailing (Student > Census > Household Contact Summary > Mailing)
  6. Click the Next button. A Filter the Data filter screen displays. Set the following parameters:
    1. Contacts.guardian = Operator is '= TRUE
    2. Contact.mailing = Operator is = 1
  7. Click the Next button. A Format output screen displays. Set the following parameters:
    1. contact.addressLine1
      1. Sort is 1
      2. Direction is Ascend
    2. contact.addressLine2
      1. Sort is 2
      2. Direction is Ascend
  8. Click the Next button.
  9. Click the Save & Test button. This will generate an HTML view of the filter.
  10. If the information shown is correct, click the Save icon. This will save the report for later selection.

As this query is written, data is returned for every person in the district. Users may want to filter down to the parent/guardian level to only list parents.

Generating an Ad hoc Filter Report for GUIDs

Tool Search: Data Export

  1. Navigate to the Data Export tool.
  2. Select the Filter designed in the previous step from the Saved Filters list.
  3. Select the Pick an Export Format option.
  4. Click Export. This report can now be used to distribute GUIDs to potential portal users.