Tool Search: Custom Help Article Setup
The Custom Help Articles tool allows you to create your own help articles, available to all users within your district. This tool provides you with a robust WYSIWYG editor, allowing you to enter text and images for building the article as well as easy to navigate system for aligning the article to a specific tool within Campus.
 Custom Help Articles Tool
See the Custom Data and Links Tool Rights article for information about tool rights for this and related tools.
Create a New Custom Help Article
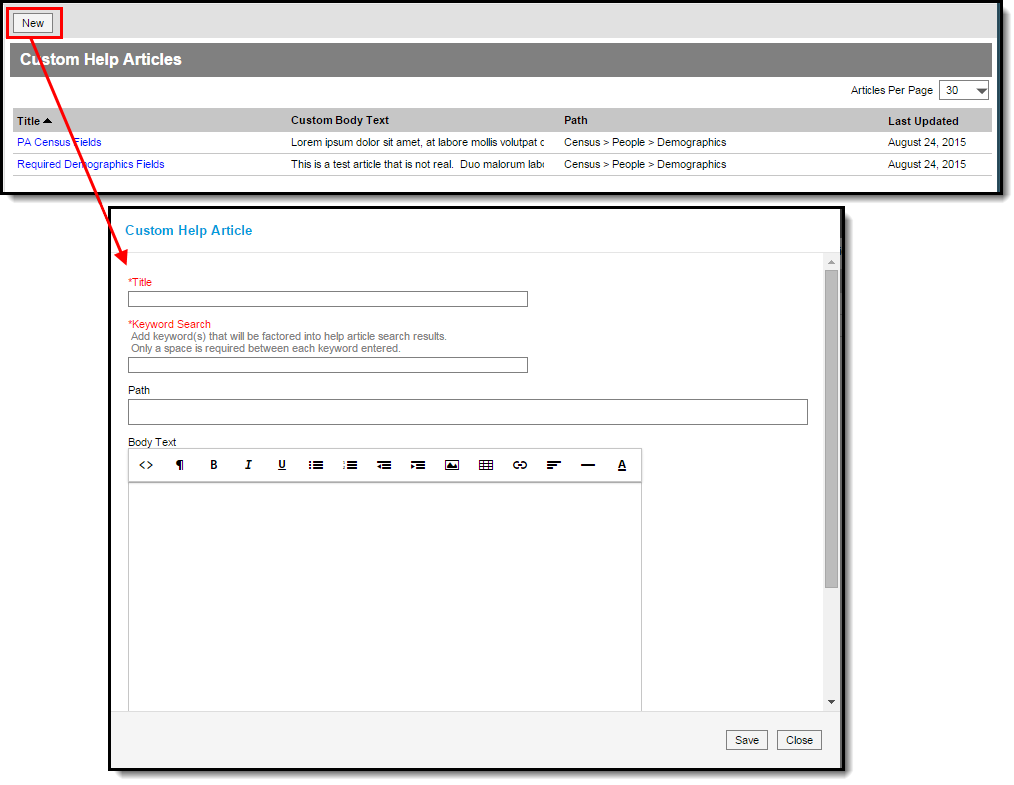
To create a new help article, click the New icon in the upper left-hand corner (Image 3). The Custom Help Article editor will appear.
Image 3: Creating a New Help Article
Enter a Title for the article. This is the title that will appear at the top of the article (Image 4).
Enter keywords within the Keyword Search field. Keywords are factored into help article search results (Image 4).
Only a space is required between each keyword entered.
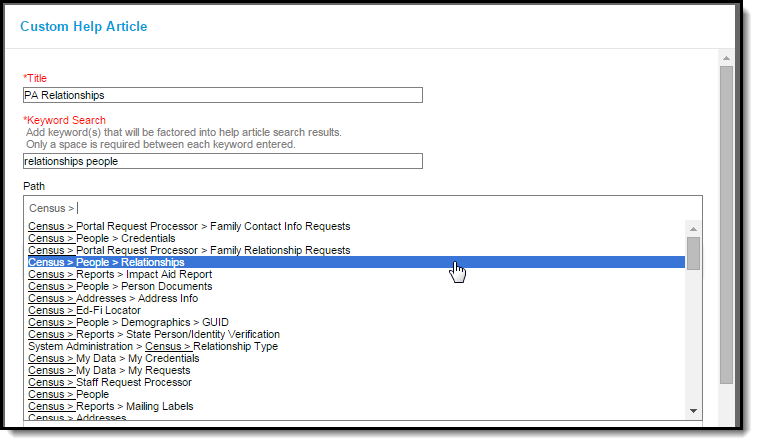
Indicate the tool(s) being described in the help article by entering the tool's Path (Image 4). This field is dynamic and will continue to narrow tool results as you continue to enter more characters.
For example, in the image below (Image 4), the user has entered 'Census >' and is given a list of tools with a path beginning with 'Census >'.
Image 4: Entering the Title, Keyword Search, and Path
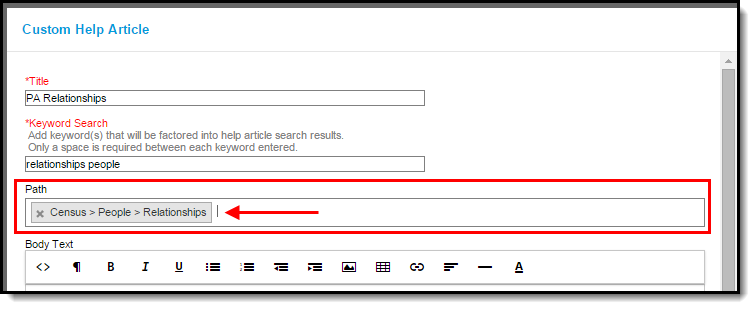
Once a path has been entered/selected, it will appear as a box within the Path field (Image 5). To remove this path, select the X on left-hand side of the box. To add another path, proceed by entering characters within the Path field.
Image 5: Viewing an Entered Path
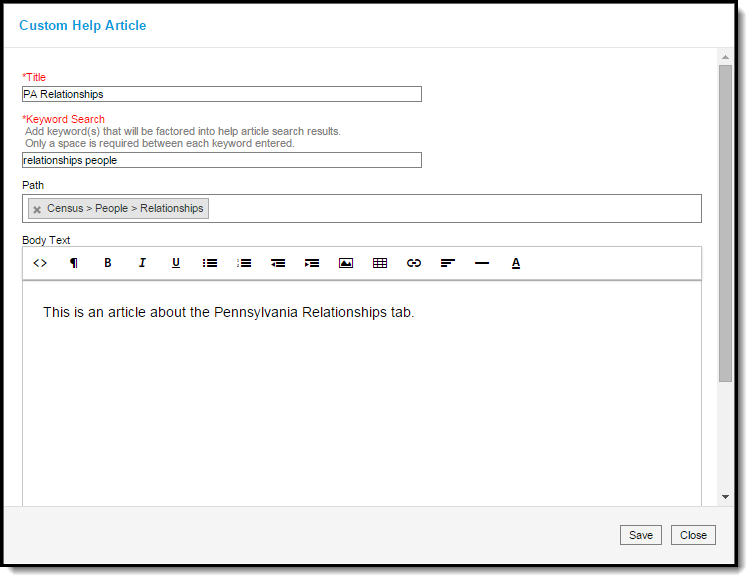
Once the Title, Keyword Search, and Path have been entered, write the Body Text of the article (Image 6).
The Body Text field provides standard WYSIWYG functionality. See the WYSIWYG Editors article for more information.
Image 6: Entering Body Text
Once the Title, Keyword Search, Path, and Body Text has been entered, hit the Save button. The article will appear within the Custom Help Articles list and is now available for all users within your district (Image 7).
Image 7: Saved Help Article
How Users Access Saved Custom Help Articles
The are two ways in which users can access custom help articles within Campus.
The first way is to select the question mark icon in the upper right-hand corner of Campus (Image 8). All custom help articles related to the tool which the user was using at the time they pressed the question mark icon will appear in a separate window under the District Defined Help section (Image 8).
If a custom help article fails to appear within the District Defined Help section, ensure the Path of the help article matches the tool in which the user was using at the time in which they selected the question mark icon.
Users will also be given all documentation, videos, simulations, hands-on virtual labs, and curriculum related to the tool within the Infinite Campus Defined Help section (Image 8).

Image 8: Accessing Help via the Question Mark Icon
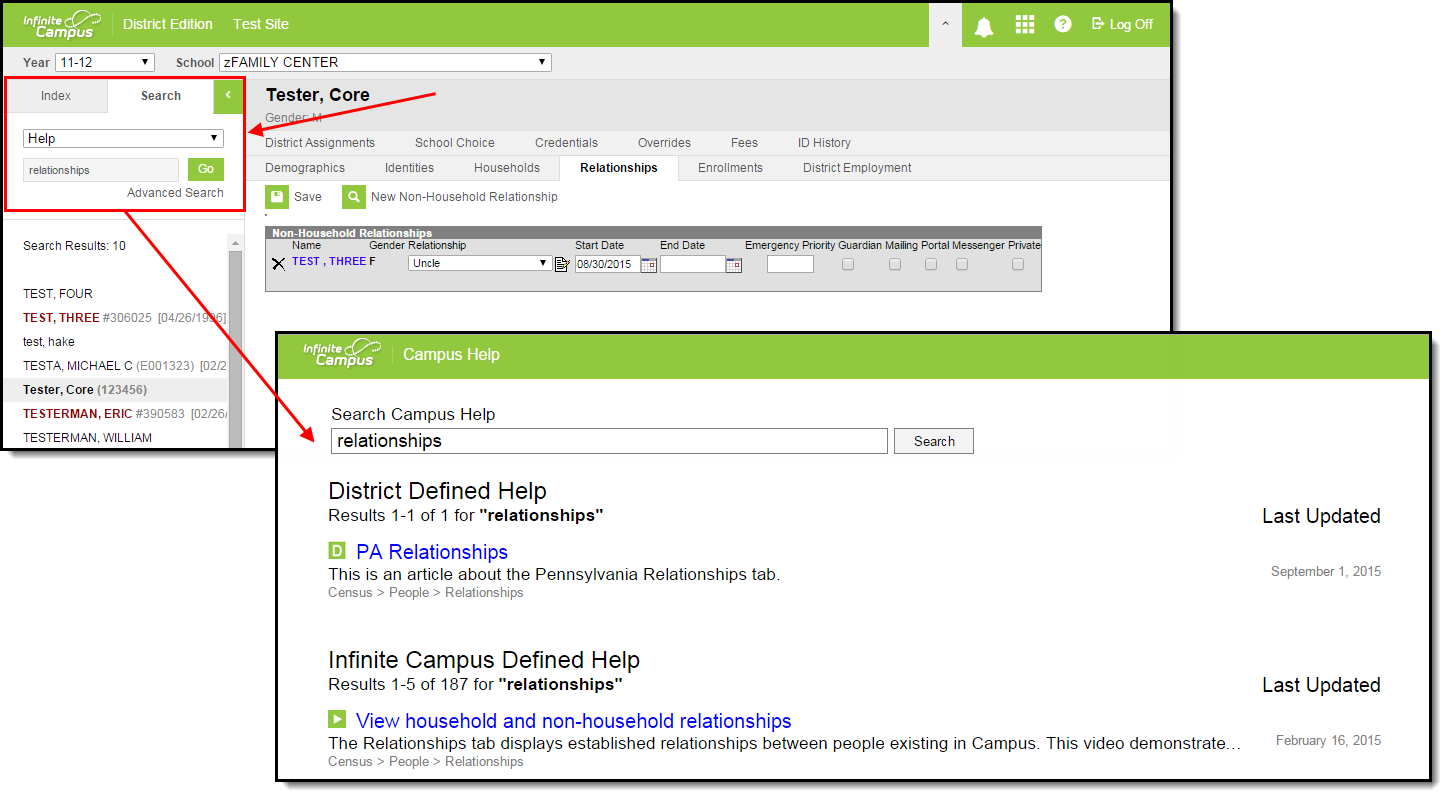
The second way users can access custom help articles is to go to the Search tab, select a search value of Help, enter search criteria, and select the Go button (Image 9).
Search results will appear in a separate window, with custom help articles appearing in the District Defined Help section and any relevant documentation, videos, simulations, and curriculum appearing in the Infinite Campus Defined Help section (Image 9).
Image 9: Searching for Help Articles
Custom help articles created by users at the state level will see their articles within the State Defined Help section of search results (Image 10).
Custom help articles created at the state level are not available for district users as they are not published down from state to district.
Image 10: Example of a State-Level Custom Help Article
Modify a Custom Help Article
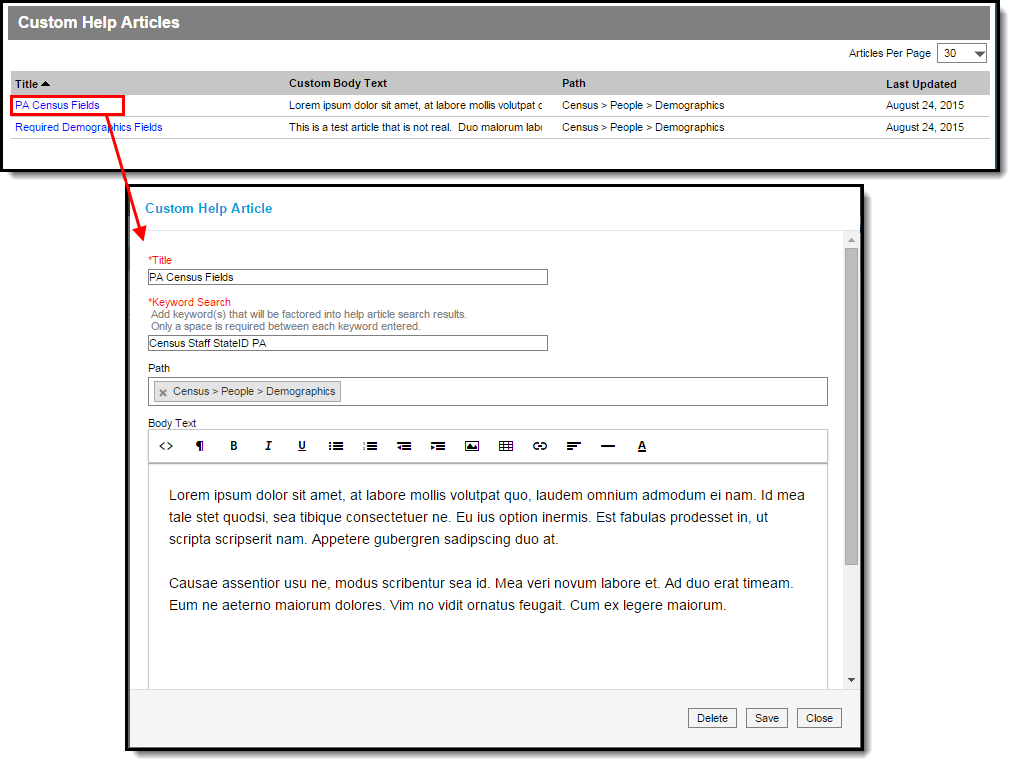
Custom help articles can be modified by selecting the article from the Custom Help Articles list, modifying any values within the Custom Help Article editor, and selecting the Save button (Image 11).
Image 11: Modifying a Custom Help Article
Delete a Custom Help Article
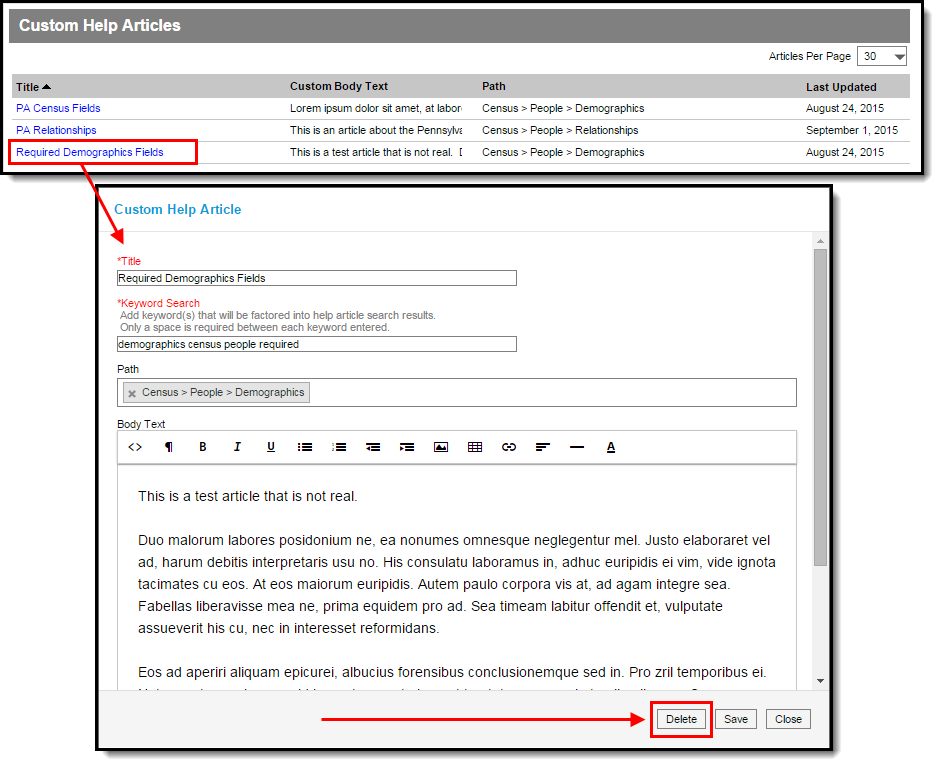
To delete a custom help article, select the article from the Custom Help Article list and click the Delete button (Image 12). The article is no longer saved to the database and can no longer be accessed by users.
Image 12: Deleting a Custom Help Article
