The following information is provided by Shoutpoint. More information regarding Shoutpoint can be found here.
Creating Remote Dial-in Campaign covers notification creation and maintenance by calling the remote dial-in service or logging in online. For information regarding creating and maintaining user accounts and contacts see Remote Dial-In Administration.
Access Remote Dial-in by Phone
- Access the Remote Dial-In by calling 1-888-707-2518. If that number cannot be reached, use the available back-up number of 1-949-522-8522.
- Enter the numeric PIN followed by "#" on the phone pad.
Set up a New Campaign by Phone
# | Step | Description |
|---|---|---|
1 | Press 1 to Set Up a New Campaign. |
|
2 | Record the message. | Record your message and press one of the following keys when finished:
|
3 | Activate the campaign. | You must activate your campaign before it will go out. Select from one of the following options:
|
4 | Press 1 to Monitor the campaign. | The System will report the following:
|
Monitor an Existing Campaign by Phone
# | Step | Description |
|---|---|---|
1 | Press 2 to monitor an existing campaign. | The system presents the following options:
|
2 | Select the desired schedule ID. | The system reports the following:
|
3 | Select the desired option after the system reports. | One of the following options may be selected:
|
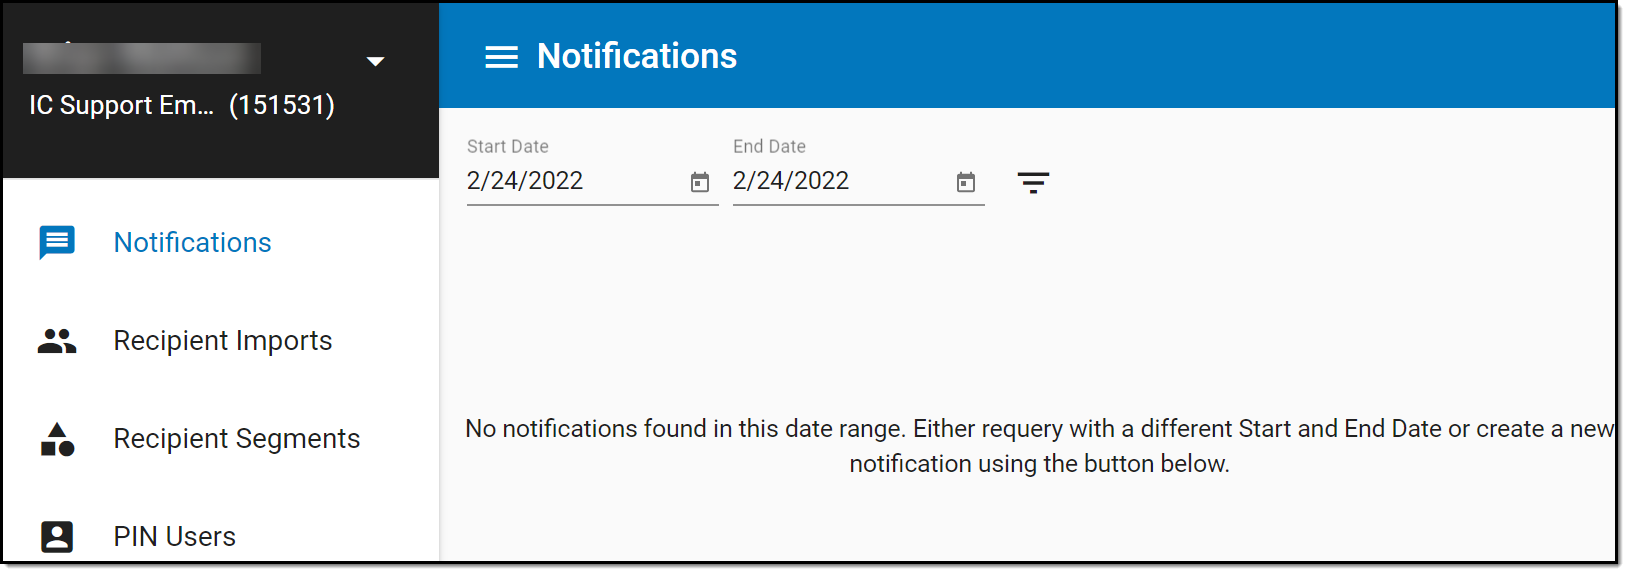
Access Remote Dial-In Online
- Go to: http://console.remotedialin.com.
- Enter your username and password or enter your numeric PIN.
- Click OK. After logging in, users will be directed to the "Notifications" page.
 Remote Dial-in Web Access
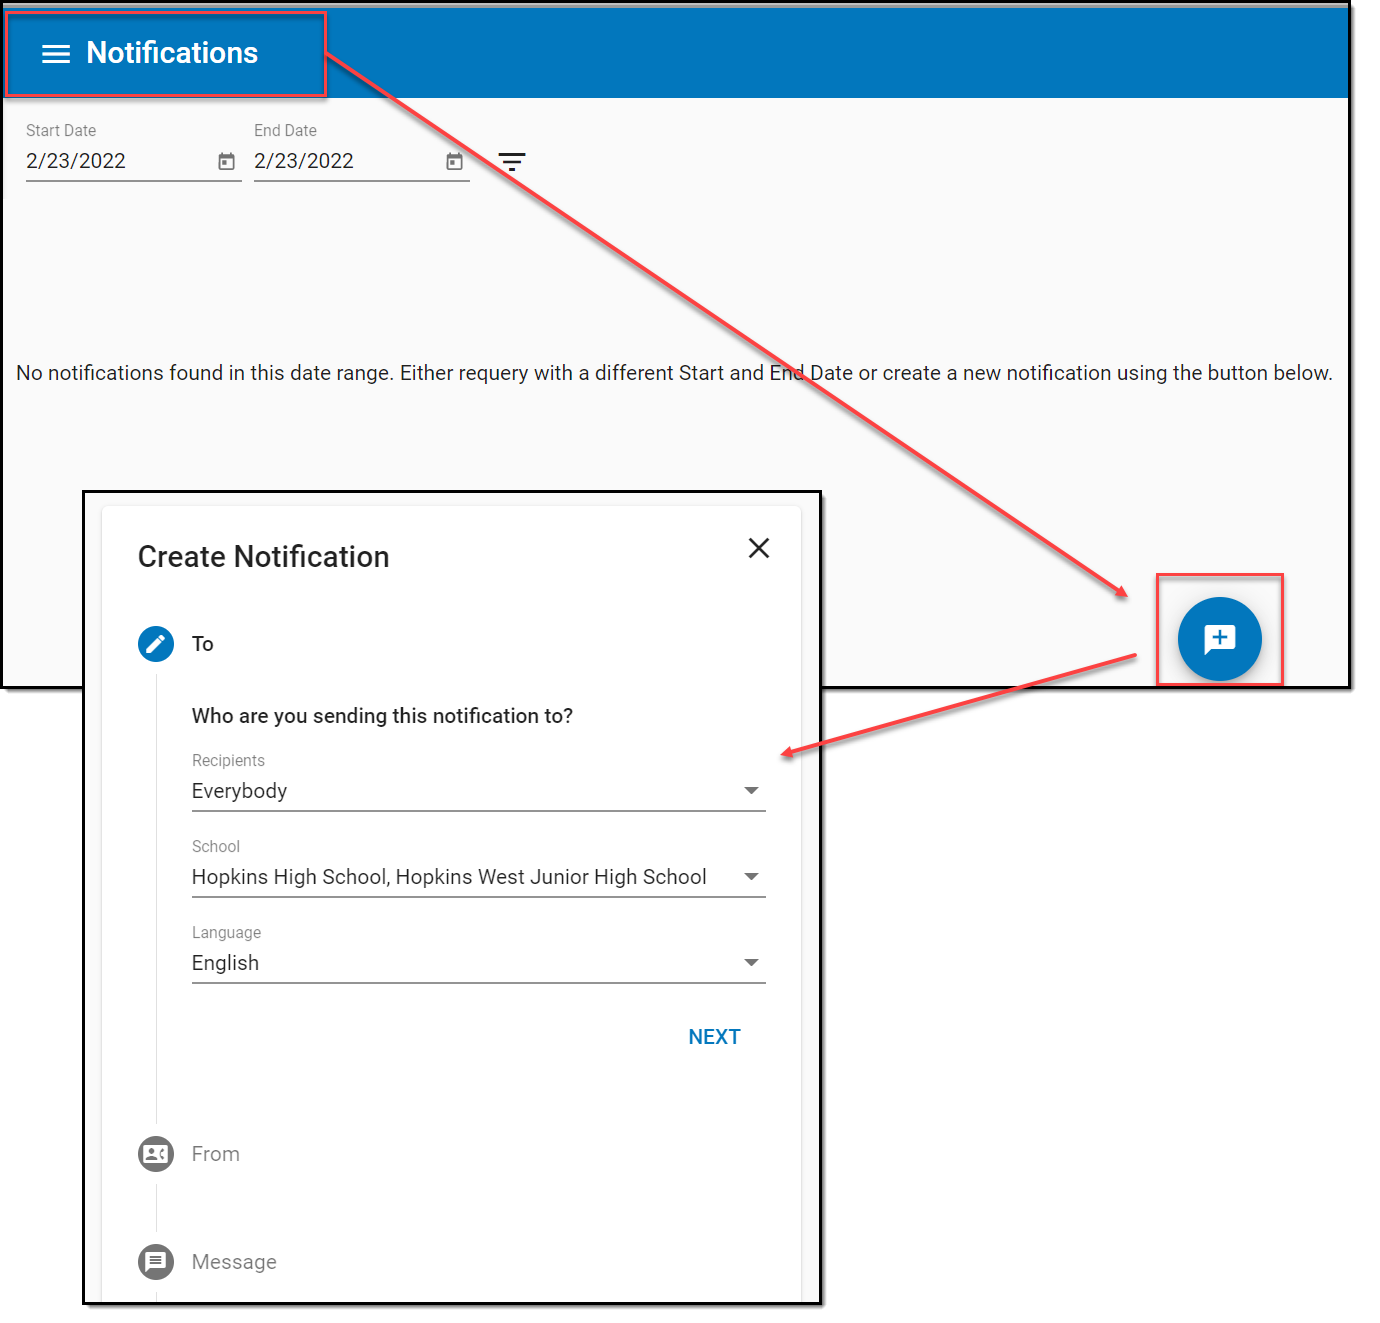
Create a Notification Online
Notifications are voice message campaigns districts create to send urgent or important messages to students, parents, and staff. Notifications can be sent immediately or scheduled for a later date and time.
 Remote Dial-In Create Notification
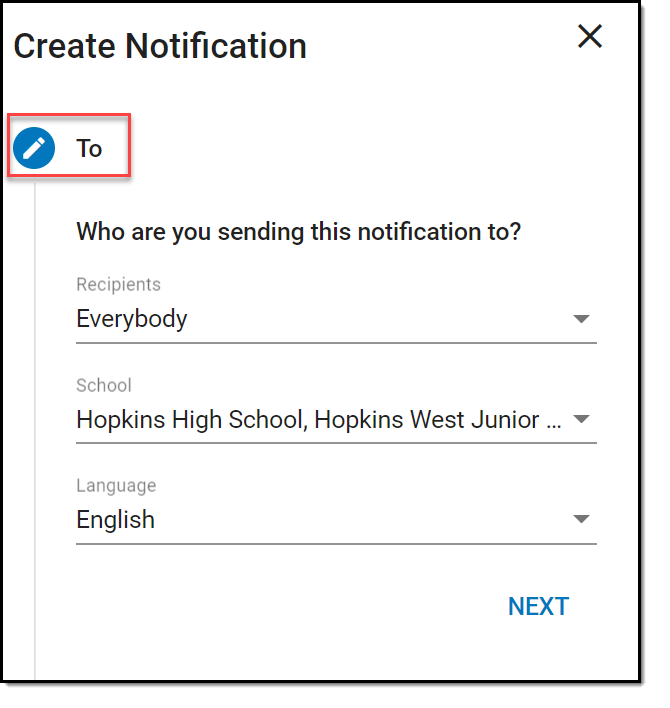
Select Recipients
Contacts are updated nightly from Campus.
Choose which contacts will receive the notification:
- Select the blue plus icon from the lower right-hand corner of the Notifications screen and a "Create Notification" side panel will display.
- Select Recipients the message will be sent to. This filters to Staff, Students and any available Recipient Segments.
- Choose which Schools receive the notification.Select either All Schools, a single school or a group of schools from the list.
- Select the Language preference the message should be sent to. This does not translate the message and only acts as a messaging filter. Only recipients who's language preference (Census > Demographics) matches the selected language will receive the message.
- Click Next.
 Remote Dial-In Recipients (To)
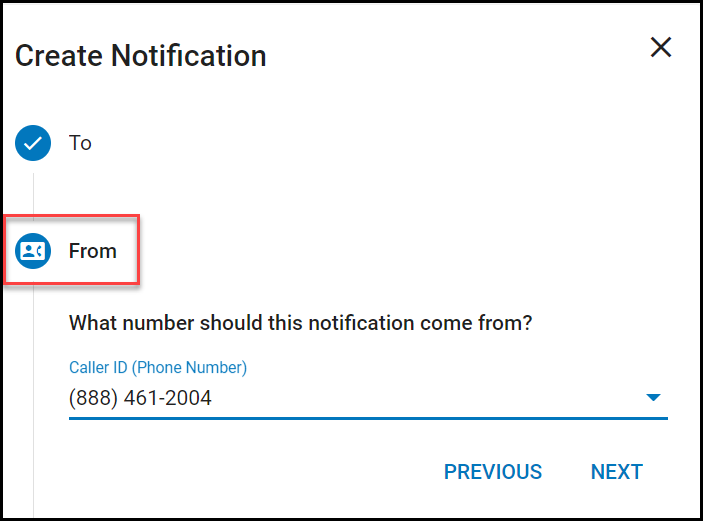
Caller ID Preference (From)
This is the caller ID phone number from which the calls will be delivered.
 Shoutpoint - Notifications Caller ID
- Select a Caller ID. The phone number selected here will display for message recipients.
- To add or remove a phone number to the Caller ID field, go to System Administration > Messenger > Messenger Preferences > CallerID Preferences.
- Click Next.
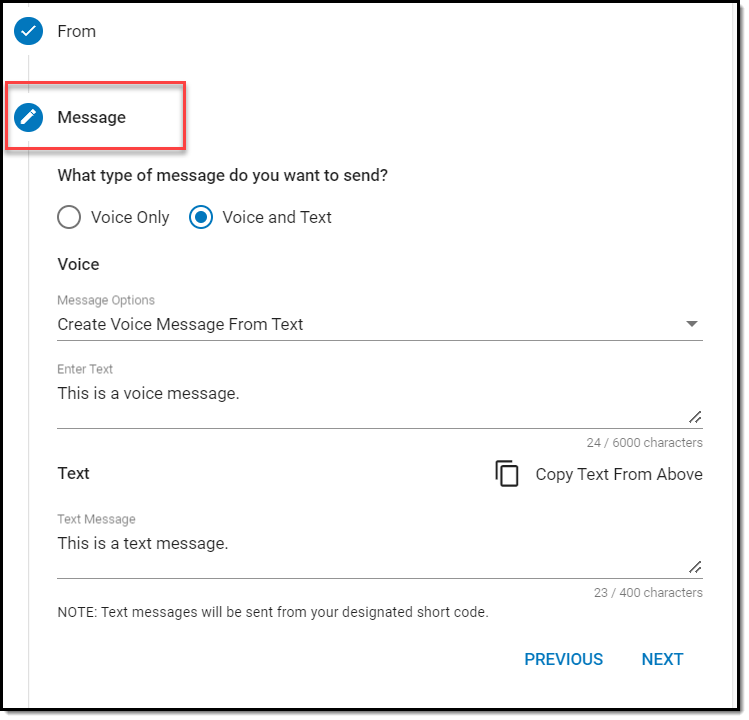
Compose a Message
When a voice message is created from entered text, the message will be processed by a text-to-speech engine. Shoutpoint recommends only entering English language messages with this option.
 Shoutpoint - Notifications Message
- Select Voice Only.
- Select from the following Message Options:
- Upload Voice Message File.
- This option allows users to select an audio file from their local system and import it. Audio files may be in mp3, m4a, wav, or aac file format (though some operating system/browser combinations may only support mp3), and may be up to 10MB in size.
- Create a voice message from the text entered in the Enter Text field. Text entered here provides a transcript for the digital voice reader to read from.
Note: The Voice and Text Option is not currently supported at this time. If texts are needing to be sent, please use Message Builder or Messenger 2.0 within Infinite Campus.
- Select Next.
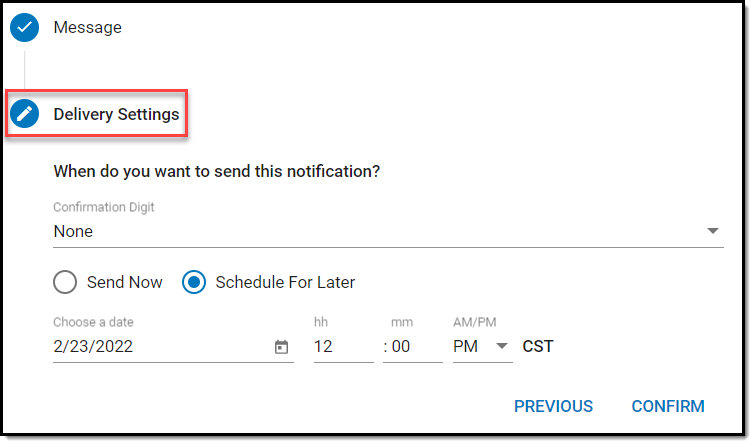
Delivery Settings
Delivery Settings determines when the message is sent. Messages can be sent immediately (Send Now), or scheduled for a later date and time. Select Confirm when all desired selections are made and a confirmation window with a summary of the notification settings will display. Click Send if all settings are correct and you are ready to send the message.
 Shoutpoint - Notification Delivery Settings
 Stopping or Resuming a Notification
In the event a message has been sent and needs to be stopped, users may expand the detail panel of the message and select the "Stop Notification" button. After the user clicks "Confirm," the Stop Notification button will toggle to a "Resume Notification" button. Select Resume Notitication when you are ready to send the message.
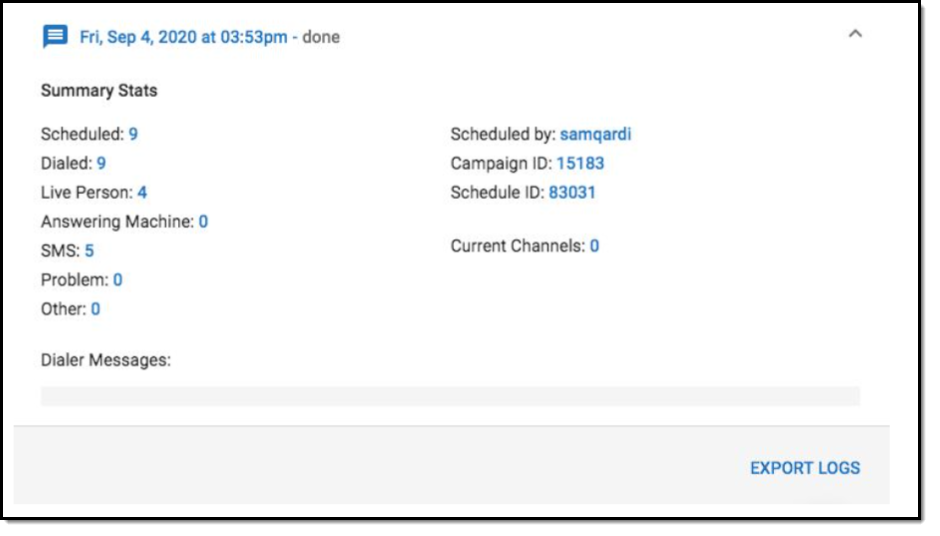
Notification Stats and Call Logs
 Remote Dial-In Su
- The “Problem” stat includes calls that receive a status of “operator” (i.e. a number that is not currently in service) as well as other statuses indicating that there was a problem placing the call or connecting to the number.
- The “Other” stat includes calls that receive a status of “busy” or “no answer.”
