Tool Search: Course Catalogs
A Course Catalog is a high-level organization of all course masters in a specific school. A high school might have a different course master for each grade level. Those course masters make up the catalog. Fields marked with a checkbox on this editor cannot be changed on the course and MUST be managed through the Course Master.
Review the Course Masters Overview article for information on Course Masters best practices and a Course Master Workflow.
 Course Catalogs
Administrators can lock certain settings when creating a course catalog. This reduces differences across the district and provides a more uniform approach to curriculum.
See the Course Catalog Tool Rights article for information on rights needed to use this tool.
Create a New Course Catalog
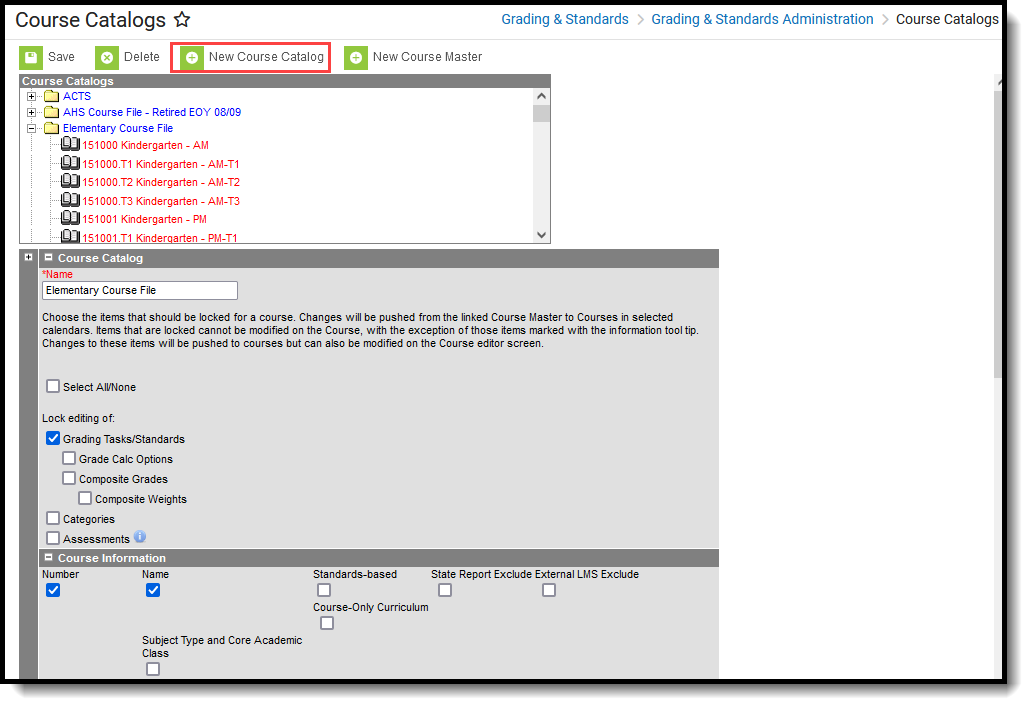
- Select the New icon.
- Enter the Name of the Course Catalog. Note that Course Catalogs must have unique names.
- Mark the Select All/None checkbox to mark ALL checkboxes on the Course Information, NCES Data and Description editors as locked. Or, leave unmarked to choose which fields are locked.
- Click the Save icon. The new catalog appears in the Course Catalog tree.
 New Course Catalog
Lock Fields on a Course Catalog
When an item is marked to be locked, changes made to the Course Master are pushed to the courses in the selected calendars. The locked items cannot be modified on the Course except for the following. Behavior for locking these fields is noted below:
- Assessments - when locked, information copies forward and is pushed, but changes can be made to assessments at the course level.
- Terms - when locked, information from the Course Master is pushed to courses, but changes can be made at the course level.
- Schedules - when locked, information from the Course Master is pushed to courses, but changes can be made at the course level.
- Period - when locked, information from the Course Master is pushed to courses, but changes can be made at the course level.
Lock Fields
- Select which catalog to set lock properties.
- Mark the Select All/None checkbox to lock ALL fields. You can also mark each field individually (see step 5).
- If editing of grading tasks and grading standards needs to be limited, mark the (Lock editing of) Grading Tasks/Standards checkbox.
- If editing of categories needs to be limited, mark the (Lock editing of) Categories checkbox.
- If editing assessments needs to be limited, mark the (Lock editing of) Assessments checkbox.
- If editing grade calculation options needs to be limited, mark the (Lock editing of) Grade Calc Options checkbox.
- Composite Grades can be locked separately from the rest of Grade Calc Options.
- If not all of the listed fields need to be locked, mark the fields that need to be locked through each available editor.
- Click the Save icon when finished. The changes are saved.
Locked data displays in gray text on the Course editor, and changes can only be made through the Course Master. There is also a note on the Course editor that indicates it is linked to a Course Master.
In this example, the Number, Name, State Code, and Subject Type/Core Academic Class fields are marked as locked on the Course Catalog Editor.
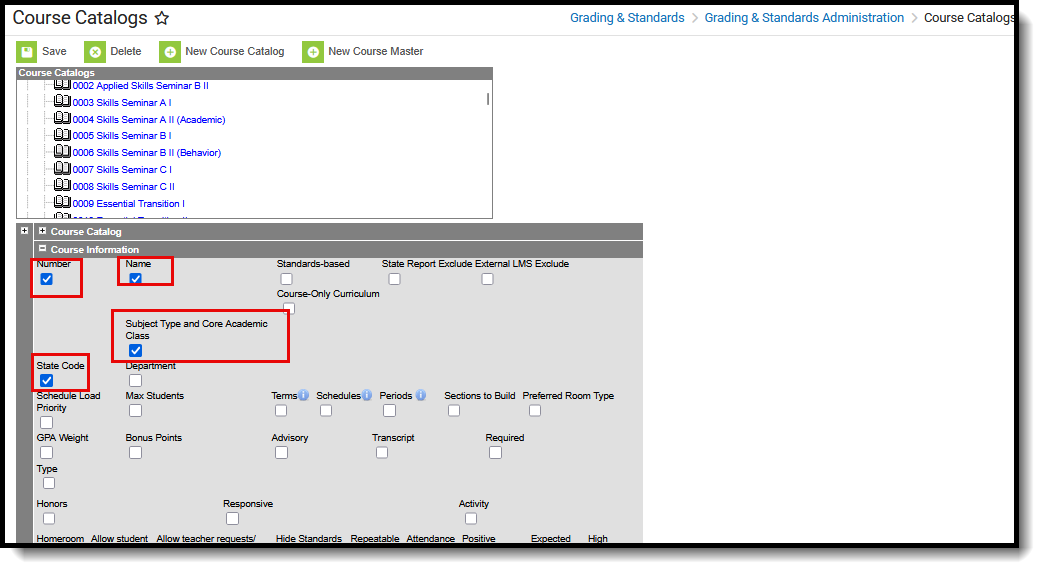 Course Catalog - Fields Locked for Editing
Changes can be made to those fields on the Course Master Detail (lef image below), but once they are pushed to courses, those fields CANNOT be modified on the Course Information editor (right image below).
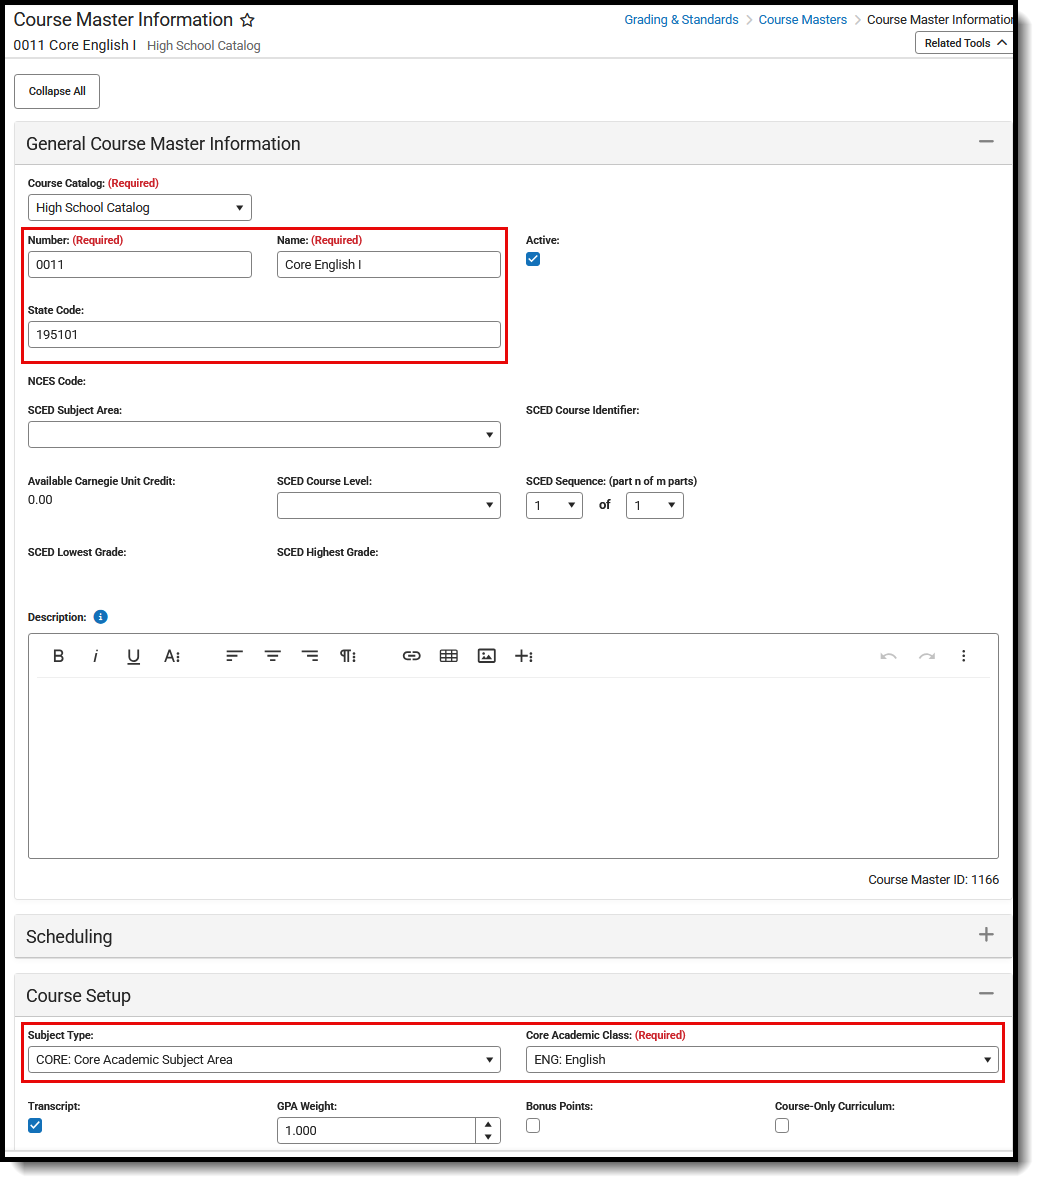 Course Master - Fields Locked on Catalog can be Modified |
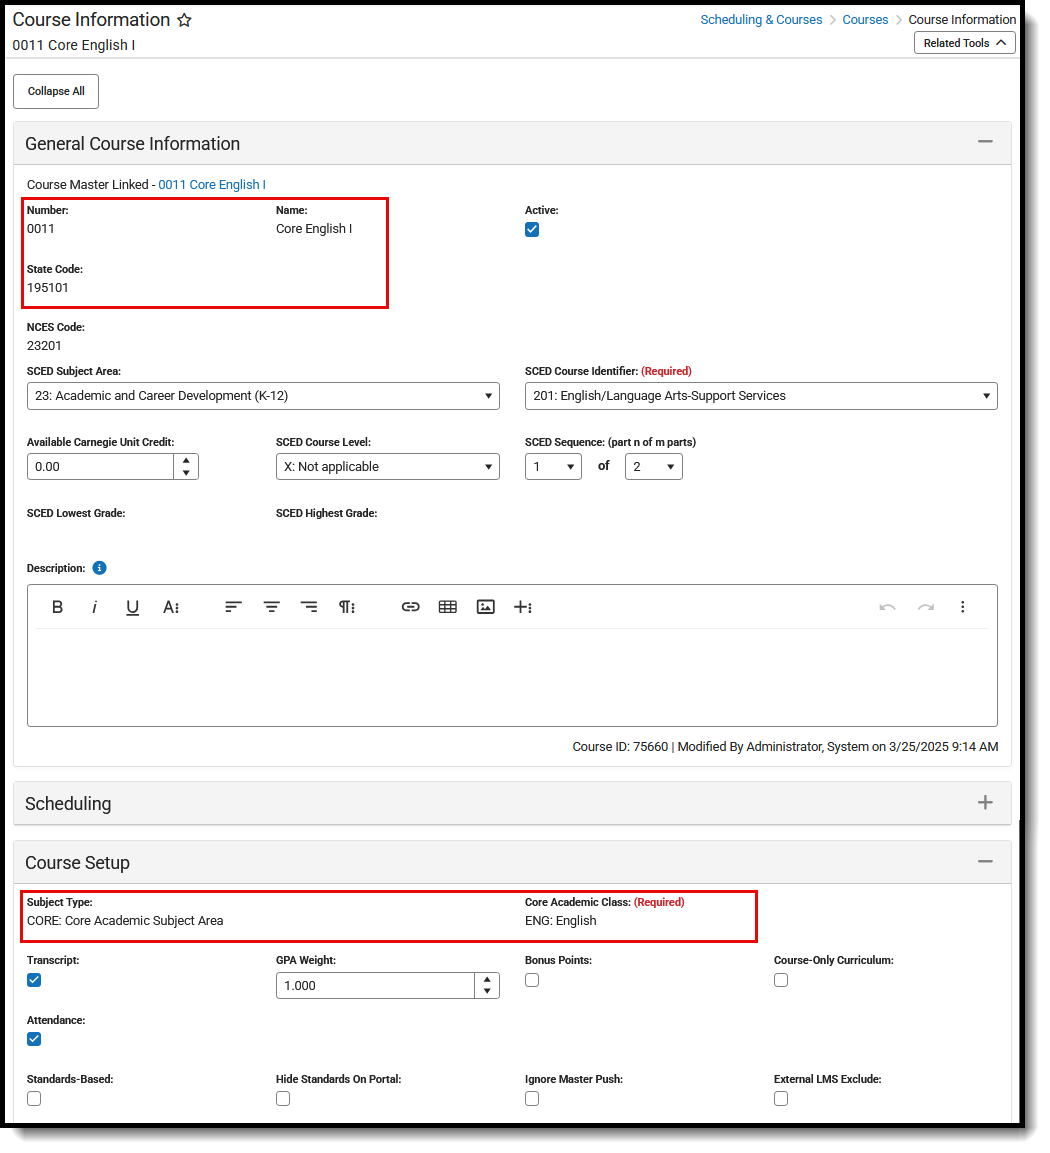 Course Information - Fields Locked for Editing Cannot be Modified |
Locked Fields on Course Information and Section Information
Some Section Information fields that share a name with Course Information fields - same options, same functionality, etc. The Section fields act as an OVERRIDE to the values selected at the Course level.
When pushing data from the Course Master to Course, and from Course to Section, the values populated at the Section level are NOT updated to match the data at the Course level, nor are they locked from editing at the Section level.
In the following example, the Instruction Method field on the Course Master is set to AN: Applied Instruction. That Course Master was pushed to the Course, and the same value is assigned and cannot be modified on the Course Information editor.
 Course Master, Course Information - Push Data Displays Same Value
On the Section Information, a different value for this field is needed for just one section of the course, while the other sections don't. For that section, the field is populated at the Section level.
 Section Information Override Value Selection
When future updates are made to the Course Master and pushed to the Course and then to the Section, the values selected in the Override fields are NOT UPDATED.
Course information is the core reporting information unless the Section is populated. This means:
- Values populated in the Section Information fields take precedence over the values populated in the Course Information fields.
- Section Information fields appear blank unless they are populated manually.
- Section Information fields should only be populated when the values need to differ from the Course Information fields.
Create a New Course Master from the Course Catalog
Course Masters can be created from the Course Catalog view. However, adding Grading Tasks, Standards, and Assessments must be done in the Course Masters toolset.
- Select the New icon.
- Select the Course Catalog to which this new course master belongs.
- Enter the Number of the Course Master.
- Enter values for the remaining fields on the editor.
- Click the Save icon when finished.
Information can be saved at any time. Users can enter values for one editor at a time and save after each one or enter all values at once and save at the very end.
See the Course Masters article for detailed information on adding data to course masters.
Add a Course Catalog to a School
Tool Search: School Information
This is Step 2 in the Course Master Workflow.
After creating the Course Catalog, the School editor must be updated to recognize that the school uses one.
- Navigate to School Information and select the applicable school.
- Select the Course Catalog from the dropdown list.
- Click the Save School icon.
 School Detail - Course Catalog Selection
