Tool Search: Custom Module Setup
The Custom Module Setup tool was previously named Custom Module. Any Custom Modules created prior to the functionality allowing for a Contact Log and/or Custom Forms can be modified by navigating to the Custom Module Setup tool and selecting from the checkboxes.
The Custom Module Setup tool is used to create and manage organizational modules that store Custom Forms and/or Contact Logs.
Custom Forms can currently be created for the following modules:
- Attendance
- Counseling
- Health
- PLP
- RTI
- Special Ed
When creating a new area to house custom forms using the Custom Module Setup tool, a form needs to be created using the Custom Form Setup tool. The custom area that was created appears in the Module dropdown list for selection.
Custom Forms are uploaded using the Custom Form Setup tool and assigned to students using the Forms tool.
Custom Contact Logs can be created and are available in the Custom category of Student Information by default. When creating a custom contact log, the location can be edited using the dropdown lists for menu and category items. They can also be moved to a different location in the index after they are created using the Custom Tool Placement Editor or merged with other Custom Modules that also only contain Contact Logs.
Custom Form contact log records entered on the Forms tool are only tied to the form itself and do NOT display on the Custom Module Contact Log.
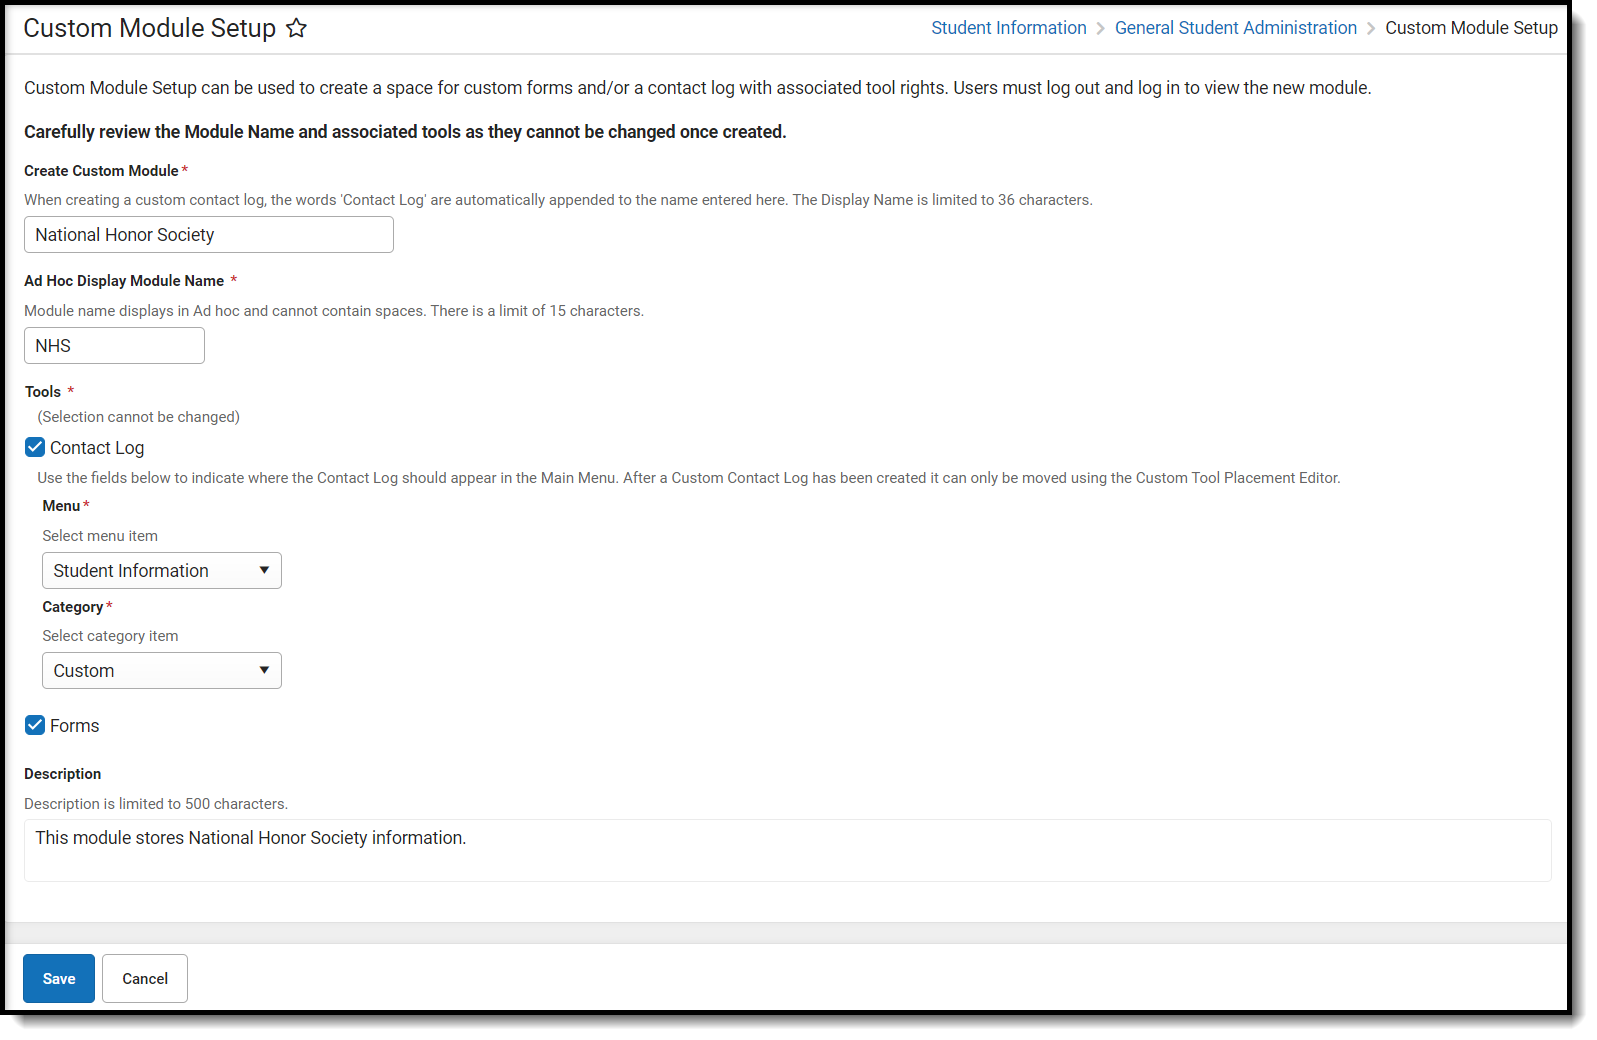
Custom Module Setup Detail
Click New or click on an existing module to view the Custom Module Detail.
 Custom Module Setup Detail
See the Custom Module Setup Tool Rights article for information about rights needed to use this tool.
| Field Name | Description |
|---|---|
| Display Name | The name of the module that displays in Module dropdown for Custom Forms and in the list of modules in the Forms tools; and/or in the Custom Category of Student Information or a specified location in the index for Custom Contact Logs. The Display Name CANNOT be modified after saving. For Contact Logs, the words 'Contact Log' are automatically appended to the name entered here. There is a 36 character limit. |
| Ad Hoc Display Module Name | The unique database name of the module. This name CANNOT be modified after saving. There is a 15 character limit. |
| Description |
Any information about the module. The Description CAN be modified after saving. There is a character limit of 500. The Description for historically created Custom Modules that do not meet the naming convention cannot be modified. |
Create New Custom Module
- Enter a Display Name.
- Enter an Ad Hoc DisplayModule Name.
- Select the Tools this Custom Module should be created for.
- If Contact Log is selected indicate where it should appear in the Main Menu by using the Menu and Category dropdown lists.
- If Forms is selected the display name will be an option in the Module dropdown list when creating a new custom form in Custom Form Setup.
- Optional: Enter a Description.
Click Save when finished or Cancel to go back. Users should log out of Campus and log back in to assign tool rights and view the Custom Module in the Module dropdown of the Custom Forms tool or in the selected area for Contact Logs.
Custom Module Custom Forms cannot be deleted. If the Custom Forms module is no longer used, remove all user tool rights for the module.
Merge or Delete Custom Module Contact Logs
After a Custom Module is created, two additional buttons display: Merge and Delete. These buttons can only be used in conjunction with Custom Modules that have Contact Log selected as a tool. Users cannot Merge or Delete any Custom Modules that include Custom Forms.
 Custom Module Setup Merge and Delete ButtonsMerge Custom Module Contact Logs

- Click Merge. A side panel appears showing the number of contact log records found from this custom module contact log.
- Select the Custom Module Pushing Data to from the dropdown list. Only Custom Modules that do not have Forms associated are available for selection. If there are forms associated, an error message appears. Once selected, the number of contact log records found from the contact log to be pushed to updates.
- Click Merge.
Delete Custom Module Contact Logs
- Click Delete. A pop-up appears confirming this record will be deleted. Delete is only available for custom modules that do not have Forms associated. If there are forms associated, an error message appears.
- Click Delete to confirm or Keep to cancel.
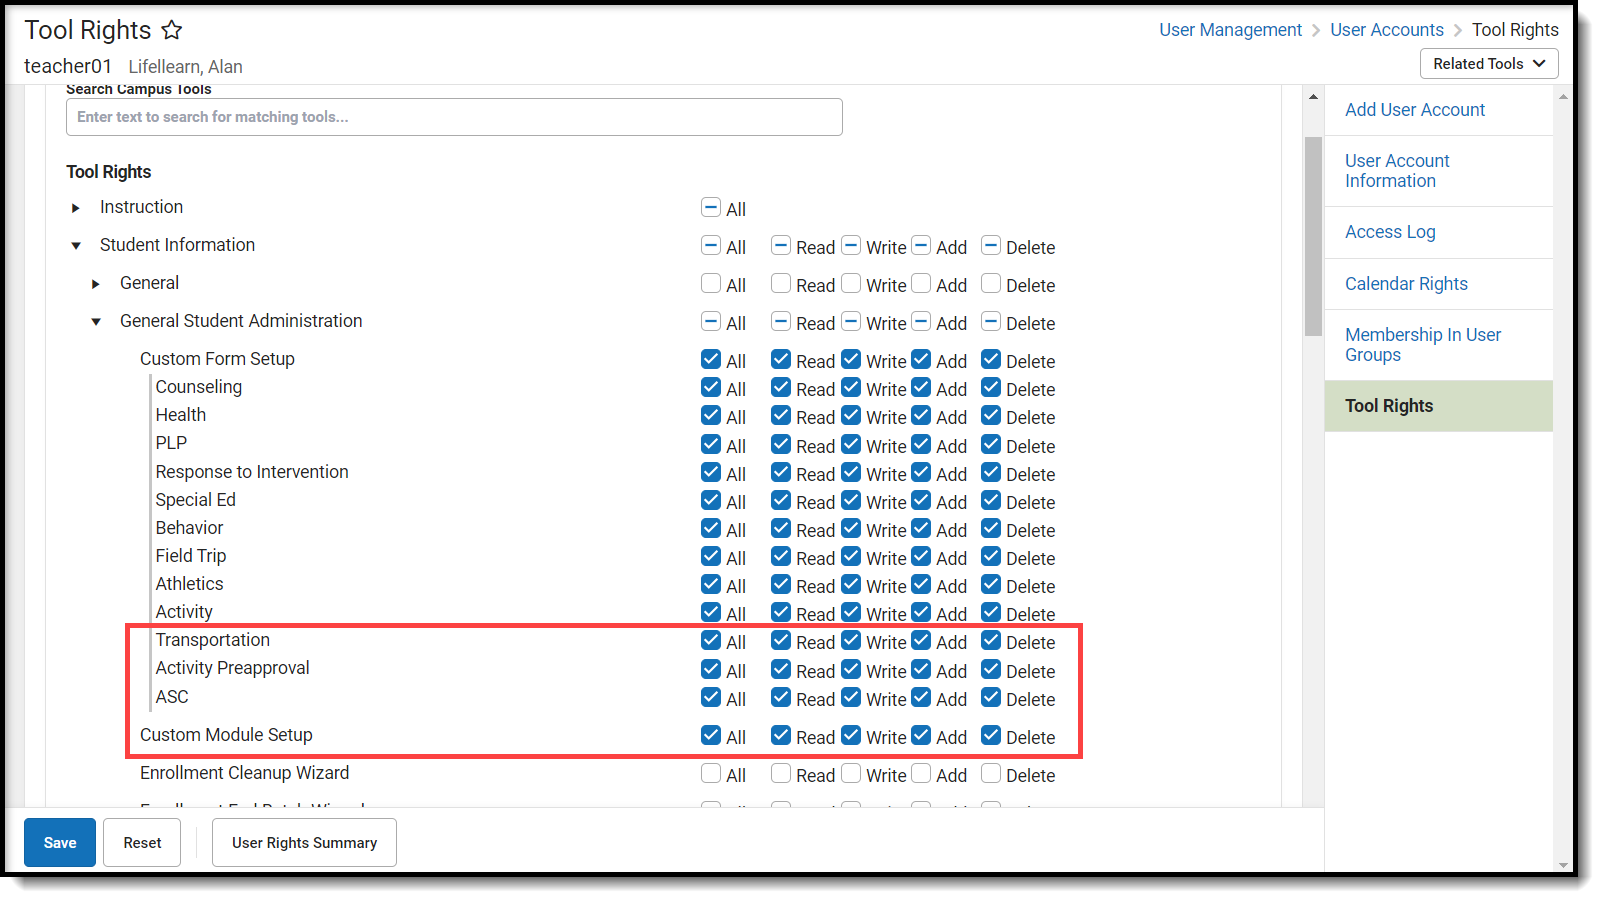
Assign Custom Module Tool Rights
Custom Forms and Custom Module Tool Rights
Each Custom Module Custom Form creates separate tool rights in the Custom Forms and Forms tool rights folders. Users must assign individual module tool rights in order for forms to be uploaded in those modules. See the Tool Rights (Custom Forms) documentation for additional information. Also located directly below any Custom Forms are the tool rights for the Custom Module Setup tool.
 Custom Module Custom Forms Tool Rights
Users must also assign individual module tool rights in order for forms to be attached to a person. See the Tool Rights (Forms) documentation for additional information.
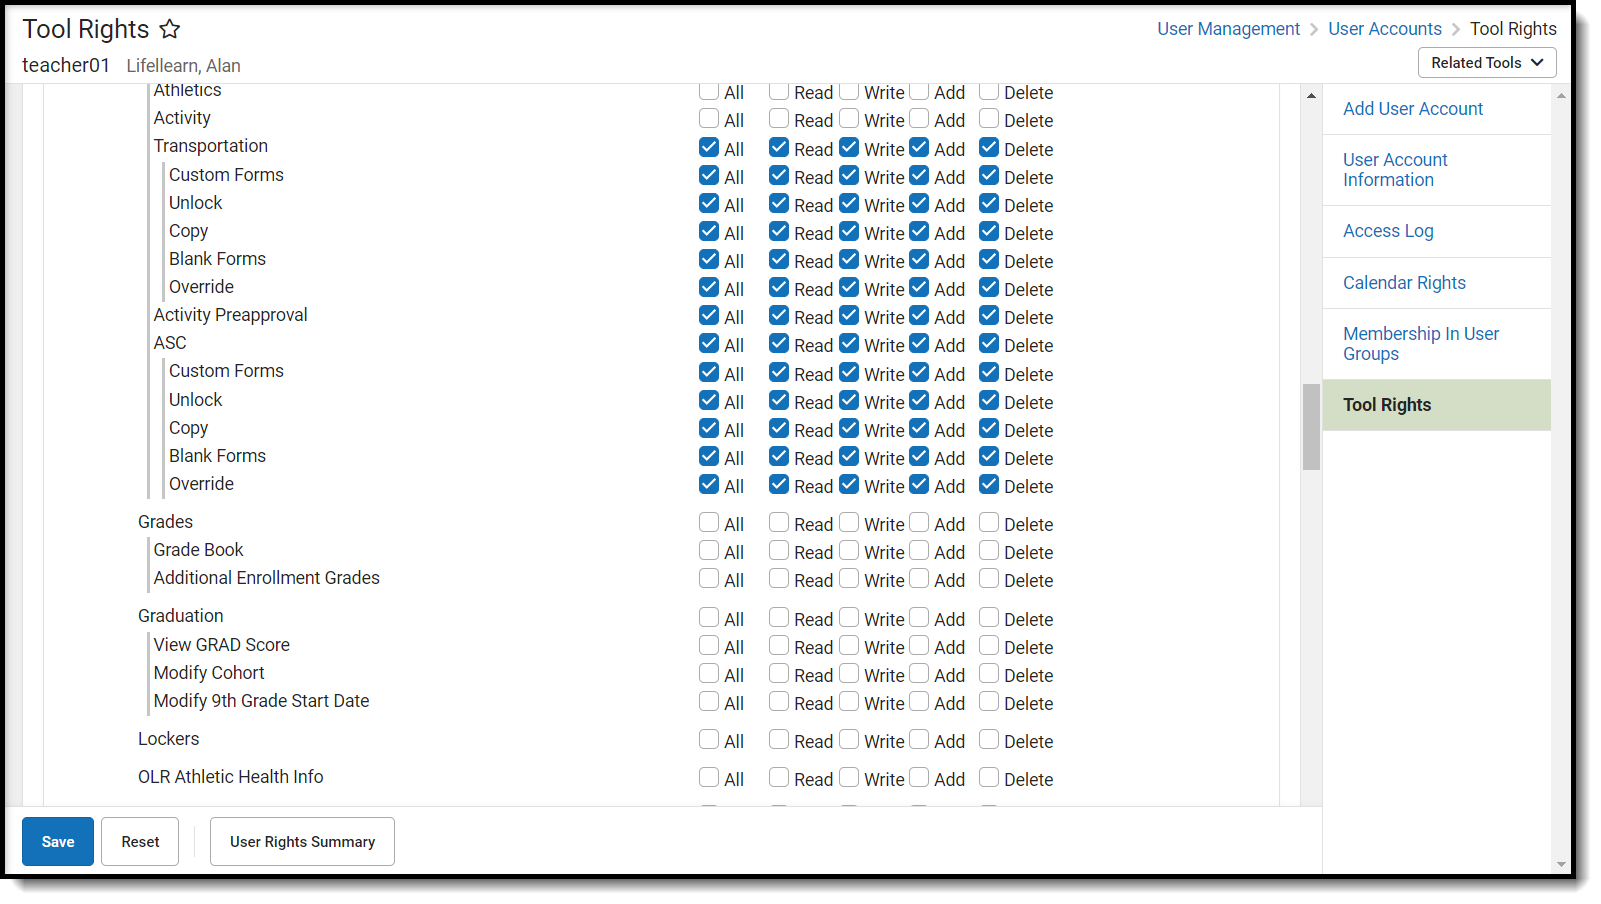 Individual Module Tool Rights for Custom Forms in Student Information > General > Forms
Custom Contact Logs Tool Rights
Each Custom Module Contact Log creates separate tool rights in the Student Information > Custom tool rights folder.
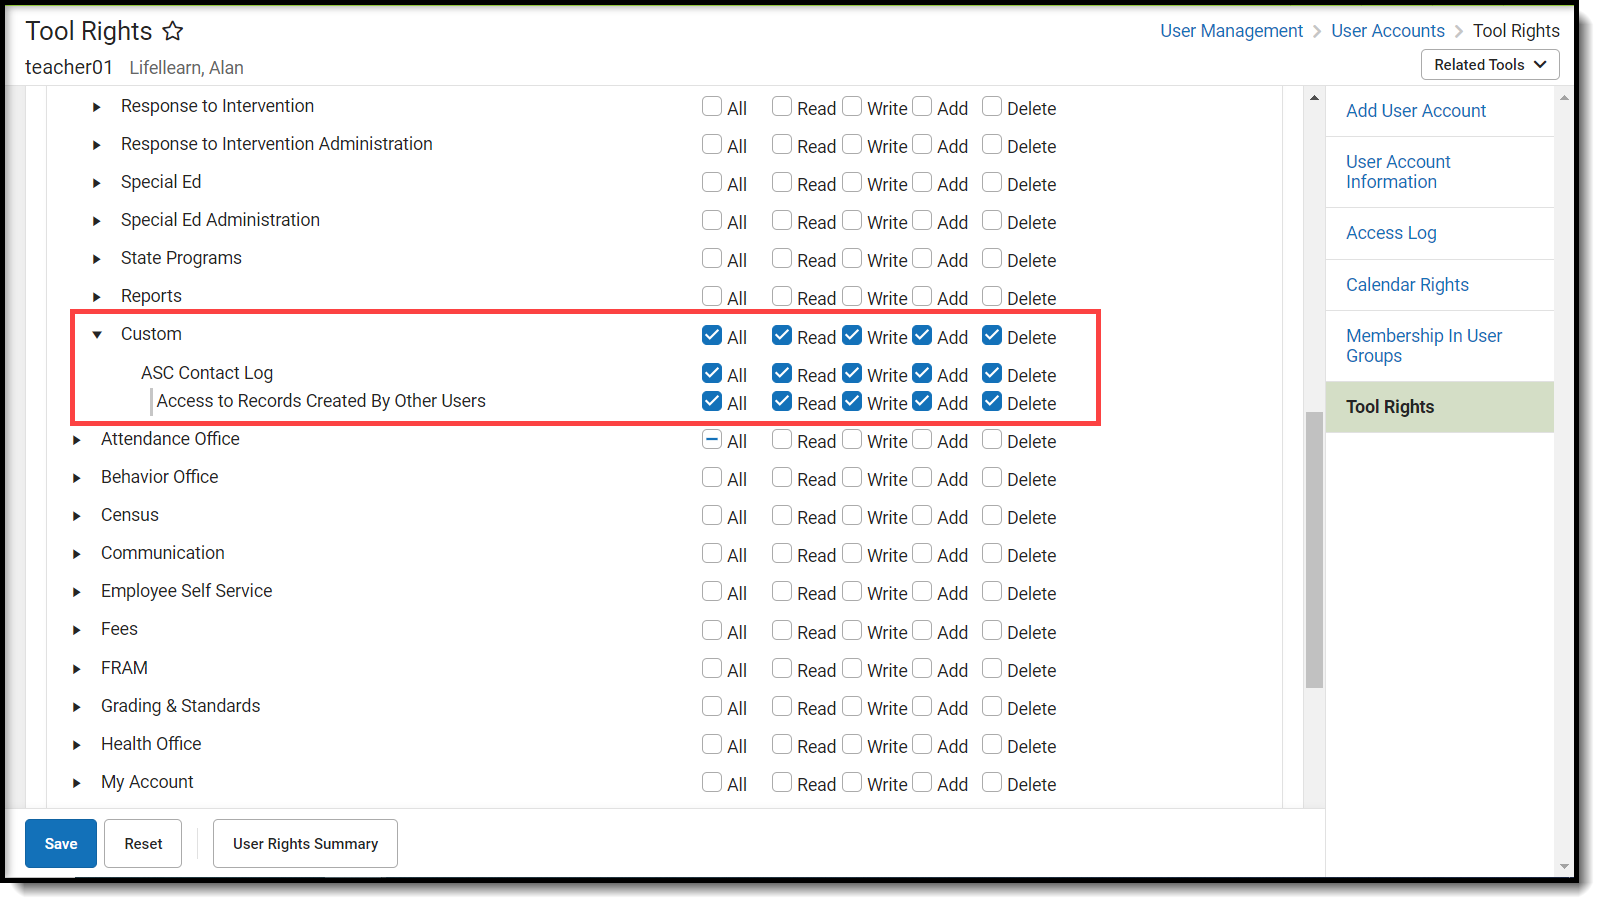 Custom Tool Rights for Custom Contact Logs
Custom Tool Placement Editor Tool Rights
In order to edit the location of Custom Contact Logs, rights are needed for the Custom Tool Placement Editor. Read rights are needed at a minimum.
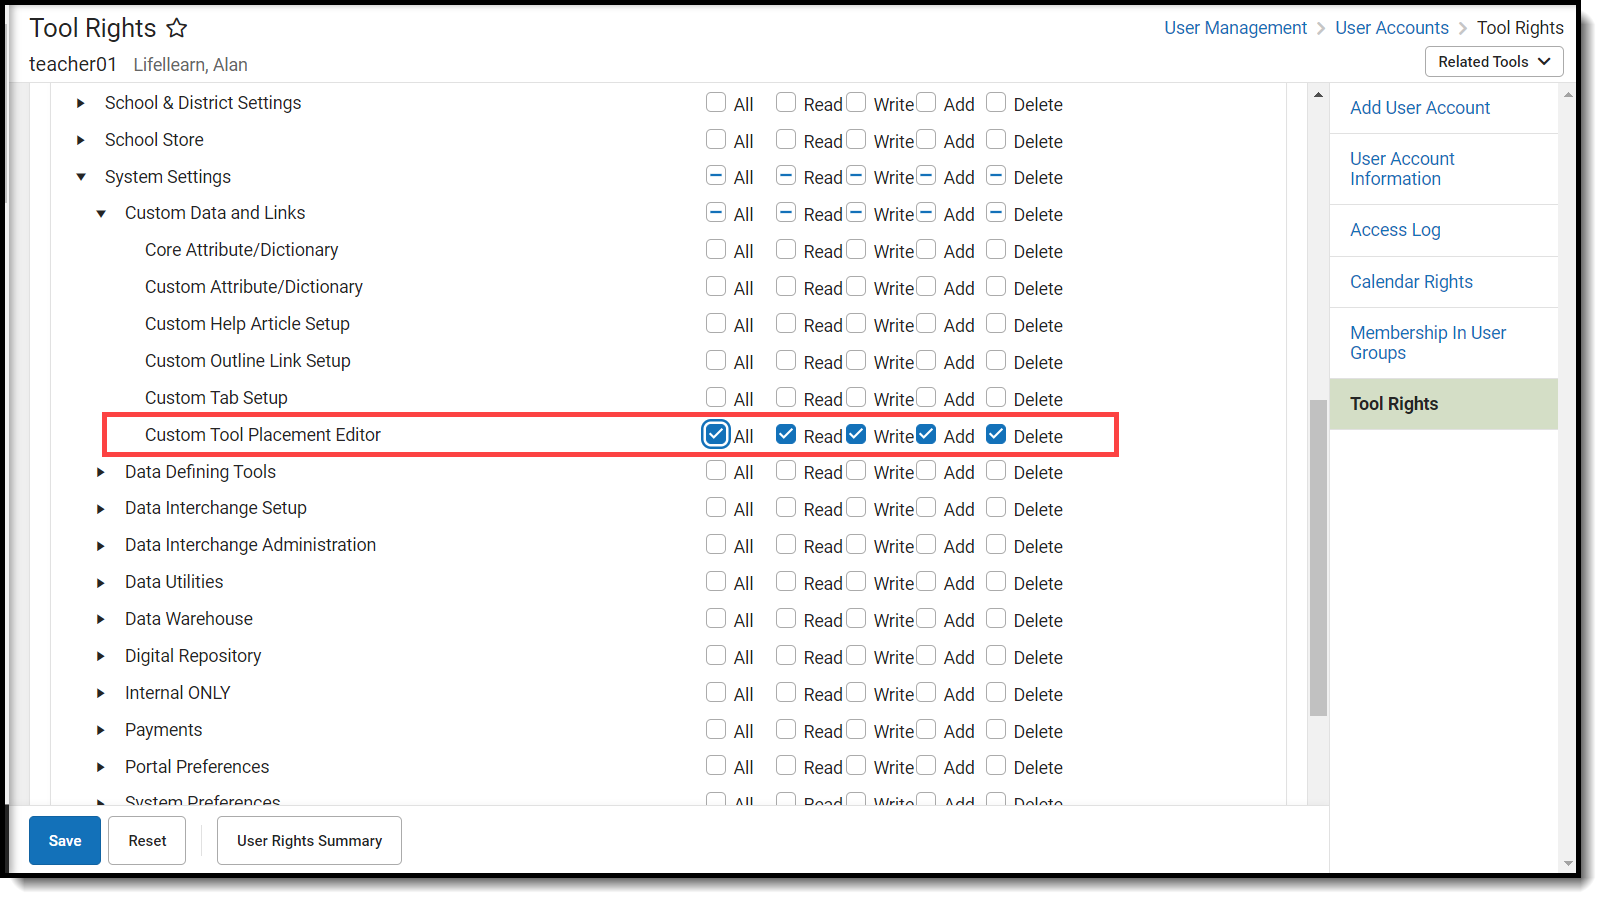 Tool Rights for Custom Tool Placement Editor
