Tool Search: Payments Reporter
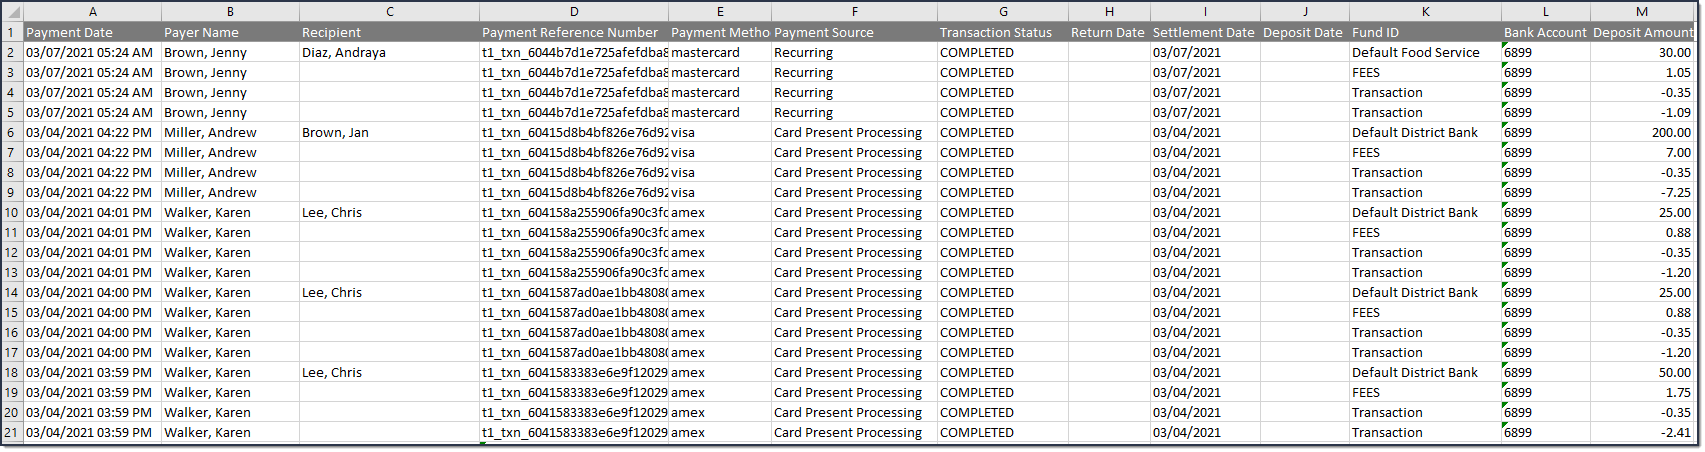
The Payments Reporter details all transactions that were completed through the online payment process. With this tool, you can check the status of a specific payment, issue refunds, and revoke transactions.

Important Information about this Tool
- Campus automatically voids all returned transactions. The original transaction appears with the Returned status and the correcting transaction appears with the Return Void status. Transactions may be returned if the account is not valid or has insufficient funds.
- Transaction fees are never refunded.
- Payments with the Transaction Status Resolved can only be refunded if the transaction was resolved by Campus Support. If you need to refund a payment that you manually resolved, contact Campus Support for assistance.
- When a payer makes a purchase for $0.00, Campus assigns a reference number but a Payment Method does not appear in the report. In addition, Service Fees are not applied when the total is $0.00.
- A Deposit Date does not display either unless the zero dollar purchase was purchased with other items for which the payer was charged and the transaction is processed.
- If an E-check fails, it can occur up to 10 business days after settling. If there is a failure, the amount of the E-check is automatically returned.
- Refunds (full or partial) for echecks are not allowed until there is a Settlement Date.
- Refunds for echecks are processed 12 days after the transaction's Payment Date. This ensures funds have cleared before the refund is processed.
- All refunds that are requested between 5:45 p.m. and 6:00 p.m. Eastern Time will not process until 12:00 a.m. the following day. For example, a refund requested at 5:45 p.m. on September 1st will be processed at 12:00 a.m. on September 2nd. This rule applies to all payment types except for echecks which cannot be processed until 12 days after their transaction's Payment Date.
- If a transaction is disputed, a chargeback or dispute fee is assessed. These can be searched for in the Description column as ‘Chargeback’ or “Dispute.’ When clicked, the Payment Transaction history will appear showing all the fees associated with that transaction.
About the Deposit Process
Following a payment, the funds are typically deposited into your bank account within three to four business days. This timeframe includes the settlement of the payment, the request for the deposit, and the bank's processing duration. Please note that this period may vary slightly depending on the timing of the payment and Stripe’s processing schedule.
The deposit process runs daily before 5:45 PM Eastern Time (ET). The deposit job must complete by 6:00 PM Eastern Time (ET); otherwise, the payment platform moves the request date forward one day to ensure the deposit job has enough time to complete.
The deposit process does not run on weekends (Saturday, Sunday) or holidays.
| Step | Description | ||||||
|---|---|---|---|---|---|---|---|
| 1 | Campus determines your district's account balance. When your district is processing payments, any returns/refunds you process are subtracted from your account balance when they occur. At the end of each business day, Campus calculates the balance and then requests a deposit. If your district's account balance is negative, Campus issues a negative deposit. | ||||||
| 2 | After determining the balance, Campus combines transactions with the following statuses into a deposit.
| ||||||
| 3 |
|
Tips for Searching
- You can search for transactions according to their Payment Date or Deposit Date. Click the Show Filters button, then select the option you want to use in the View By field and enter the appropriate start and end dates.

- To include district payments such as Service Fees in your search, click the Show Filters button then toggle Include District Payments to ON. If you want to see payments made to your school only, set the toggle to OFF.
This toggle is only available if your system administrator has assigned the appropriate tool rights.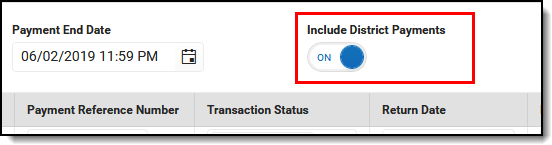
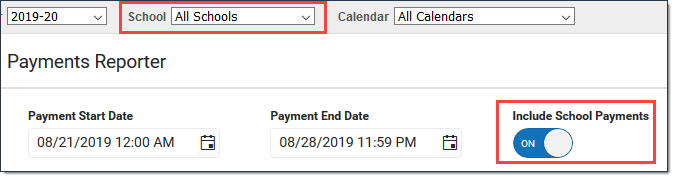
- If you select All Schools in the School dropdown list, only payments made to the district display. However, you can set the Include School Payments toggle to On to include payments from all schools in the district.
- Search results are grouped by Fund ID.
- Select an individual line to see the entire transaction in the Payment Transaction panel.
- Sort results by Deposit Date and Deposit Amount when trying to perform a bank reconciliation.
- You can sort the results by clicking a column heading. Each click changes the data in ascending or descending order.
- You can add filters to narrow the report's results. For example, you can find payments that were made on a specific date or Transaction Status.


Transaction Status Descriptions
Transaction Status |
Description |
|---|---|
| Completed | A fully completed transaction. |
| Canceled | If a transaction displays this status, you can manually resolve the transaction or contact Campus Support. |
| Exception | The payment was processed by the payment vendor but not on Campus. If a transaction displays this status, you can manually resolve the transaction or contact Campus Support. |
Returned and Return Void |
Campus automatically voids all returned transactions from the payment vendor. The original transaction appears with the Returned status and the correcting transaction appears with the Return Void status. Transactions may be returned if the account is not valid or has insufficient funds. Transactions also appear in these states if the district manually Refunds a Payment. There could be a two to five-day delay in which Campus may have completed the transaction and the payment vendor may need to return it. |
Revoked |
Note: Revoked can no longer be used as a status, but any transactions previously marked as Revoked will retain that status. Transactions can be manually revoked by the district if an interruption occurs between the district and the payment vendor where the payment was never processed. This status displays transactions manually revoked by the district within the date range entered on the editor. |
Pending |
If a transaction displays this status, you can manually resolve the transaction or contact Campus Support. |
| Processing | If a transaction displays this status, our payment processor is waiting for confirmation from the bank that the transaction has cleared. Once the confirmation is received, the deposit date could be in the past. For example, a fee or refund might show a deposit request date of 4/3 but will stay in pending status until 4/10 then once in completed status the deposit date would be 4/4.
Negative deposits can take 5-7 business days before they have a Deposit State of Completed in Campus. |
View Details for a Single Transaction
To view details for a single transaction, click the transaction you want to view. The Payment Transaction panel displays details for the transaction.
Since lines on the Payments Reporter are grouped by Fund ID, this is a good method for viewing the entire transaction.

View Disputed Transaction Details in Payment Transaction Panel
When a user clicks on a transaction with a dispute, the information related to that dispute will display within the Dispute Detail.
For Stripe, disputes have been supported since version .2531, and for Payrix since version .2539. Any disputes before these updates will show fees in the Transaction Details section, while disputes after the updates appear in the Dispute Details section.

See the Fees Reports Tool Rights article for information on available tool rights.
Issue a Full Refund
Tips
- This option is only available if your system administrator has assigned the appropriate tool rights.
- The Transaction Fee cannot be refunded.
- The Service Fee can only be returned if your District has enabled Service Fee refunds in the Payment setup.
- If you do NOT refund Service Fees, the Service Fee stays in a Completed status.
- Refunds for echecks are not allowed until there is a Settlement Date.
- Click the transaction you want to refund.
Result: The Payment Transaction panel displays. - Click the Preview Refund button.
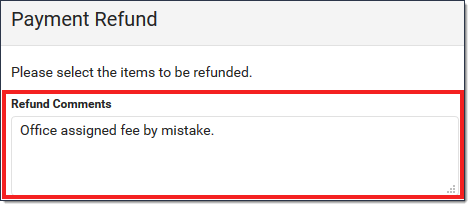
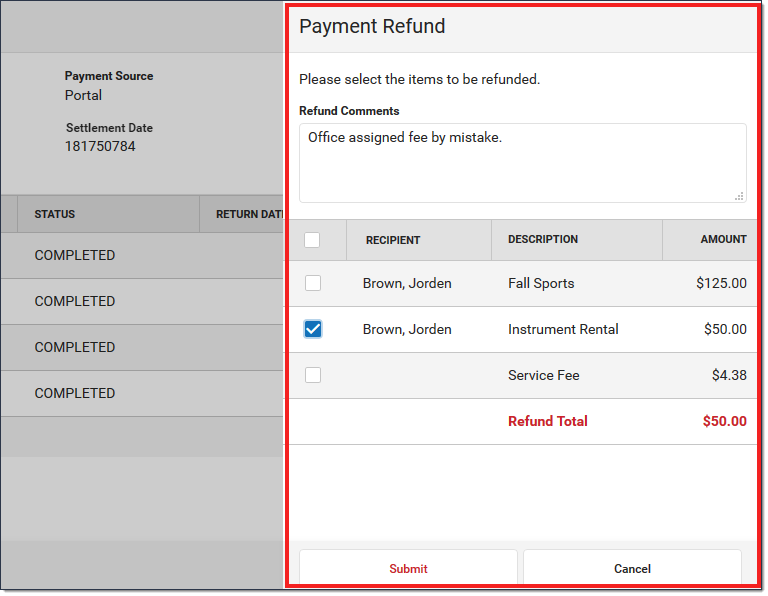
Result: The Payment Refund panel displays. Enter the reason for the refund in the Refund Comments field. (optional)
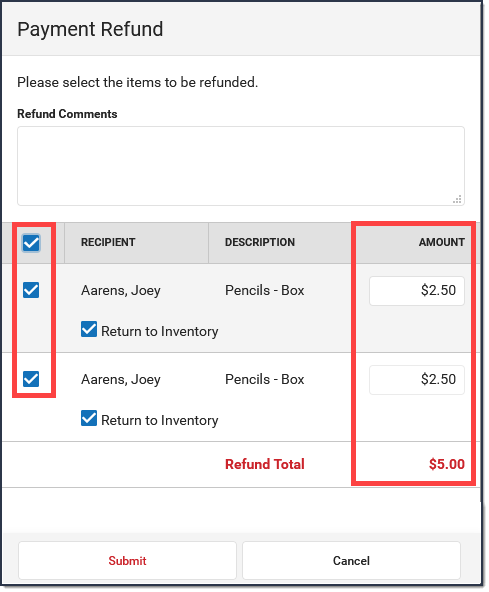
Complete one of the following options. Options that display depend on whether your district allows partial refunds.
If Partial Refunds... Then... is enabled in Payments Setup (district settings) 
- Mark all of the checkboxes.
- Verify the Amount you want to refund.
- If your district uses inventory tracking, verify the Return to Inventory checkbox is marked next to the item(s) you want to return (optional)
- Click Submit.
is not enabled in Payments Setup (district settings) 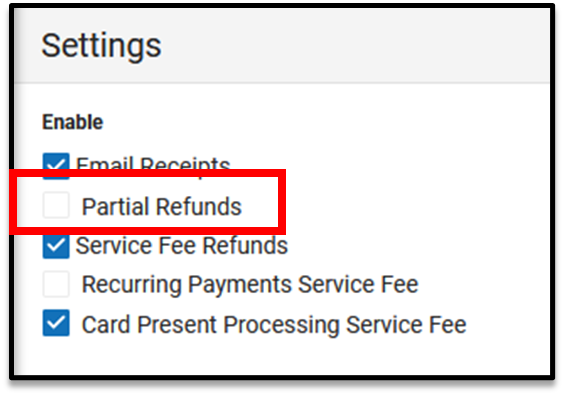
- The entire amount is refunded; you cannot give partial refunds.
- If your district uses inventory tracking, verify the Return to Inventory checkbox is marked next to the item(s) you want to return (optional)
- Click Submit
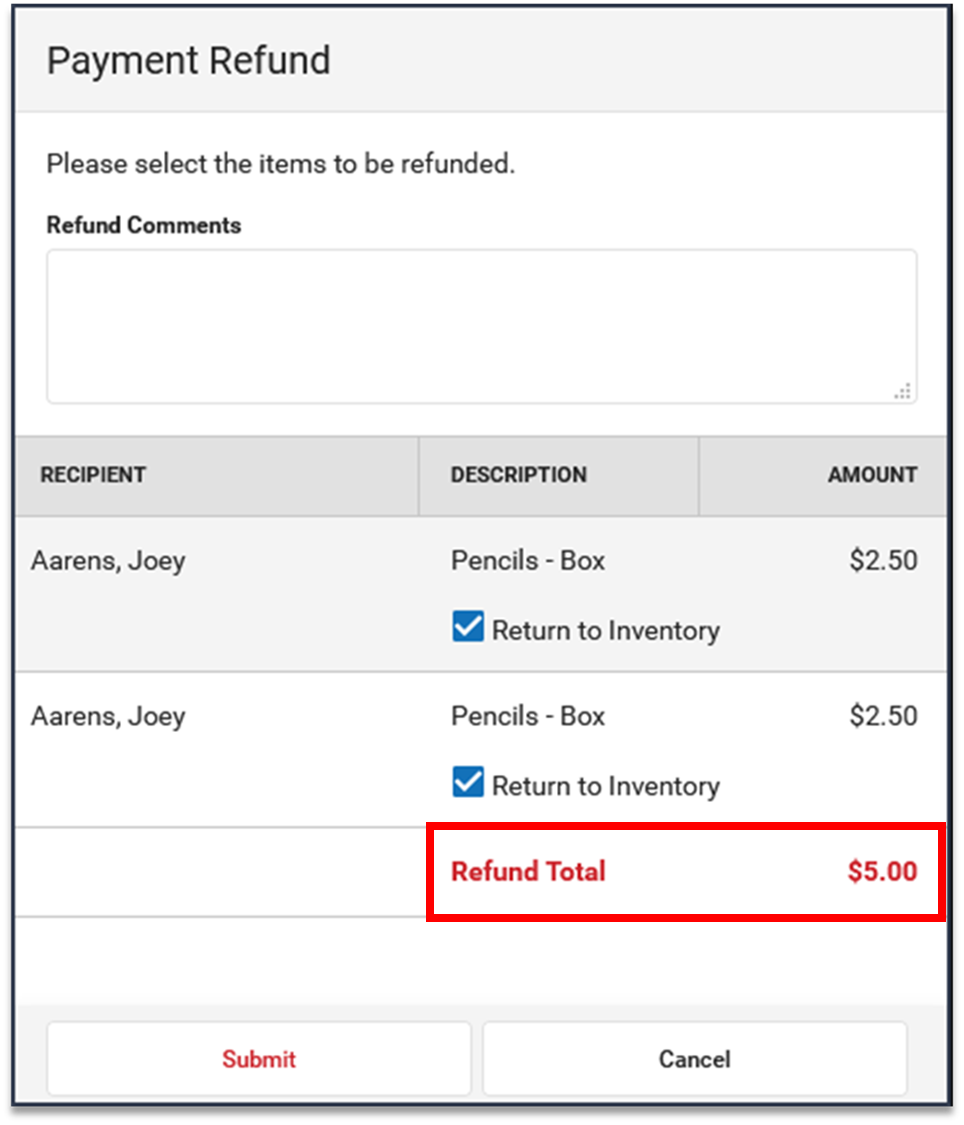
Result: A confirmation message displays.- Click OK.
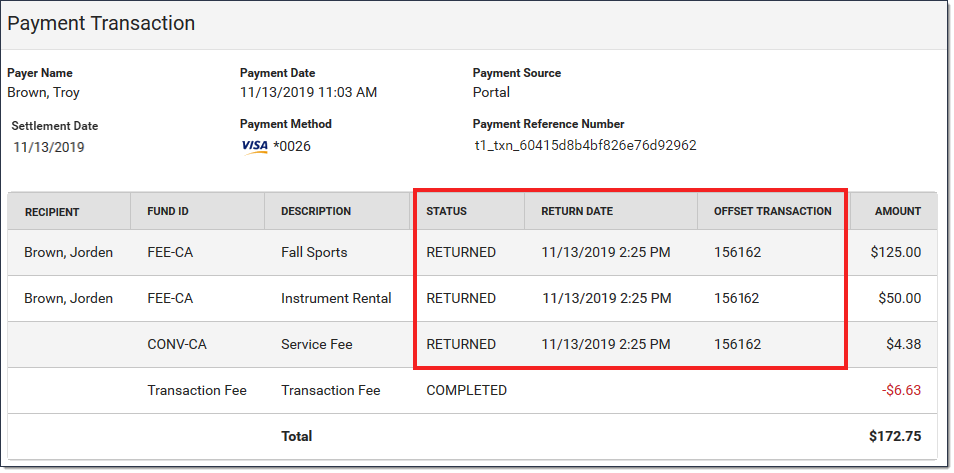
Result- The Payments Reporter screen displays. Campus updates the original Transaction Status to RETURNED and adds an offset entry with the Status RETURNEDVOID on the refunded lines.
- Campus also updates the original payment transaction's details. After a refund is made, the details include a Return Date and the Offset Transaction Reference Number.
- Refunds may incur an additional Transaction Fee based on your district's contract with the payment vendor.


Issue a Partial Refund
Tips
- This option is only available if:
- Your system administrator has assigned the appropriate tool rights.
- Your district has enabled partial refunds in the Payment setup.
- The Transaction Fee cannot be refunded.
- Refunds may incur an additional Transaction Fee based on your district's contract with the payment vendor.
- The Service Fee can only be returned if your District has enabled Service Fee refunds.
- If an item is already partially returned, you cannot make additional refunds on the same item.
- Partial refunds appear in the Payments Reporter with a status of Partial Return and an offset transaction number.
- Refunds for echecks are not allowed until there is a Settlement Date.
- If split fees is enabled, districts may opt to refund only the service fee related to the specific product being returned, rather than the entire service fee if a full refund option is enabled.
- Click the transaction you want to refund.
Result The Payment Transaction panel displays. - Click the Preview Refund button.
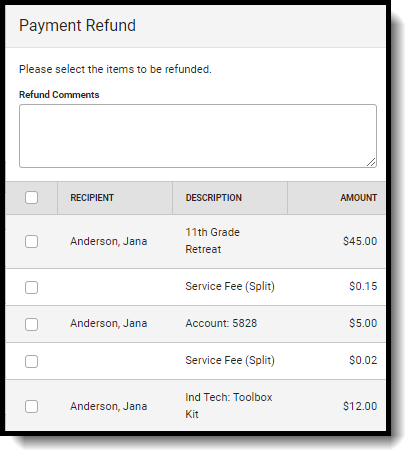
Result The Payment Refund panel displays. Only items eligible for a refund displayed on the screen.
Enter the reason for the refund in the Refund Comments field. (optional)
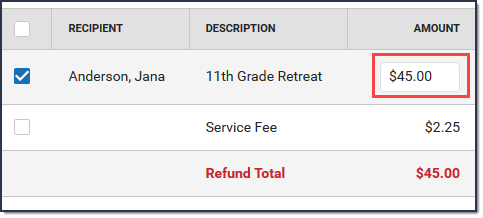
- Mark the checkbox(es) next to the item(s) you want to return.
Verify the Amount(s) you to refund.
You can change the amount to be less than the amount that was paid.
- Verify the Return to Inventory checkbox is marked next to the item(s) you want to return to inventory. (optional)
This checkbox only displays if you use inventory tracking and is automatically selected. If you do not want to return an item to inventory, make sure the checkbox is cleared.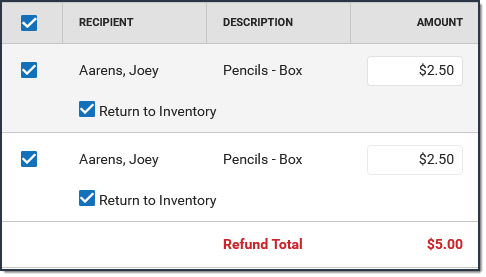
- Click Submit.
Result: A confirmation message displays. - Click OK.
Results- The Payments Reporter screen displays. Campus updates the Transaction Status to RETURNED and adds an offset entry with the Status RETURNEDVOID on the refunded lines.
- Campus also updates the payment transaction's details. After a refund is made, the details include a Return Date and the Offset Transaction Reference Number.
- Refunds may incur an additional Transaction Fee based on your district's contract with the payment vendor.


Select Columns to Display
The column selector allows you to choose which columns to hide or display. Click the Select Columns button and mark the checkbox next to the columns you want to display. Clear the checkbox next to the columns you want to hide.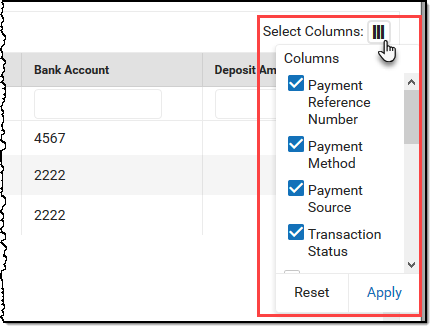
Group Report by Specific Columns (Grouping Options)
The report displays differently based on the grouping options you select. Select the column(s) you want to group together and drag the column(s) to the area above the table. You can select multiple columns and further group the report results.
Payments Reporter Column Descriptions
The following columns are available on the Payments Reporter. These columns are available via the column selector and can be grouped, filtered, and saved as templates.
TIP
You can sort the Payments Report by clicking a column heading. Each click changes the data in ascending or descending order. When grouping specific columns, be sure to also sort the column headings to ensure you are viewing the report results in an organized manner.
| Column | Description |
|---|---|
| Payment Date | The date on which the payment was made. |
| Payer Name | The name of the person who made the payment. This column will only show a name if the payer is a logged-in Infinite Campus user. |
| Payment Method Account Name | If a name is entered in a payment method, it will be displayed in this field. |
| Recipient | The person receiving items purchased in the School Store or the student who was registered for an activity.
If an item was purchased and paid through the Campus Mobile Payments app, the student's name appears IF the student number was entered at the time of the purchase. |
| Description | A description of the fee.
If the 'Split Transaction and Service Fees' checkbox has been enabled within the Payments Setup Settings, any transaction or service fee involving a split will be designated with '(Split)' in its description. |
| Payment Reference Number | This number is automatically generated by the payments platform and is a unique identifier for a specific transaction. |
| Payment Method | Indicates what was used to make the payment; e.g., type of credit card or eCheck. If eCheck is used, it will indicate if it was from checking or savings. |
| Card Entry Type | Shows whether a credit/debit card payment was typed in manually, swiped, or processed through the Campus Mobile Payments app using a chip insert or tap (EMV). If the payment method was not a credit or debit card, this column will appear blank. |
| Payment Source | Identifies where the transaction occurred.
|
| Transaction Status | The current state of the transaction. See the Transaction Status topic for more information.
|
| Dispute Status | Displays the status for any payment currently or previously involved in a dispute.
If you have any questions regarding a Dispute Status, please contact Support. |
| Return Date | After a refund is made, the details include this Return Date and the Offset Transaction Reference Number. |
| Settlement Date | The date on which the payment is finalized and eligible to be deposited. |
| Deposit Date | The date when the payment platform deposits the money into the bank accounts. |
| Deposit Request Date | The date when Campus requested payments to be disbursed to the bank accounts. |
| Deposit Request Reference | The ID the payment platform sends to Campus when Campus requests a disbursement. |
| Fund ID | The unique identifier for the Fund Account. Fund ID is unique and the same Fund ID cannot be used at different schools. |
| Fund Description | A description of the Fund Account. |
| Bank Account | The bank account associated with the Fund ID. |
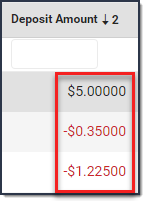
| Deposit Amount | The specific amount of money that constitutes the deposit.
Tip: Turn the Show Full Value toggle to ON to see the Deposit Amount go to 5 decimal places.
|
Create and Manage Templates
Templates allow you to save a custom view of the Payments Reporter and use it again later. You can choose specific columns to display, group them in a useful way, filter data in each column, and save your selections as a template. You can create multiple templates as well as update or delete templates at any time.
Create a New Template
If there are existing templates, click the Reset button before you begin.

- Use the Select Columns tool to choose the column(s) you want to display then drag the column(s) you want to group together to the area above the table.
- Click the Show Filters button and enter any filter data you want to use. (Optional)
- Further narrow down report results by using the filters in each column. (Optional)
- Click the New button (next to the Load Template dropdown list).
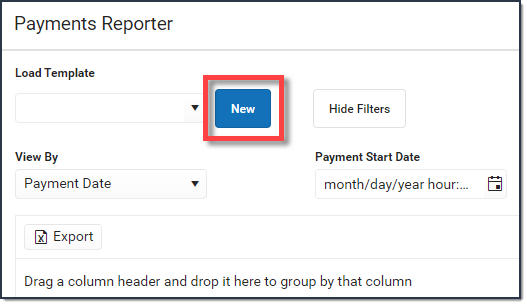 Result: The Create Template panel displays.
 - Enter the Template Name then click Save.
Result: The new template displays in the Load Template dropdown list.
 Result: The Create Template panel displays.
Delete a Template
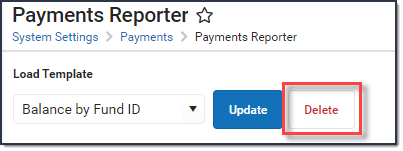
To delete a template, select the template you want to delete in the Load Template dropdown list then click the Delete button.
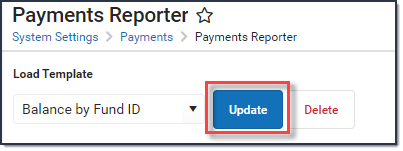
Update a Template
To update a template, select the template you want to update in the Load Template dropdown list. Make any necessary changes then click the Update button to save your changes.
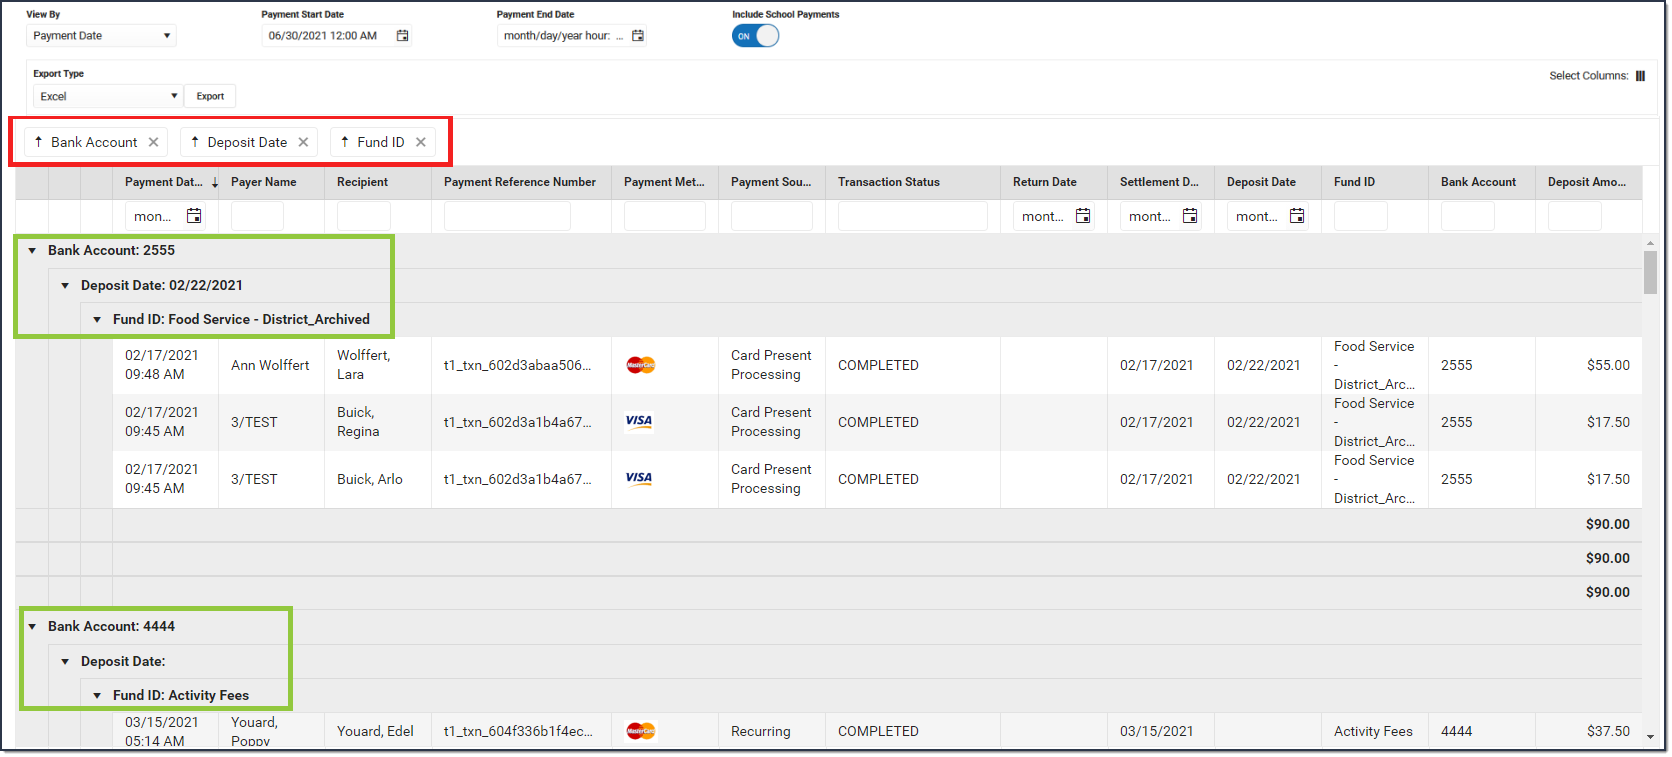
Identify Deposit Balance by Fund ID
The report displays differently based on the grouping options you select. Select the column(s) you want to group together and drag the column(s) to the area above the table. To identify the balance by Fund ID, group columns in the following order:
- Bank Account
- Deposit Date
- Fund ID
Export the Report
You can export the report to CSV or PDF format. To export the report, select the format you want from the Export Type dropdown list then click the Export button.

If you do not limit the report results using the Payment Start Date and/or the Payment End Date, the export will be limited to the last 60 days.