The Academic Planner allows schools to manage a student's academic plan through their entire school career. Academic Planning is a process that requires the use of several tools in Campus and several roles in a school. This study guide covers the components necessary to enable the basic functionality of the Academic Planner.
Credits
Credit Groups
Credit Groups define how credits earned by students are counted on transcripts and are used in tracking a student's progress towards graduation.
Tool Search: Credit Groups
Credit Groups define how credits earned by students are counted on the transcripts and used to track a student's progress toward graduation. Credits on the transcript will display chronologically, but a summary of student work is available on the transcript, showing the number of credits in each category defined in the Credit Group. Credit Groups do not include the number of credits earned by a student, which is determined by the course's Grading Tasks, but instead organize credits earned across courses on the student's Credit Summary. See the Uses in Campus for more information.
If you are using the Academic Planning functionality, see the Best Practices and Things to Know section.
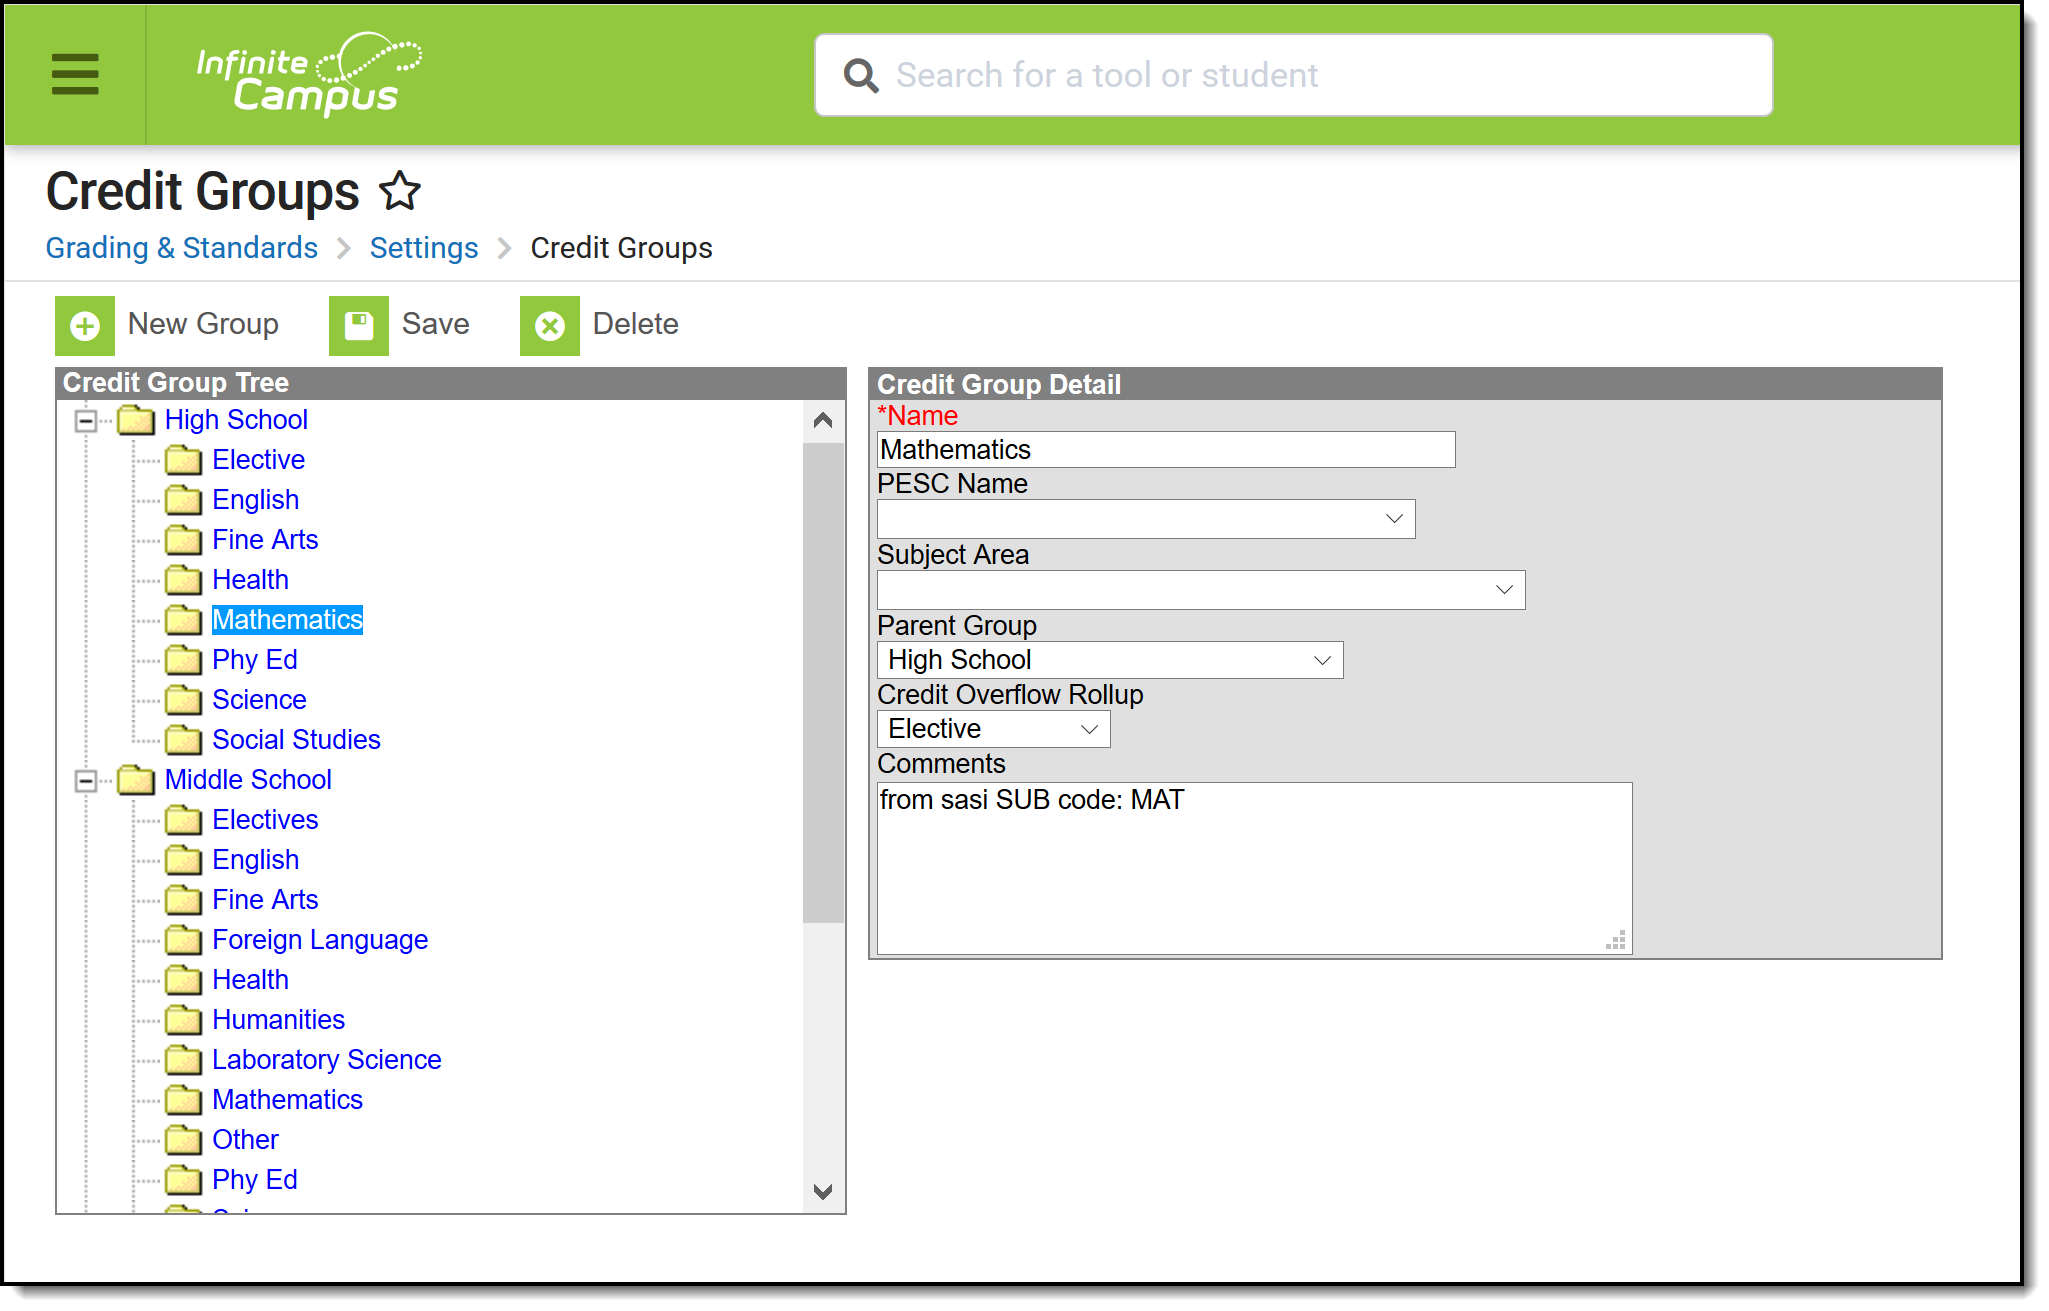 Credit Groups
See the Grading Setup Tool Rights article to learn about rights needed to use this tool.
Uses in Campus
- Credit Groups are attached to a School on the
School Standard Setup tool, which alphabetically lists all credit parent groups and parent groups for Standards. If a School is selected in the Campus toolbar when you create a Credit Group, that group will be marked by default on that school's School Standards tab.
- If a Credit Group is NOT marked on the School Standards tab for ANY school, the Credit Group is considered inactive. Any scores on the student's Transcript associated with an inactive credit group will display as such in the Transcript Credit Editor when entering a new transcript entry or editing an existing entry. The word INACTIVE is displayed only behind the name of the Credit Group; the transcript does not print this word.
- Credit Types, the Credit Groups within credit parent groups, are attached to Grading Tasks when aligned to Courses. The number of credits earned for that Grading Task is also indicated.
- Credit Groups can be included in Transcripts by selecting the appropriate checkboxes when creating the Transcript Report Preferences. Credit Groups do not need to be selected for a specific School to be added to a Transcript Report.
- Credit Groups are used in Academic Planning (Student Information) to define required credits and indicate a student's progress toward completing an academic program.
- The student Credit Summary tab organizes the number of credits the student has earned in each Credit Group and Credit Type. To be included on this tab, Credit Groups must be selected in the Transcript Report Preferences AND scores posted to the Grading Task that includes the Credit Group.
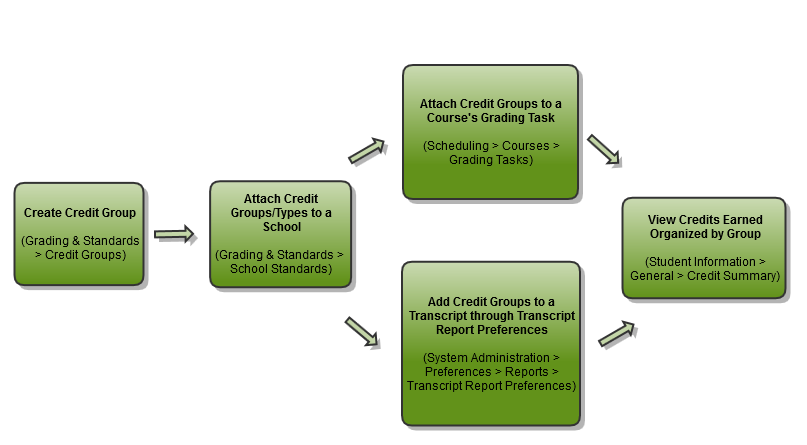 Credit Groups and Credit Types in Campus
Credit Groups vs. Credit Types
Credit Groups are buckets of credit types. They help organize the credit types. A Group might be high enough to be at the school level—High School, Middle School, etc. This setup would create a credit type for each area where students receive credit—History/Social Studies, English, Science, Mathematics, etc.
Credit Groups are created first and follow a parent/child setup that other areas in Campus follow.
Credit Group Fields
The same fields exist when creating both groups and types.
| Field | Description |
|---|---|
| Name | Displays the name of the credit group/type. |
| PESC Name | PESC Standards are used in the eTranscript process to validate transcript records. See the eTranscript article for more information.
If your district uses the eTranscript functionality, a value from this dropdown must be populated. |
| Subject Area | The general area of instruction addressed in the course. |
| Parent Group | The selection indicates the credit group associated with this new credit type.
Leave the Parent Group field blank when creating a group. This field is only populated when creating a type. |
| Credit Overflow Rollup | This section indicates where the student receives credit when the student has met the credit requirement of the designated credit type and where the additional credit should now be placed. For example, a student takes 4 years of Math, and only 3 years are required. The additional credit earned will overflow to Electives. Infinite Campus supports n-tiers of credit roll-ups, so Math can roll up to Academic Electives, which roll up to General Electives.
This should only be populated on Credit Types.
Logic exists to eliminate the possibility of users creating an infinite loop of credit overflow assignments. For example, History Course A overflows to Government and Government Course B overflows to History, a loop is created. To eliminate this, a validation exists when saving the entry to check for any potential loops that may occur. Users must change the selections that are causing the loops before saving.
See the Credit Overflow Rollup section for more information on how it relates to academic planning. |
| Comments | Enter any comments related to this new group or credit. |
Best Practices for Credit Groups and Credit Types
If you are using Academic Planning functionality:
- Set up a district-wide credit structure. This means all high schools within the district will have the same credit groups, and all middle schools that allow students to earn high school credits will have the courses aligned to high school credits. This structure also allows for a student's academic plan to be easily updated if he transfers schools within the district.
- Ensure Credit Types are granular enough to support all programs offered in the district. If a Credit Group is named High School, the Credit Types should be named according to each area of study where a student can receive credit. This granularity does not need to be at the grade level; it is just the topic of credit (i.e., English, Math, Science).
Create Credit Groups
- Click the New Group icon. A Credit Group Detail editor is displayed to the right.
- Enter the Name of the Credit Group.
- Click the Save icon. The new credit group is listed in the Credit Group Tree.
Create Credit Types
- Click the New Group icon. A Credit Group Detail editor is displayed to the right.
- Enter the Name of the Credit Type.
- Select the PESC Name from the dropdown list if desired.
- Select the Parent Group from the dropdown list.
- Select the appropriate option for the Credit Overflow Rollup option.
- Enter any Comments about the credit type.
- Click the Save button to finish creating the type.
Credit Overflow Rollup
This is necessary if you are using Academic Planning.
The Credit Overflow Rollup field will redirect excess credits from the current credit type. Once the current credit type has met its credit requirements, any additional credits will be placed in the credit type designated by the Credit Overflow Rollup field value.
The Credit Overflow Override field is set for a single course Grading Task. It is used to roll credits when the current credit type has met its credit requirements. The credits from the course will first try to roll up to the override credit type. If that credit type has met its requirements, it will look at the overflow setup for the course's credit type.
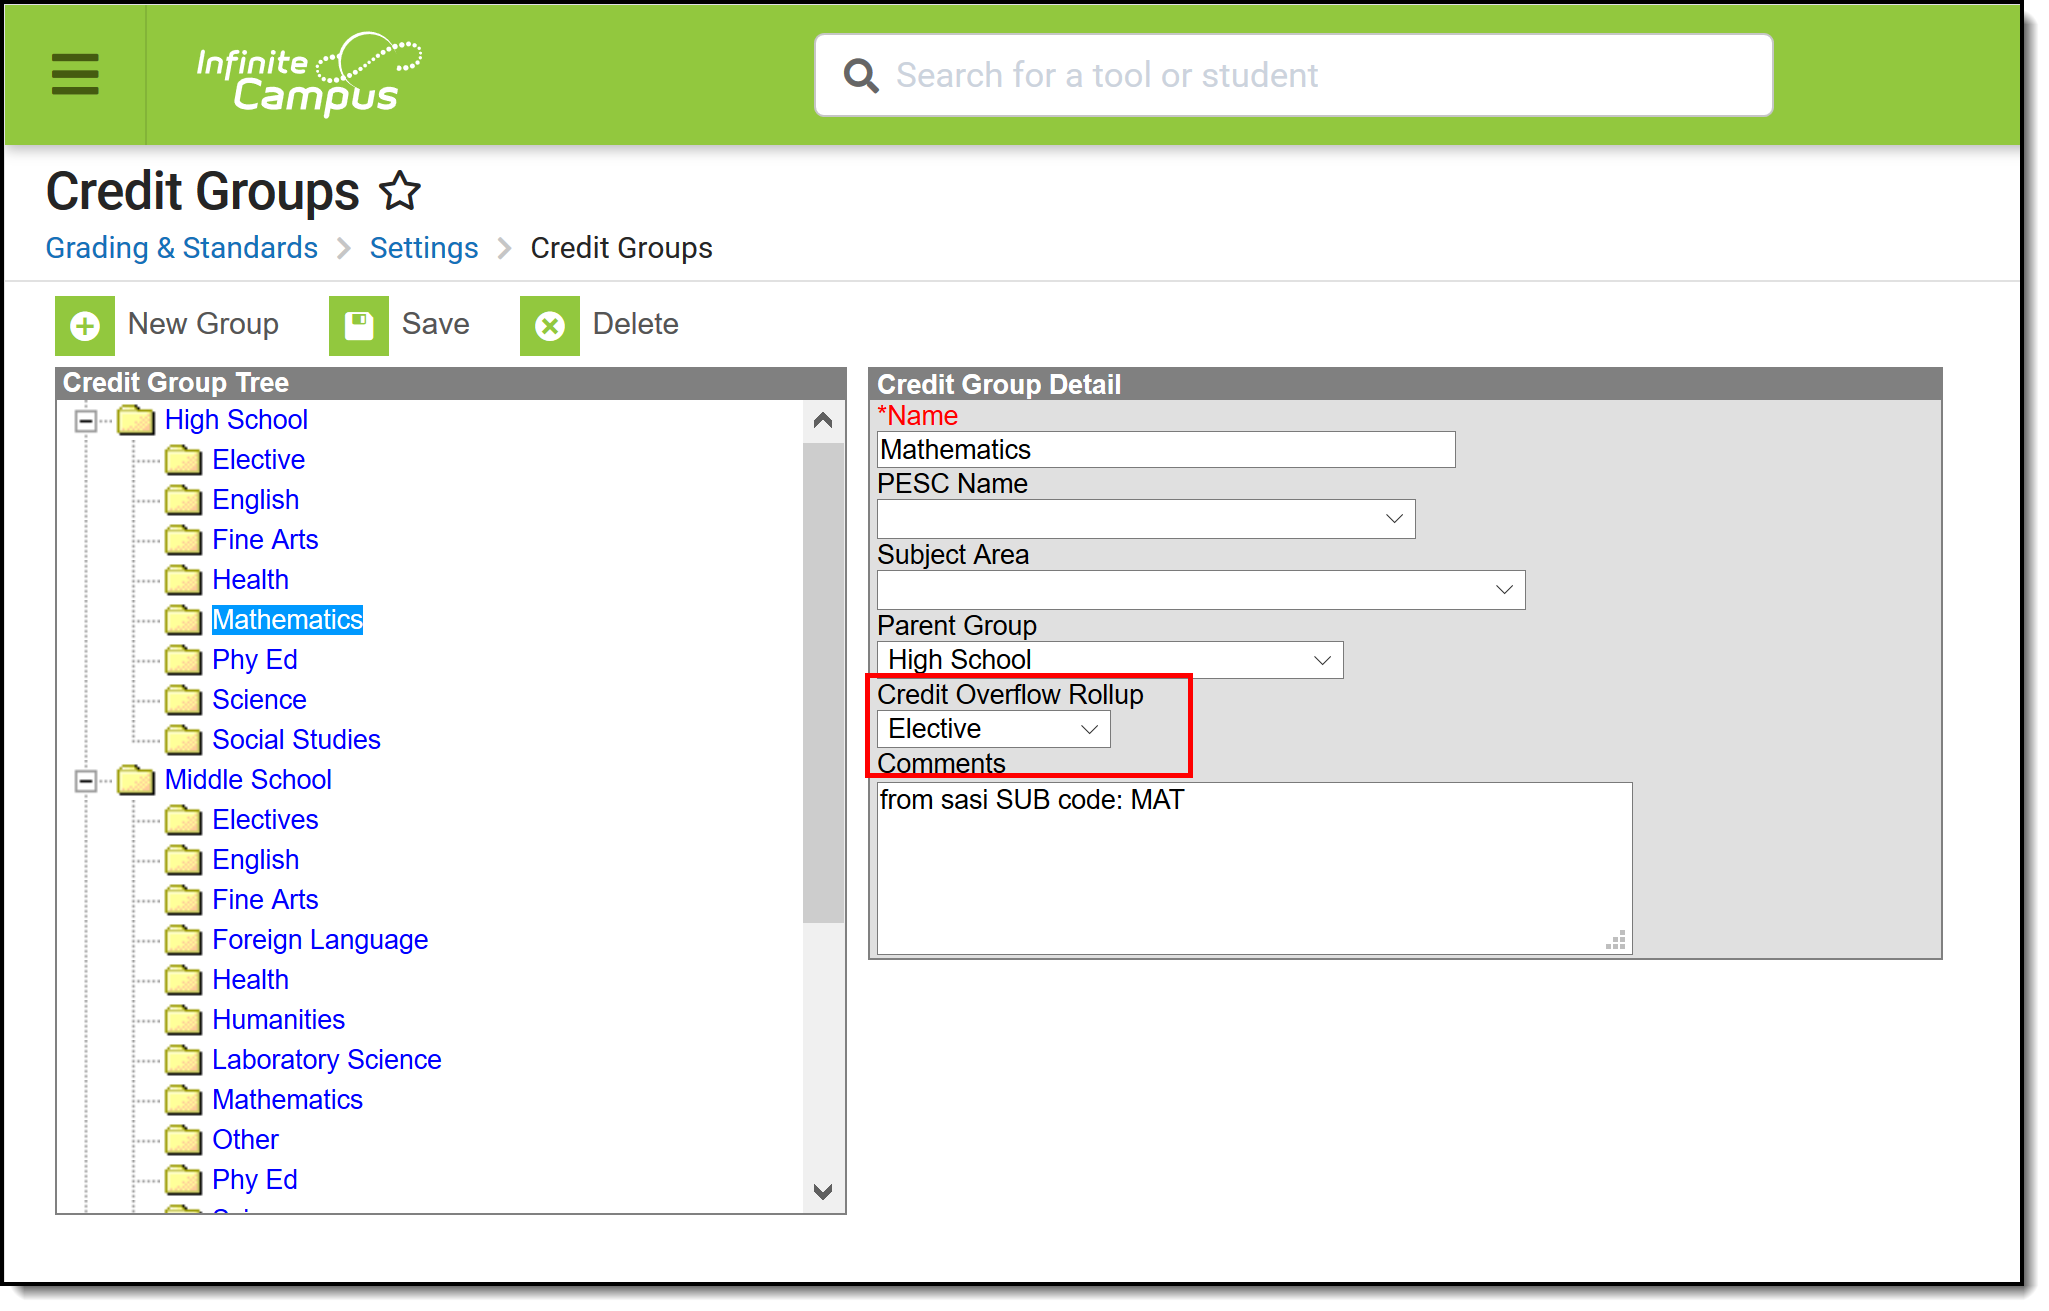 Credit Overflow Rollup Field
Credit Overflow Rollup in Practice
Taking four years of math meets the state's credit requirement of three years. The extra credit is used to meet the elective credit requirement using the Credit Overflow Rollup field.
Campus supports n-tiers of credit rollups, so Math can roll up to Academic Electives, which roll up to General Electives. Campus also supports n-trees of credit rollups, so it is possible for Math to roll up to Academic Electives and then Physical Education to roll up to General Electives for two separate end buckets.
Credit Overflow Override in Practice
A particular course may be able to count towards more than one credit type. For example, a CTE course may fulfill a science or math credit. This course would be set up with its default credit type of Math and an override rollup credit type of Science.
If the student has completed their math requirement, this course would be counted as a science credit (only if a science credit was still needed). If both credit requirements were met, the default rollup would occur, likely going from math to elective credit.
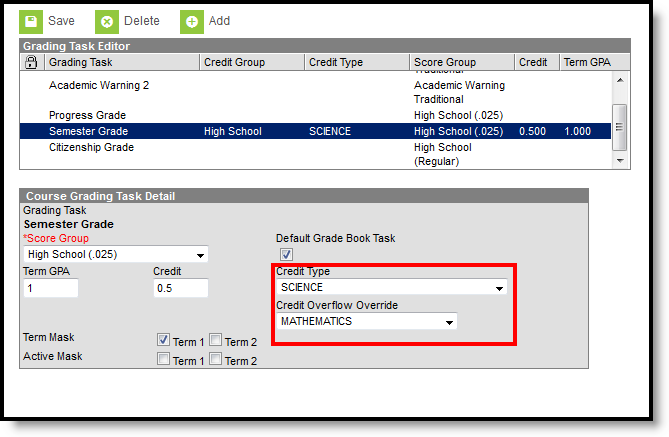 Course Grading Task Detail - Credit Overflow
Best Practices for Credit Overflow
- If a credit is moved from overflow in one credit type to another, and the second credit type is full, the credit keeps moving until a credit type is found that hasn't met the minimum credit amount or doesn't have the Credit Overflow Rollup set.
- The Grad Progress tool will display the correct credits for:
- each credit group total
- each grade level/credit group field
- each grade level total
- each overflow total
- and the overall total
- The Course Plan displays the correct credits for:
- each credit group
- each grade level
- each overflow credit that is counted in the correct credit group
- all completed courses
Set Credit Overflow Rollup
- Create Credit Groups, following the procedures listed listed above.
- Create Credit Types, following the procedures listed above.
Set Credit Overflow Override
- Search for a Course and navigate to the Grading Tasks tab.
- Select the Grading Task where the student receives credit (usually a Semester or Trimester grading task)
- Verify the selected Credit Type is correct. If not, select the correct one
- Set the desired credit type option for the Credit Overflow Override field. This selection is used when the student receives credit if they have met the required credits.
State-Specific Information
Certain states may require Credit Groups to be entered a certain way. Always follows those procedures.
Course Set Up
Course Masters
A Course Master defines elements of courses from a district level, providing courses with the same number, naming convention, and setup for grading throughout the district. Changes made to the Course Master are also applied to the courses at the schools.
Tool Search: Course Master Information
A Course Master defines course elements of courses from a district level, so all schools are using the same number and naming convention for courses, as well as the same setup for grading. Course Catalogs need to be created first before creating Course Masters. A Course Catalog is a collection of Course Masters that is then attached to the school. Changes made to the Course Master are also applied to the courses at the schools if fields have been locked.
Review the Course Masters Overview article for information on Course Masters best practices and a Course Master Workflow.
 Course Master Information
See the Course Master Information Tool Rights article for details on the rights and subrights required to use this tool.
Courses that exist prior to creating Course Masters are not automatically linked to the newly created Course Master. Use the Course Status tool to relink those courses.
When Grading Tasks, Standards, and Assessments are locked on the Course Catalog, that information displays with a lock icon at the Course level and cannot be deleted unless they are removed from the Course Master.
Navigation
The Course Master Information editor is organized into the following sections:
- General Course Master Information includes identifying information, whether the course master is active, SCED information, and a course description.
- Scheduling includes the length of the course, the number of periods it meets in one day, the number of schedules it meets in, the department name, the maximum student count, etc.
- Course Setup includes fields like the course is an attendance-taking course, uses positive attendance, is standards-based, reports scores on a student's transcript, and much more.
- State Defined lists all of the fields that are used for state reporting in your state and includes fields like Dual Credit and State Report Exclude.
- District Defined lists any field your district has chosen to collect data on. These are added using the Custom Attribute/Dictionary.
- Comments lists any additional information about the course that your school or district wants known. This could be a note when the course was added to the catalog, that it must meet in a certain room, that it's only for seniors, or some other piece of information.
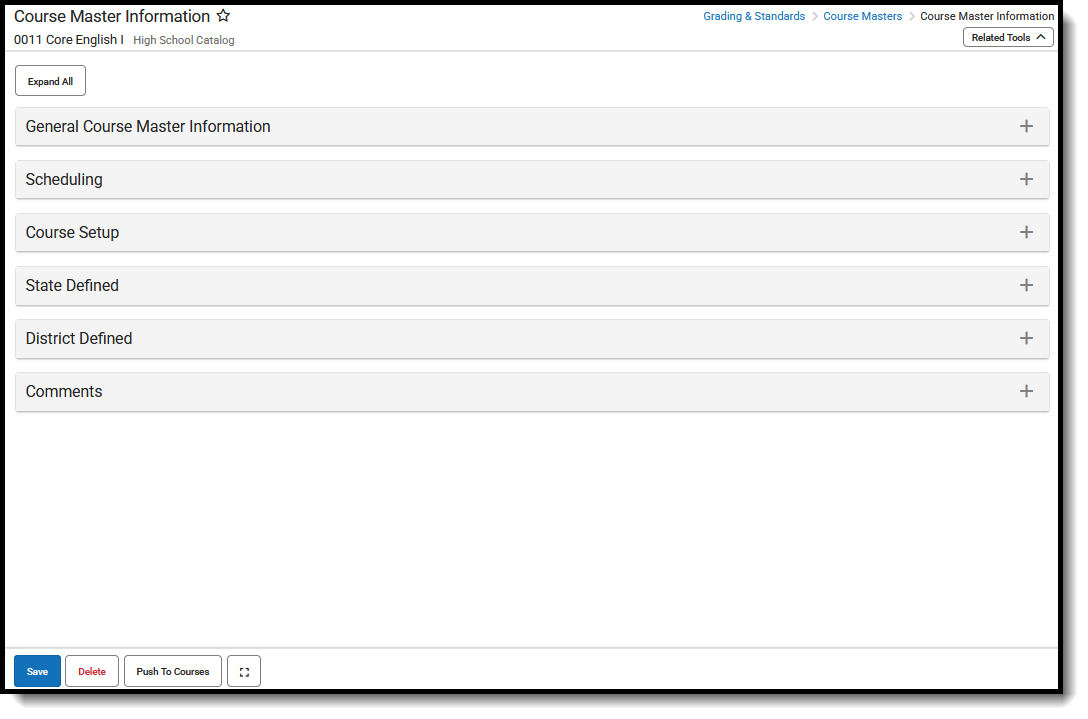 Course Master Information Editor - All Cards Collapsed
Click on the gray header or use the plus sign on the right side to expand the card. Use the Expand All/Collapse All button at the top of the tool to open or close all of these sections.
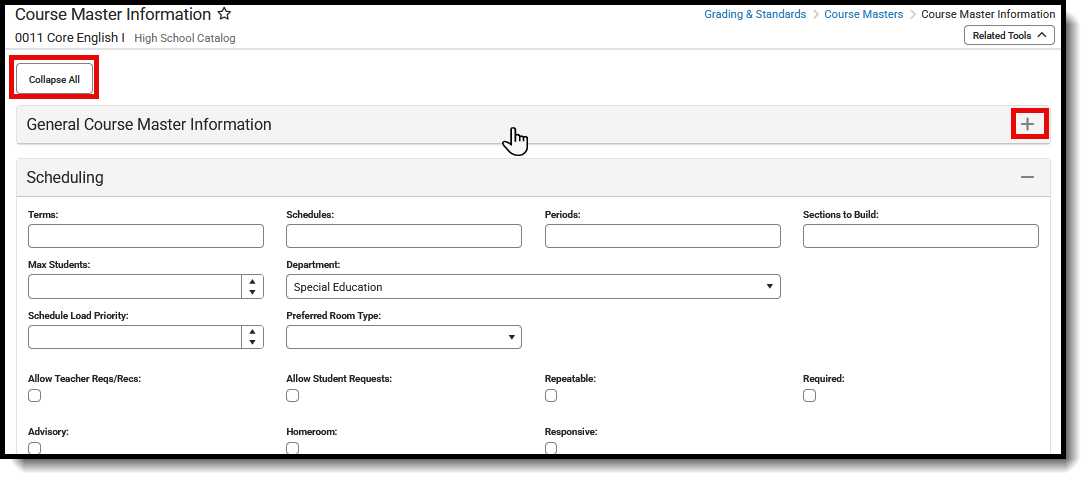 Open or Close Course Information Cards
The Save, Delete, Push to Sections, and Full Screen view buttons display across the bottom of the tool.
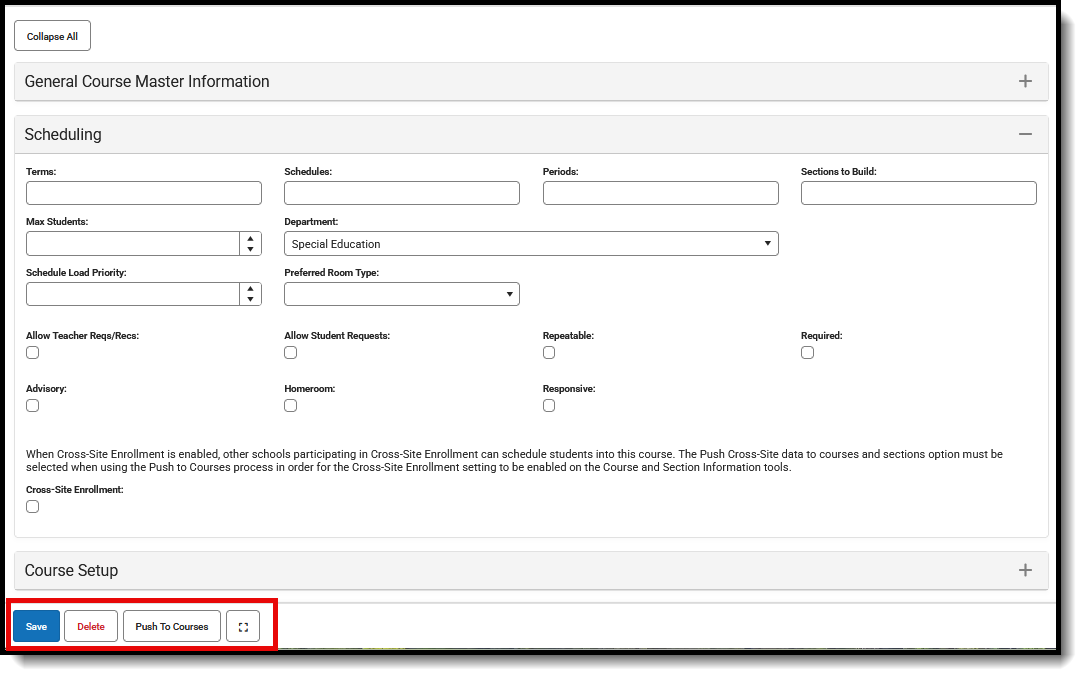 Course Master Information - Save, Delete, Push to Courses, Full Screen
Edit Course Master Information
Existing course master information can be modified by changing current values for the selected course. Any new course masters need to be added using the Add Course Master tool.
Best Practices for modifying course master data:
- Always follow your school's/district's policies for updating course master information.
- Changes to course masters are best managed before the start of the school year.
- Locate and modify the desired value for the appropriate field. The required fields must have a value to save the updates.
- Click Save when finished.
Once course master information is saved, that change can be pushed to the courses.
Delete Course Masters
- Search for and select the Course Masters to delete.
- Click Delete. The course master is deleted when there are no linked courses.
Course Masters can only be deleted when there are no linked courses. When there are linked courses, a Validation Error message displays.
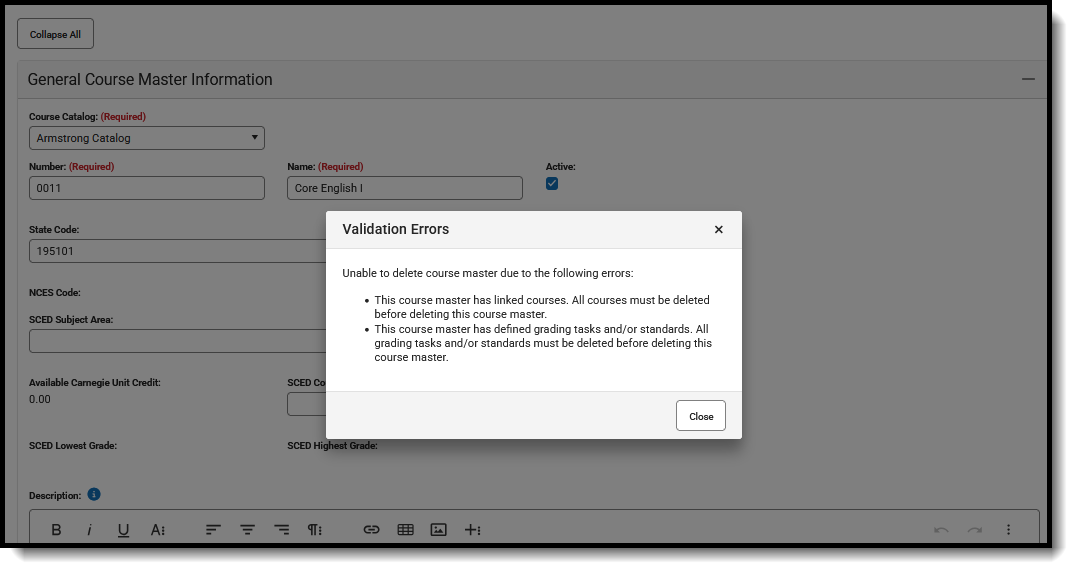 Delete Course Master Validation Error
When there are no validation errors, the course master is deleted. Once deleted, the screen goes blank, and then the Course Master Search option opens.
Course Masters should only be deleted when they were created in error. While users assigned full tool rights to Course Master Information can delete courses, this is not a recommended practice.
- Deleting a course master causes a loss of current and historical data, including student scores, transcript records, attendance data, etc.
- Course Masters cannot be deleted when:
- The Active Trial is locked.
- Courses are assigned to the course master.
- Cross-Site Enrollment students are scheduled into the course.
- Responsive Course Schedules are aligned with the course.
Instead of deleting the course master, set the course master to inactive by removing the Active checkbox. An inactive course master remains within the catalog, but it will not be available. Inactive course masters still roll forward to future calendars and can be marked as Active when they need to be available again. This way, historical data is not lost.
Push to Courses
The Push to Courses option moves the selections on the Course Master to the Courses. This action updates all courses within the Course Master to have the same information - Grading Tasks, Standards, Categories, etc.
Exercise caution when pushing changes to courses once classes are in session, as changes may affect grade calculations.
When data is pushed from the Course Master, Course level Grading Tasks and Standards are overwritten when the same task name and term mask are set. Course level Grade Calc Options are updated with the new data.
Course Master data can be pushed to any calendar for a school associated with the Course Catalog. Calendars may have varying numbers of periods, terms, schedules, etc. The number of periods, terms, and schedules from the Course Master pushes to the destination courses up to the number the destination calendar has. A validation message displays when the Course Master has more terms, periods, and/or schedules than the receiving calendar. The maximum value pushes to the courses.
The best time to implement district-level categories is at the beginning of the school year.
Note the following:
- Data must be LOCKED in order to push information to courses. Marking fields as locked is done at the Course Catalog level. Custom Course elements have a corresponding lock field on the Course editor.
- When a category pushed from a course and a category created by the teacher in the section have the same name, the teacher's category is appended with (1) to distinguish it from the category from the course.
- Categories pushed to sections are locked from editing by teachers.
- Categories and Grade Calculation options aligned to a Course Master ARE NOT reflected in Campus Instruction if a teacher has already set up any of the following: Grade Book, Planner, or Assignment Overview. This is to ensure any existing assignments and grades are not modified.
- Changes made to calculations in Grade Calc Options and Composite Grading may result in changes to students' grades once classes are in session.
- This option is NOT available when the course is a mapped Cross-Site Enrollment course.
- Click Push to Courses.
- In the pop-up that opens, verify the correct calendar year is selected.
- Select the desired Destination Calendars to determine to which courses the course master information is pushed.
- The Course Information is automatically selected. Mark additional checkboxes for any course data that needs to be pushed.
- Click Push to update courses with the grading data from the course master.
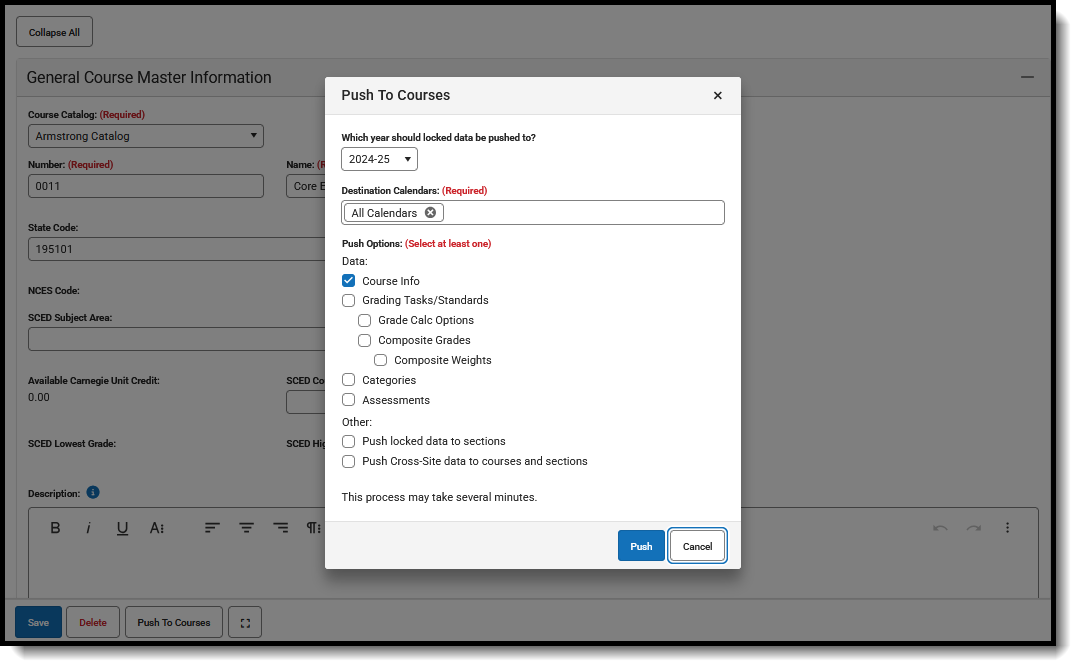 Course Master - Push to Courses
Locked Fields from Course Catalog
Any field that displays on the Course editor can be locked to limit edits made by other users. When locked on the Course Catalog, attributes for Grading Tasks and Standards remain editable on both the Course Master and Course. However, deletion of existing data on the Course (assigned grading tasks, assessments, etc.) is NOT possible, even when the user has the correct tool rights.
When an item is marked to be locked, changes made to the Course Master are pushed to the courses in the selected calendars. Items that are locked cannot be modified on the Course, with the exception of the following. Behavior for locking these fields is noted below:
- Assessments - when locked, information copies forward and is pushed, but changes can be made to assessments at the course level.
- Terms - when locked, information from the Course Master is pushed to courses, but changes can be made at the course level.
- Schedules - when locked, information from the Course Master is pushed to courses, but changes can be made at the course level.
- Period - when locked, information from the Course Master is pushed to courses, but changes can be made at the course level.
Course information is the core reporting information unless the Section is populated. This means:
- Values populated in the Section Information fields take precedence over the values populated in the Course Information fields.
- Section Information fields appear blank unless they are populated manually.
- Section Information fields should only be populated when the values need to differ from the Course Information fields.
See the Locked Fields on Course Information and Section Information explanation on the Course Catalog article for details.
Set Course Parameters Used in Scheduling Processes
These fields are used in the Scheduling Board when building courses for the next school year.
The values entered for Terms, Schedules, and Periods must be within the limits of the calendar structure. For example, a value of six for Terms is not a valid entry for a calendar that has four terms.
- Expand the Scheduling card.
- Enter the number of Terms, Schedules, and Periods in which a course section meets. For example, Integrated Math I A course sections meets for two terms, two days of the rotation (or both days when it is an A/B rotation), and for one period each meeting.
- Enter the number of Sections to Build.
- Enter the maximum number of students who can be placed in a course section the Max Students field.
- Enter the priority that should be assigned to the course in the Schedule Load Priority field.
- Review any other values selected for the course and modify as needed.
- Click the Save button when finished.
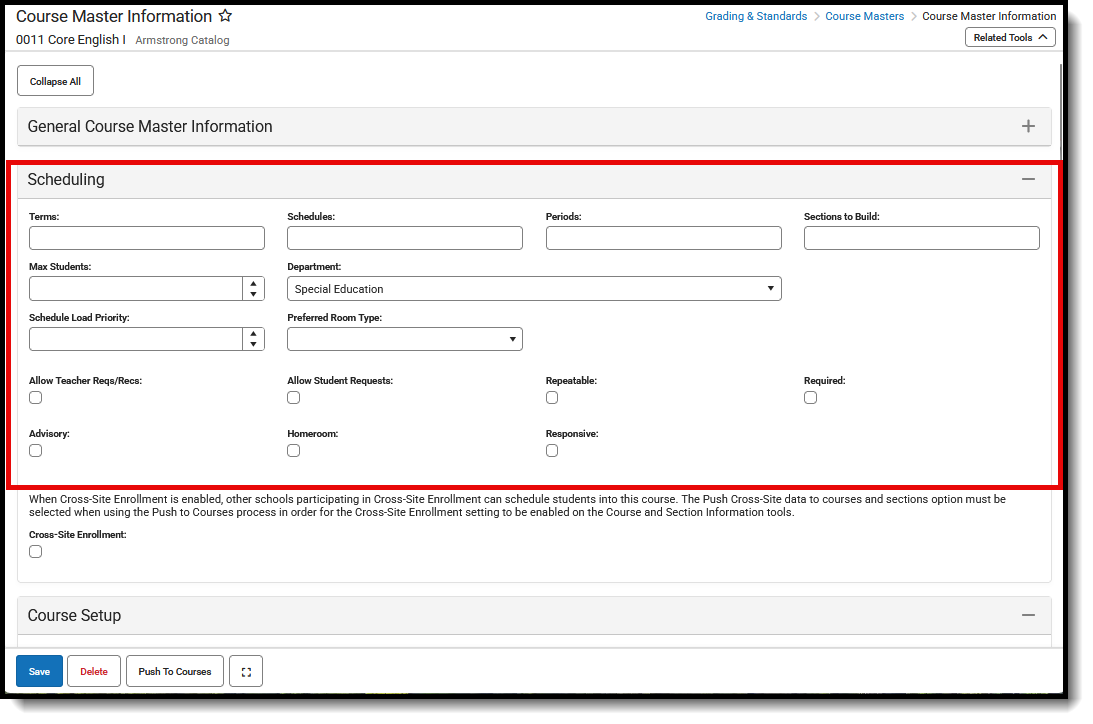 Course Master Information - Scheduling Card
Manage NCES and SCED Course Data
The National Center for Education Statistics (NCES) collects and analyzes data related to education. Codes are used in the collecting and processing of data that facilitates the exchange of information to ensure uniform values. In Campus, these codes are assigned to courses on the Course editor, the Course Masters tool and used in the Course Catalog. These fields are also available in the Ad hoc Reporting Filter Designer when generating reports using the Course/Section Data Type.
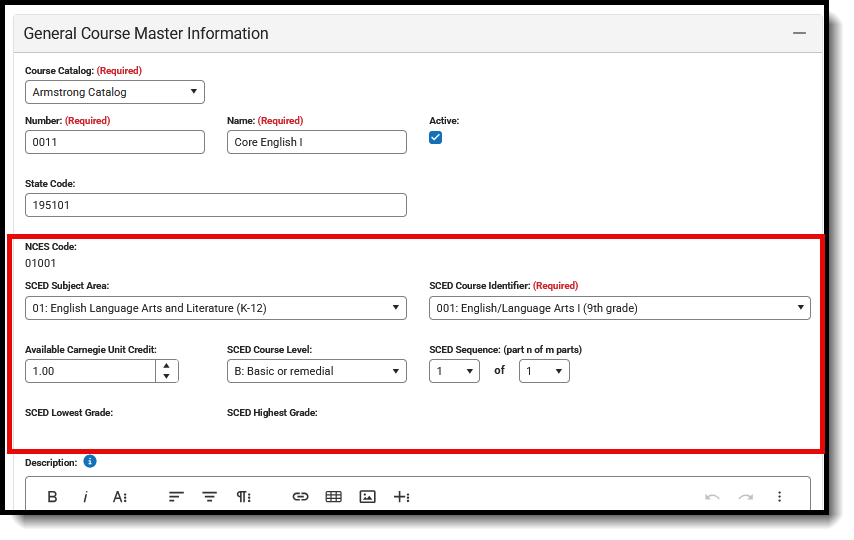 SCED Course Master Fields
The NCES Code is a 12-digit number. When the SCED Subject Area and the SCED Course Identifier fields are populated, the NCES Code displays as a 5-digit number. When the remaining SCED fields are populated, the NCES Code displays a 12-digit number. When the Course Level field uses localized values with codes that are more than one character, the NCES Code can be longer than 12 digits.
NCES Code Sequence
The following information describes how the NCES Code is derived.
| NCES Number Display | NCES Code |
|---|---|
| 5-digit Number | 2 digits from SCED Subject Area (01001)
3 digits from SCED Course Identifier (03003)  |
| 12-digit Number | 2 digits from SCED Subject Area (01001G091212)
3 digits from SCED Course Identifier (01001G091212) 2 digits from SCED Lowest Grade (01001G091212) 2 digits from SCED Highest Grade (01001G091212) 1 value from SCED Course Level (01001G091212) 2 digits from SCED Sequence (01001G091212) |
| 12-digit Number with Carnegie Unit Credit Populated | 2 digits from SCED Subject Area (01001G1.0012)
3 digits from SCED Course Identifier (01001G1.0012) 4 digits (includes decimal) from Available Carnegie Unit Credit (01001G1.0012) 1 value from SCED Course Level (01001G1.0012) 2 digits from SCED Sequence (01003G1.0012)  Available Carnegie Unit Credit values report when present over SCED Lowest/Highest Grade. |
NCES and SCED options are not editable in the Attribute Dictionary as they are a nationally standardized set of codes. These codes are automatically marked to copy forward with newly created calendars.
NCES Data syncs to State Edition applications. NCES Data also rolls forward with calendars, as NCES selections are tied to a courseID. Additional items added to the Attribute/Dictionary are automatically marked as Copies Forward.
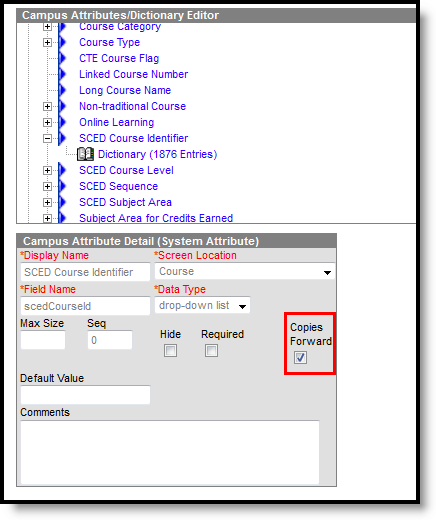 NCES Data - Copies Forward
Course Master Information Field Descriptions
The following is a list of fields available in each of the Course Master Information cards.
General Course Master Information
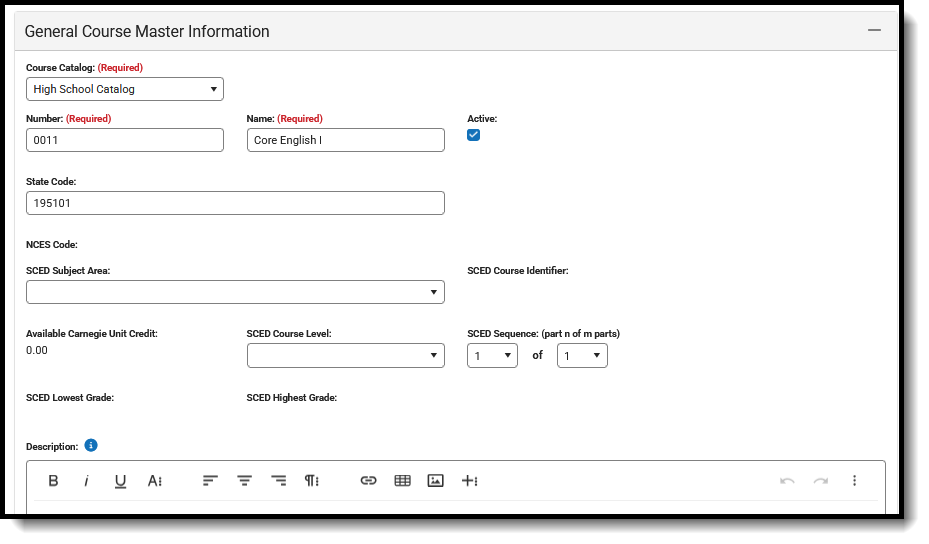 General Course Master Information Card
| Field Name | Description | Location |
|---|---|---|
| Course Catalog Required |
Lists which course catalog the selected Cousre Master is linked. | Database: CourseCatalog.name
Ad hoc Reporting: Course/Section Data Type: Course > Course Information > catalogName (courseInfo.catalogName) |
| Number Required |
This number is used for identification, searching, and making requests. It is also displayed on student schedules and transcripts.
Spaces are not allowed at the beginning or end of this field. Numbers or letters can be entered. Course Master numbers must be unique for each Course Master in each school. |
Database: CourseMaster.number
Ad hoc Reporting: Course/Section Data Type: Course > Course Information > courseMaster.Number (courseInfo.courseMasterNumber) |
| Name Required |
A more descriptive identifier, the course name is visible in many places in Campus and can be up to 30 characters in length.
Spaces are not allowed at the beginning or end of this field. |
Database: CourseMaster.name
Ad hoc Reporting: Course/Section Data Type: Course > Course Information > courseMasterName (courseInfo.courseMasterName) |
| Active | Indicates the course master is active and available to align courses.
|
Database: CourseMaster.active
Ad hoc Reporting: Course/Section Data Type: Course > Course Information > active (courseInfo.active) |
| State Code | A code assigned to a course that is used in state reports, up to 20 characters long. The entered value can be numbers or letters, decimals or special characters.
See the Responsive Scheduling article for section for this field's impact on responsive courses. This field behaves differently in each state. See the State Code Field Logic section for details. |
Database: CourseMaster.statecode
Ad hoc Reporting: Course/Section Data Type: Course > Course Information > CourseMasterStateCode (courseInfo.CourseMasterStateCode) |
| NCES Code | A 5-digit or 12-digit alphanumeric value (depending on what fields are populated) that is a combination of the populated SCED codes and Available Carnegie Unit value.
See the NCES Code Sequence section for details on how the code is derived.
There is a core set of NCES values provided by the National Center for Education Statistics website. In certain states, these values may be localized.
Note that the NCES code field displays "none" until the Subject Area and the SCED Course Identifier fields have been populated. When those values have been cleared, the NCES code field displays "none" |
Database: N/A (calculated field using the Subject Area and SchedCourseID)
Ad hoc Reporting: Student Data Type: Student > Learner > Schedule > Course/Section > NCESCode (courseSection.NCESCode) Course/Section Data Type: Course > Course Information > NCES Code (courseInfo.NCES Code) |
| SCED Subject Area | The Secondary School Course Classification System: School Codes for the Exchange of Data (SCED) presents a taxonomy and course descriptions for secondary education.
This is intended to help schools and education agencies maintain longitudinal information about students' coursework in an efficient, standardized format that facilitates the exchange of records as students transfer from one school to another, or to post-secondary education.
For a list of the SCED Subject Area Codes, see the National Center for Education Statistics website. |
Database: CourseInfo.SCEDSubjectArea Ad hoc Reporting: Course/Section Data Type: Course > Course Information > SCED Subject Area (courseInfo.SCED Subject Area) |
| SCED Course Identifier Required |
A 3-digit number that distinguishes a course within a Course within SCED Subject Area.
These identifiers are general but provide enough specificity to identify the course's topic and to distinguish it from other courses in that subject area. |
Database: CourseInfo.SCEDCourseIdentifier Ad hoc Reporting: Course/Section Data Type: Course > Course Information > SCED Course Identifier (courseInfo.SCED Course Identifier) |
| Available Carnegie Unit Credit | Indicates the amount of credit available to a student who successfully meets the objectives of the course. It is a measure of "seat time" rather than a measure of attainment of the course objectives.
The Carnegie Foundation defined the Carnegie Unit as 120 hours of class or contact time with an instructor over the course of a year at the secondary (American high school) level. This breaks down into a single one-hour meeting on each of five days per week for a total of 24 weeks per year. However, knowing that classes usually meet for 50 minutes yields a value of 30 weeks per year. A semester (one-half of a full year) earns 1/2 a Carnegie Unit.
The entered value formats as N.NN. When a value of 1.5 is entered, the NCES Course Code includes this as 1.50. See the NCES Code Sequence section for details on how the code is derived.
A course meeting every day for one period of the school day over the span of a school year offers one Carnegie unit.
Values of 1 up to 999.99 can be entered. |
Database: CourseInfo.SCEDAvailableCredit Ad hoc Reporting: Course/Section Data Type: Course > Course Information > SCED Available Credit (courseInfo.SCED Available Credit) |
| SCED Course Level | The secondary course's level of rigor.
Options may be localized in some states. |
Database: CourseInfo.SCEDCourseLevel Ad hoc Reporting: Course/Section Data Type: Course > Course Information > SCED Course Level (courseInfo.SCED Course Level) |
| SCED Sequence (part n of m parts) | Describes the manner in which schools may break up courses into multiple courses to address complex course content.
Chemistry may be broken into 2 different courses: Chemistry 1 and Chemistry 2. Taking Chemistry 1 would be course "one of two" or "1 2". It is important to remember that sequence describes the order in which courses are taken.
The first sequence field cannot have a higher value than the second sequence field.
These fields are automatically populated with values of 1 of 1.
|
Database: CourseInfo.SCEDSequenceNumber CourseInfo.SCEDSequenceMax Ad hoc Reporting: Course/Section Data Type: Course > Course Information > SCED Sequence Number (courseInfo.SCED Sequence Number) Course/Section Data Type: Course > Course Information > SCED Sequence Max (courseInfo.SCED Sequence Max) Ad hoc Additional Information SCED Sequence Number applies to the Part N field. SCED SequenceMax applies to the Part M field. |
| SCED Lowest Grade | Indicates the lowest grade level offered for a specific course.
This field is used for pre-secondary courses (e.g., elementary and middle school courses) and can be selected when the SCED Subject Areas field has a value of the following and a SCED Course Identifier is selected:
The entered grade level must be less than the entered grade level for SCED Highest Grade.
This field is not available in all states. |
Database: CourseInfo.SCEDLowestGrade
Ad hoc Reporting: Course/Section Data Type: Course > Course Information > SCED Lowest Grade (courseInfo.SCED Lowest Grade) |
| SCED Highest Grade | Indicates the highest grade level offered for a specific course.
This field is used for pre-secondary courses (e.g., elementary and middle school courses) and can be selected when the SCED Subject Areas field has a value of the following and a SCED Course Identifier is selected:
The entered grade level must be greater than the entered grade level for SCED Lowest Grade.
This field is not available in all states. |
Database: CourseInfo.SCEDHighestGrade Ad hoc Reporting: Course/Section Data Type: Course > Course Information > SCED Highest Grade (courseInfo.SCED Highest Grade) |
| Description | The Course Description section displays the detailed description of the course. This description is visible in the Course Catalog and when students request courses on the Campus Portal. It can only be modified from the Course Catalog. | Database: Course.description
Ad hoc Reporting: Course/Section Data Type: Course > Course Information > description (courseInfo.description) |
State Code Field Logic
The State Code field behaves differently in each state. The following summarizes these differences. Follow your state's procedures when using this field.
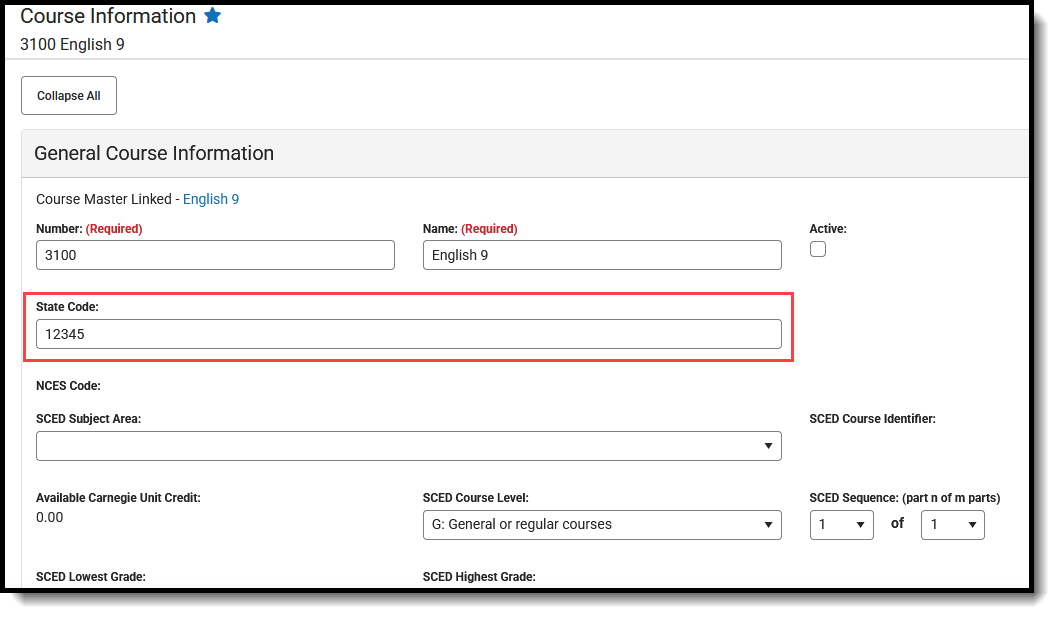 State Code Field on General Course Information Card
For states that use the Course Management tool to define State Codes:
- The State Code field is a searchable dropdown with values defined in Course Management.
- No additional values can be added to the Course Information tool.
- When the State Code field is populated on the Course Master Information tool, the field is read-only on the Course Information tool.
- When the State Code field is NOT populated on the Course Master Information tool and is not locked, the field can be populated on the Course Information tool.
For states that use the State Code attribute and define dictionary values in either the Course attribute or the Definition attribute via the Core Attribute/Dictionary:
- The State Code field is a searchable dropdown with values defined in Course Management.
- No additional values can be added on the Course Information tool.
- When the State Code field is populated on the Course Master Information tool, the field is read-only on the Course Information tool.
- When the State Code field is NOT populated on the Course Master Information tool and is not locked, the field can be populated on the Course Information tool.
For states that do not use Course Management or the State Code Attribute to define values:
- The State Code field is a text box instead of a searchable field.
- When the State Code field is populated on the Course Master Information tool, the field is read-only on the Course Information tool.
- When the State Code field is NOT populated on the Course Master Information tool and is not locked, the field can be populated on the Course Information tool.
Scheduling
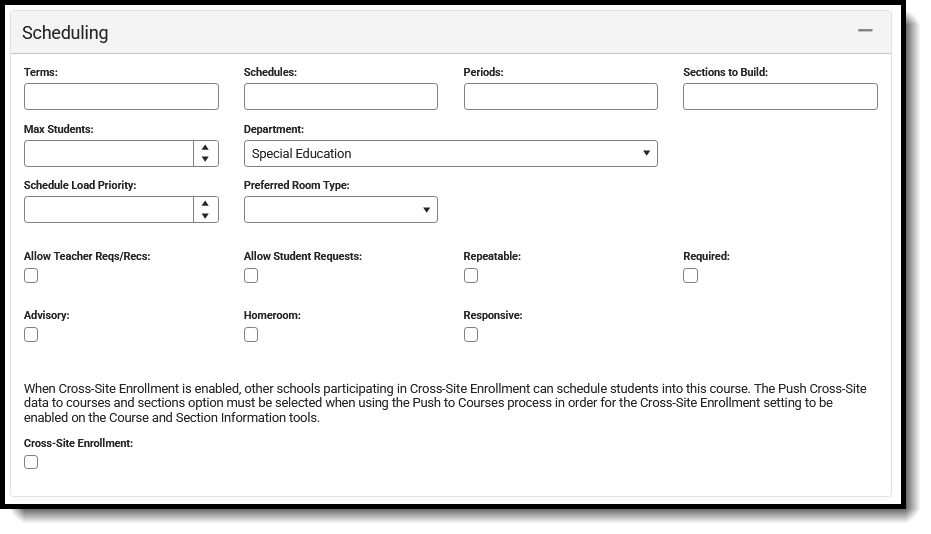 Scheduling Card
| Field | Description | Location |
|---|---|---|
| Terms | Indicates the number of terms one instance of the course covers, such as a semester long course that lasts for two terms in a four quarter schedule.
This field, along with the Schedules and Periods fields, needs to be populated in order to accurately reflect a student's requested units. The entered number for this field must be greater than zero (0) and must not be more than the maximum number of terms set on the calendar. For example, a a value of 6 cannot be entered for a calendar that has only 4 terms. Academic Planning Logic This field calculates the credit a student receives for this course. This field should not be blank or have a value of zero. When viewing the Course Plan and the Grad Progress tools, a planned course that is scored multiple times only displays once with the total amount of credit the student receives for that course. Value is multiplied by the value entered in this field. |
Database: Course.terms
Ad hoc Reporting: Course/Section Data Type: Course > Course Information > terms (courseInfo.terms) |
| Schedules | Indicates the total number of period schedules in which the course meets.
This field, along with the Terms and Periods fields, needs to be populated in order to accurately reflect a student's requested units. The entered number for this field must be greater than zero (0) and must not be more than the maximum number of schedules assigned to the calendar. For example, a a value of 6 cannot be entered for a calendar that has only 4 schedules. |
Database: Course.schedules
Ad hoc Reporting: Course/Section Data Type: Course > Course Information > schedules (courseInfo.schedules) |
| Periods | Indicates the number of periods in one day a course is taught.
This value is most often one. For schools using block scheduling, this number would be two - the student attends the same course for two hours. This field, along with the Terms and Schedules fields, must be populated to accurately reflect a student's requested units. The entered number for this field must be greater than zero (0) and must not be more than the maximum number of periods set on the calendar. For example, a a value of 6 cannot be entered for a calendar that has only 4 periods. |
Database: Course.period
Ad hoc Reporting: Course/Section Data Type: Course > Course Information > periods (courseInfo.periods) |
| Sections to Build | Indicates to the Scheduling Board how many sections of this course exist. | Database: Course.sectionToBuild
Ad hoc Reporting: Student > Learner Planning > Course Requests > Course > sectionsToBuild (course.sectionToBuild) Course/Section Data Type: Course > Course Information > sectionsToBuild (courseInfo.sectionsToBuild) |
| Max Students | Displays the maximum number of students that can be scheduled into the sections of the course. This field is also on the Section Information editor; it only needs to be populated in one location (either on the Course editor or the Section editor).
Only positive, whole number values can be entered. When using the Scheduling Board to load course sections OR when loading requests for students using the Walk-In Scheduler, this field MUST be populated with a value that is greater than zero. |
Database: Course.maxStudents
Ad hoc Reporting: Course/Section Data Type: Course > Course Information > maxStudents (courseInfo.maxStudents) |
| Department | Contains the lists of departments created in that can be used to organize courses. Assigning a department to courses helps in the organization of the schedule.
When using the Scheduling Board or when searching by department, all courses in that department are grouped together. |
Database: Course.departmentName
Ad hoc Reporting: Course/Section Data Type: Course > Course Information > departmentName (courseInfo.departmentName) |
| Schedule Load Priority | Indicates priority that should be given to a course during scheduling. This is used in the Scheduling Board when loading course requests. A value of 1 indicates the courses are first, which might be helpful for courses that aren't offered every year. |
Database: Course.priority
Ad hoc Reporting: Course/Section Data Type: Course > Course Information > departmentName (courseInfo.departmentName) |
| Preferred Room Type | Lists the type of room in which this course can be scheduled. Room types are created in the Attribute/Dictionary.
See the Room Setup article for more information. |
Database: Course.roomType
Ad hoc Reporting: Course/Section Data Type: Course > Course Information > departmentName (courseInfo.departmentName) |
| Allow Teacher Reqs/Recs | Indicates teachers are able to recommend students for the course. When marked, teachers can suggest courses for the student using the Course Requests tool and can recommend future courses for the student using Student Course Recommendations.
See the Teacher Course Requests and Course Recommendations section for more information. Student Course Recommendations are used in the Academic Planning process and require the student to have an active Academic Plan. Teacher Course Requests are used in the Scheduling process. Academic Planning Logic Courses marked with this checkbox can be chosen by teachers in the Teacher Course Requests tool and the Student Course Recommendations tool, when the teacher has appropriate tool rights. Teachers can only request courses that are marked to allow student requests.e |
Database: Course.allowTeacherRequests
Ad hoc Reporting: Course/Section Data Type: Course > Course Information > allowTeacherRequsts (courseInfo.allowTeacherRequests) Ad hoc Information: Reports a value of zero (0) when the checkbox is not marked, and a value of 1 when the checkbox is marked. |
| Allow Student Requests | Indicates students can request this course through the Portal.
When this is not marked, the course displays in the Course Catalog search results with a message that states courses can only be added by a counselor, and students are not allowed to request this on the Portal. Academic Planning Logic Courses marked to Allow Student Requests can be chosen by students when planning courses for the next school year(s) and can be added to their academic plan in the Portal. When a course is not marked to allow student requests, the Course Catalog search on the Portal displays a message, and only counselors can add the course to a student's Academic Plan. |
Database: Course.requestable
Ad hoc Reporting: Course/Section Data Type: Course > Course Information > requestable (courseInfo.requestable) |
| Repeatable | Courses marked as repeatable can be chosen by students multiple times to add to their academic plan.
Academic Planning Logic Courses marked as repeatable can be chosen by students multiple times to add to their academic plan. |
Database: Course.repeatable
Ad hoc Reporting: Course/Section Data Type: Course > Course Information > repeatable (courseInfo.repeatable) Additional Ad hoc Information Reports a value of zero (0) when the checkbox is not marked, and a value of 1 when the checkbox is marked. |
| Required | Indicates whether the course is required.
Marking this does not mean the course is necessary for a student to graduate (those courses are indicated on a student's Graduation Plan). There is no logic associated with marking this, but when a school were to use this checkbox to note which courses a student needed in order to meet graduation requirements, this would be used in a report. Then, all courses marked as Required could be found. |
Database: Course.required
Ad hoc Reporting: Course/Section Data Type: Course > Course Information > required (courseInfo.required) Additional Ad hoc Information Reports a value of zero (0) when the checkbox is not marked, and a value of 1 when the checkbox is marked. |
| Advisory | Identifies a course as an advisory course. | Database: Course.advisory
Ad hoc Reporting: Course/Section Data Type: Course > Course Information > advisory (courseInfo.advisory) |
| Homeroom | Indicates that this course functions as a homeroom.
This field is used in scheduling and attendance reports and functions as a sort option when scheduling courses for the next school year. It also causes the teacher's name to print on the Report Card. |
Database: Course.homeroom
Ad hoc Reporting: Course/Section Data Type: Course > Course Information > homeroom (courseInfo.homeroom) Ad hoc Information Reports a value of zero (0) when the checkbox is not marked, and a value of 1 when the checkbox is marked. |
| Responsive | When marked, indicates the course allows for Responsive Course offerings.
See the Responsive Scheduling articles for more information. This checkbox cannot be marked for Cross-Site Enrollment courses. When this checkbox is marked, the following fields are disabled:
|
Database: Course.responsive
Ad hoc Reporting: Course/Section Data Type: Course > Course Information > responsive (courseInfo.responsive) Ad hoc Information Reports a value of zero (0) when the checkbox is not marked, and a value of 1 when the checkbox is marked. |
| Cross-Site Enrollment | When marked, indicates this course is available for students participating in Cross-Site Enrollment courses.
This only displays when the Course Master Information has Cross-Site Enrollment marked. See the Cross-Site Enrollment articles for more information. |
Database: CourseMaster. allowCrossSiteEnrollment
Ad hoc Reporting: Course/Section Data Type: Course > Course Information > Course Master Cross-Site Enabled (courseInfo.Course Master Cross-Site Enabled) |
Course Setup
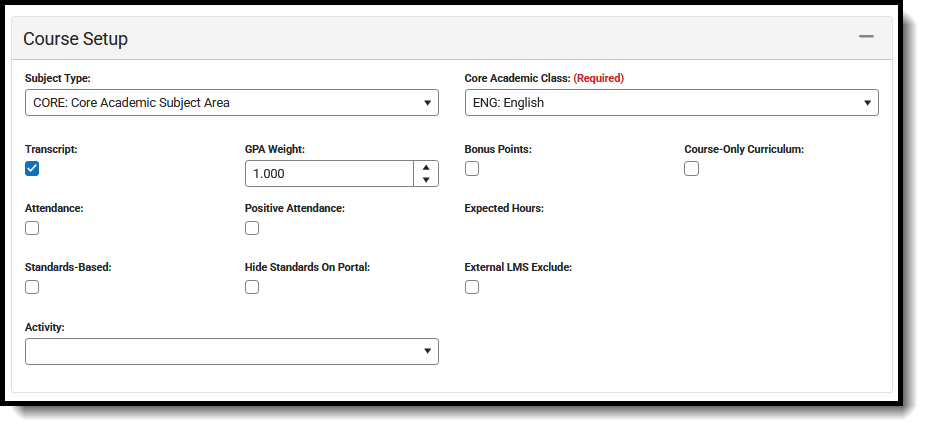 Course Setup Card
| Field | Description | Location |
|---|---|---|
| Subject Type | Indicates whether the information taught in the course applies to one of the following:
CORE: Core Academic Subject Area ELEM: Basic Elementary Curriculum SPED: Special Education Content When the information does not fall into one of these categories, select NA: Not Applicable. When CORE is selected, a required Core Academic Class field displays. |
Database: Course.subjectType
Ad hoc Reporting: Course/Section Data Type: Course > Course Information > subjectType (courseInfo.subjectType) |
| Core Academic Class Required |
This field is required when the Subject Type is set to CORE: Core Academic Subject Area.
Core Academic Classes refer to any course in one of the following areas:
|
Database: Course.coreSubject
Ad hoc Reporting: Course/Section Data Type: Course > Course Information > coreSubject (courseInfo.coreSubject) |
| Transcript | Indicates whether the course should be included on student transcripts. | Database: Course.transcript
Ad hoc Reporting: Course/Section Data Type: Course > Course Information > transcript (courseInfo.transcript) Ad hoc Information: Reports a value of zero (0) when the checkbox is not marked, and a value of 1 when the checkbox is marked. |
| GPA Weight | Indicates that the course contributes to the student’s cumulative GPA calculation. It indicates the impact of the course score in GPA calculations relative to other courses.
For example, a school’s score group is on a standard 4.0 scale. A course has a weight of 2. For a student that receives an A (4.0), the GPA value then equals an 8, thus inflating the calculation. Most often, this field is set to a 1. When the course does not contribute to the GPA at all, leave the field blank.
When the GPA Weight on a Transcript Course Record is blank/null/zero, the GPA Value for that Course is not included in any Weighted or Unweighted GPA calculations on the transcript. |
Database: course.gpaWeight
Ad hoc Reporting: Course/Section Data Type: Course > Course Information > gpaWeight (courseInfo.gpaWeight) |
| Bonus Points | Indicates whether bonus points are used in calculating GPA. | Database: Course.bonusPointsAvail
Ad hoc Reporting: Course/Section Data Type: Course > Course Information > bonusPointsAvail (courseInfo.bonusPointsAvail) Ad hoc Information: Reports a value of zero (0) when the checkbox is not marked, and a value of 1 when the checkbox is marked. |
| Course-Only Curriculum | Prevents teachers from aligning assignments aligned to sections in this course to sections in any other courses.
Normally, teachers can align an assignment to any section they teach, including those in multiple sections. This option restricts that ability; when an assignment is aligned to a section in this course, only other sections of the same course can be selected in the Section Selector of the assignment. |
Database: Course.courseOnlyCurriculum
Ad hoc Reporting: Course/Section Data Type: Course > Course Information > courseOnlyCurriculum (courseInfo.courseOnlyCurriculum) Ad hoc Information: Reports a value of zero (0) when the checkbox is not marked or a value of 1 when the checkbox is marked. |
| Attendance | Indicates whether attendance is taken during this course. | Database: Course.attendance
Ad hoc Reporting: Course/Section Data Type: Course > Course Information > attendance (courseInfo.attendance) Ad hoc Information: Reports a value of zero (0) when the checkbox is not marked, and a value of 1 when the checkbox is marked. |
| Positive Attendance | Indicates whether attendance recorded for this section is in the form of positive attendance, in which the teacher tracks how long students work in a given course area.
When the Positive Attendance Preference is set to No, this field is used as an indicator. When the preference is set to Yes, additional logic is turned on, allowing schools to enter positive attendance data for these courses. |
Database: Course.unitAttendance
Ad hoc Reporting: Course/Section Data Type: Course > Course Information > unitAttendance (courseInfo.unitAttendance) Ad hoc Information: Reports a value of zero (0) when the checkbox is not marked, and a value of 1 when the checkbox is marked. |
| Expected Hours | When the Positive Attendance Preference is set to Yes, this field displays, indicating the total number of hours of attendance a student enrolled in this class is required to have.
Hours can be entered as whole numbers or as decimal numbers up to 6 characters (1000.25, etc.). A maximum value of 8760 hours can be entered. |
Database: Course.expectedHours
Ad hoc Reporting: Course/Section Data Type: Course > Course Information > expectedHours (courseInfo.expectedHours) |
| Standards-Based | Indicates whether this course is graded using a traditional grading scale or aligned with a standards area. | Database: Course.standardsBased
Ad hoc Reporting: Course/Section Data Type: Course > Course Information > standardsBased (courseInfo.standardsBased) |
| Hide Standards On Portal | Hides the standards assigned to a course from being viewed on the Portal and Student App. Standards still display for teachers in Campus Instruction.
Marking this checkbox marks it for all of a course's section upon save. |
Database: Course.hideStandardsOnPortal
Ad hoc Reporting: Student Data Type: Student > Learner Planning > Course Requests > Course > hideStandardsOnPortal (course.hideStandardsOnPortal) |
| External LMS Exclude | When a district is sharing Campus data with an external learning management system, this checkbox can be used to exclude specific records from being shared.
This designation also applies to all Sections associated with this Course. When the Exclude checkbox is marked for the School or Calendar associated with this Course, that designation also applies to this Course. |
Database: Course.externalLMS
Ad hoc Reporting: Course/Section Data Type: Course > Course Information > externalLMSExclude (courseInfo.externalLMSExclude) Ad hoc Information: Reports a value of zero (0) when the checkbox is not marked or a value of 1 when the checkbox is marked. |
| Activity | Indicates the course is being used to track an activity such as an athletic team or extra-curricular. It may use a state- or district-defined set of codes. | Database: Course.activityCode
Ad hoc Reporting: Course/Section Data Type: Course > Course Information > activityCode (courseInfo.activityCode) |
State Defined
The State Defined card includes any field required for your state's reports and extracts, and any field your state needs to track but may not be included in reports/extracts.
The top three fields (highlighted in the image below) are used throughout Campus in other areas, and are defined below.
Fields vary by state. Review your state's content for more information.
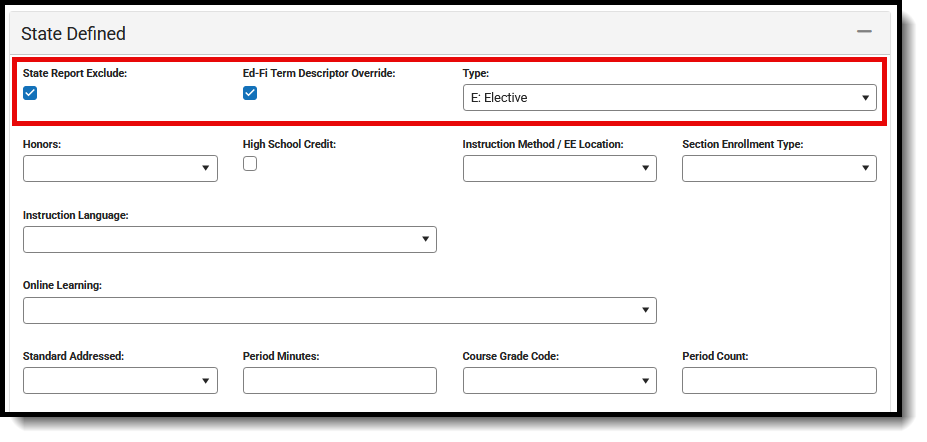 State Defined Card
| Field | Description | Location |
|---|---|---|
| State Report Exlcude | When marked, course information is not included in any state reports.
See the Responsive Scheduling and Course Management section for this field's impact on responsive courses. |
Database: Course.stateReportExclude
Ad hoc Reporting: Course/Section Data Type: Course > Course Information > stateReportExclude (courseInfo.stateReportExclude) Ad hoc Information: Reports a value of zero (0) when the checkbox is not marked or a value of 1 when the checkbox is marked. |
| Ed-Fi Term Descriptor Override | This field determines whether the course is eligible to be mapped to a different Sessions resource in Ed-Fi than the one that would be referenced based on the Section Schedule Placement.
This field only displays when your state used Ed-Fi to collect student data through Ed-Fi Resources. |
Database: Course.edFiTermType
Ad hoc Reporting: Course/Section Data Type: Course > Course Information > edFiTermType (courseInfo.edFiTermType) |
| Type | The options available in this dropdown can be edited in the Attribute Dictionary and provide additional filtering fields in Ad hoc Reporting. | Database: Course.type
Ad hoc Reporting: Course/Section Data Type: Course > Course Information > type (courseInfo.Type) |
District Defined
This section lists any fields and values your district has chosen to track. These are localized fields that may or may not be reported in local reports or state reports.
 District Defined Card with Fields Defined
These fields are created in the Custom Attribute/Dictionary tool.
Your district should provide guidance on district-defined fields. When no district-defined fields are created, text indicating such fields displays in place of any fields.
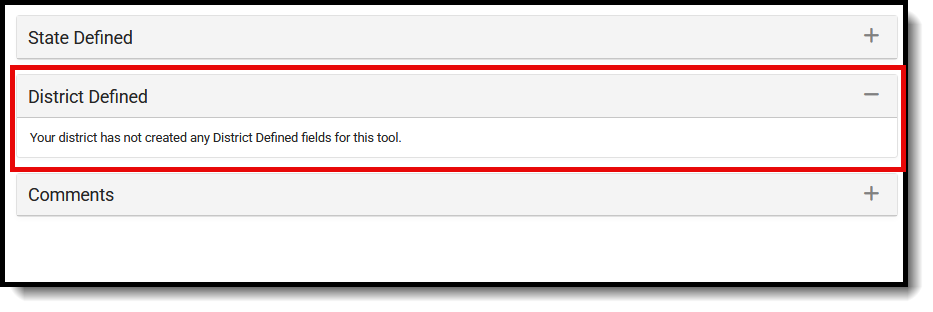 District Defined Card - No Fields Defined
Comments
The Comments section provides any additional information added for the course. This is a text field where staff can enter items related to when it was added to the catalog, who added it, etc. It differs from the Description field in that it is used for internal notes about the course and not used in any other scheduling tool or process.
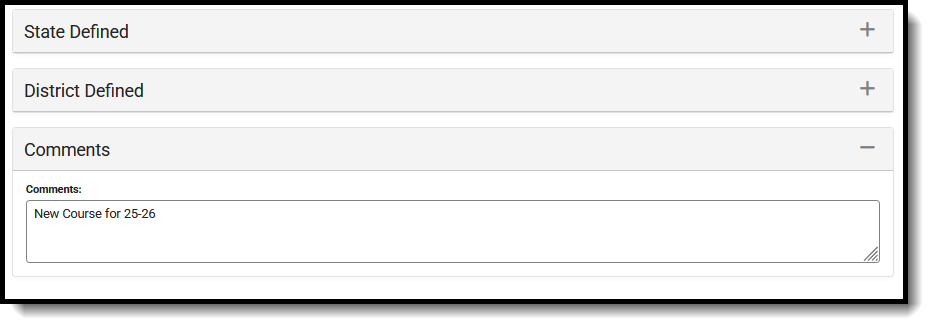 Comments Card
State-Specific Information
Fields may vary by state:
Save
From Course Master Information, you can update basic course information and push those changes down to courses and its sections. In this video, you will learn how to edit course master information and push that data down to courses and sections.
Add Course Wizard
The Add Course Wizard provides the data entry for basic course information. This editor contains the same fields and options as the Course editor. The Add Course Wizard can be used for schools that use the Course Master tools and those that do not.
Tool Search: Add Course
The Add Course tool allows users to create new courses and enter the required fields for saving them. It contains the same fields as the Course Information tool but also includes data entry for basic course information.
When the school selected in the Context Switcher is linked to a Course Master, the Add Course Master tool displays.
As of the Campus.2515 Release Pack (April 2025), the Add Course tool has a new look and feel! It now matches the updated Course Information tool.
- See the Course Information Field Descriptions for definitions, database information, and Ad hoc Reporting locations.
- Use your browser's search functionality (CTRL-F, F3, etc.) to locate the new field.
- Your tool rights may need to be modified. Full access to Add Course requires Read and Write rights, plus Read rights to Course Information and Section Information.
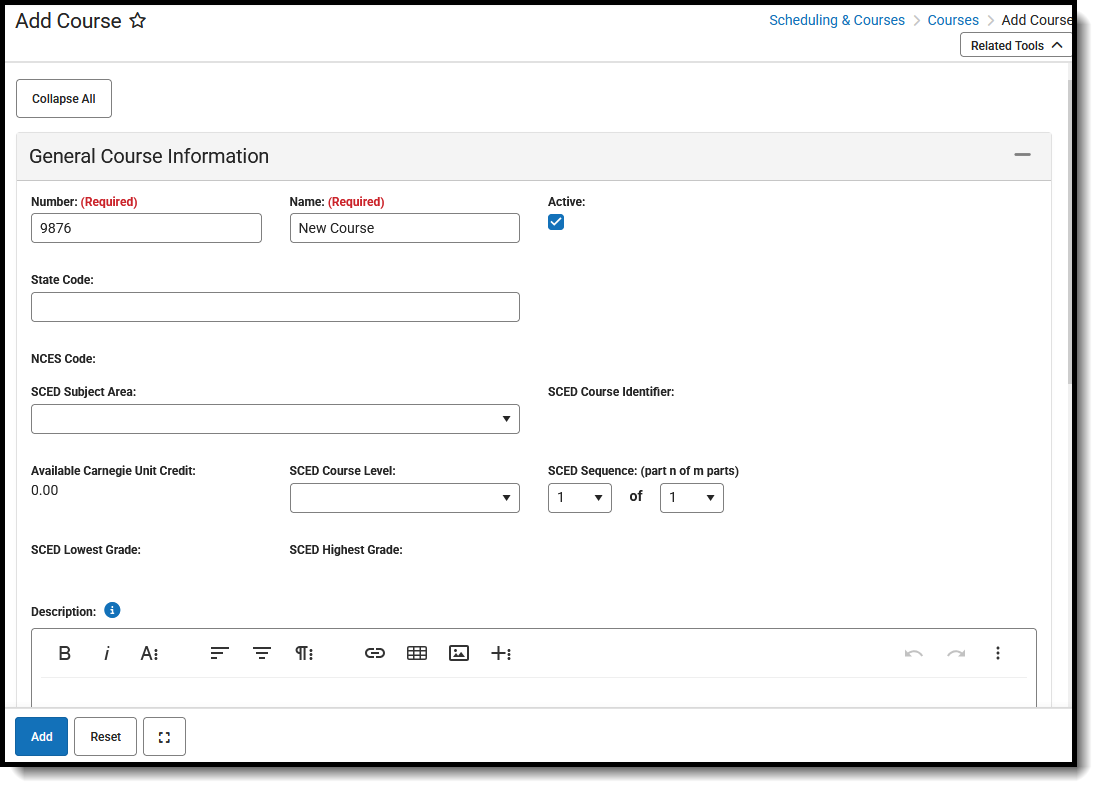 Add Course Tool
To add a new course, users need at least Read rights to Course Information and Section Information.
For more information on necessary tool rights, refer to the Add Course Tool Rights and the Course Information Tool Rights articles.
The Add Course tool is organized into the following sections:
- General Course Information includes identifying course information, whether it's an active course (students can be scheduled into it), SCED information, and a course description.
- Scheduling includes the length of the course, the number of periods it meets in one day, the number of schedules it meets in, the department name, the maximum student count, etc.
- Course Setup includes fields like the course is an attendance-taking course, uses positive attendance, is standards-based, reports scores on a student's transcript, and much more.
- State Defined lists all of the fields that are used for state reporting in your state and includes fields like Dual Credit and State Report Exclude.
- District Defined lists any field your district has chosen to collect data on. These are added using the Custom Attribute/Dictionary.
- Comments lists any additional information about the course that your school or district wants known. This could be a note when the course was added to the catalog, that it must meet in a certain room, that it's only for seniors, or some other piece of information.
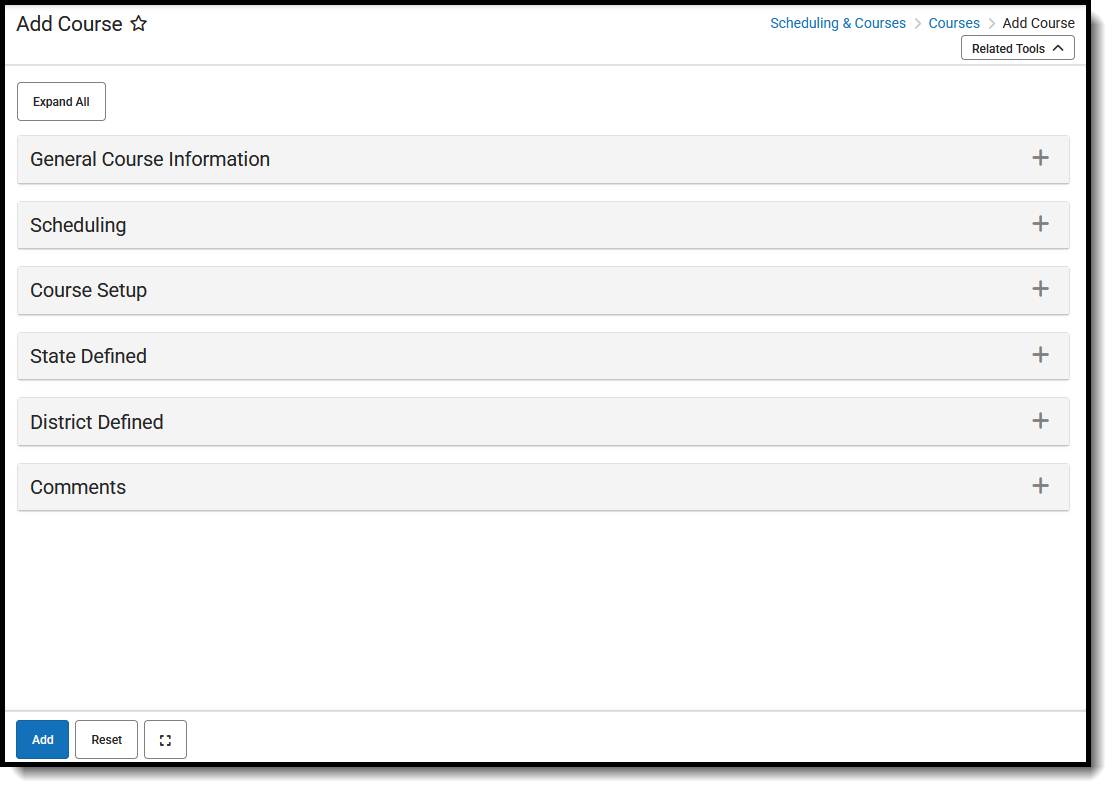 Add Course Tool - All Cards Collapsed
Click on the gray header or use the plus sign on the right side to expand the card. Use the Expand All/Collapse All button at the top of the tool to open or close all of these sections.
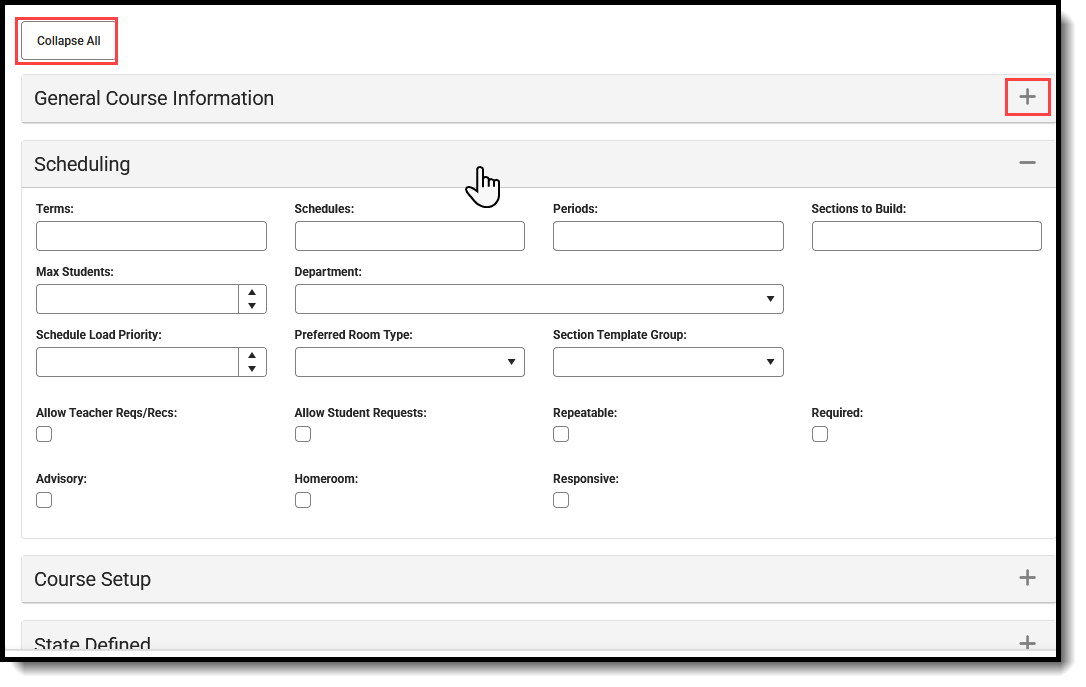 Open or Close Add Course Cards
The Add, Reset, and Full Screen view buttons display across the bottom of the tool.
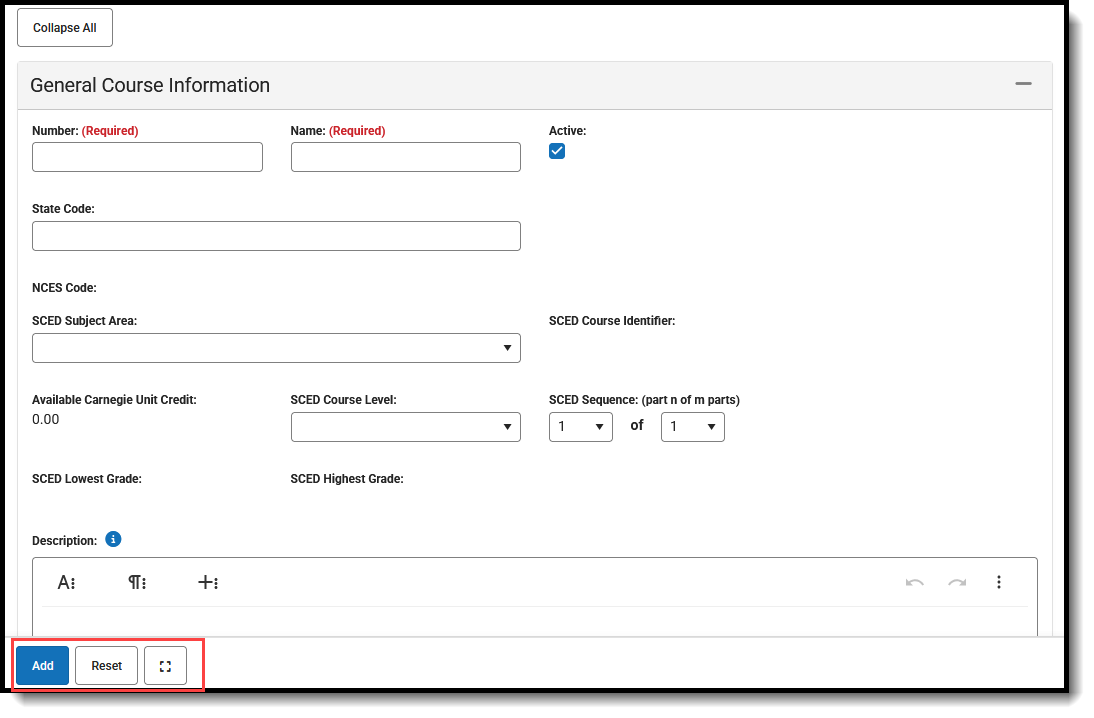 Add Course - Add, Reset, Full Screen
Add a Course
- In the General Information card, enter the new course Number and Name. These are the only fields that need to be populated to save the new course.
- Mark the Active checkbox. This is automatically marked. Remove the checkbox if the course is considered not active (not available for course requests or placement on student schedules).
- Populate all other fields as needed, following district and school policy.
- Click the Add button when finished. The new course is added to the list of available courses for the selected calendar.
Once a course is added, the screen reloads as the Course Information tool where additional course management can be done - adding sections, assigning teachers, etc.
 Search for Newly Added Course
Reset the Add Course Cards
Click the Reset button to remove any values entered in any of the fields on the Add Course tool. This clears out all fields in case of a misentry or an error. Re-enter the new course information as needed.
Add Course from Course Master
When the selected calendar is linked to a Course Master, a new course can be added from the Course Master without navigating to Course Master Information or Add Course Master tools. The Add Course tool displays a message across the top of the tool indicating that a district-wide Course Catalog is in use and that new courses need to be created as a Course Master and linked to your schedule. All active Course Masters are listed.
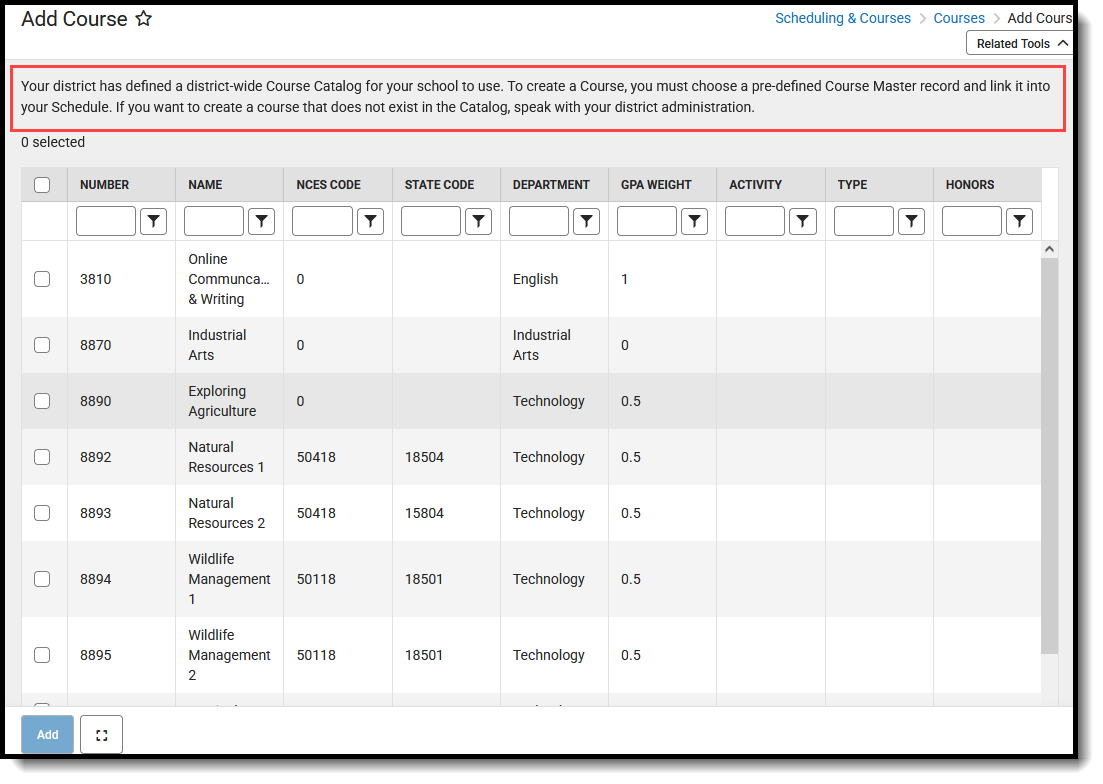 Add Course from Course Master
- Enter matching values for one or more columns to return results.
- Place a checkmark next to the desired Course Master(s).
- Click Add. A confirmation message displays indicating which courses are being added to the current schedule.
- Choose one of the following:
- Continue to add the course.
- Copy to Clipboard to copy the list of courses being added. The list of courses can be pasted into a document for review at a later time.
- Cancel adding the course.
The selected course masters are added to the list of available courses.
This video shows how schools that HAVE been assigned a Course Catalog can add courses from the catalog.
For schools that HAVE NOT been assigned a Course Catalog, Add Course is used to enter information for courses that will be offered at the selected school.
Grading Tasks (Course Masters)
The Grading Tasks tab lists the items that teachers grade as part of the grading process. These tasks include mid-term grades, quarter grades, semester grades, etc. These grading tasks are created in the Grading Tasks tool in the Grading and Standards area.
Tool Search: Grading Tasks
The Grading Tasks tab lists the items the teachers grade as part of the grading process. These tasks include mid-term grades, quarter grades, semester grades, etc. These grading tasks are created in the Grading Tasks tool in the Grading and Standards area.
Review the Course Masters Overview article for information on Course Masters best practices and a Course Master Workflow.
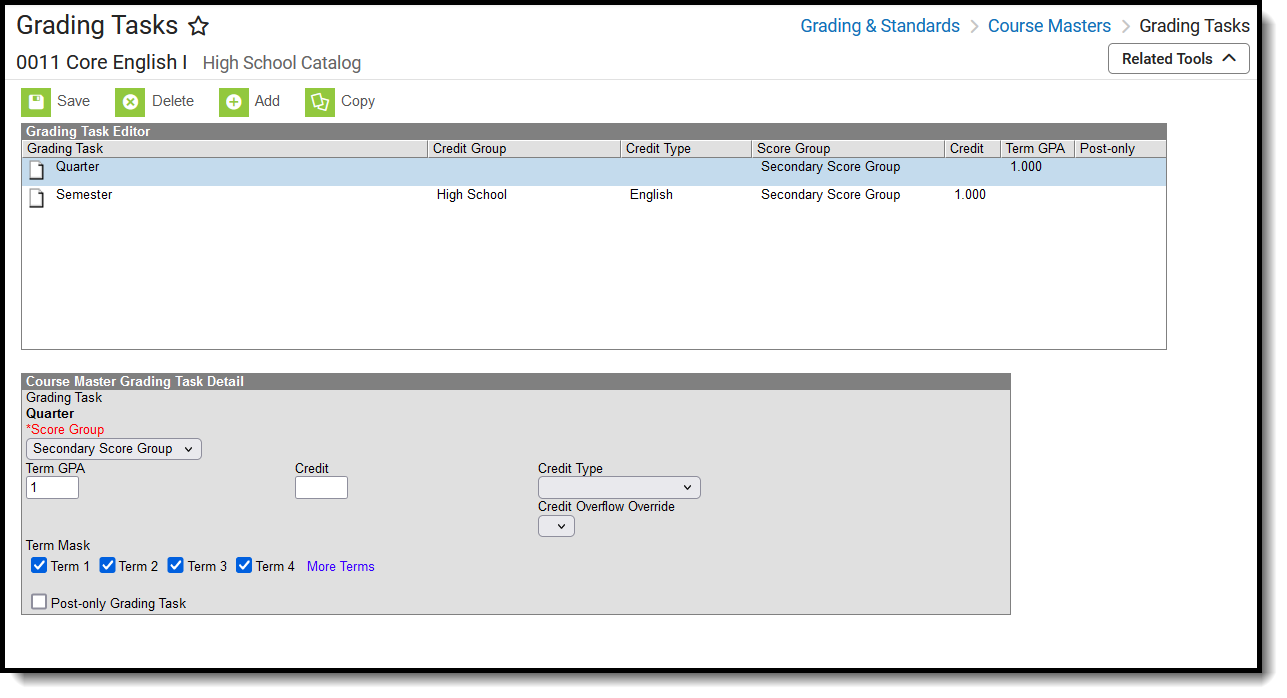 Course Masters Grading Tasks Editor
Visit the Course Status tool to view a list of all courses associated with a given course master, see the status of grading setup for each course, and relink courses as needed.
See the Grading Tasks Tool Rights article to learn about rights needed to use this tool.
Grading Task Information in Ad hoc Query Wizard
Course Grading Task fields are available in the Query Wizard when using the Course/Section Data type in the Course > Course Information > Grading Task Credit folder.
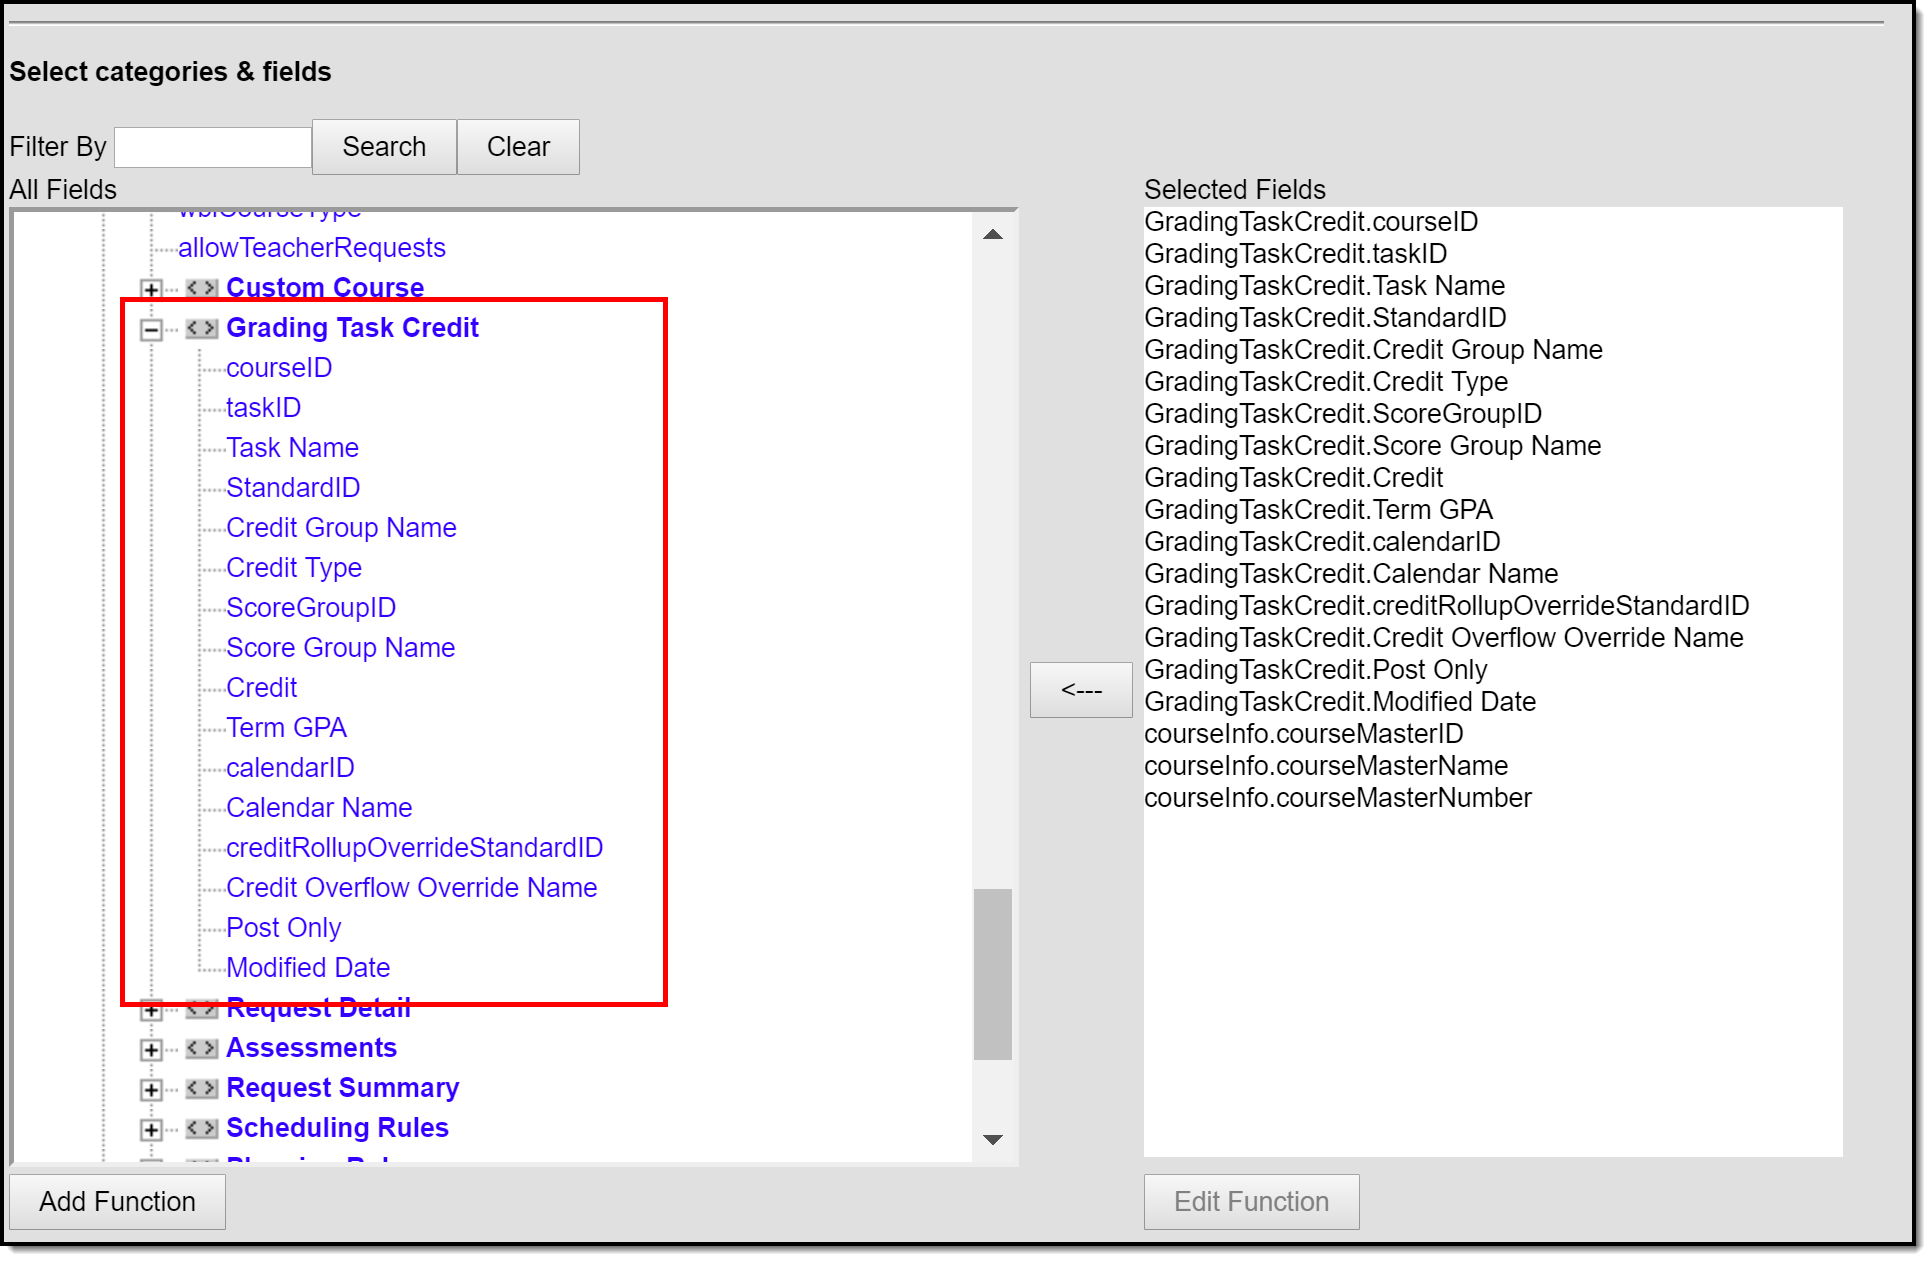 Grading Task Ad hoc Fields
Course Master Grading Task Editor
Before assigning grading tasks to courses, verify the following:
- Grading Tasks have been created in the Grading and Standards area.
- Score Groups have been created in the Grading and Standards area.
- Credit Types have been created in the Grading and Standards area.
The Grading Task editor provides a list of grading tasks and a detail editor showing specific elements of the selected grading task. The following provides a description of the fields on the Course Master Grading Task editor.
|
Field |
Description |
Ad hoc Fields |
|---|---|---|
|
Score Group |
Determines the points and/or letter grades that will be used when scoring the grading task. |
GradingTaskCredit.ScoreGroupName |
|
Term GPA |
Indicates the weight used when calculating the grade of the student. Refer to the GPA Calculations in Campus article for detailed explanations. |
GradingTaskCredit.TermGPA |
|
Credit |
Indicates the amount of credit the student receives upon completion of the course or when the course is posted on a transcript. This value depends on the setup of courses. This is usually only populated on those tasks that are posted to transcripts. |
GradingTaskCredit.Credit |
|
Credit Type |
Indicates the group of credit the student receives when credit is given. This is used in Academic Planning when tracking the progress of the student towards graduation. |
GradingTaskCredit.CreditType |
| Credit Overflow Override |
This field is set for a single course Grading Task and is used to roll credits when the current credit type has met its credit requirements.
The credits from the course will first try to roll up to the override credit type. If that credit type has met its requirements, it will then look at the overflow setup for the course's credit type.
A particular course may be able to count towards more than one credit type. For example a particular CTE course may fulfill a science credit or a math credit. This course would be set up with its default credit type of Math and an override rollup credit type of Science. If the student has completed their math requirement, this course would then be counted as a science credit (only if a science credit was still needed). If both credit requirements were met, then the default rollup would occur, likely going from math to elective credit. |
GradingTaskCredit.CreditOverflowName |
|
Term Mask |
Selection indicates when the task is graded. Term masks are always selected when the task is needing to be graded.
|
This field is not available in Ad hoc Reporting. |
| Post-only Grading Task |
Indicates a grading task cannot be aligned to assignments and categories in the teacher's Grade Book. Post-only Grading Tasks are for posting grades only, not for aligning student work. |
GradingTaskCredit.PostOnly
Reports a value of 1 if the checkbox is marked; reports a value of 0 if the checkbox is not mark. |
Add Grading Tasks to Course Masters
- Click the Add icon. A Course Master Grading Task Detail will display.
- Select the Grading Task to add to the Course Masters from the dropdown list.
- Select the Score Group from the dropdown list.
- Enter the Term GPA weight the student receives.
- Enter the Credit value the student receives.
- If desired, select the appropriate Credit Overflow Override option from the dropdown list.
- Select the Credit Type from the dropdown list.
- Mark the appropriate Term Mask for the grading task.
- If desired, mark the Post-only Grading Task checkbox.
- Click the Save icon when finished.
Any changes made to the Grading Tasks or any other Course Master tab require a push process to the courses. This option is available on the Course Master Info tab.
Delete a Grading Task from a Course Master
- Select the Grading Task to delete from a course from the Grading Task table.
- Click the Delete icon. A warning message will appear indicating the Grading Task is about to be deleted. If the Grading Task is used in a composite grade calculation, that calculation must be edited to not use the Grading Task that's being deleted.
- Click OK to continue or click Cancel.
Copy a Grading Task to Another Course Master
The entire Course Master can be copied from one school to another using the Copy button on the Course Master Info tab.
Use the Copy icon to easily add the Grading Tasks associated with one Course Master (called the Source Course Master) to one or more other Course Masters in the same Course Catalog (called Destination Course Masters). The Copy icon displays when proper tool rights are assigned.
When copying a grading task from one course master to another:
- The Course Catalogs must be the same for the source course master and the destination course master.
- Grading tasks that already exist in the destination course master will not be copied again. This means when five grading tasks are selected to be copied in the source course master, but three of those already exist in the destination course master, only the two that do not exist in the course master will be copied.
- When a Course Catalog is locked for grading tasks, the copy process pushes the grading task to destination courses.
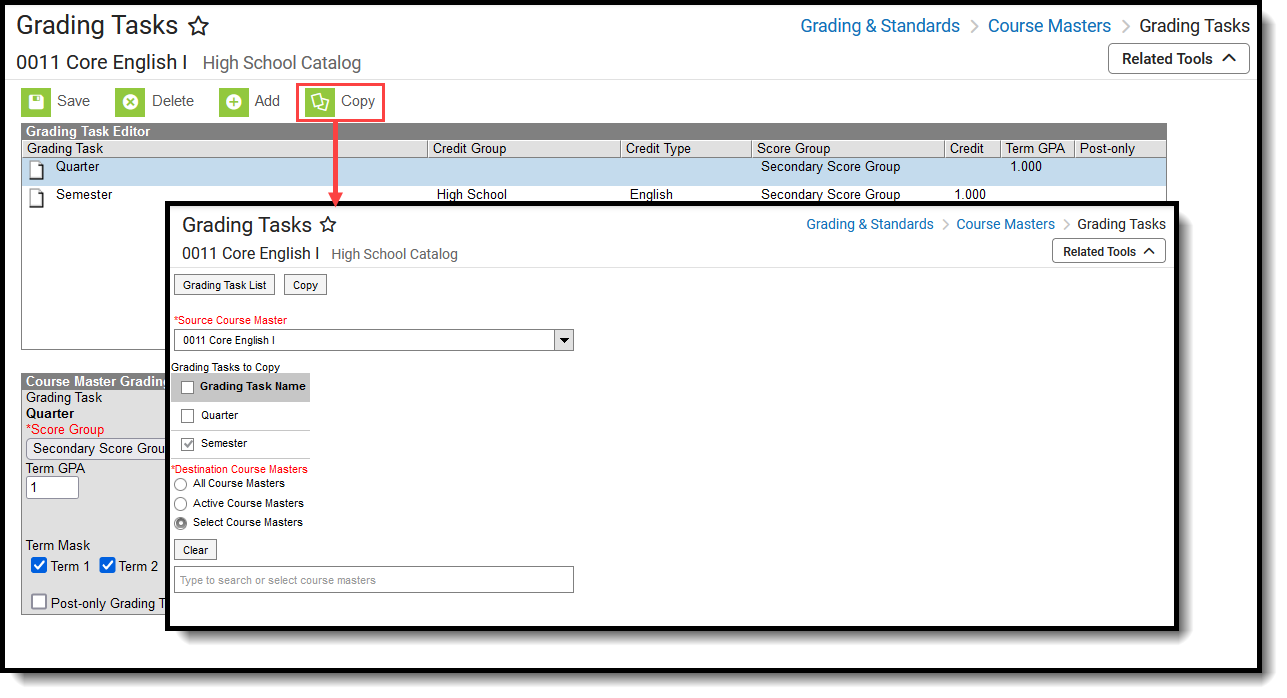 Copy Grading Tasks
- Select a specific grading task to copy or just click the Copy icon without selecting a grading task. When a specific grading task is selected to copy, that grading task is the only one selected to copy; when no grading tasks are selected to copy, all of the grading tasks in that Course Master are automatically selected to copy.
- Select the Source Course Master from the dropdown list. This displays the currently selected course master. To change this selection, begin typing in the dropdown field.
- Mark the Grading Tasks to Copy. Or, clear the selections by clicking the checkbox in the gray Grading Task Name header.
- Select the Destination Course Master:
- All Course Masters: copies task(s) to all course masters in the course catalog.
- Active Course Masters: copies task(s) to all course masters in the course catalog that currently have the Active flag marked.
- Select Course Masters: copies task(s) to the selected course masters. To select a master, type the Number or Name in the search field. Multiple masters can be selected. Click Clear to remove all masters from the list.
- Click the Save button to copy the selected grading tasks to the destination course master. This action saves the selection; the grading tasks are not copied until a school year is selected (see the information below).
When the copy is complete, and the catalog is locked, an alert displays asking to which calendar years the information should be pushed. Select the school year from the dropdown and click OK.
A confirmation displays indicating the selected grading tasks from the Source Course Master have been copied to the Destination Course Masters. At this point, the grading tasks are copied and are displayed on the Course Master Grading Task tab of the Destination Course Master.
If there are no grading tasks to copy, an alert displays indicating all selected grading tasks already exist in the destination course master.
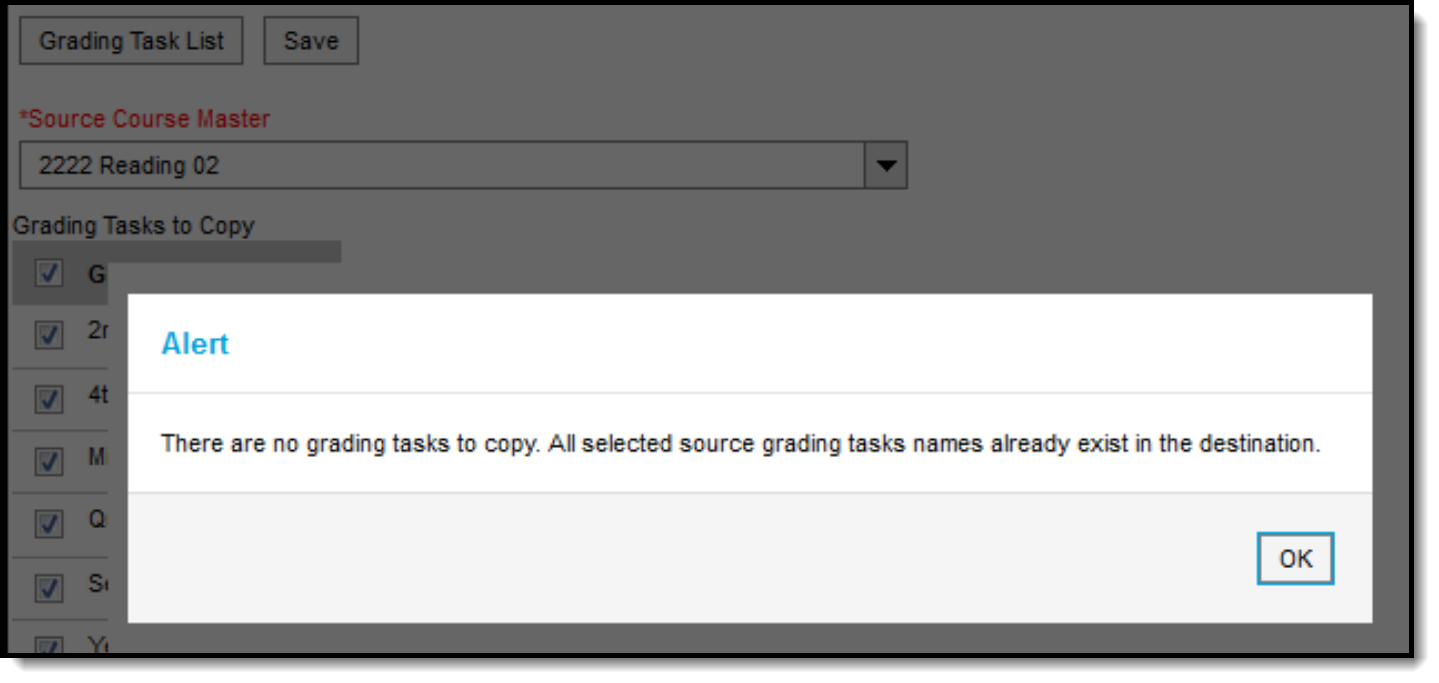 Alert Indicating No Grading Tasks were Copied
To return to the main view of Course Master Grading Task, click the Grading Task List button.
Grading tasks describe the types of grades that appear on student report cards, such as mid-term grades, semester grades and trimester grades. Districts using course catalogs can define these tasks on course masters for schools that use them.
Grading Tasks (Courses)
The Grading Tasks tab lists the items that teachers grade as part of the grading process. These tasks include mid-term grades, quarter grades, semester grades, etc. These grading tasks are created in the Grading Tasks tool in the Grading and Standards area.
Tool Search: Course Grading Tasks
The Grading Tasks tool lists the items the teachers grade as part of the grading process. These tasks include mid-term grades, quarter grades, semester grades, etc. These grading tasks are created in the Grading Tasks tool in the Grading and Standards area.
If you are using the Multiple Year Academic Planning functionality, see the Best Practices for more information.
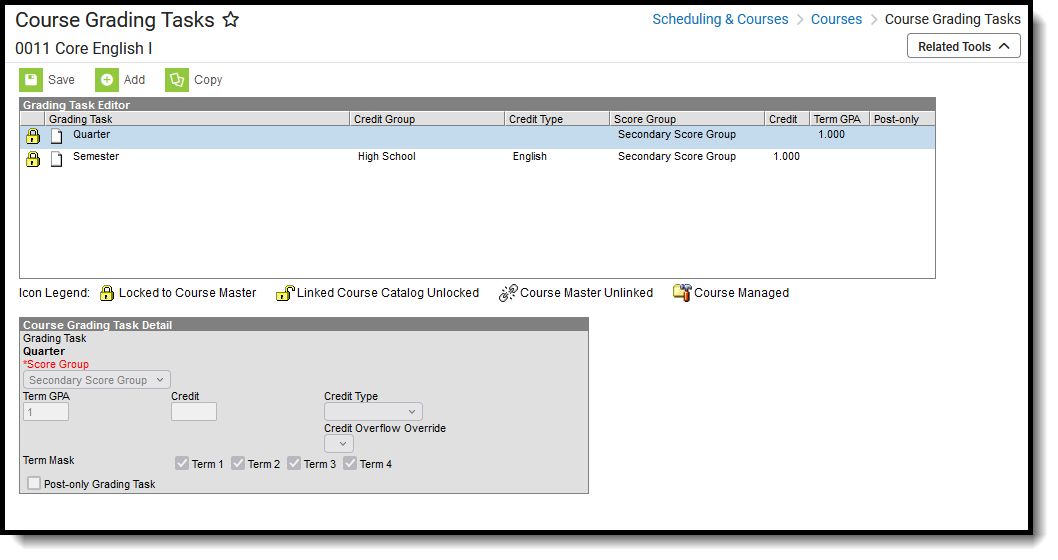 Course Grading Tasks
See the Course Grading Tasks Tool Rights article for information about rights needed to use this tool.
Grading Tasks can also be managed at the Course Master level. Icons in the Grading Task List provide more information about each task:
| Icon | Text | Description |
 |
Locked to Course Master | Indicates that the task corresponds to a task at the Course Master level. These tasks are not editable in this tool. |
 |
Linked Course Catalog Unlocked | Indicates that tasks are unlocked for the whole Course Catalog. These tasks are editable in this tool. |
 |
Course Master Unlinked | Indicates that the tasks is associated with a tasks at the Course Master level, but that the link with that task is broken.
To relink tasks:
|
 |
Course Managed | Indicates that the task is managed at the Course level and does not have a corresponding record at the Course Master level. |
Visit the Course Status tool to view a list of all courses associated with a given course master, see the status of grading setup for each course, and relink courses as needed.
Best Practices for Grading Tasks
When using Academic Planning functionality:
- When a calendar is assigned a Course Master, the Credit Overflow Override field must be set on the Grading Task of the course in the course master.
- When a calendar is not assigned a Course Master, and courses are maintained at each school, the Credit Overflow Override field must be set on the Grading Task of the course.
For districts that have more than one high school and multi-year academic planning is used, it is recommended that Course Masters be created. This reduces the amount of individual course maintenance that needs to be performed.
Grading Task Information in Ad hoc Query Wizard
Course Grading Task fields are available in the Query Wizard when using the Course/Section Data type in the Course > Course Information > Grading Task Credit folder.
 Grading Task Ad hoc Fields
Course Grading Task Detail Editor
Before assigning grading tasks to courses, verify the following:
- Grading Tasks are created in the Grading and Standards area.
- Score Groups are created in the Grading and Standards area.
- Credit Types are created in the Grading and Standards area.
The Grading Task Editor provides a summary of the grading task, including its name, assigned credit group and credit type (if listed), the score group, the credit value and the term GPA. It also indicates if that grading task is locked. The locked icon displays when the course is linked to a Course Master, and grading tasks are assigned at the Course Master level. Changes can only be made through the Course Master. Fields are marked as locked on the Course Catalog.
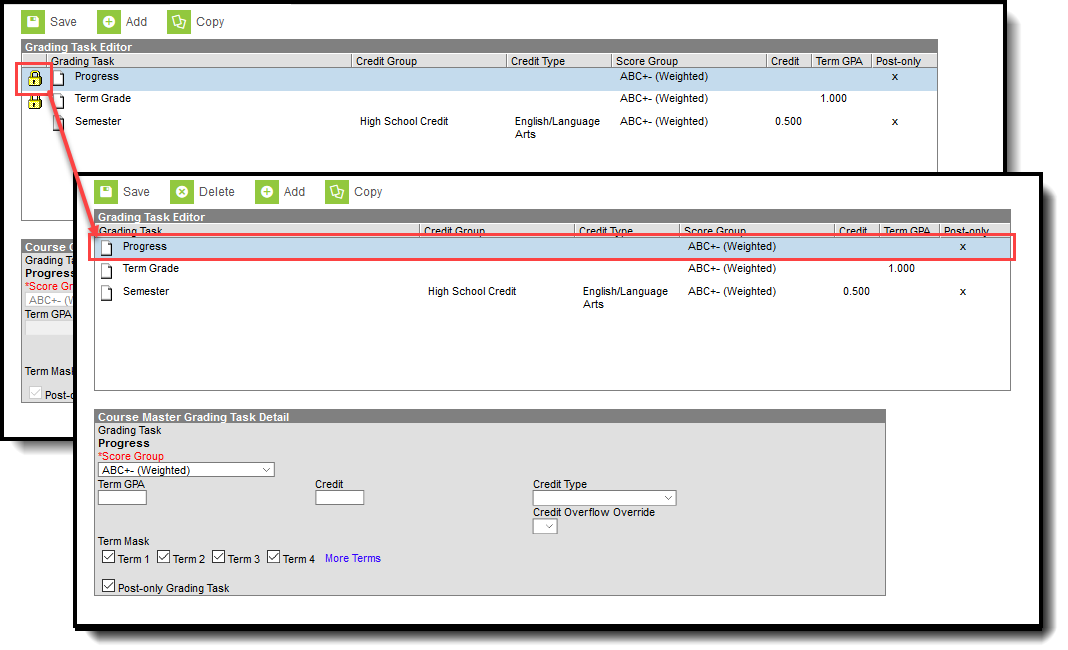 Grading Task Lock Display from Course Master
The Grading Task editor provides a list of grading tasks and a detail editor showing specific elements of the selected grading task. The following provides a description of the fields on the Course Grading Task editor.
|
Field |
Description |
Ad hoc Fields |
|---|---|---|
|
Score Group |
Determines the points and/or letter grades that is used when scoring the grading task. |
GradingTaskCredit.ScoreGroupName |
|
Term GPA |
Indicates the weight used when calculating the grade of the student. |
GradingTaskCredit.TermGPA |
|
Credit |
Indicates the amount of credit the student receives upon completion of the course or when the course is posted on a transcript. This value depends on the set up of courses - whole year courses or semester long courses. This is usually only populated on those tasks that are posted to transcripts. |
GradingTaskCredit.Credit |
|
Credit Type |
Indicates the group of credit the student receives when credit is given. This is used in Academic Planning when tracking the progress of the student towards graduation.
|
GradingTaskCredit.CreditType |
|
Credit Overflow Override |
This field is set for a single course Grading Task and is used to roll credits when the current credit type has met its credit requirements.
The credits from the course first try to roll up to the override credit type. If that credit type has met its requirements, it then looks at the overflow setup for the course's credit type.
A particular course may be able to count towards more than one credit type. For example a particular CTE course may fulfill a science credit or a math credit. This course would be set up with its default credit type of Math and an override rollup credit type of Science. If the student has completed their math requirement, this course would then be counted as a science credit (only if a science credit was still needed). If both credit requirements were met, then the default rollup would occur, likely going from math to elective credit. |
GradingTaskCredit.CreditOverflowName |
|
Term Mask |
Selection indicates when the task must be graded.
|
N/A |
| Post-only Grading Task |
Indicates a grading task cannot be aligned to assignments and categories in the teacher's Grade Book. Post-only Grading Tasks are for posting grades only, not for aligning student work. |
GradingTaskCredit.PostOnly
Reports a value of 1 if the checkbox is marked; reports a value of 0 if the checkbox is not mark. |
| Exclude from Ed-Fi
(WI only) |
Indicates the Grading task is not reported to Ed-Fi. |
|
Add Grading Tasks to Courses
- Click the New icon. A Course Grading Task Detail displays.
- Select the Grading Task to add to the Courses from the dropdown list.
- Select the Score Group from the dropdown list.
- Enter the Term GPA weight the student receives.
- Enter the Credit value the student receives.
- Select the Credit Type from the dropdown list.
- If desired, select the appropriate Credit Overflow Override option from the dropdown list.
- Mark the appropriate Term Mask for the grading task.
- If desired, mark the Post-only Grading Task checkbox.
- Click the Save icon when finished.
Copy Grading Tasks to Another Course
Use the Copy icon to easily add the Grading Tasks associated with one course to another course (called the Source Course) to one or more other courses (called Destination Courses). The Copy icon displays when proper tool rights are assigned.
When copying a grading task from one course to another:
- Grading tasks that already exist in the destination course are not copied again. This means when five grading tasks are selected to be copied in the source course, but three of those already exist in the destination course, only the two that do not exist in the destination course are copied.
- Destination courses cannot be tied to any course masters.
- Grading tasks are copied from one course to another course within the same calendar year.
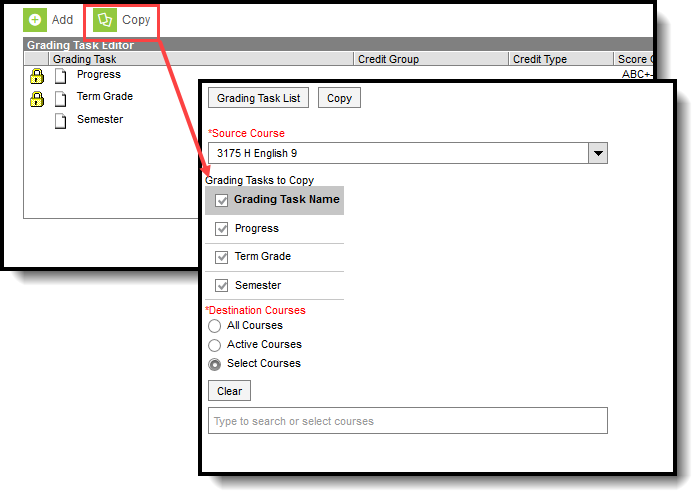 Copy Grading Tasks
- Select a specific grading task to copy, and then click the Copy icon.Or, just click the Copy icon without selecting a grading task. When a specific grading task is selected to copy, that grading task is the only one selected to copy; when no grading tasks are selected to copy, all of the grading tasks in that course are automatically selected to copy.
- Select the Source Course from the dropdown list. This displays the currently selected course. To change this selection, begin typing in the dropdown field.
- Mark the Grading Tasks to Copy. Or, clear the selections by clicking the checkbox in the gray Grading Task Name header.
- Select the Destination Course(s):
- All Courses: copies tasks to all courses in the calendar.
- Active Courses: copies tasks to all courses in the calendar that currently have the Active flag marked.
- Select Courses: copies tasks to the selected courses. To select a course, type the Number or Name in the search field. Multiple courses can be selected. Click Clear to remove all courses from the list.
- Click the Save button to copy the selected grading tasks to the destination course.
If there are no grading tasks to copy, an alert displays indicating all selected grading tasks already exist in the destination course master.
Grading tasks are the items that appear on student report cards and transcripts. This video demonstrates how to use the Grading Tasks Setup tool to define the types of grades that will be posted.
Course Recommendations
Student Course Recommendations
The Student Course Recommendations tool allows teachers to recommend future courses for students. Future courses must be within the same department as the current course and the student must have a future enrollment.
Tool Search: Course Recommendations
The Student Course Recommendations tool allows teachers to recommend future courses for students within the same Credit Type or Department as the current course if the student has a future enrollment. If there is no matching department or credit type in the student's future calendar, any course that can be requested is available for selection.
Recommendations display on the student's Academic Course Plan and are viewable by Counselors.
Using this tool requires certain fields to be marked on the Course editor. Contact your Campus Administrator for more information.
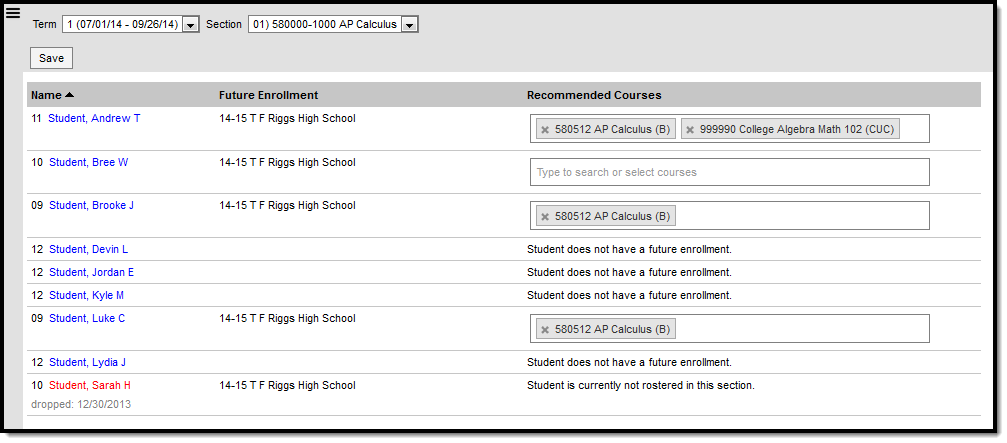
Student Course Recommendations
See the Instruction Tool Rights article for information on available tool rights.
Course Recommendations vs Course Requests
Student Course Recommendations are similar to Teacher Course Requests. The difference is that recommendations are used in academic planning whereas course requests are used in scheduling, meaning the student must have an assigned Academic Program.
Recommendations suggest courses for the next school year, which appear on the student's Course Plan. In comparison, Teacher Course Requests record a teacher's permission for a student to take another course at some point within the same school, courses which appear in the student's Walk-In Scheduler.
Enter Recommendations
The student list populates based on the roster of the Section selected in the Campus toolbar. Dropped students display in red text if the Account Setting is set to include them. All courses linked to the student's future enrollment are searched.
- Begin typing in the Recommended Course field for the course to recommend for the student.
- Click the Save icon when finished.
Recommended courses display on the student's Course Plan.
Only courses that are available display. If a student already planned a course in a future year that is not next year, that course is not available in the Recommended Courses field.
Note: teachers cannot remove locked, planned courses via Student Course Recommendations. Locked courses can only be unlocked from the Course Plan.
The Student Course Recommendations tool allows teachers to recommend courses for student course plans. This video demonstrates how to create recommendations for future enrollments.
Graduation Programs
Graduation Programs
Graduation Programs show a student's progress toward graduation based on the requirements entered for the program.
This tool was updated with the Campus.2523 release.
Tool Search: Graduation Program
Graduation programs can be created for a particular school or all schools in the District. Additionally, options are available to limit programs to groups of students based on their Graduation Cohort Year and to define whether programs are available for selection on the Student/Parent Portal.
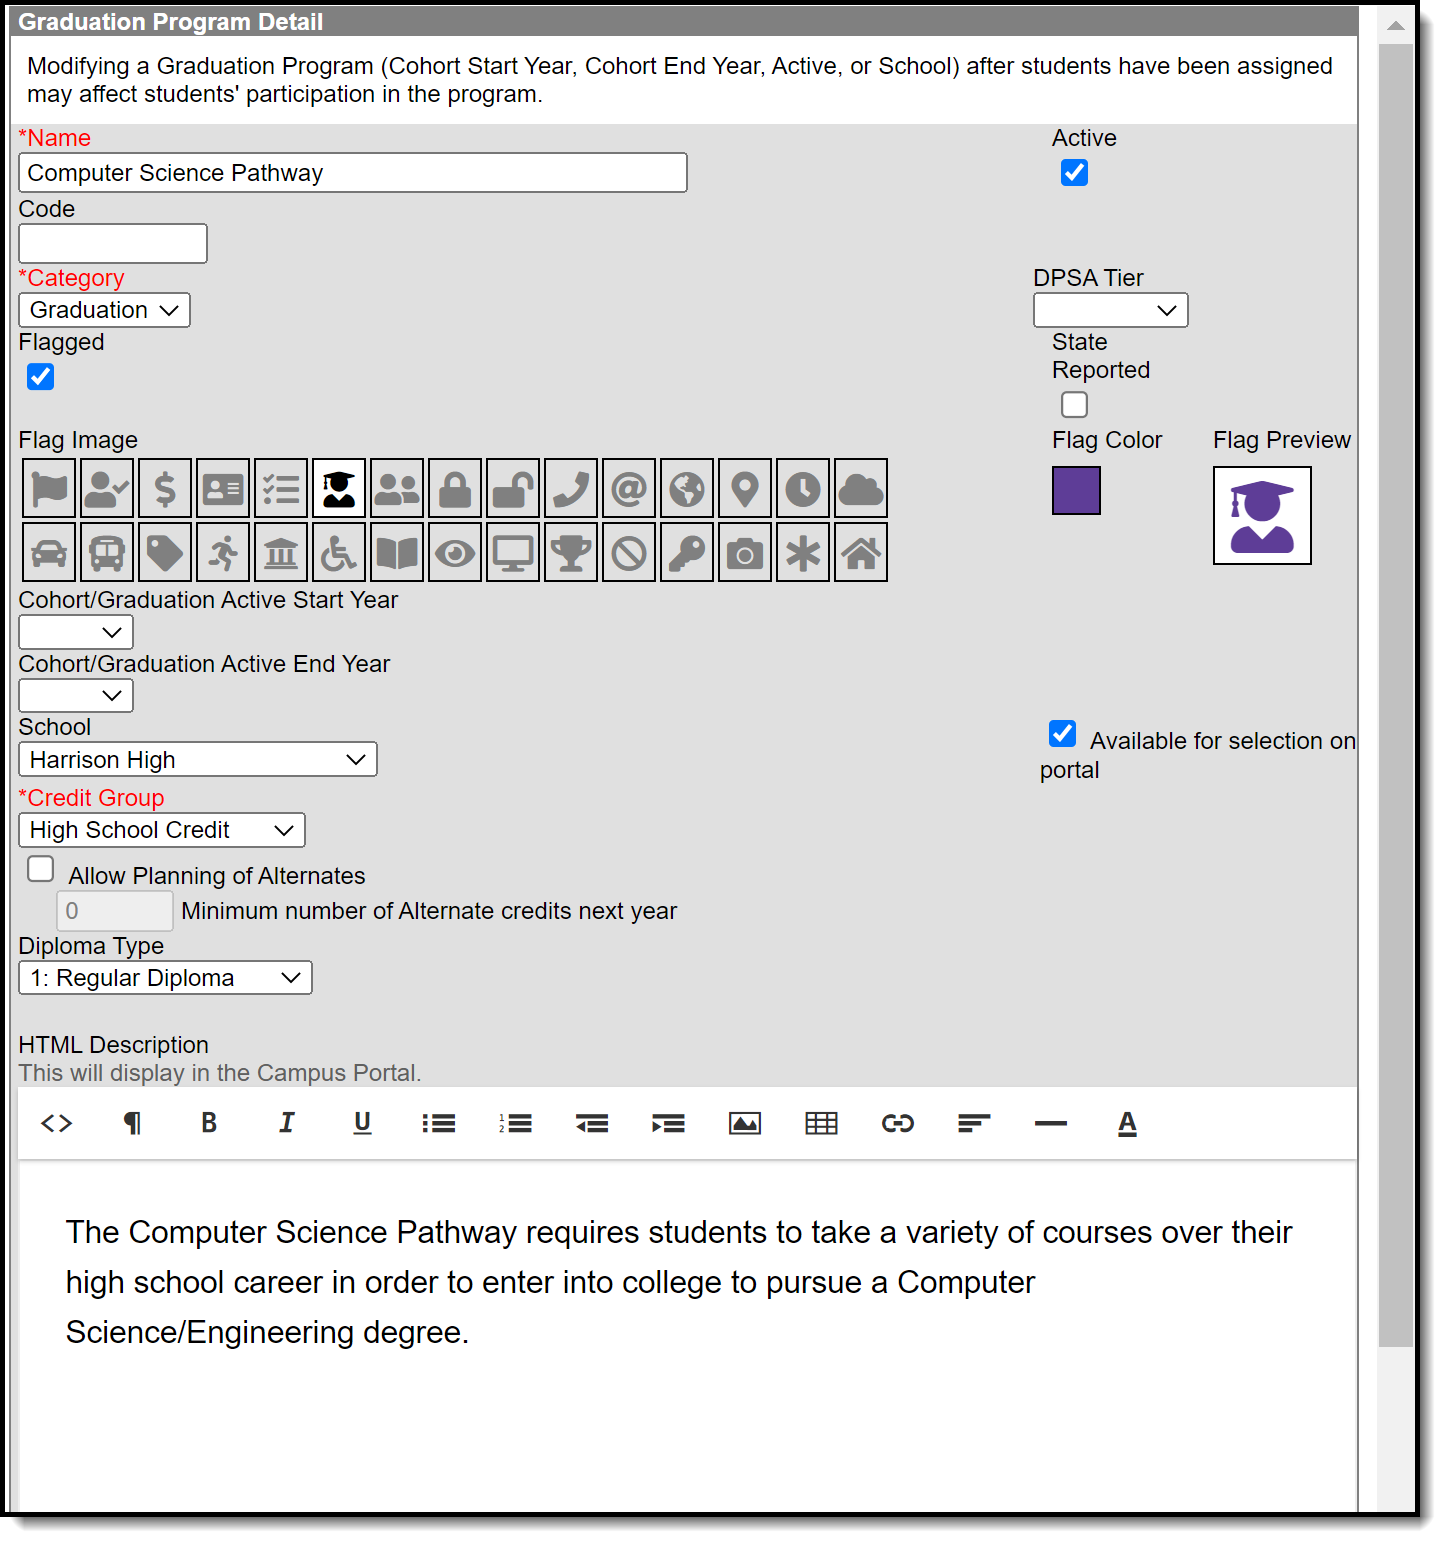 Graduation Program Detail Editor
Best Practices and Things to Know
Use the following list as a guideline when creating and managing graduation programs for your district and/or school.
- Create one graduation program for each diploma type offered in your district.
- Since graduation programs contain a set of requirements (credit requirements, course requirements, test requirements, etc.), each time any of these requirements change, a new Graduation Program should be created. This ensures those students assigned to a program at any given time have the requirements for that time period.
- Editing an existing Graduation program once it has been assigned to student(s) could adversely affect students assigned to the program.
- Create a basic, general program against which all students can be measured. This program contains the minimum requirements for graduation using the minimum District requirements.
- Create one middle school program that covers all middle school credit requirements. All students would be assigned to this program. Middle schools can use the Course Planner to make multiple year selections and to choose electives. Cohorts would be assigned to students when they get their first high school (9th grade) enrollment.
- Graduation programs can contain recommended courses to pursue as part of a focus area or career path. If available in your state, Academic Programs can also be created for this purpose.
- Graduation programs that are no longer needed should be inactivated instead of deleted, especially if students are assigned to the program.
Graduation Program Detail
| Field | Description |
|---|---|
Name Required | Describes the name of the program. This name can be up to 50 characters in length. |
| Active | Indicates the program is active and can be assigned or chosen by students. When a new program is created, this checkbox is automatically marked. |
| Code | Identifies the program using a State Code or a Classification of Instructional Programs (CIP) code. This code can be a district-defined code or a state-defined code. This field may also be the Program name, the Pathway Name, the State Standard, or Instructional Area Code. For some states, this is a text field to enter the CIP code. In other states, this is a searchable field that includes the Ed-Fi codes for the Program. |
Category Required | Indicates the classification of the program. For Graduation programs, the only available option is Graduation. |
| DPSA Tier | Only used in Minnesota & Wisconsin. Select the tier associated with the Graduation program being set up. |
| Flagged/Flag Image/Flag Color/Flag Preview | When marked, the program displays with an icon next to the student's name in the student header and section Roster. The default selection for a Graduation Program is the Graduate image in orange, but this can be changed to any of the other 30 available images and 12 available colors. Images and colors only display when this checkbox is marked.
|
| State Reported | Indicates the program is reported in state extracts as a means of tracking student progress. In order for this sort of flag to display next to the student's name, the Flagged checkbox must also be selected. |
| Cohort/Graduation Active Start Year | The selected year narrows down the students who are eligible for the program based on the NCLB Cohort End Year fields on their graduation tab. Students who have an NCLB Cohort End Year greater or equal to the Cohort/Graduation Active Start Year have the ability to select this program. If left blank, all students are able to select the program. When assigning programs to students using the Batch Assignment Tool, students who have a Graduation NCLB Cohort Start Year field the same as or later than the year entered in this field can be assigned to the program. |
| Cohort/Graduation Active End Year | The selected year narrows down the students who are eligible for the program based on the NCLB Cohort End Year fields on their graduation tab. Students who have an NCLB Cohort End Year less than or equal to the Cohort/Graduation Active End Year have the ability to select this program. If left blank, all students are able to select the program. When assigning programs to students using the Batch Assignment Tool, students who have a Graduation NCLB Cohort End Year field the same as or prior to the year entered in this field can be assigned to the program. |
| School | If populated, this program is only available to students whose most future enrollment is at the selected school. If not populated, this program is available to students across the district. |
| Available for selection on portal | When marked, the program can be selected on the Portal graduation Planning tool. |
Credit Group Required | This selection controls the display of the Credit Types available when setting and evaluating Credit and Course Requirements. |
| Allow Planning of Alternates | When marked, students and counselors can add alternate courses to the course plan that are scheduled in the event planned courses cannot be placed. This adds an additional section the Course Plan that does not display if this checkbox is not marked. If a counselor removes this selection from a program and students assigned to that program have alternate courses planned, those alternate courses are removed from the student's course plan. See the Course Plan article for more information on planning alternates. |
| Minimum number of Alternate credits next year | Indicates the lowest number of alternate credits a student can add to their course plan. This is required when the Allow Planning of Alternates checkbox is marked. This is a numeric value between 0 (zero) and 999.999. |
| Diploma Type | This selection indicates which diploma type an on-track student receives on the Course Plan Admin tool. |
| HTML Description | Provides information about the program on the Portal graduation Planning. Use the WYSIWYG editor to modify fonts, add graphics, etc. |
Create a Graduation Program
- Select the New icon. A Graduation Program Detail editor displays.
- Enter the Name of the Graduation Program.
- Verify the Active checkbox on the far right is marked. This is automatically marked; if the program should not be available for selection immediately, remove this selection.
- Enter a Code for the Graduation Program. This code may be used in state reports.
- Select a Category for the program.
- (MN Only) Select a DPSA Tier for the program.
- If the program should be flagged (an image displays next to the student's name in Student Information), mark the Flagged checkbox.
- If the program reports to the state (the school receives funding for the program), mark the State Reported checkbox.
- If the program has been marked as Flagged, select an image for the flag and a color to appear next to a student's name when this program is assigned.
- Select the Cohort/Graduation Active Start Year and Cohort/Graduation Active End Year from the dropdown list.
- Select the School to which this program is available.
- Mark the Available for selection on portal checkbox.
- Select the appropriate Credit Group.
- Mark the Allow Planning of Alternates checkbox.
- If Allow Planning of Alternates is marked (step 12), enter the Minimum number of Alternate Credits Next Year value that students can plan.
- Select a Diploma Type from the dropdown list.
- Enter an HTML Description of the Graduation Program.
- Click the Save icon when finished.
The new program appears in the Graduation Program tree with additional options that also need to be set up before the graduation Program is assigned to a student. After creating a program, enter Credit Requirements, Course Requirements, Test Requirements and GPA Requirements.
Copy a Graduation Program
Copying a Graduation Program creates an exact copy of the chosen program with a different name. All pieces of the program are copied - Credit Requirements, Course Requirements, Test Requirements and GPA Requirements.
- Select the program to copy from the Graduation Programs tree.
- Click the Copy Program icon in the action bar.
- An alert message displays, indicating the program is about to be copied. Acknowledge this by choosing OK to continue or Cancel to not copy the program.
- Upon accepting the warning message, the Graduation Program Detail editor updates with the same information that was entered in the original program, plus an indication that it is a copy of another program in the Name field. This naming convention is the same name that the previous program was called with the words Copy(1) at the end of the field.
- Modify this Name to reflect the desired name of the program.
- Review the entered information and make any adjustments needed for this copied program, following the procedures described in the Create a Graduation Program section.
- Click the Save icon when finished. The new program is listed in the Program Administration tree with additional options that also need to be reviewed for accuracy before the graduation Program is assigned to a student.
After copying the program, review the Credit Requirements, Course Requirements, Test Requirements and GPA Requirements.
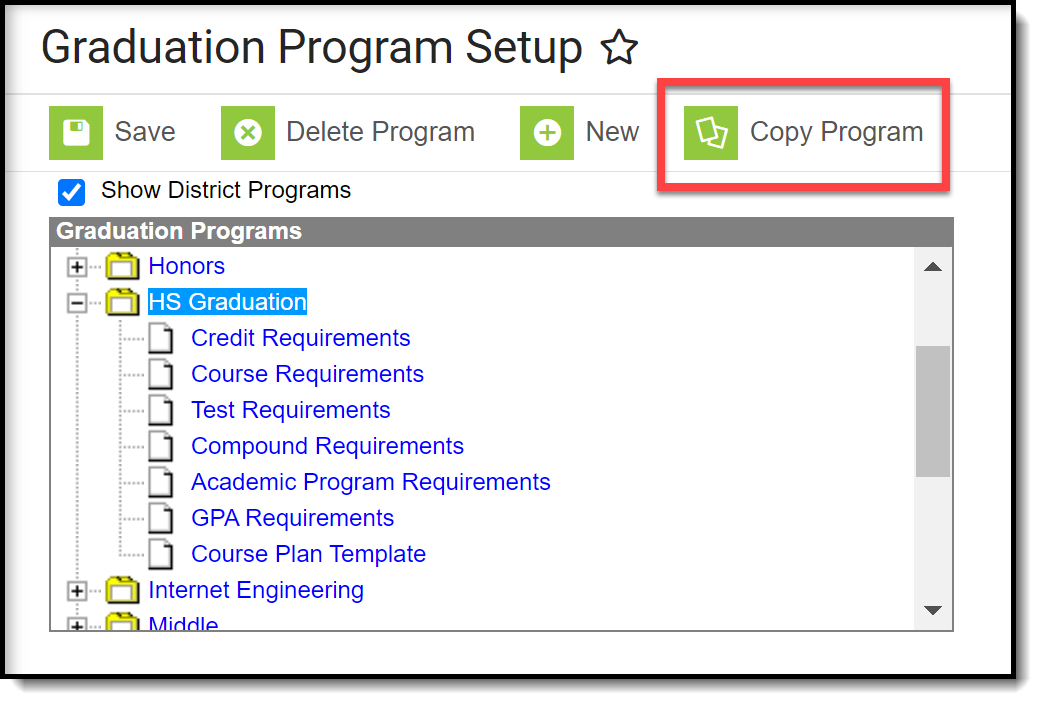 Copy a Graduation Program
Delete a Program
If a program needs to be deleted, select the program and click the Delete Program icon. An alert message displays asking if the program should really be deleted. Continue with this process by choosing OK or cancel the deletion process by clicking Cancel. If OK is chosen, the program is deleted and is removed from the graduation Programs tree.
Deleting a program completely removes all history of the program, including any record of students being assigned to it.
- If a program was created in error or it was never assigned to students, continue with the deletion.
- If a program is no longer being used, but student have been assigned to it, consider inactivating the program instead of deleting it.
 Delete a Program
Deactivate a Graduation Program
Programs can be made inactive by removing the checkmark from the Active checkbox in the Program Detail. Inactive programs display in red text at the bottom of the graduation programs tree and cannot be selected for assignment to a student or chosen on the Portal.
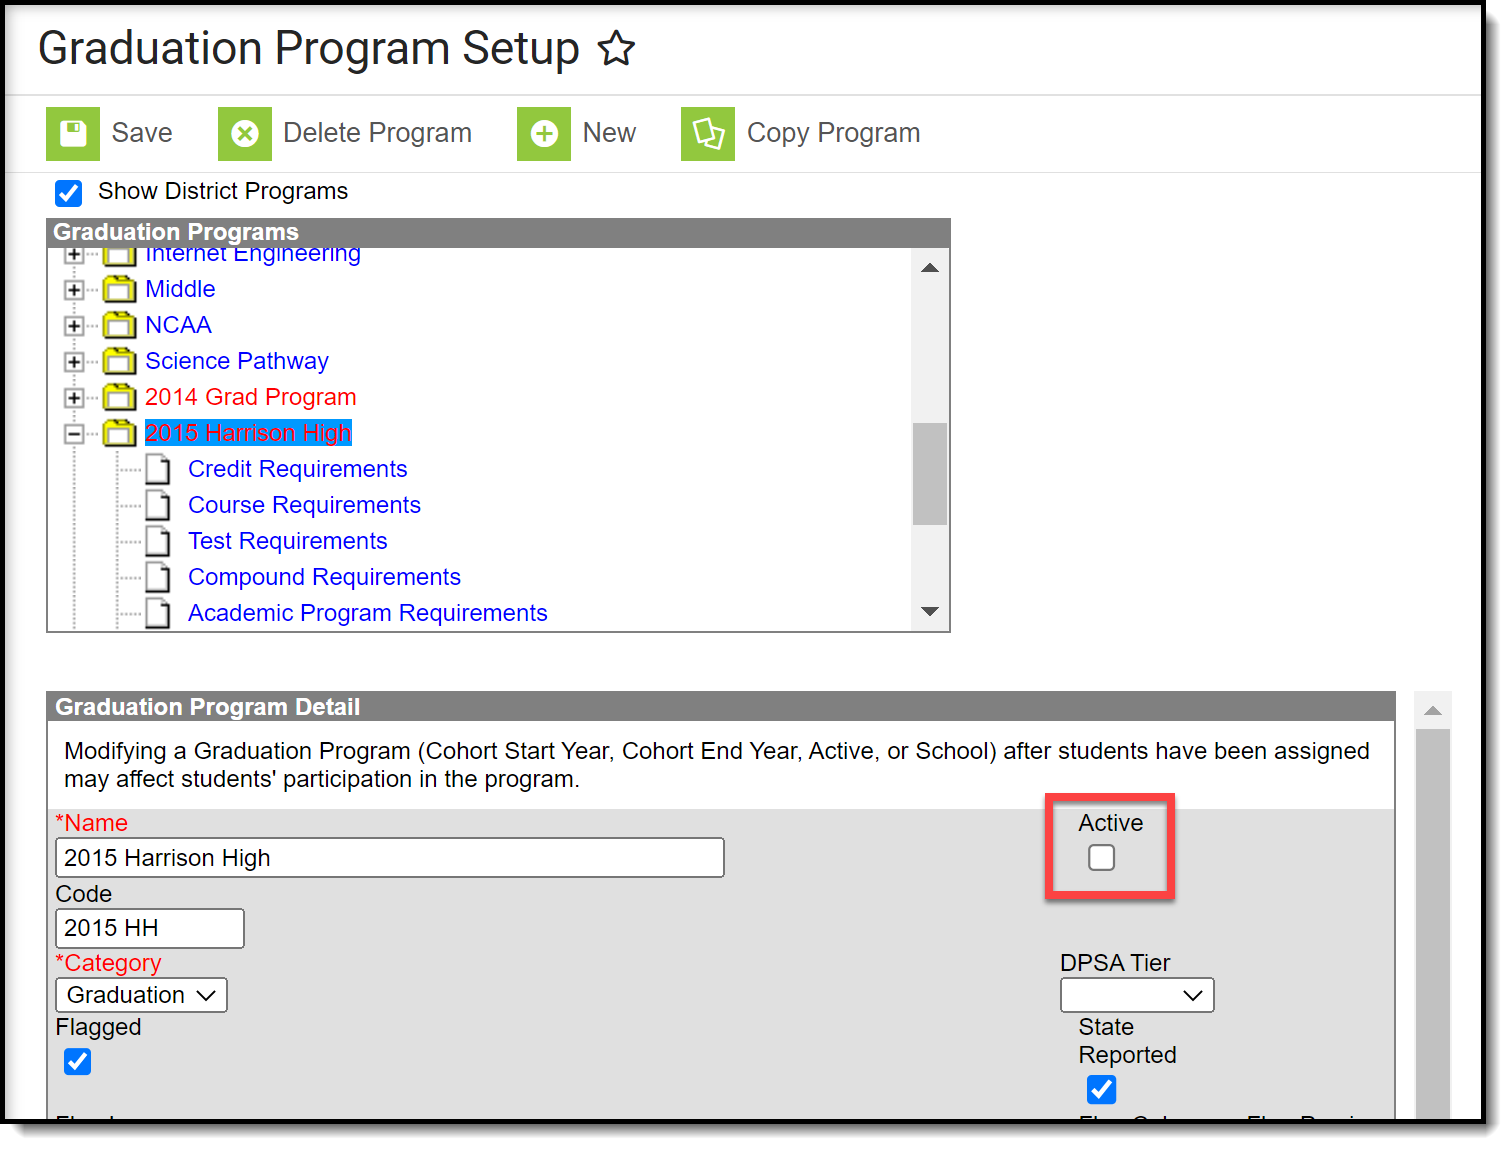 Deactivated Program Display
Assign Credit and GPA Requirements
Administrators can assign a required number of credits for a credit group. This allows Graduation Program requirements to be predicated upon completion of a certain number of courses in a specific Credit Group.
The GPA (Grade Point Average) Requirements editor indicates the overall GPA and GPA per course credit the student in this program needs to successfully complete the program’s requirements.
This tool was updated with the Campus.2523 release. Users on Campus.2523 or newer will use the Academic and Graduation Programs tool to create and maintain Graduation Programs.
Tool Search: Graduation Program Setup
The GPA (Grade Point Average) Requirements editor indicates the overall GPA and GPA per course credit the student in this program needs to successfully complete the program’s requirements.
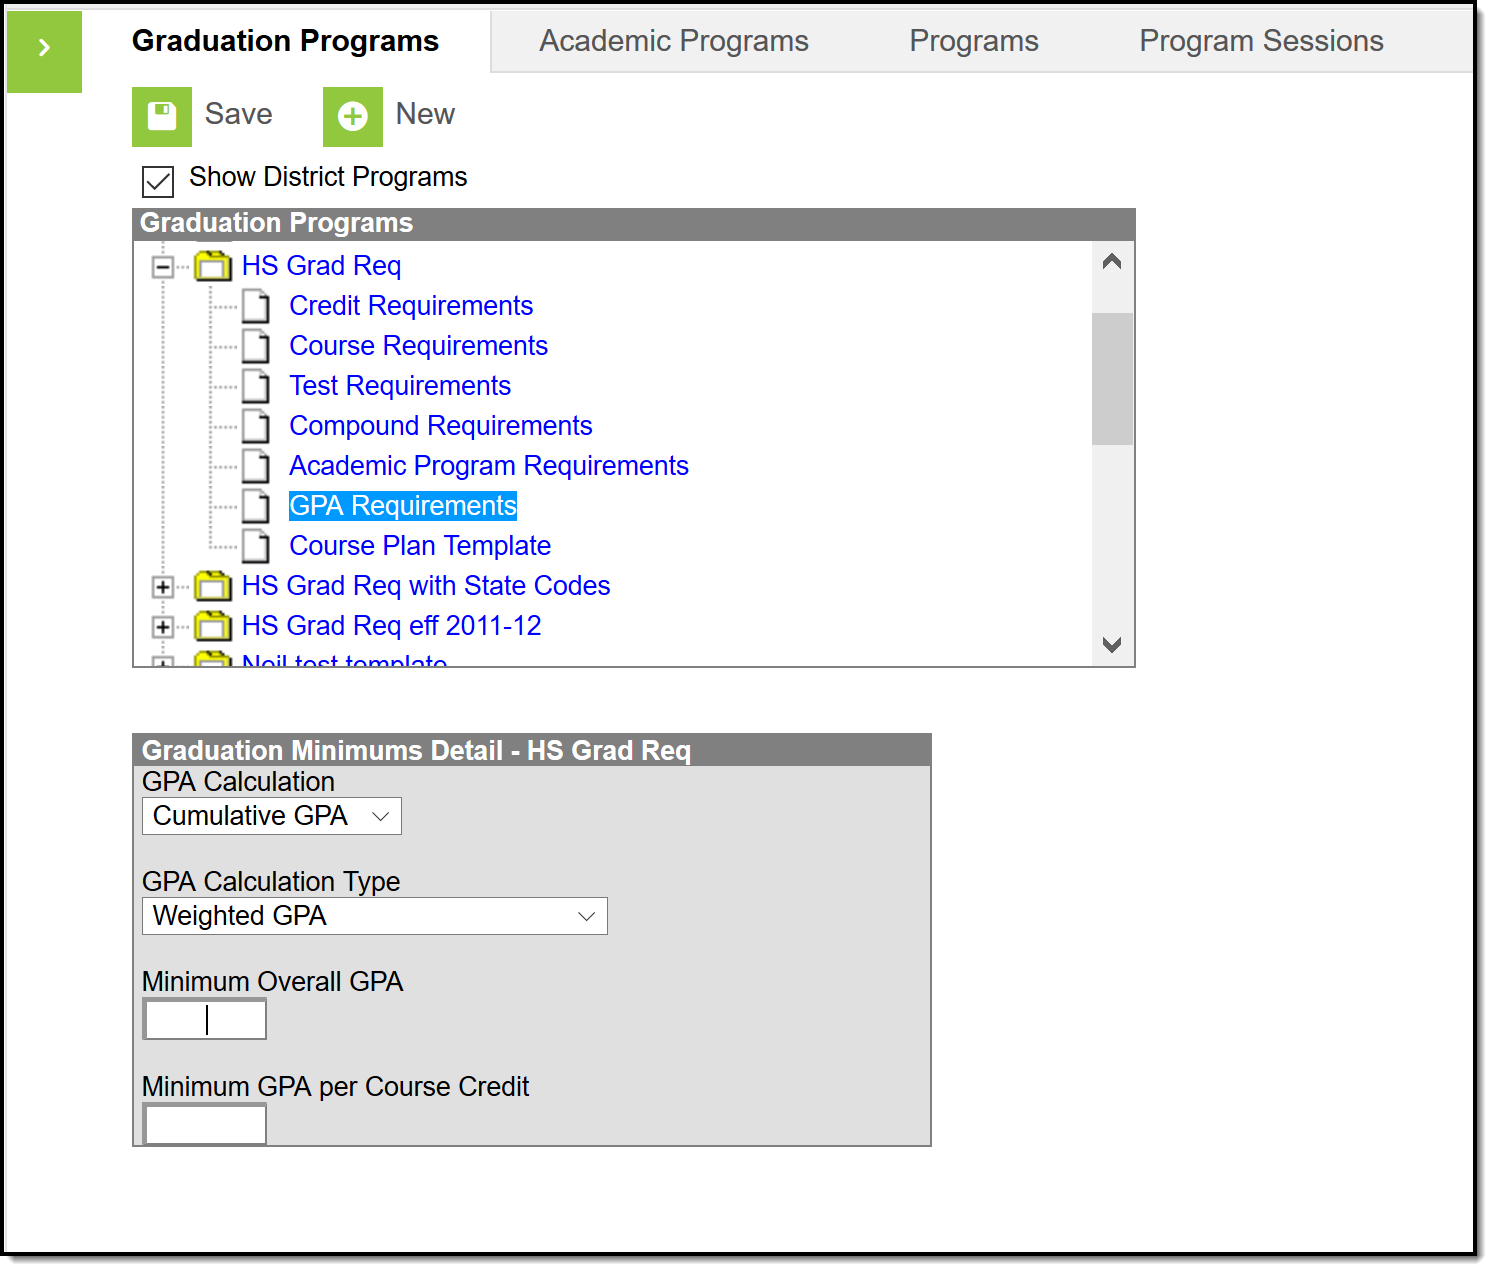 Graduation Programs GPA Requirements
Be aware of any state requirements in place for certain programs. For example, in order for a student to receive a diploma, the Unweighted GPA 4.0 scale might have to be used, but for actual successful program completion, the student may need to get a B (3.0) or higher for advanced courses.
Also note that Custom GPAs can be created to use with the Academic Program. Specific courses can be associated with the Custom GPA, if desired.
GPA Requirements Editor
| Field | Description |
|---|---|
| GPA Calculation | This option determines how the GPA is calculated. For most schools, this will be the standard Cumulative GPA calculation. If custom GPAs are created in the GPA Calculation tool and should be used for this program, select that option. |
| GPA Calculation Type | This option indicates the type of GPA calculation that will be used. The selected calculation type that is used for course requirements also uses this calculation type. Four options are available:
|
| Minimum Overall GPA | Entered numeric value (up to 6 digits) indicates the overall GPA the student must have for successful completion of this program. The selections made in the GPA Calculation and the GPA Calculation Type fields are used when comparing this entered value to the student's cumulative GPA, as follows:
|
| Minimum Overall GPA per Course Credit | Entered numeric value (up to 7 digits) indicates the overall GPA per course credit the student must have for successful completion of this program. The value entered here is compared to the GPA value displayed on the transcript record and the GPA value entered on the Score Group that is assigned to the course. The selections made in the GPA Calculation and GPA Calculation Type fields are used when comparing this entered value to the student's GPA per course, as follows:
This logic displays on the Grad Progress by displaying in red on the Grad Progress Credit Group for those that do not meet the entered value or if the student has zero credits toward the academic program. It also displays on the Course Plan Credit Group for courses that have received a score. If the student does not meet the entered value, the name of the course and the number of credits received display in a pop-up. |
Set GPA Requirements
- Expand the options for the Graduation Program from the Graduation Program tree.
- Select GPA Requirements option. A Graduation Minimums Detail displays
- Select the desired GPA Calculation from the dropdown list.
- Select the desired GPA Calculation Type from the dropdown list.
- Enter the Minimum Overall GPA value for this program.
- Enter the Minimum GPA per Course Credit value for this program.
- Click the Save icon when finished.
This tool was updated with the Campus.2523 release.
Tool Search: Graduation Program Setup
Administrators can assign a required number of credits for a credit group. This allows Graduation Program requirements to be predicated upon completion of a certain number of courses in a specific Credit Group.
For example, if a requirement was that ninth graders must have completed at least two credits of English, there would be a 2 in the Credit Requirements field that corresponded to Grade 09 and Credit Type: English.
If you are using the Multiple Year Academic Planning functionality, see the Best Practices section.
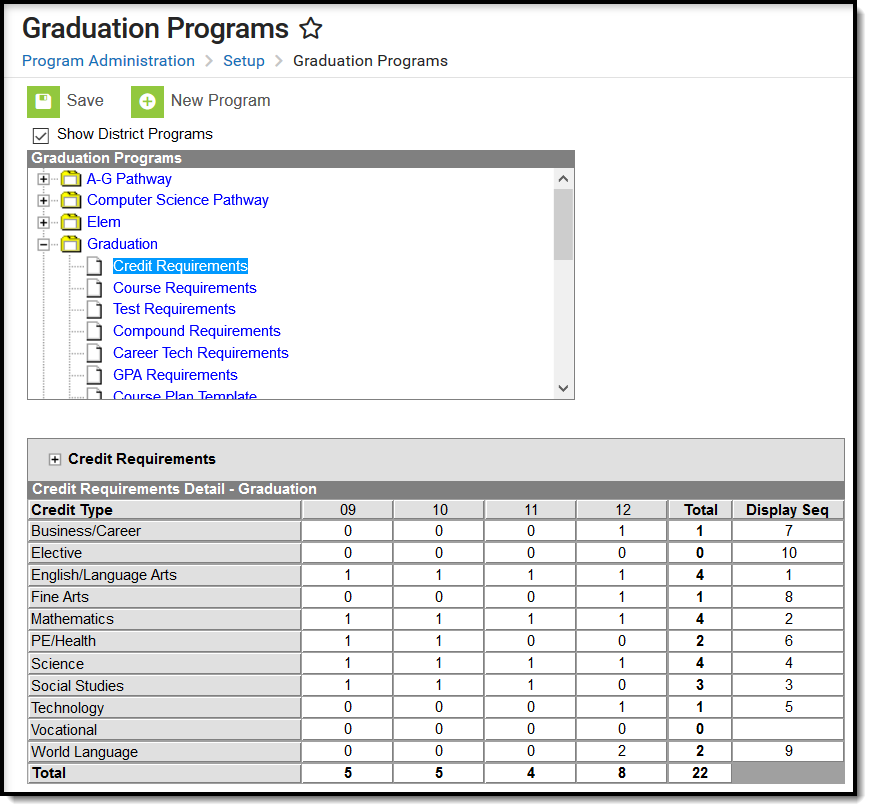 Credit Requirements for Graduation Programs
Entered credit requirements by grade level are the suggested pacing for a student, not a hard requirement that must be followed. If a student wants to take all science requirements in one year, that can be done, if approved by the student's counselor.
Best Practices
Credit requirements are assigned by the grade level and are the suggested pacing to the student, not hard requirements. It only matters that all credit requirements are completed by the end of student's high school career.
- If a Credit Type intentionally is not required for a certain grade level, that credit type does not display in other program tools (Course Planner, Graduation Planning, etc.). A value must be entered for all credit types. For credit types where no requirement exists, enter '0'.
Credit Requirement Layout
The name of the selected program displays just after the editor notes. Before making changes to any values assigned here, verify the desired program is selected.
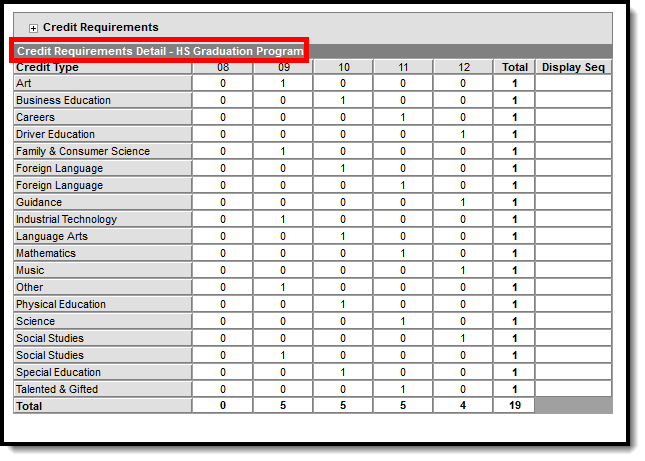 Credit Requirements Table - Program Name
Credit Types display down the left-hand side of the grid, while grade levels appear in ascending sequence order to the right. Grade levels that have a sequence of zero are not included, as well as grade levels that are excluded from cumulative GPA/Class Rank calculations.
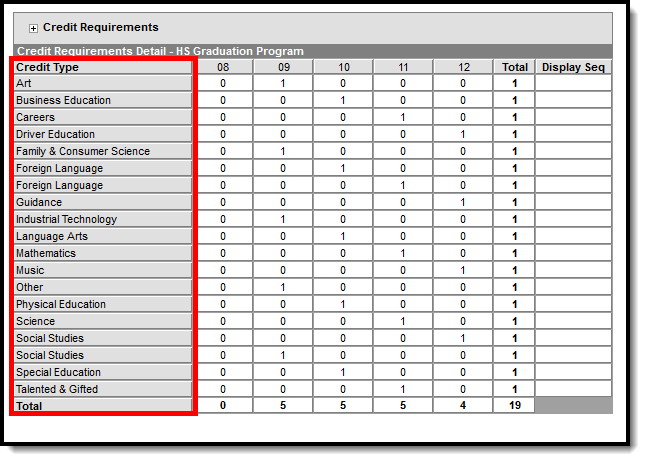 Credit Requirements - Credit Types
Credits are totaled by grade level going down each credit type and across each credit type. An overall total column displays to the right, allowing users to see the entered totals by credit type and by grade level. The very last total cell is the total number of credits a student must have in the selected program.
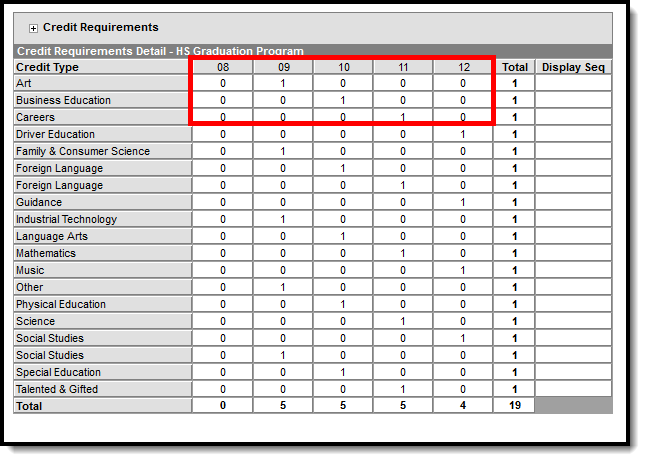 Grade Level Totals
Totals are calculated by the grade levels (Total row across the bottom) and the Credit Type (Total column on the right), giving a total number of credits the student must have in order to meet the program requirements.
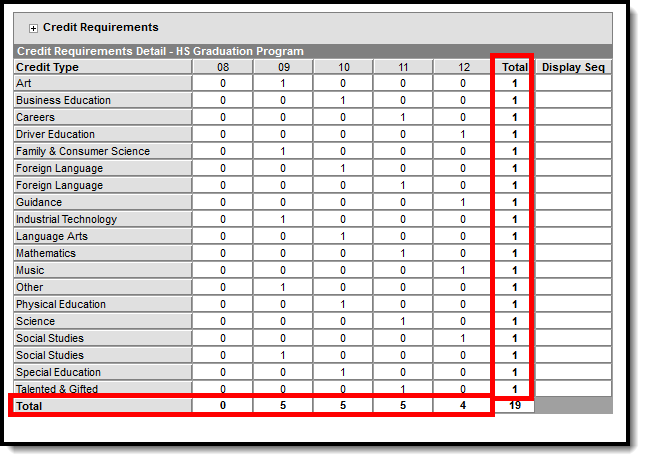 Credit Type and Grade Level Totals
The Display Sequence column determines the order Credit Types display on the Course Plan tool, the Grad Progress tool, and the Academic Planning and Graduation Progress on the Portal. It is also used to order the Credit Types on the Academic Plan Progress Report, the Course Plan Report and in the Transcript Credit Summary display. If no value is entered, credit types display in alphabetic order.
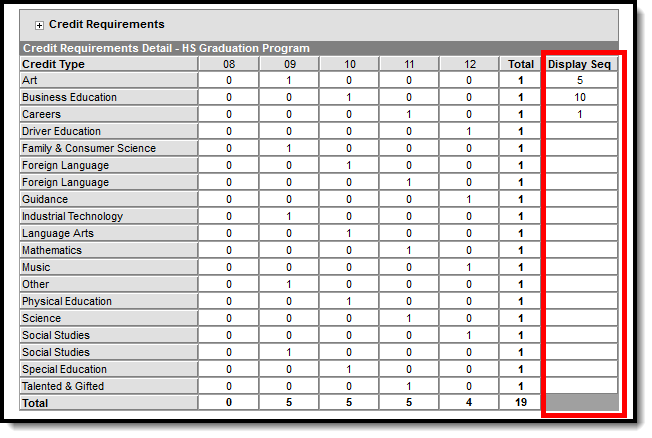 Display Sequence
Credit Requirements Table - Display Sequence
Assign Credit Requirements to a Program
- Select the specific Program from the Graduation Programs tree and expand the options.
- Select Credit Requirements. A credit group matrix displays.
- For each credit type, click in the corresponding grade level cell and enter the number of credits a student must achieve. The entered value must be a positive number (no negative signs) up to six digits (3 before a decimal, 3 after a decimal).
- Click the Save icon when finished. The total credits for each type and grade level is totaled after saving.
When the Graduation Program is created, use the Batch Assignment Tool to assign the graduation program to students en masse, or assign the program to just one student on the Program tab located in Academic Planning.
If there are no credits entered for a credit type, that type does not display on Graduation Progress, Course Planner tabs, the Academic Program Transcript Credit Summary or the Portal unless that credit type also has a Display Sequence entered.
Credit Requirement Validations
The following validations occur when entered credit requirements are saved:
| Validation | Description |
|---|---|
| Invalid Grade Levels | Grade levels in the Credit Requirements grid are validated against the selected calendar. If grade levels do not match, a warning message displays indicating that credit requirements have already been created for the selected program with different grade levels. Users can overwrite the entries by clicking ok or canceling the entered amounts. |
| Invalid Credit Amounts | If a non-numeric value is entered, a warning message displays. If a cell is null or blank, a warning message displays. If a value larger than six digits is entered, a warning message displays. If a negative value is entered, a warning message displays. |
| Invalid Display Sequences | If an incorrect numeric value is entered (not between 0 and 255), a warning message displays. If a non-numeric value is entered, a warning message displays. If a negative number is entered, a warning message displays. |
Create Course Plan Templates
The Course Plan Template allows counselors/administrators to create course plans for graduation programs. When students are assigned to that program, the Academic Planner automatically adds the courses from the Course Plan Template into the student's Course Plan.
This tool was updated with the Campus.2523 release. Users on Campus.2523 or higher will use the Academic and Graduation Programs tool to create and maintain Graduation Programs.
Tool Search: Graduation Programs
The Course Plan Template allows counselors/administrators to mass add courses to a student's Course Plan. For example, a graduation program for incoming eighth graders contains all of the core courses high school students must take and pass for the next four years. Instead of adding those courses individually for each student, administrators can create course plans for that graduation program. When students are assigned to that program, the Academic Planner automatically adds the courses from the Course Plan Template into the students Course Plan.
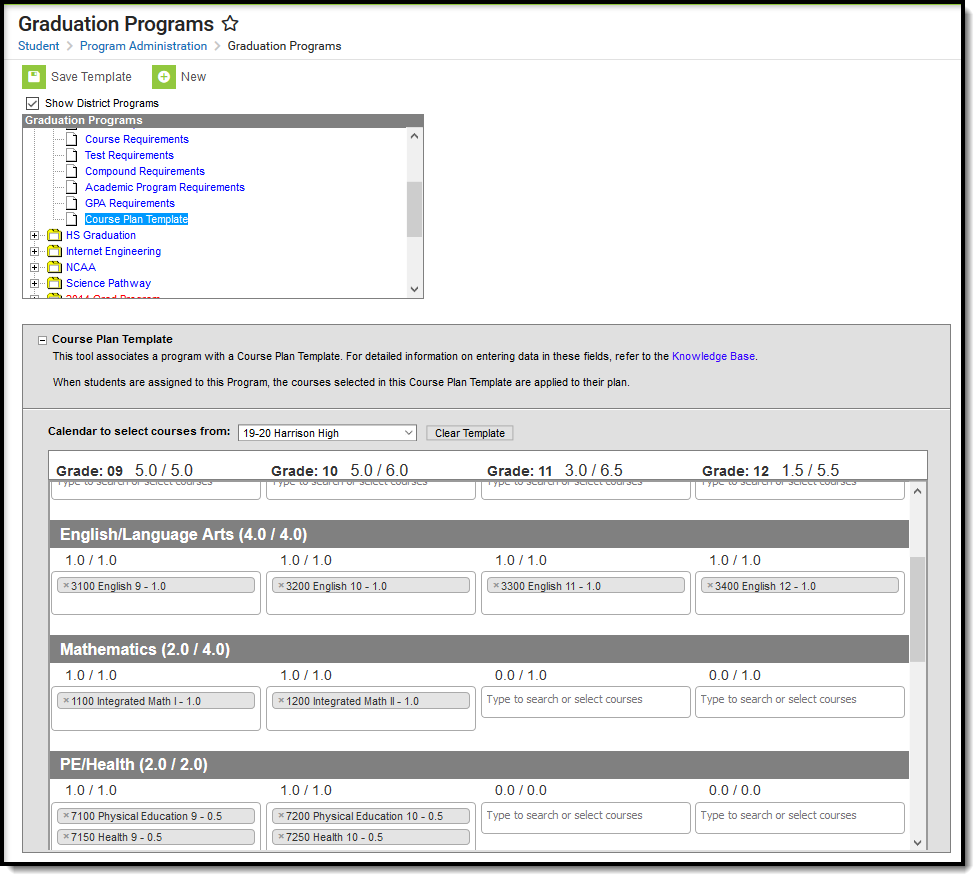 Graduation Program - Course Plan Templates
Additional courses the student wants to plan outside of this template can be added by the student on the Portal using the Academic Planner tool. Additional single courses the counselor wants a particular student to plan can be added using the Course Plan tool in Academic Planning.
Individual changes can still be made for students who need to alter the plan.
Students can take the courses in different grade levels than what the plan suggests. If the template indicates that Algebra I be taken in 9th grade, but the student successfully completed that course in 8th grade, the 9th grade math course might instead be Geometry, which is planned for 10th grade.
When planning for current year, course plan templates apply any course that is on the template for a student who meets the current year planning requirements (no scheduled courses for the current year, no transcript courses for the current year). If planned courses already exist for students in the current year grade level, the Course Plan Template does not apply course plans to the current year grade level. See the Course Plan article for more information on planning for the current year.
Best Practices
This tool is best used for incoming 9th grade students who do not have any existing scores posted to a transcript from a previous high school enrollment. When a program is assigned to a student, students are assigned this template, along with the other program requirements (course requirements, test requirements, etc.). The Course Plan Template courses are automatically added to the student's Course Plan tab. If the student is assigned both a graduation program and an academic program, the academic program courses also display on the Course Plan tab.
Course Plan Templates only add a planned course into a cell if nothing has previously been planned or added to the student's transcript. The Course Plan Template only adds courses to the Course Plan if the box in the Credit Type and Year is blank. It does not append/overwrite if there is a planned course or a course on the transcript in that credit type/year.
In the example below, the student is assigned both a graduation program and an academic program.
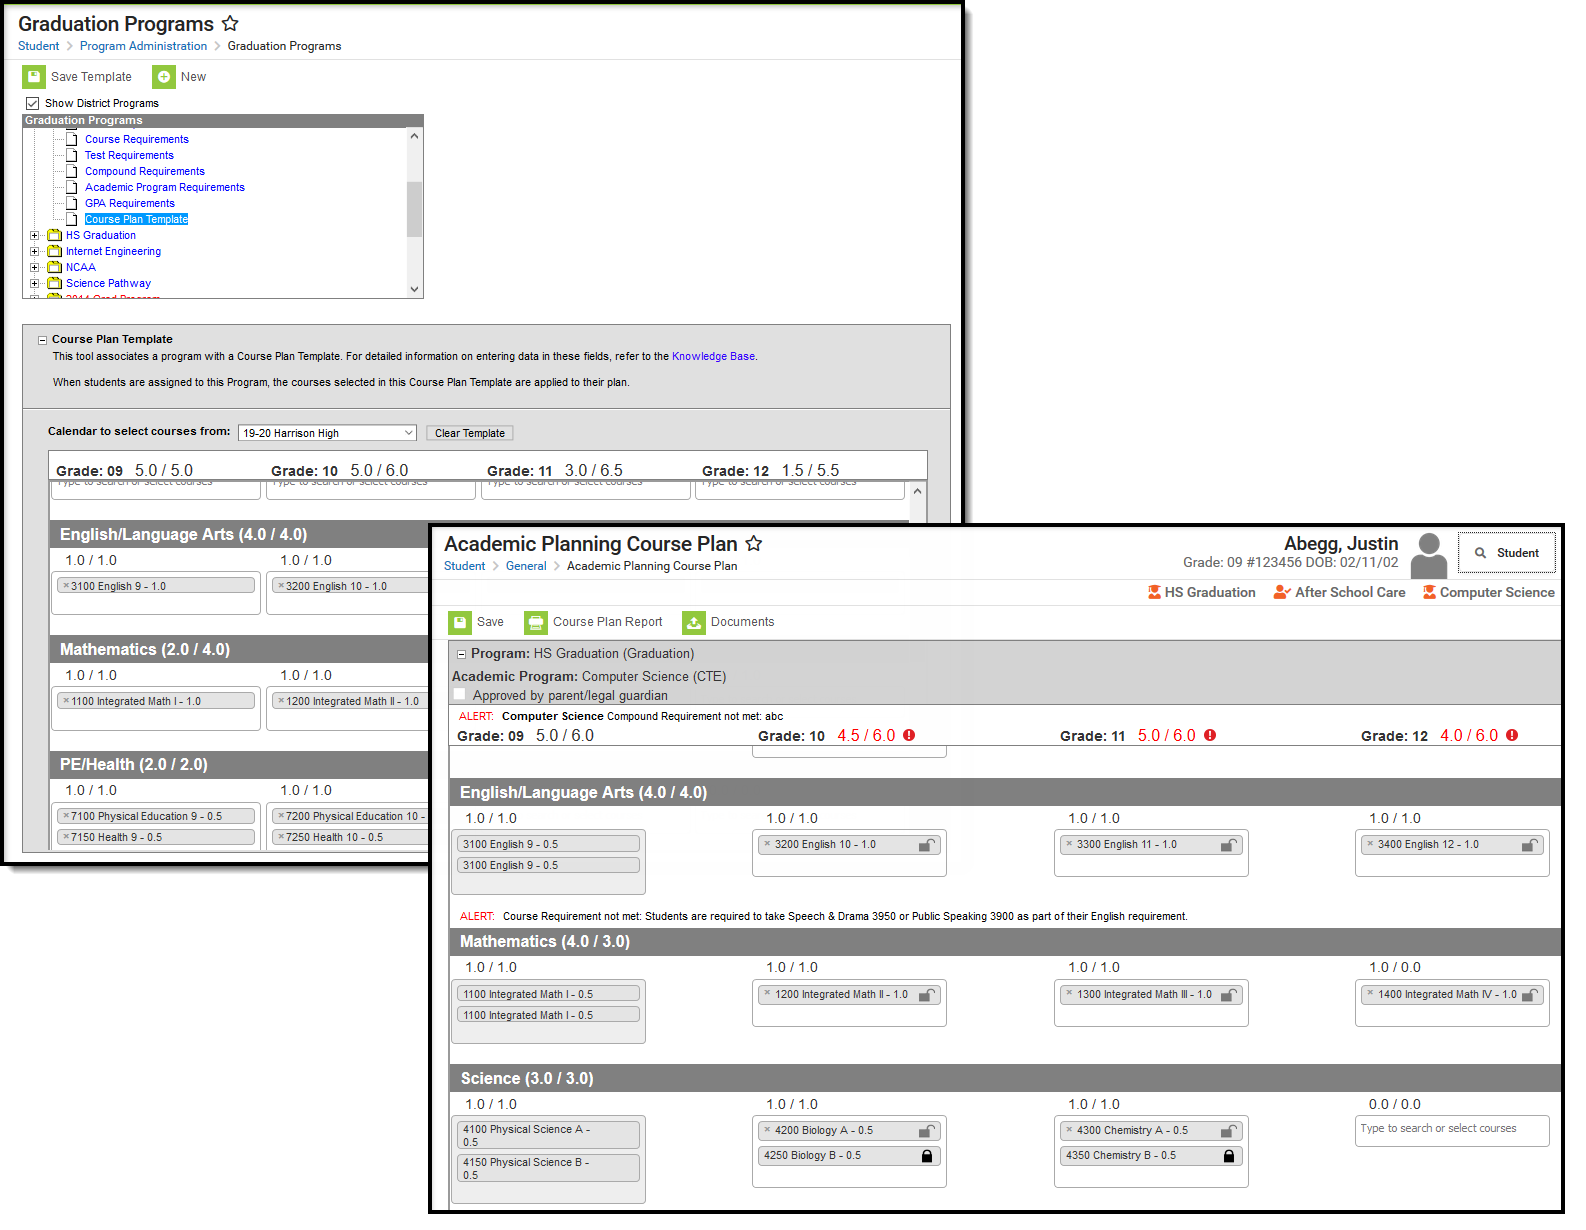
Student Course Plan - Assigned to Academic and Graduation Program
This tool can also be used for students who already have scores posted to their transcript. The course plan template does not add courses from a grade level the student has completed (ended enrollment). If a student transfers from another high school in the junior year, and has transcript records for the freshman and sophomore year, courses that are on the template for the junior and senior year are added to the transfer student's course plan for Grade 11 and Grade 12. The columns for Grade 09 and 10 contain the transcript information (from the transfer courses).
Things to Know
For courses like Band or Choir, or other courses that can be taken multiple times throughout a student's high school career, make sure these sorts of courses are marked as Repeatable. Another option is to set these courses up as individual courses for each grade level. 9th graders would have a Band - Grade 09 course, 10th graders would have a Band - Grade 10 course, etc. The Course Plan Template will not add a course to a student's plan that has already been planned, which means a course that could be repeated would not be added.
If the student has already planned courses for future grade levels in a certain credit area, courses from the plan template are not added for that area. If a student already has transcript scores for a course in the plan, it is not added again.
Courses in which the student is already scheduled are not added to the course plan.
Courses cannot be locked on the plan template. This action is only available to a counselor on the student's Course Plan tab.
Using Course Plan Templates is a plan for students' graduation or career tech program. This is not a tool to mass assign actual courses to student schedules. That process is performed using the Scheduling Board and other Scheduling tools.
Course Plan Template Warnings, Alerts and Errors
Just like the display on a student's Course Plan, alerts display on the Course Plan Template when a Planning Rule is violated during the creation of the template. Each time a change is made on the Course Plan, all rules and requirements are reevaluated and updated alerts and messages display. The Course plan does not need to be saved to show these alerts. When the alerts have been satisfied, they will be removed automatically.
Counselors can still save course plans when alerts and warnings exists.
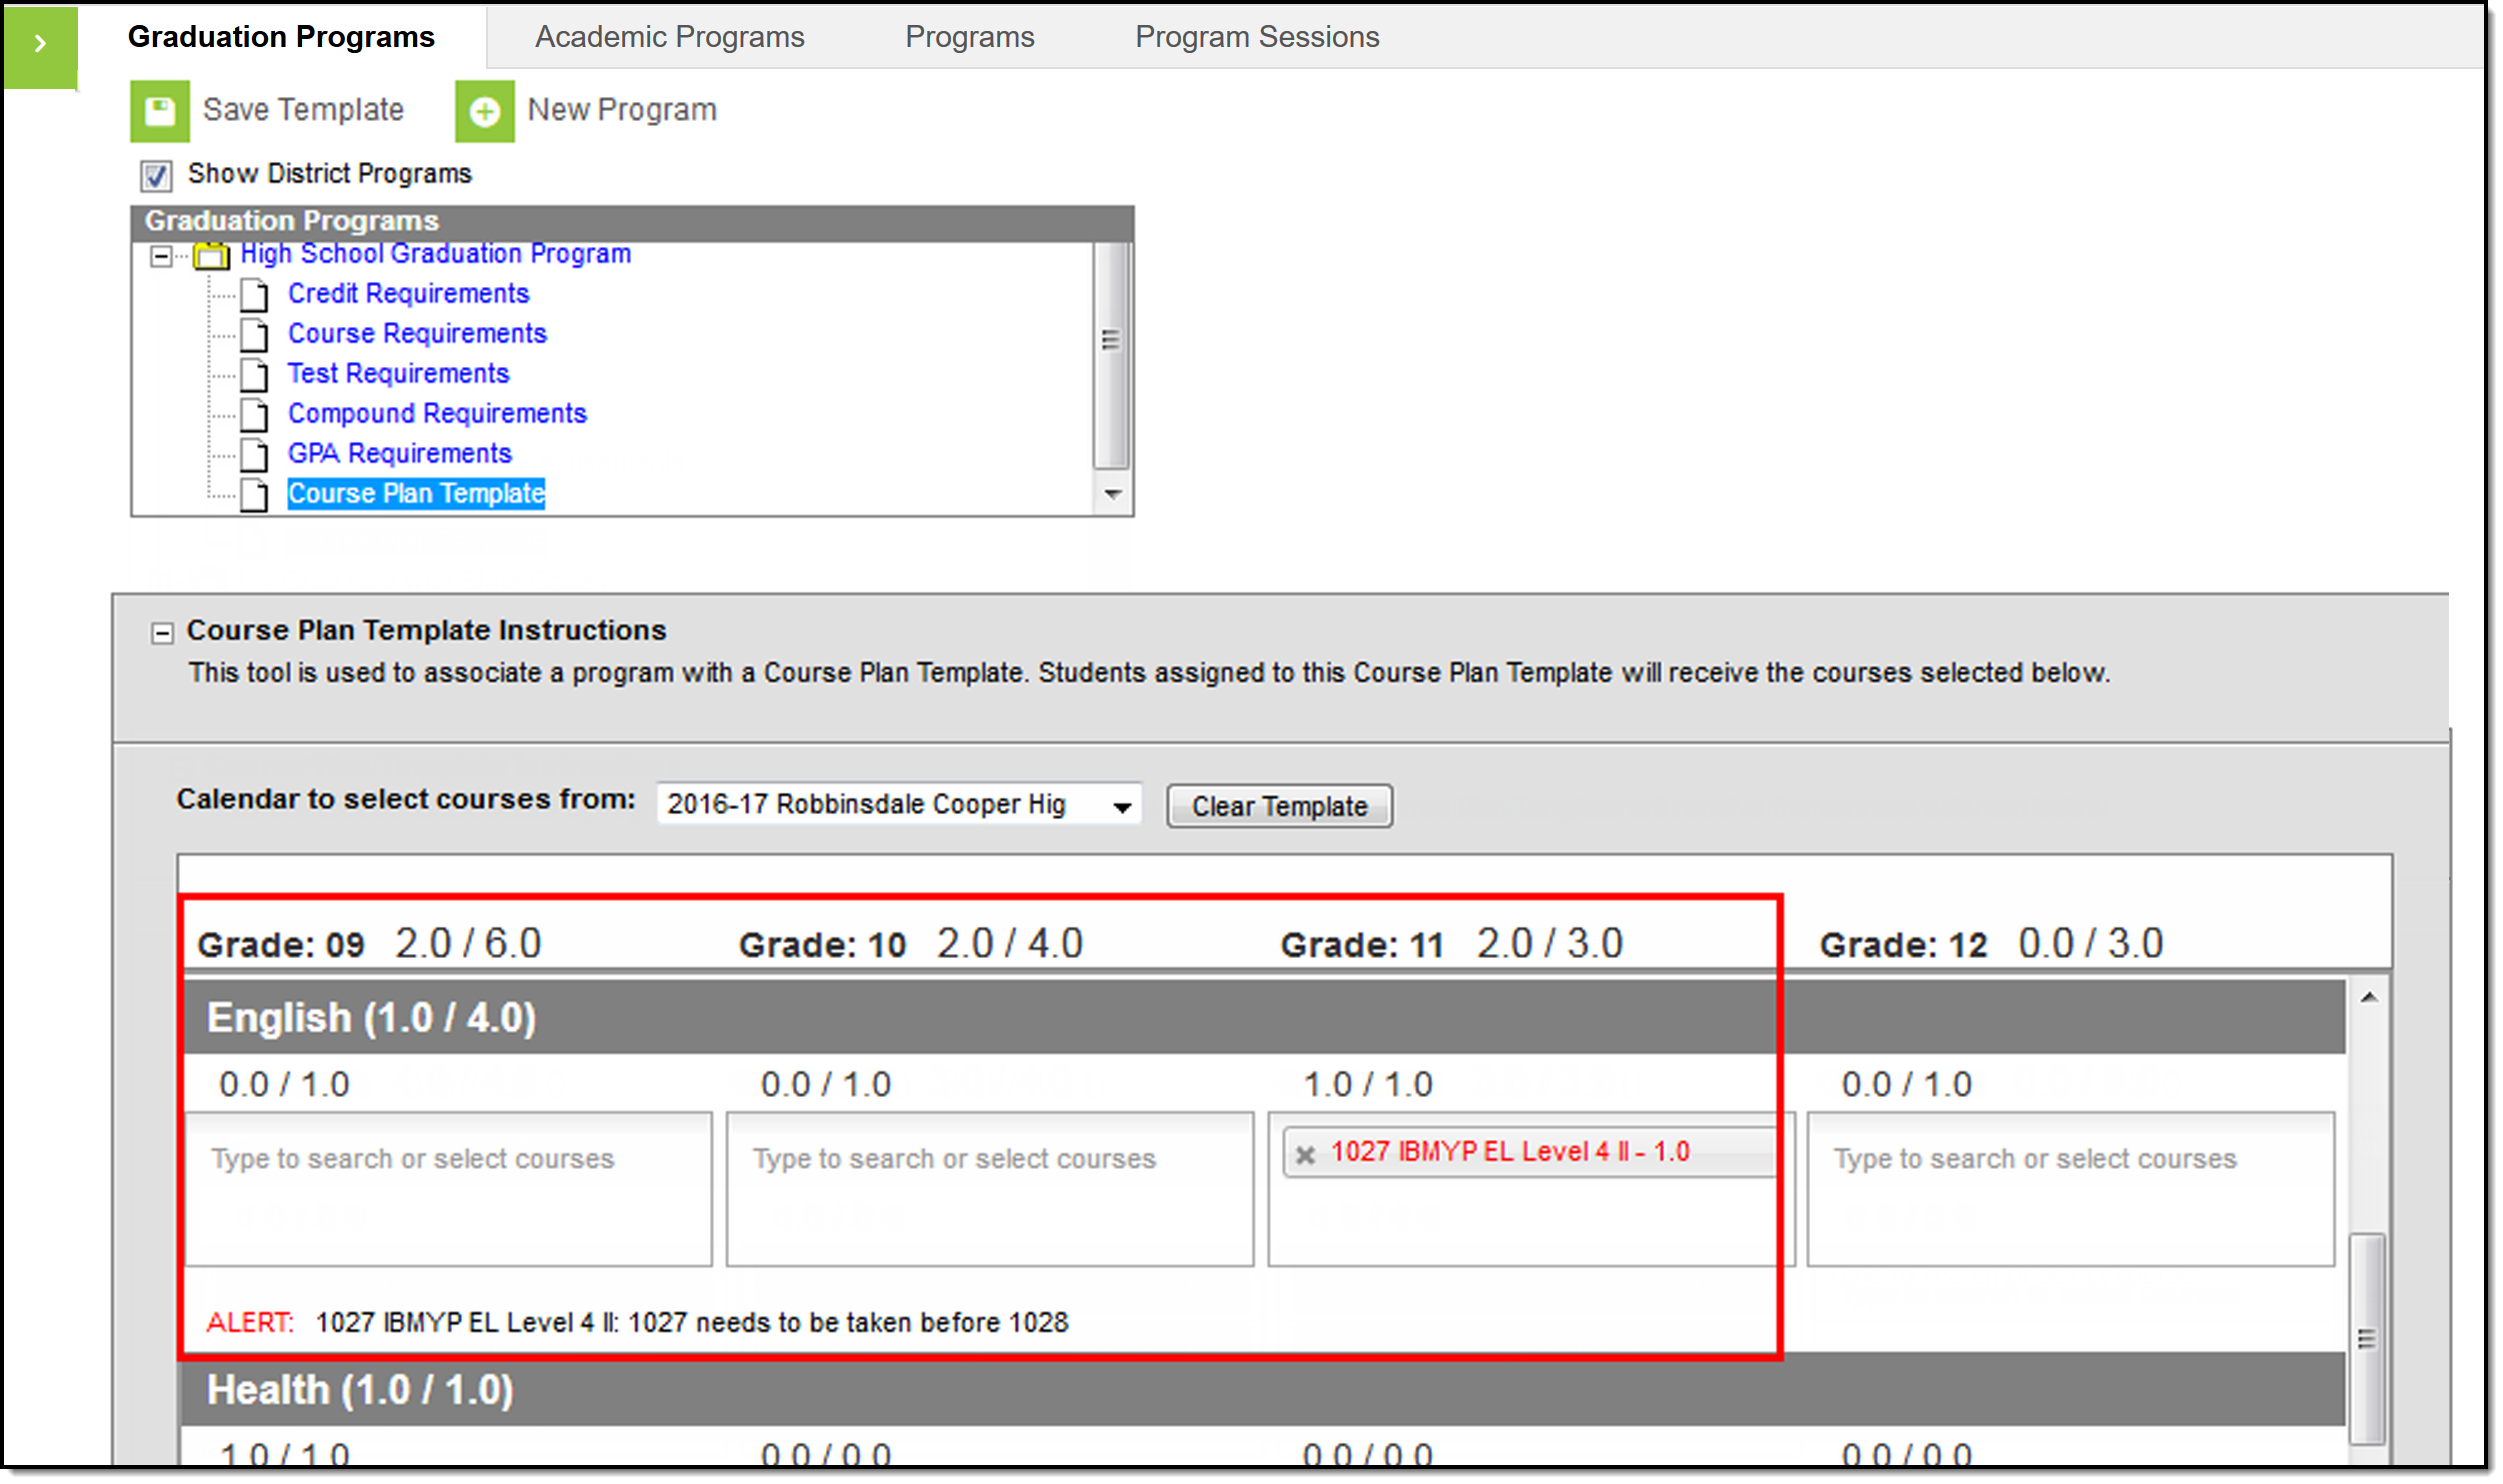 Course Plan Templates - Alerts and Warnings
In the image above, the template has placed a course (1027) in Grade 11 without its prerequisite course (1028) has been planned. Below, the template now has course 1028 planned before 1027, which also causes an error. To correct this, course 1027 needs to be planned in a year before course 1028 is planned. The template can be saved with this alert, but the student will not be able to modify their plan. A warning message displays, indicating such.
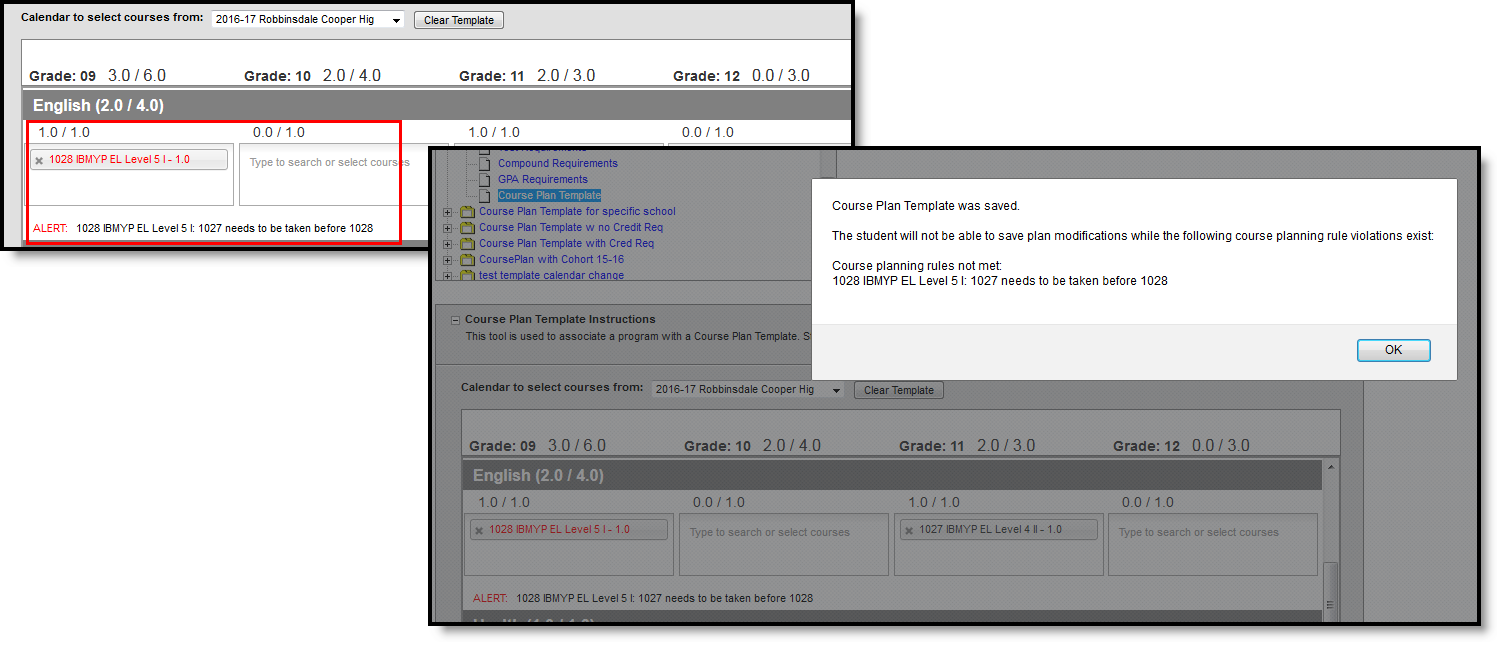 Course Plan Templates Saved with Active Alerts
Warnings display when:
- There is a failure in the template that prohibits the student from modifying and saving their course plan.
Alerts display when:
- A grade does not have enough credits planned.
- A credit type does not have enough credits planned.
Students who have an Academic Plan that contains an error will not be able to save changes made to their course plan from the Portal.
- When the Enforce All Rules option is marked as part of the Academic Planner option, students can only save their academic plan if it meets ALL requirements and planning rules that have been established.
- When the Enforce All Rules options is NOT marked, students can save their plan without meeting all requirements, but all planning rules must still be met. Warning messages from failed requirements and failed planning rules display so users can see the issues but still save the entry.
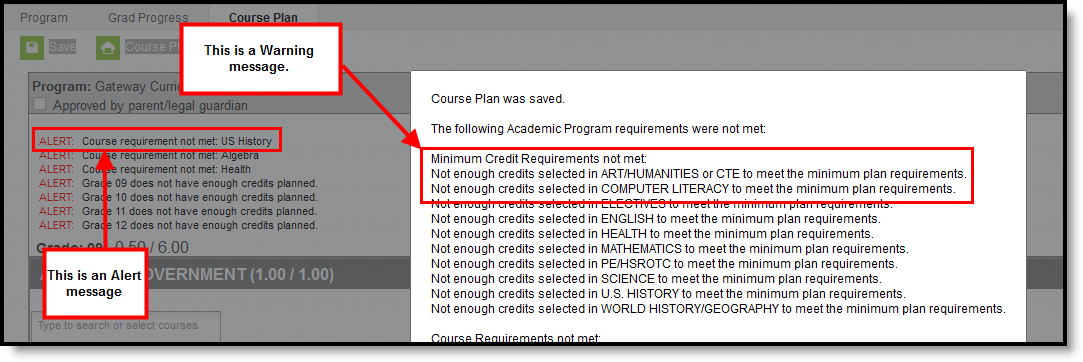 Course Plan Warnings and Alerts
Add Courses to a Plan Template
The courses display based on the selected calendar in the Campus toolbar. To load courses from another calendar, change the Calendar to select courses from selection. Only calendars in which the program is available are available for selection (School selection is populated on the Graduation or Career Tech Programs tab, or the program is available for all schools in the district).
- Click in the text box below the number of credits for a certain grade level. Active courses meeting that credit type display for selection.
- Choose the desired course(s). When they are added, they display the same way a planned course does and the number of credits is updated. The credits assigned to a course appear after the course name.
- Add enough credits for future years as needed.
- Repeat these steps for each credit type. At the end of the process, the student should have a clear idea of what courses need to be taken in each grade level to meet the requirements of the assigned program.
- Click the Save icon when finished.
Click the X next to any added course that does not need to be on the Plan Template. Click the Clear Template button to remove ALL courses from the grid.
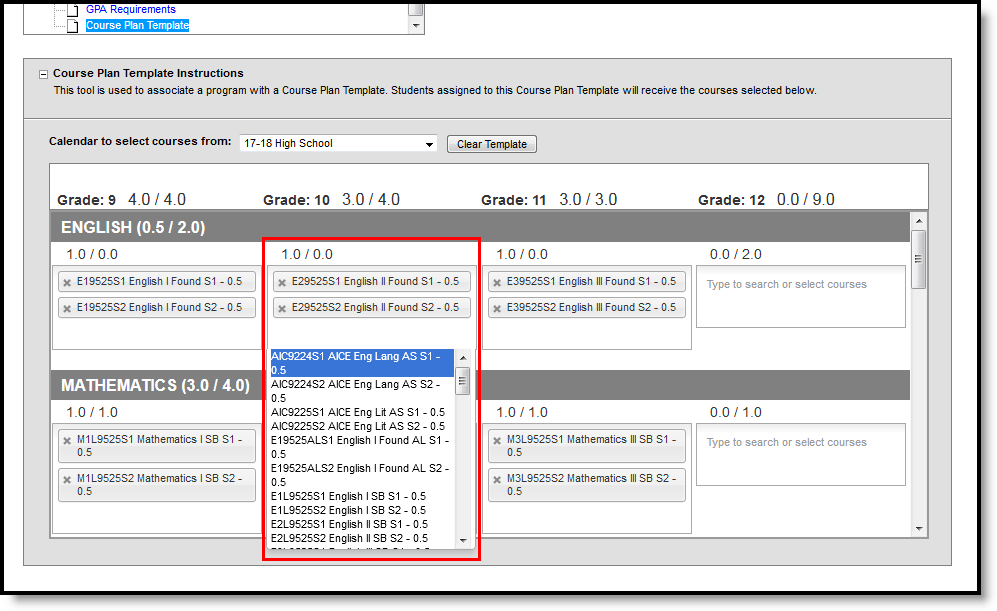 Adding Courses to the Plan Template
Batch Assignment
Batch Assignment Tool
The Batch Assignment Tool adds, deletes or modifies the selected flag or programs to (or from) the selected students’ Flags tab, Program (Academic Planning) tab, CTE tab, Programs tab, and Program Session tab.
Tool Search: Batch Program Assignment Wizard
The Batch Program Assignment Wizard adds, deletes, or modifies assignment of the selected flag, graduation program, academic program, program or program with sessions on the selected students’ Flags, Programs (General), or Programs (Academic Planning) tools. It also manages course assignments, tracks graduation and academic progress, locks or unlocks plans, posts diplomas, and updates Course Requests.
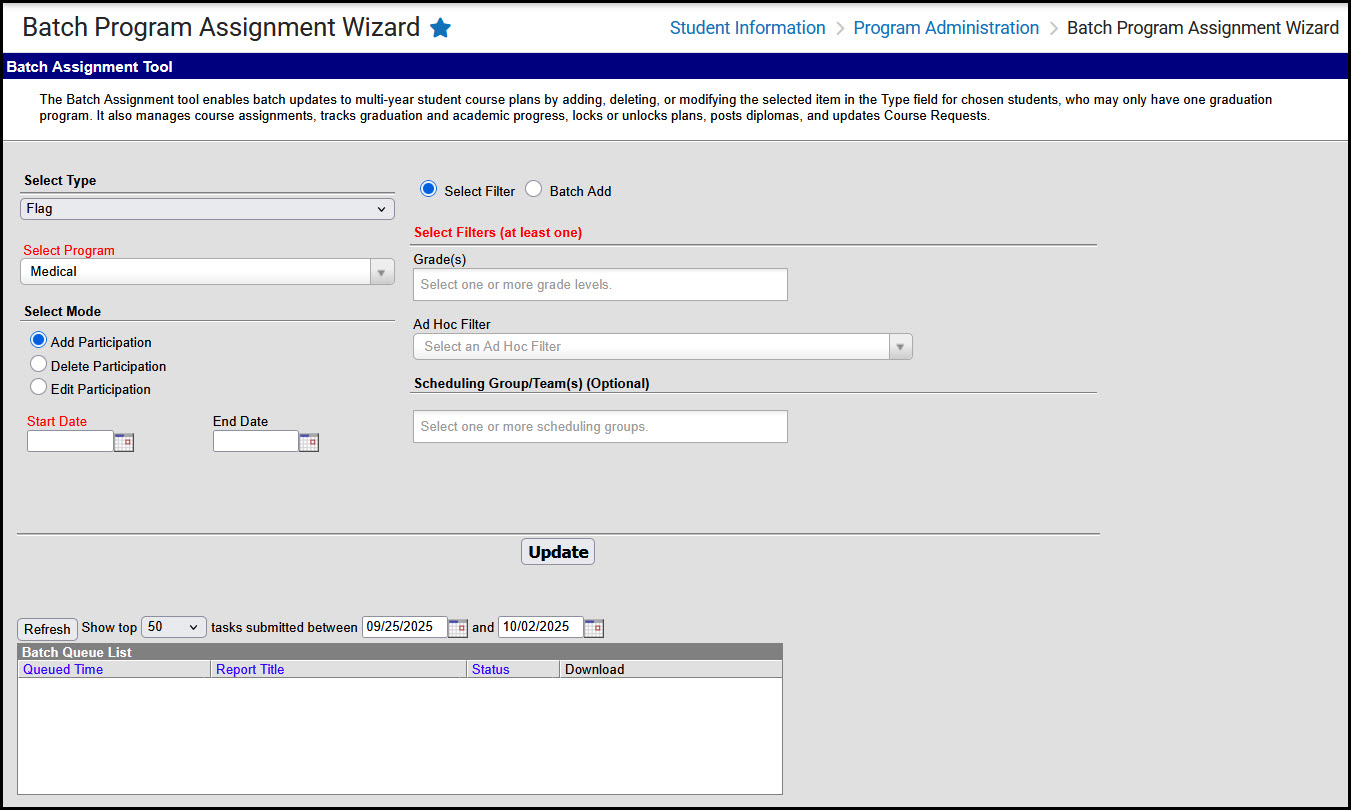 Batch Program Assignment Wizard
See the Batch Program Assignment Wizard Tool Rights article for information about rights needed to use this tool.
General Information
- Select a school and calendar from the Context Switcher before selecting a program type to batch assign. Depending on the selected program type, users may see programs that can be assigned district-wide, programs that apply only to their school, and inactive programs (red text).
- A student can have multiple assignments of any program type other than graduation. Students are allowed only one graduation program assignment. If the student already has a graduation program assigned to them, it is overwritten when a new assignment is made.
- Some programs are created with requirements or conditions students must meet in order to be assigned to them. For example, students assigned to a graduation program must have the appropriate cohort start and end year if that information is associated with the selected graduation program.
Batch Assignment By Type
Academic Program
Academic Programs define a course of study. The Progress tool displays a selected student's progress toward meeting requirements for completing the program(s) to which they are assigned, such as course requirements, assessments, and certificates. Not every state uses Academic Programs, and those that do may use them differently.
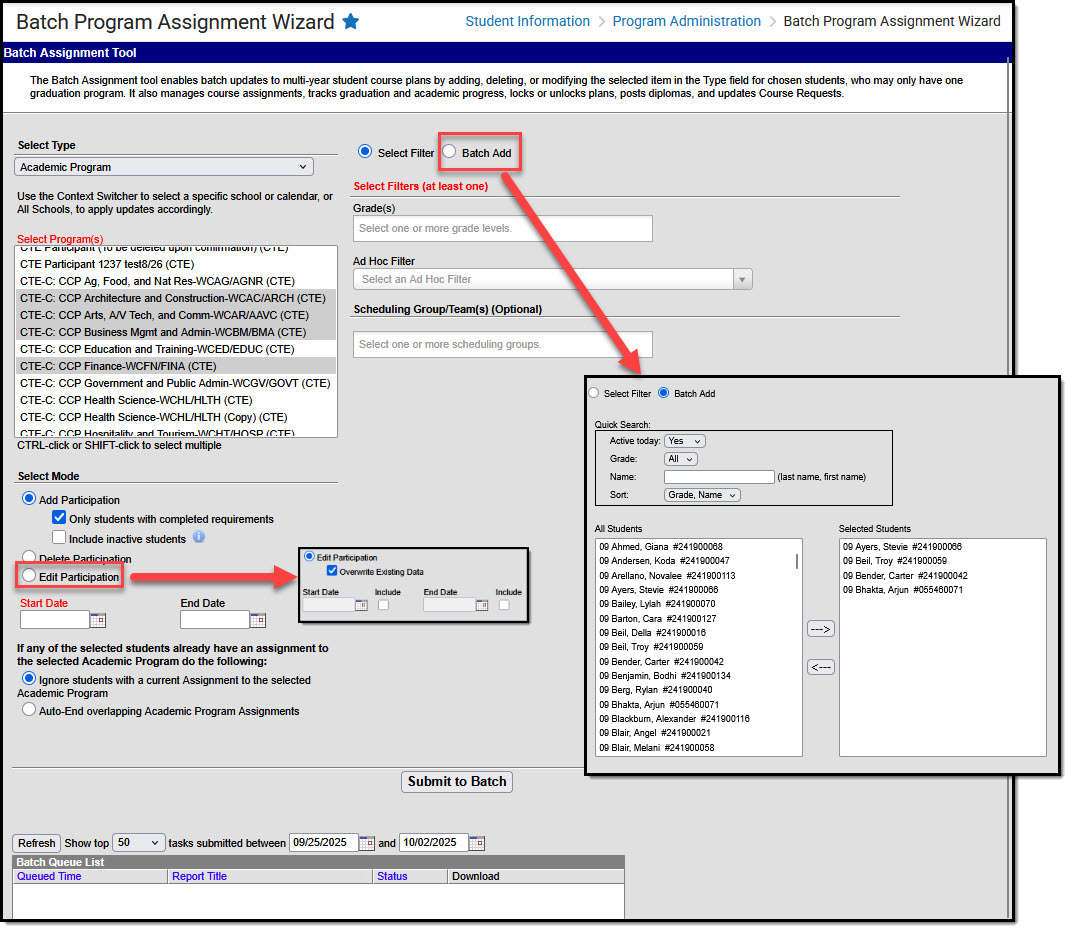 Batch Program Assignment Wizard - Academic Program
- From the Context Switcher, select either one school or All Schools.
- Select Type: Academic Program
- Select Programs: select one or more programs to update
- Choose Students to update (Select Filter OR Batch Add)
- Select Filter: Select at least one filter type. (Example: Selecting Grade(s)=09 and Ad Hoc Filter=Honor Roll Students would return only 9th grade students included in the Honor Roll Students filter).
- Batch Add: use quick search or manual select options to locate and select students to which the update will apply.
- Select Mode (choose one)
- Add Participation
- Only students with completed requirements: select to align program to students who aren't currently assigned to it but have already completed the program's requirements
- Include inactive students: appears when "Only students with completed requirements" is selected, allows inclusion of students who completed requirements but are not actively enrolled
- Delete Participation: remove participation records for selected program
- Note for CTE Programs: CTE Program Participation Records are only deleted when the end date is NULL or occurs in the future.
- Edit Participation: choose to edit participation by entering a Start and/or End Date. If you wish to override or remove existing dates, select Override Existing Data, indicate which dates to include, and either enter dates or leave the fields blank as appropriate.
- Add Participation
- Start/End End Date: you must enter a date if the field is red (e.g. Start Date on Add Participation), otherwise enter dates or leave dates blank as appropriate
- Note for CTE Programs: CTE Program Participation Records are only deleted when the end date is NULL or occurs in the future.
- Select Ignore to skip students already assigned to the program(s) or select Auto-End to end date existing overlapping assignments.
- Submit to Batch. Select options for when the batch job should run (e.g. off-peak hours for large amounts of data), then select OK.
Academic Program (Automated)
Academic Programs that have been marked Include in Automatic Assignment appear in the list of programs that can be selected for automated assignment. Some schools follow this process at the beginning of every year, using first and last instructional day dates, expecting that students may be assigned to one or more new programs annually based on courses they take.
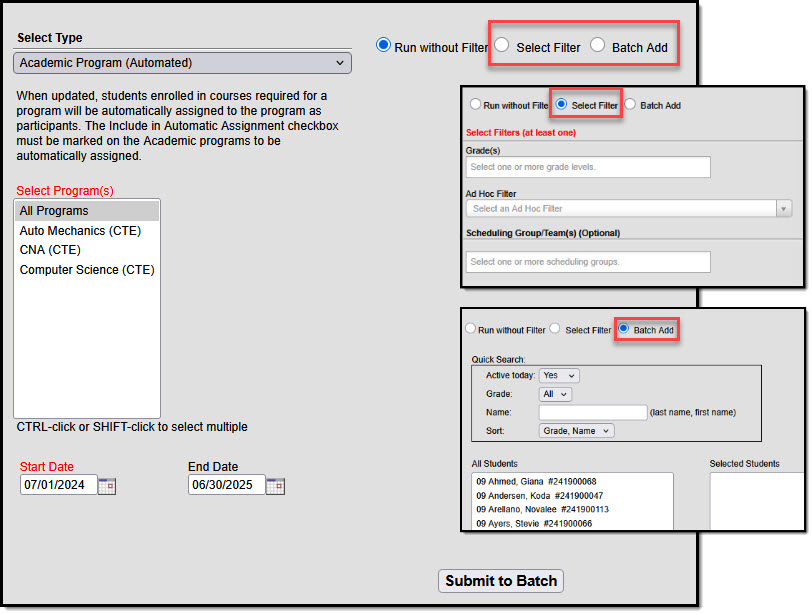 Batch Program Assignment - Academic Program (Automated)
 Program Marked for Automatic Assignment
- Select Type: Academic Program (Automated)
- Select Programs: select one or more programs to update
- Choose Students to update (Select Filter OR Batch Add)
- Run without Filter: This selection runs for all students, is resource-intensive, and should be run during off-peak hours.
- Select Filter: Select at least one filter type. (Example: Selecting Grade(s)=09 and Ad Hoc Filter=Honor Roll Students would return only 9th grade students included in the Honor Roll Students filter).
- Batch Add: use quick search or manual select options to locate and select students to which the update will apply.
- Enter a Start Date and, optionally, an End Date.
- Submit to Batch: Select options for when the batch job should run (e.g. off-peak hours for large amounts of data), then select OK.
- Students enrolled in courses required for a program will be assigned to the program as participants. Assignments are not duplicated.
Flag
Flags are alerts that schools can create and assign to students to indicate things such as participation in a program, or if a student has a contact or medical alert. Start and End Dates set the date range during which the flag's icon, if it has one, appears next to the student's name in Campus.
 Batch Program Assignment - Flag
- Select Type: Flag
- Select Program: choose one program from the list
- Choose Students to update (Select Filter OR Batch Add)
- Select Filter: Select at least one filter type. (Example: Selecting Grade(s)=09 and Ad Hoc Filter=Honor Roll Students would return only 9th grade students included in the Honor Roll Students filter).
- Batch Add: use quick search or manual select options to locate and select students to which the update will apply.
- Select Mode (choose one):
- Add Participation: add flag to selected students that do not already have one
- Delete Participation: remove flag from selected students
- Edit Participation: choose to edit participation by entering a Start and/or End Date. If you wish to override or remove existing dates, select Override Existing Data, indicate which dates to include, and either enter dates or leave the fields blank as appropriate.
- Select Update to apply selections, then select OK to close the confirmation message that appears.
Graduation
Graduation Programs define all the academic requirements necessary for a student to graduate, such as courses to be taken and GPA to be earned.
- A student may only be assigned to one graduation program at a time.
- Changing the student's graduation program doesn't change recorded data regarding things such as classes taken and grades earned.
- The student's Progress toward meeting graduation standards could change based on the requirements defined for whatever graduation program they're currently assigned to.
 Batch Program Assignment - Graduation
- Select Type: Graduation
- Select Program students will be assigned to
- Choose Students to update (Select Filter OR Batch Add)
- Select Filter: Select at least one filter type. (Example: Selecting Grade(s)=09 and Ad Hoc Filter=Honor Roll Students would return only 9th grade students included in the Honor Roll Students filter).
- Batch Add: use quick search or manual select options to locate and select students to which the update will apply.
- Select Mode (choose one):
- Add Participation: add program for selected students
- Delete Participation: remove program for selected students
- Edit Participation: choose to edit participation by entering a Start and/or End Date. If you wish to override or remove existing dates, select Override Existing Data, indicate which dates to include, and either enter dates or leave the fields blank as appropriate.
- Select Update to apply selections, then select OK to close the confirmation message that appears.
Program
Programs can be used to indicate student participation in whatever a district defines as a program. Examples include after school clubs, intramural sports, or community education. When you select a program a summary of program information appears just beneath the Update button.
 Batch Program Assignment - Program
- Select Type: Program
- Select Program students will be assigned to
- Choose Students to update (Select Filter OR Batch Add)
- Select Filter: Select at least one filter type. (Example: Selecting Grade(s)=09 and Ad Hoc Filter=Honor Roll Students would return only 9th grade students included in the Honor Roll Students filter).
- Batch Add: use quick search or manual select options to locate and select students to which the update will apply.
- Select Mode (choose one):
- Add Participation: add program for selected students
- Delete Participation: remove program for selected students
- Edit Participation: choose to edit participation by entering a Start and/or End Date. If you wish to override or remove existing dates, select Override Existing Data, indicate which dates to include, and either enter dates or leave the fields blank as appropriate.
- Exit Reason: select an exit reason if students are leaving the program and you need to indicate why.
- Select Update to apply selections, then select OK to close the confirmation message that appears.
Program Session
Program Sessions track the date, time, and location that an instance of a program is taking place. This option only displays programs for which sessions or instances of a program that can be tied to specific dates, times, and locations have been created.
 Batch Program Assignment - Program Session
- Select Type: Program Session
- Select Program students will be assigned to
- Select Program Session: Select "display sessions active within selected calendar date range" to limit selection options to sessions active within the calendar selected in the Context Switcher. Choose a session from the droplist.
- Choose Students to update (Select Filter OR Batch Add)
- Select Filter: Select at least one filter type. (Example: Selecting Grade(s)=09 and Ad Hoc Filter=Honor Roll Students would return only 9th grade students included in the Honor Roll Students filter).
- Batch Add: use quick search or manual select options to locate and select students to which the update will apply.
- Do not exceed Max Participants indicated in Program Session Inrformation
- Select Mode (choose one):
- Add Participation: add program for selected students
- Delete Participation: remove program for selected students
- Edit Participation: choose to edit participation by entering a Start and/or End Date. If you wish to override or remove existing dates, select Override Existing Data, indicate which dates to include, and either enter dates or leave the fields blank as appropriate.
- Exit Reason: select an exit reason if students are leaving the program and you need to indicate why.
- Status: indicate a status to be applied, if appropriate
- Select Update to apply selections, then select OK to close the confirmation message that appears.
Program Session Dates: When assigning program sessions, the entered start and end dates must be within the selected program session start and end dates.
Max Participants: When enrollment in a program session meets the entered Max Participant number, a pop-up message displays. Additional students can still be added to the program session, but be aware the enrollment has exceeded the entered value.
Portal
Portal Preferences
The Display Options allow schools to determine which features appear on the Campus Portal for students and parents. This is a school-wide tab, meaning the high school in a district may have different options selected than a middle school. The Academic Planner may be made available to display in the Portal by selecting its options on the Display Options tab.
Tool Search: Display Options
The Portal Display Options allow schools to determine which tools and data are available in the Campus Student and Campus Parent Portals. This tool is scoped to the school selected in the Campus toolbar.
Options are managed by creating templates and assigning calendars (and schedule structures) to that template. This tool also contains Batch Edit options to simplify updating multiple templates or schools.
 Portal Display Options
See the Portal Display Options Tool Rights article for suggested tool rights.
Understand the Portal Display Options Tool
The primary view of the Portal Display Options tool lists the Templates created for the school and the Calendar(s) assigned to each template. Click the name of the template or calendar to view more information.
For each template, a Status and, if applicable, which terms are enabled are displayed. The status indicates whether portal data is enabled for the calendar assigned to the template.
Use the filter options above the table to filter the list by calendars in the Previous, Active, and Future school years or by calendar status.
| The Active year is the School Year currently marked as Active in the School Year Setup tool. |
What does 'Enabled' mean?
If a Calendar (Schedule Structure) is enabled, data is available on the Campus Student and Campus Parent Portals for that calendar. The available data is determined by the display options marked in the template to which the calendar is assigned.
If a Term is enabled, Assignment, Attendance, Grades, and Schedule data for that term are available, depending on which display options are enabled.
Which calendars can be enabled?
Calendars can be enabled if they are for the current, active school year, the prior (previous) school year, or the next (future) school year.
Calendars from the previous school year can be enabled for only 90 days from the Calendar End Date. This is done by extending the enabled status of the calendar. See the Calendar & Term Settings section below for information about enabling previous calendars.
For enabled calendars in the active and previous school years, the data available on the Portals is determined by the Display Options selected. For calendars in the future school year, only the Display Options for Academic Plan, Activity Registration, Course Registration, Documents, and Schedule tools are applicable. All other data is hidden from enabled calendars in future school years.
Questions? Check out the Portal Preferences FAQ article.
Create a Template
To create a new display options template, click the New Template button at the bottom of the tool. Alternately, open an existing template, click the arrow next to the Save button, and then Save & Copy to create a copy of that template as a starting point.
 Manage display options by first creating a template.
Enter a unique Template Name. This is the name displayed in the Portal Display Options tool and when assigning calendars. Enter a Description if desired. Currently, this description is only displayed in this tool. It may help provide more information about what data is enabled in the template and how it should be used.
Display Options are grouped in expandable sections by tool. Click Expand All to view all options. When enabled tools are collapsed, an indication in the section heading indicates if the tool is enabled.
For many tools, display options can be set individually for Campus Student and Campus Parent. For some tools, additional options are displayed for specific settings when the tool is enabled. See the Display Options section below for a breakdown of each tool, its related settings, and examples from the apps. |
Once the desired options for this template are marked, click Save to complete the template. The next step is assigning calendars to the template.
Assign Calendars to a Template
To assign calendars to a template, click the Manage Calendars button at the bottom of the template. Click Assign next to the calendar(s) to assign to this template. Calendars can also be assigned by clicking the calendar name from the main display options screen.
Calendars can only be assigned to one template at a time.
 Next, calendars to the template
Calendar and Term Settings
When a calendar is assigned to a template, additional settings display:
Enable calendar when it is in the active or future school year.
When a calendar is enabled, data in that calendar is available in the portals, depending on the options selected. This setting to enable a calendar applies to calendars in the active or future school year. The Active year is the School Year currently marked as Active in the School Year Setup tool. The future school year is the next one.
Keep calendar enabled when it is in the previous school year for X days from Calendar End Date
Keeping a calendar enabled allows parents and students to access a calendar's data past its end date. This option is especially helpful for data such as Grades and Assignment scores.
Access can be extended up to 90 days past the Calendar End Date. After that date, the calendar will no longer be listed in the Portal Display Options tool and cannot be made available.
Portal Term Settings
Term-specific settings control access to Assignments, Attendance, Grades, and Schedule data.
Terms are automatically enabled based on the term's Start Date based on the automatic preferences selected. Automatically enable all terms according to the first term's Start Date, or enable each term according to its own Start Date. Select the number of days before the Start Date for which the terms should be enabled.
Display Options Summary
Below the list of terms is the Display Options Summary, which indicates the template selected for the calendar and which options are enabled.
Display Options
The following describes the available options to display in Campus Student and Campus Parent. An example of the option is provided in the last column.
See the Campus Student and Campus Parent articles for examples of what these apps look like.
 Expand sections of the display options to enable tools and specific data elements to display in the portals.
Attention districts who update their Portal Display Options via custom scripts:
Campus has provided a prism call to refresh the portal cache. This call should be run after a script updates options using the Task Scheduler. The prism call is: x=portal.PortalDisplay-reloadPortalDisplayOptionsCache
Schedule the task as desired in the Scheduler. The Tool Code for this tool is resources.PortalOptions. Select a Task Type of Java (Prism URL call) and enter the text above in the text box.
| Option | Description | Campus Student and Campus Parent |
|---|---|---|
| Academic Plan | ||
| Enable Academic Plan Tool | Displays information related to a student's course plan.
The Academic Planner and Course Registration options can be turned on at the same time, but it is not recommended. It is best to have a window of time when students can add courses to their course plans and a window of time when students can enter course requests. This eliminates the risk of overwriting course requests or planned courses. |
 Click to enlarge |
| Enforce All Rules | When marked, students can only save their academic plan if ALL planning rules and requirements have been fulfilled.
When it is not marked, students can save their plan without meeting all requirements, but all planning rules must still be met. Warning messages from failed requirements and failed planning rules are displayed so users can see the issues but still save the entry. |
|
| Require approval by parent/legal guardian | When marked, parent/legal guardians can mark this box indicating they have reviewed the student's academic plan.
This field displays as marked when the student views the plan when logged into the portal and when the counselor views the student's Course Plan. Parents/guardians can review the student's academic plan and mark this checkbox without being able to change the programs or course plans. This is helpful in situations where a counselor has worked with the student to create a plan and finalize it but still wants parents/guardians to review the selections. |
|
| Display Course Fees | Any fees assigned to a course will be displayed when viewing that course in the Course Catalog search results. | |
| Allow portal users to change program | When marked, parents/guardians and students can select a different academic plan. When not marked, only district staff (counselors, graduation program planners, etc.) can change students' academic plans. | |
| Allow to change course plans | When marked for Campus Student or Campus Parent, students and/or parents can add or remove courses from the course planner. Parents/guardians can approve the student's course plan regardless of whether this checkbox is marked. When not marked, only district staff (counselors, graduation program planners, etc.) can change academic plans for students. | |
| Access Log | ||
| Enable Access Log tool | Displays the date, time, and IP address of successful login attempts. |
|
| Activity Registration | ||
| Enable Activity Registration Viewing tool | Displays Activity Registration information in Campus Parent Portal and Campus Student Portal.
Campus finds the student's current enrollment record and checks that school's preference to determine whether Activity Registration information should display. If there isn't a current enrollment record, Campus will use a previous enrollment record to determine if the Activity Registration data can display. |
 Click to enlarge |
| Assessments | ||
| Enable Assessments tool | Displays a student's district, state, and national test scores. |
|
| Assessment Display Text - Student/Parent | Enter text in these two editors to display that text at the top of the Assessment tool in Campus Student and Campus Parent, respectively. | |
| Assignments | ||
| Enable Assignments tool | Enables the tool that lists a student's assignments for the year. Students can view scores and submit work, as enabled by their teacher. Assignments are also displayed in other areas of Campus Student and Campus Parent, including Grade Book Updates, Today, and the Calendar, as well as the Course detail and Grade detail. |
|
| Display Score Details | Displays the selected details about a student's score. Selecting these options also enables notifications when assignments are scored, based on student and parent settings.
| |
| Display Category Details | Displays category data in the grade detail, by clicking a specific task/standard in the Grades tool. Specific options include:
|
 Click to enlarge |
| Attendance | ||
| Enable Attendance Tool | Displays the student's attendance events for the school year in the Attendance tool and the Calendar. |  Click to enlarge |
| Display Attendance Comments | Displays the comments attached to attendance events (click second image) (NOT available for Kentucky districts). | |
| Display Positive Attendance Attendance tool only) | Displays attendance for any courses using Positive Attendance functionality (click third image). This option may not display for all states and districts. | |
| Show Unknown Attendance | Enables attendance with a status of Unknown to display within the Portal (ONLY available for Kentucky districts). | |
| Attendance Display Text - Student/Parent | Enter text in these two editors to display that text at the top of the Attendance tool in Campus Student and Campus Parent, respectively. | |
| Behavior | ||
| Enable Behavior Tool | Displays a student's behavior events for the school year. |  Click to enlarge |
| Behavior Display Text - Student/Parent | Enter text in these two editors to display that text at the top of the Behavior tool in Campus Student and Campus Parent, respectively. | |
| Contact Preferences | ||
| Enable Contact Preferences tool | Displays the parent/guardian's message contact information and gives access to the Change Contact Info tool. |  Click to enlarge |
| Allow Update | Students and Parents can update the following contact information from the Contract Preferences tool:
| |
| Course Registration | ||
| Enable Course Registration Tool | Lists the requested courses for the next school year for students. It is recommended that this option be turned on only during registration time.
Both the Academic Planner and Course Registration options can be turned on at the same time, but it is not recommended. It is best to have a window of time when students can add courses to their course plan, and a window of time when students can enter course requests. This eliminates the risk of overwriting course requests or planned courses. In order for students (and parents) to enter course requests, the following must be done:
See the Course Registration article for information on requesting courses. |
|
| Documents | ||
| Enable Documents Tool | Allows users to access report cards, transcripts, custom forms, and other documents.
Note: Report Cards, Transcripts, and configured Schedule reports display in this tool if 'Available in Portal' is selected in the Report Preferences. For report cards, if the Portal - Historical option is marked in the Report Setup, report cards from previous school years will also be available in the Portals. |
Click to enlarge Academic Progress:
Click to enlarge |
| Reports and Plans | The following reports and plans can be enabled:
| |
| Custom Modules | Displays Custom Forms created in corresponding Custom Modules on Portal:
For eSignature Custom Forms to display on the Portal, the following setup must be completed. See each section of the document below for detailed instructions.
|
|
| Food Service | Food service options are only available for districts who are Food Service customers. | |
| Enable Food Service Tool | Displays Food Service Account information. This option only affects Food Service-enabled districts. Marking this option for non-Food Service districts has no effect. |
Click to enlarge |
| Display Food Service Balance on the Today screen | Displays the student's food service balance on the today screen. | |
| Food Service - Barcode | Food service options are only available for districts who are Food Service customers. | |
| Display Food Service PIN Barcode on the Today screen | Displays the student's Food Service PIN as a barcode in Campus Student and Campus Parent. Students and parents can use the barcode to make Food Service purchases.
If the option "Display Barcode of Student Number on Campus Student" is also selected, each barcode displays in its own collapsible area.  Point of Sale customers who set their student's PINs to be the same as their Student Number do not need this feature if the option "Display Barcode of Student Number on Campus Student" is selected. Point of Sale customers who set their student's PINs to be the same as their Student Number do not need this feature if the option "Display Barcode of Student Number on Campus Student" is selected. |
 Click to enlarge |
| Grades | ||
| Enable Grades tool | Enables the grades tool, which lists the tasks and standards aligned to the student's courses, as well as in-progress and posted grades (based on the additional options selected). | |
| Display Grade Type | Displays the following types of grades. Selecting these options also enables notifications for grade updates, based on student and parent settings.
| |
| Display Grade Total | Displays the selected Grade Totals:
| |
| Display GPA | Displays the selected grade point average:
| |
| Other |
| |
| Grades Display Text - Student/Parent | Enter text in these two editors to display that text at the top of the Grades tool in Campus Student and Campus Parent, respectively. | |
| Health | ||
| Enable Health Tool | The Health tool lists the student's recorded vaccinations, immunizations and screenings. Separate options display for the following tools:
|
 Click to enlarge |
| Learning Tools | ||
| Enable Learning Tools | Displays a list of enabled learning tools, from which students can access learning materials. Learning tools are enabled in the LTI Configuration tool. | |
| Lockers | ||
| Enable Lockers Tool | Displays all Locker assignments for the student. |
Click to enlarge |
| Responsive Schedule | ||
| Enable Responsive Schedule Tool | Displays Responsive Scheduling offerings in Campus Student and Campus Parent.
NOTE: Additional setup for responsive scheduling courses is required. See the the Responsive Scheduling article for more information. |
Click to enlarge |
| Schedule | ||
| Enable Schedule Tool | Displays the student's schedule, both in the Schedule tool, and in the Today and Calendar views.
Schedules display for enabled terms only. Disable future terms to hide schedules until they are finalized. |
 Click to enlarge |
| Display Period Times | Displays Period Times in the student's schedule. | |
| Schedule Display Text - Student/Parent | Enter text in these two editors to display that text at the top of the Schedule tool in Campus Student and Campus Parent, respectively. |
|
| School Choice | ||
| Enable School Choice Tool | Displays data related to school choice and allows parents to accept enrollment when the school has completed processing school choice applications. |
Click to enlarge |
| Section Feed | ||
| Enable Section Feeds | Enables the Section Feed tool for students and parents. |  Click to enlarge Click to enlarge |
| Display Other Students' Comments | Displays comments for other students in a section. (Campus Parent only) | |
| Display Other Students' Names | Displays the names of other students in a section with their comments. (Campus Parent only) | |
| Student Questions | ||
| Enable Student Questions | Allows students to ask questions of their teachers from the Today screen, which is displayed in the Control Center. | |
| Transportation | ||
| Enable Transportation Tool | Displays the bus(es) a student rides to and from school. |
Click to enlarge |
| Transportation Tool Display Text - Student/Parent | Enter text in these two editors to display that text at the top of the Transportation tool in Campus Student and Campus Parent, respectively. | |
| Tuition | ||
| Enable Tuition Tool | Displays the Tuition tool that enables parents to submit school tuition payments. | |
| Tuition Options | Displays a student's tuition balance on the Home Screen. | |
| Other Display Options | ||
| Display Student Picture | Displays the student's current picture for parent and student users. |
|
| Display Student Number | Displays the student's district-assigned student number. |
Click to enlarge |
| Display Student State ID | Displays the student's State ID number on the Home page. |  Click to enlarge Click to enlarge |
| Display Counselor Email on the Course screen | Displays the email address for the student's assigned guidance/academic counselor. When marked, students or parents can email the counselor to request schedule changes.
The counselor's email is displayed on the Course detail of the Schedule.
|
Click to enlarge |
| Display Blended Learning Group Name | Displays the blended learning group that is active for the student for that day on the Today screen. |  |
Display Barcode of Student Number on Campus Student
|
Displays a barcode of the student number after the student logs in. The barcode can be used for attendance scanning as part of the Campus Workflow Suite. This option is only available for districts who have purchased the Workflow suite.
Point of Sale customers who set their student's PINs to be the same as their Student Number can use this feature. If student PINs are the same as their student number, a terminal with a 2D scanner can read the student's barcode from their mobile device and process the transaction. This feature eliminates the need to distribute a paper barcode and allows contactless payment. |
Click to enlarge |
Previous Version
Reports
Academic Plan Progress Batch
The Academic Plan Progress Batch Report allows counselors and other administrators to view a PDF report of several students' progress on their academic plans.
The Academic Plan Progress Batch Report allows counselors and other administrators the ability to view a PDF report of several students' progress of their academic plan. This same report can be generated one student at a time by printing the Academic Plan Progress report from the student's Academic Planning Progress tab.
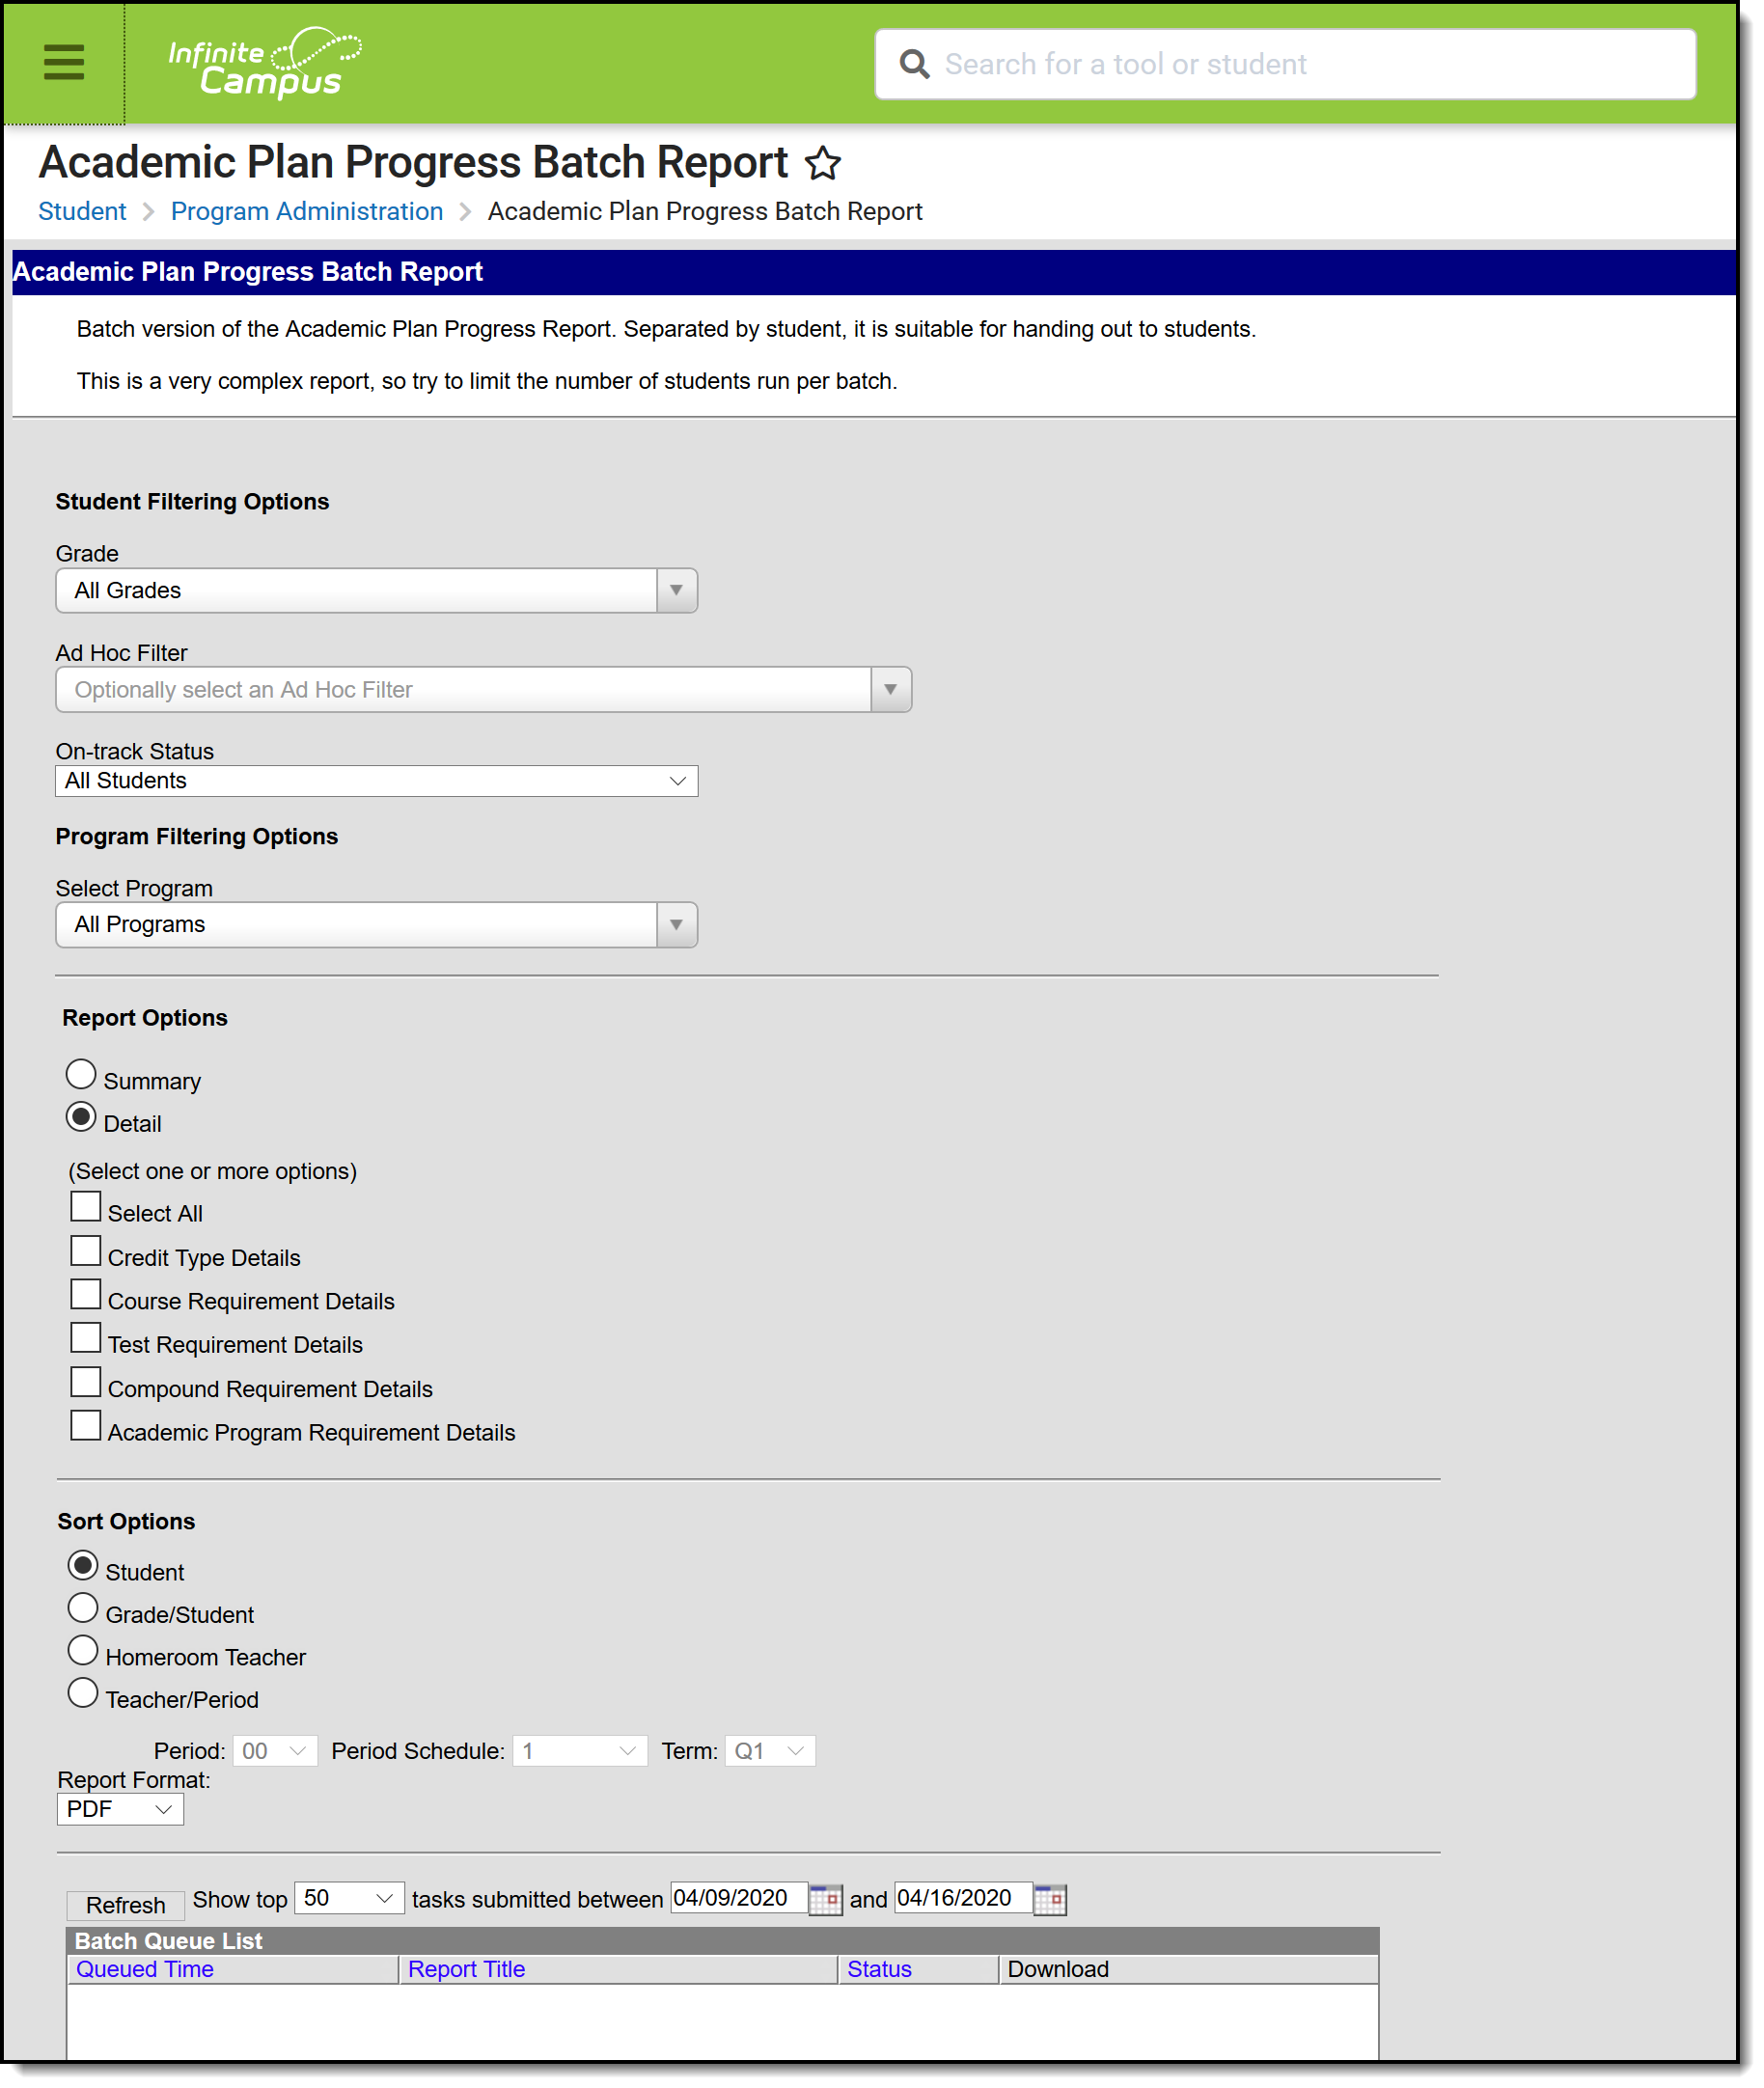 Academic Plan Progress Batch Report
See the Academic Plan Progress Batch Report Tool Rights article for information about rights needed to use this tool.
Report Logic
This report only generates information for the selected calendar in the Campus toolbar. Multiple calendars cannot be selected.
Only students who are assigned graduation programs are included in the report.
Report Editor
| Data Element | Description |
|---|---|
| Student Filter Options | |
| Grade | Filters the students included in the report to the selected grade level of enrollment. All Grades can be selected. Because this is a complex report, it is recommended that a specific grade level be selected. |
| Ad hoc Filter | Select an existing filter of students. Only those students included in the filter are considered for inclusion in the report. This filter can be selected in addition to a grade level. For example, if the filter includes all students with the last name of A, and the grade level selection is set to 10, only students in grade 10 who also have a last name that starts with A are included in the report population. |
| On-track Status | Select this option to return student who are off-track only (behind in program requirements), on-track only (met or exceeded program requirements) or All Students (on-track status is not considered). |
| Program Filtering Options | |
| Select Program | Reports information for the selected program only. When All Programs is selected, all Graduation Programs and Academic Programs assigned to the students are returned (if Academic Programs are available). When a specific Graduation Program or Academic Program is selected, only information on the selected program is returned. |
| Report Options | |
| Summary | The summary report includes information on the student's assigned graduation program, their on-track status, and the student's progress. |
| Detail | The detail report includes all of the information in the summary report, plus the information on the specifics of the requirement, and allows the selection of the following (one or all):
|
| Sort Options | |
| Student | This option displays students alphabetical by last name. |
| Grade/Student | This option displays students first by grade level of enrollment (09, 10, etc.), then alphabetical by last name. |
| Homeroom Teacher | This option displays students by the homeroom teacher, then alphabetical by last name. |
| Teacher/Period | This option displays students by the selected teacher, period, period schedule and term selected in the corresponding dropdown list. Students who are scheduled as of the last calendar day print on the report. |
| Report Format | The report prints in either PDF or DOCX formats. |
| Report Generation Options | |
| Generate Report | Use the Generate Report button to display the results of the report immediately. |
| Submit to Batch | Use the Submit to Batch option to determine when the report generates. Because this is a complex report, if your selected student number is more than 50, use the Submit to Batch option. |
Generate the Report
- Select the Grades to include in the report.
- Select the Ad hoc Filter to use to further narrow the results of the report, if desired.
- Select the desired On-track Status for the students.
- Select the desired Academic Program.
- Select the desired Report Options and Sort Options.
- Select the desired Report Format.
- Click the Generate Report button or the Submit to Batch button.
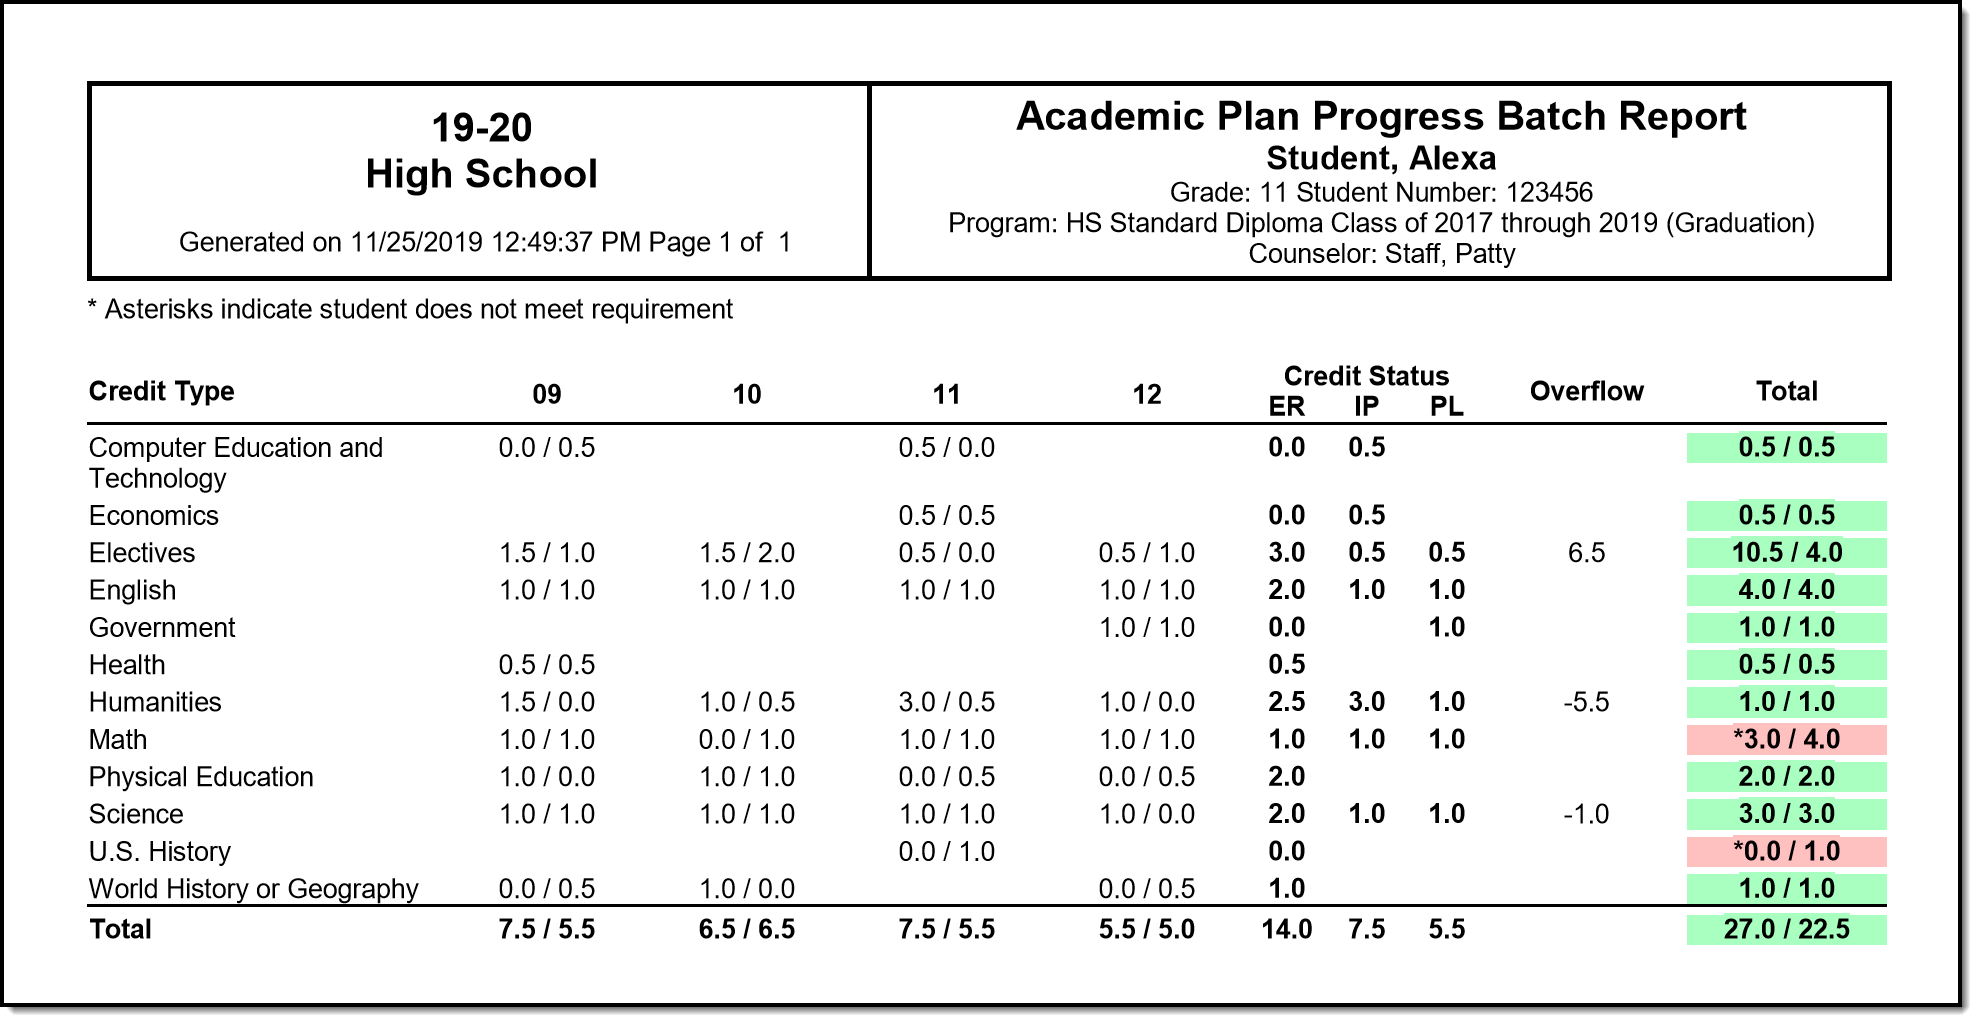 Academic Plan Progress Batch Report, Summary View
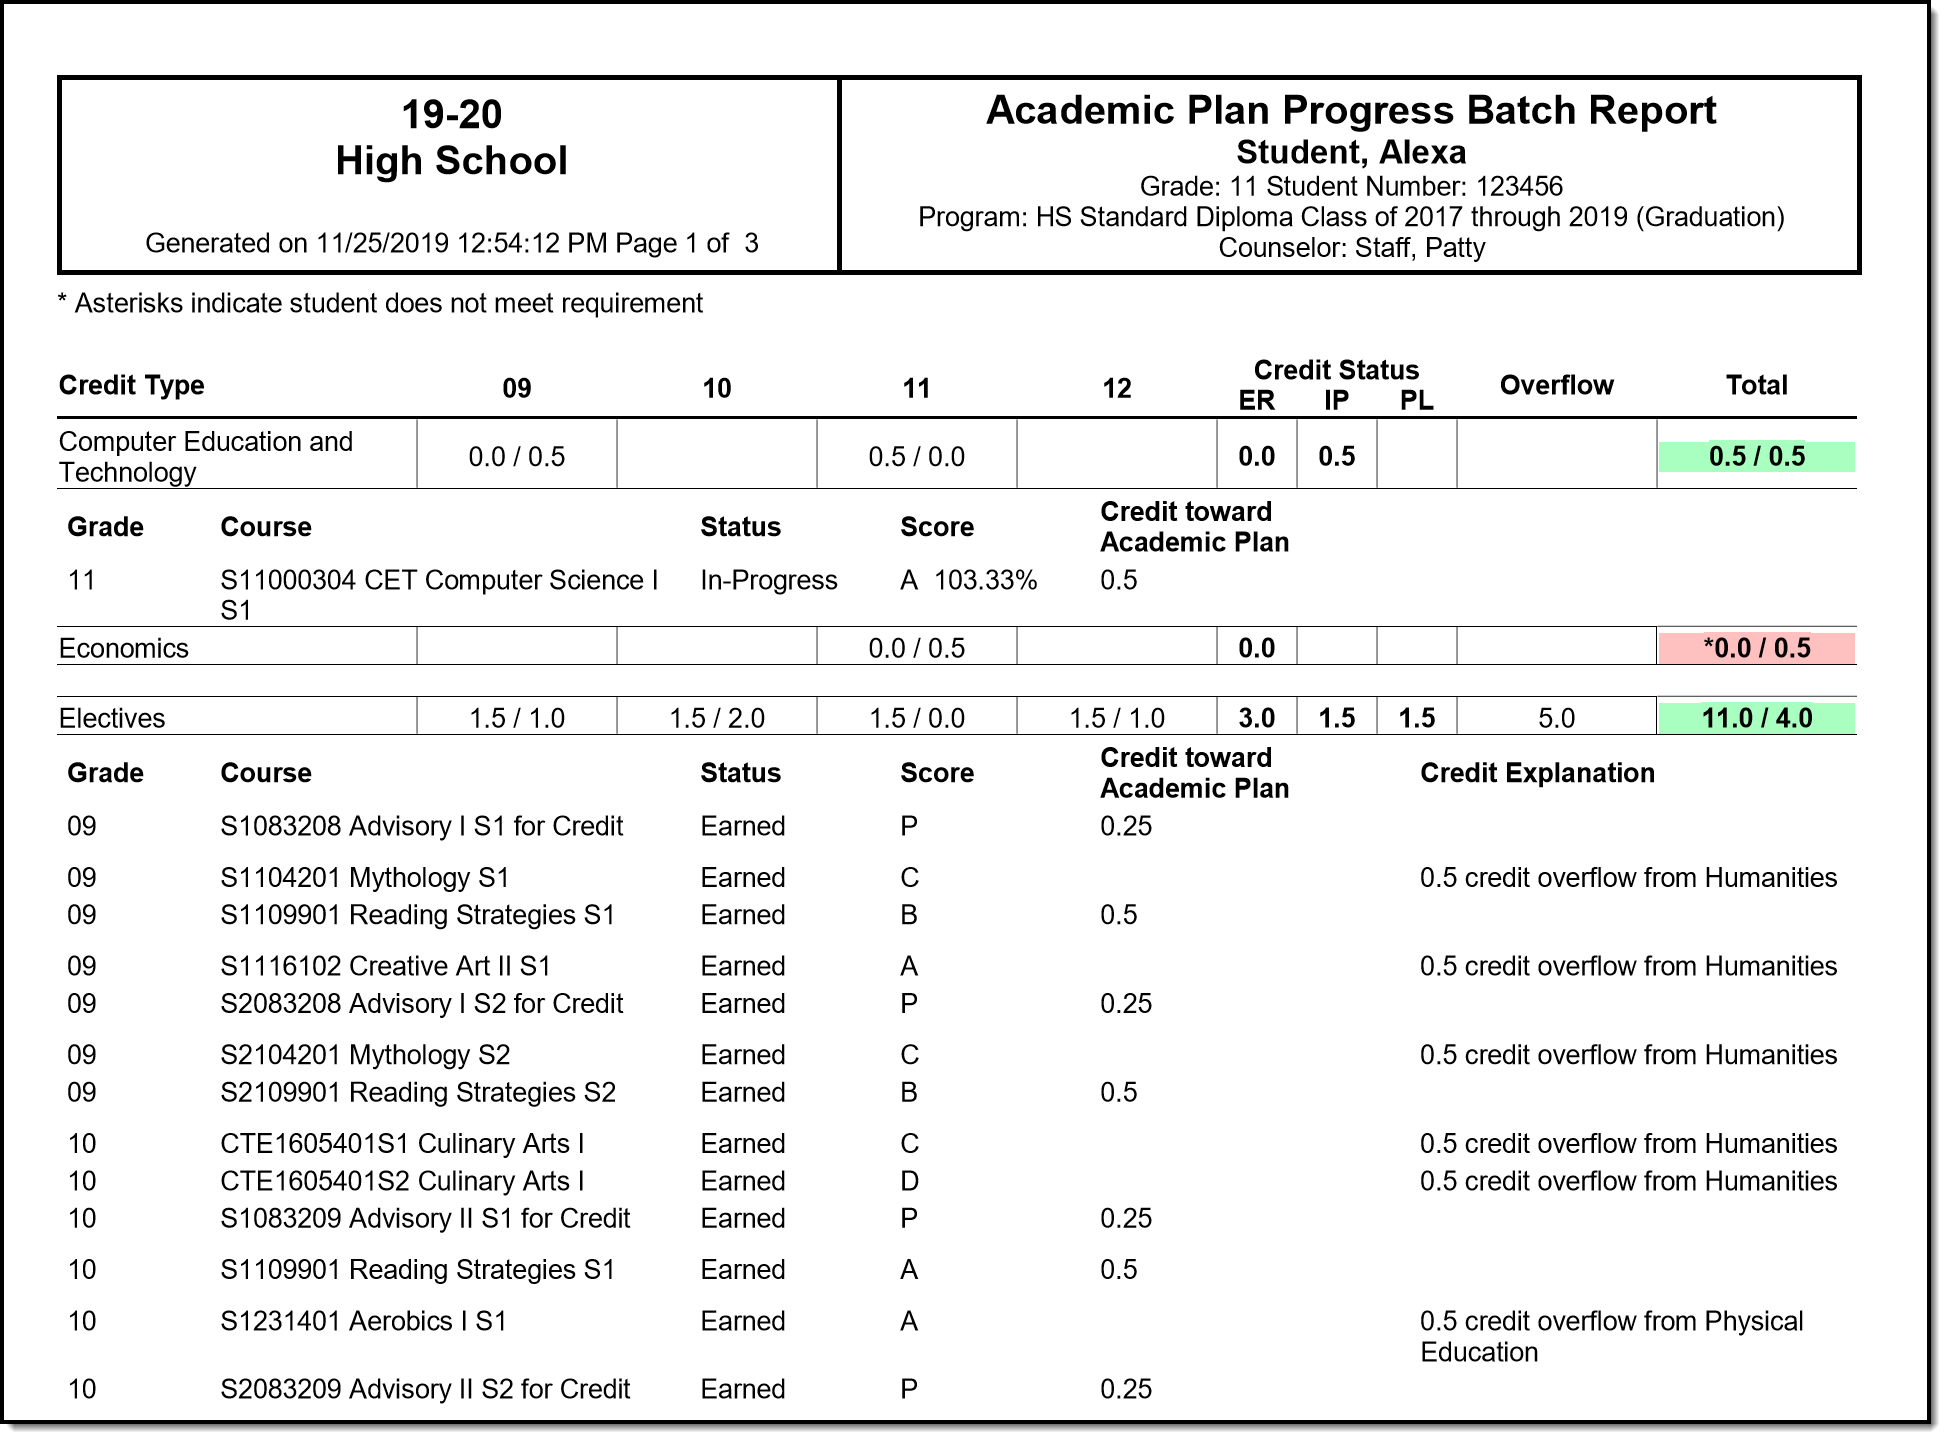 Acadwemic Plan Progress Report, Detail View
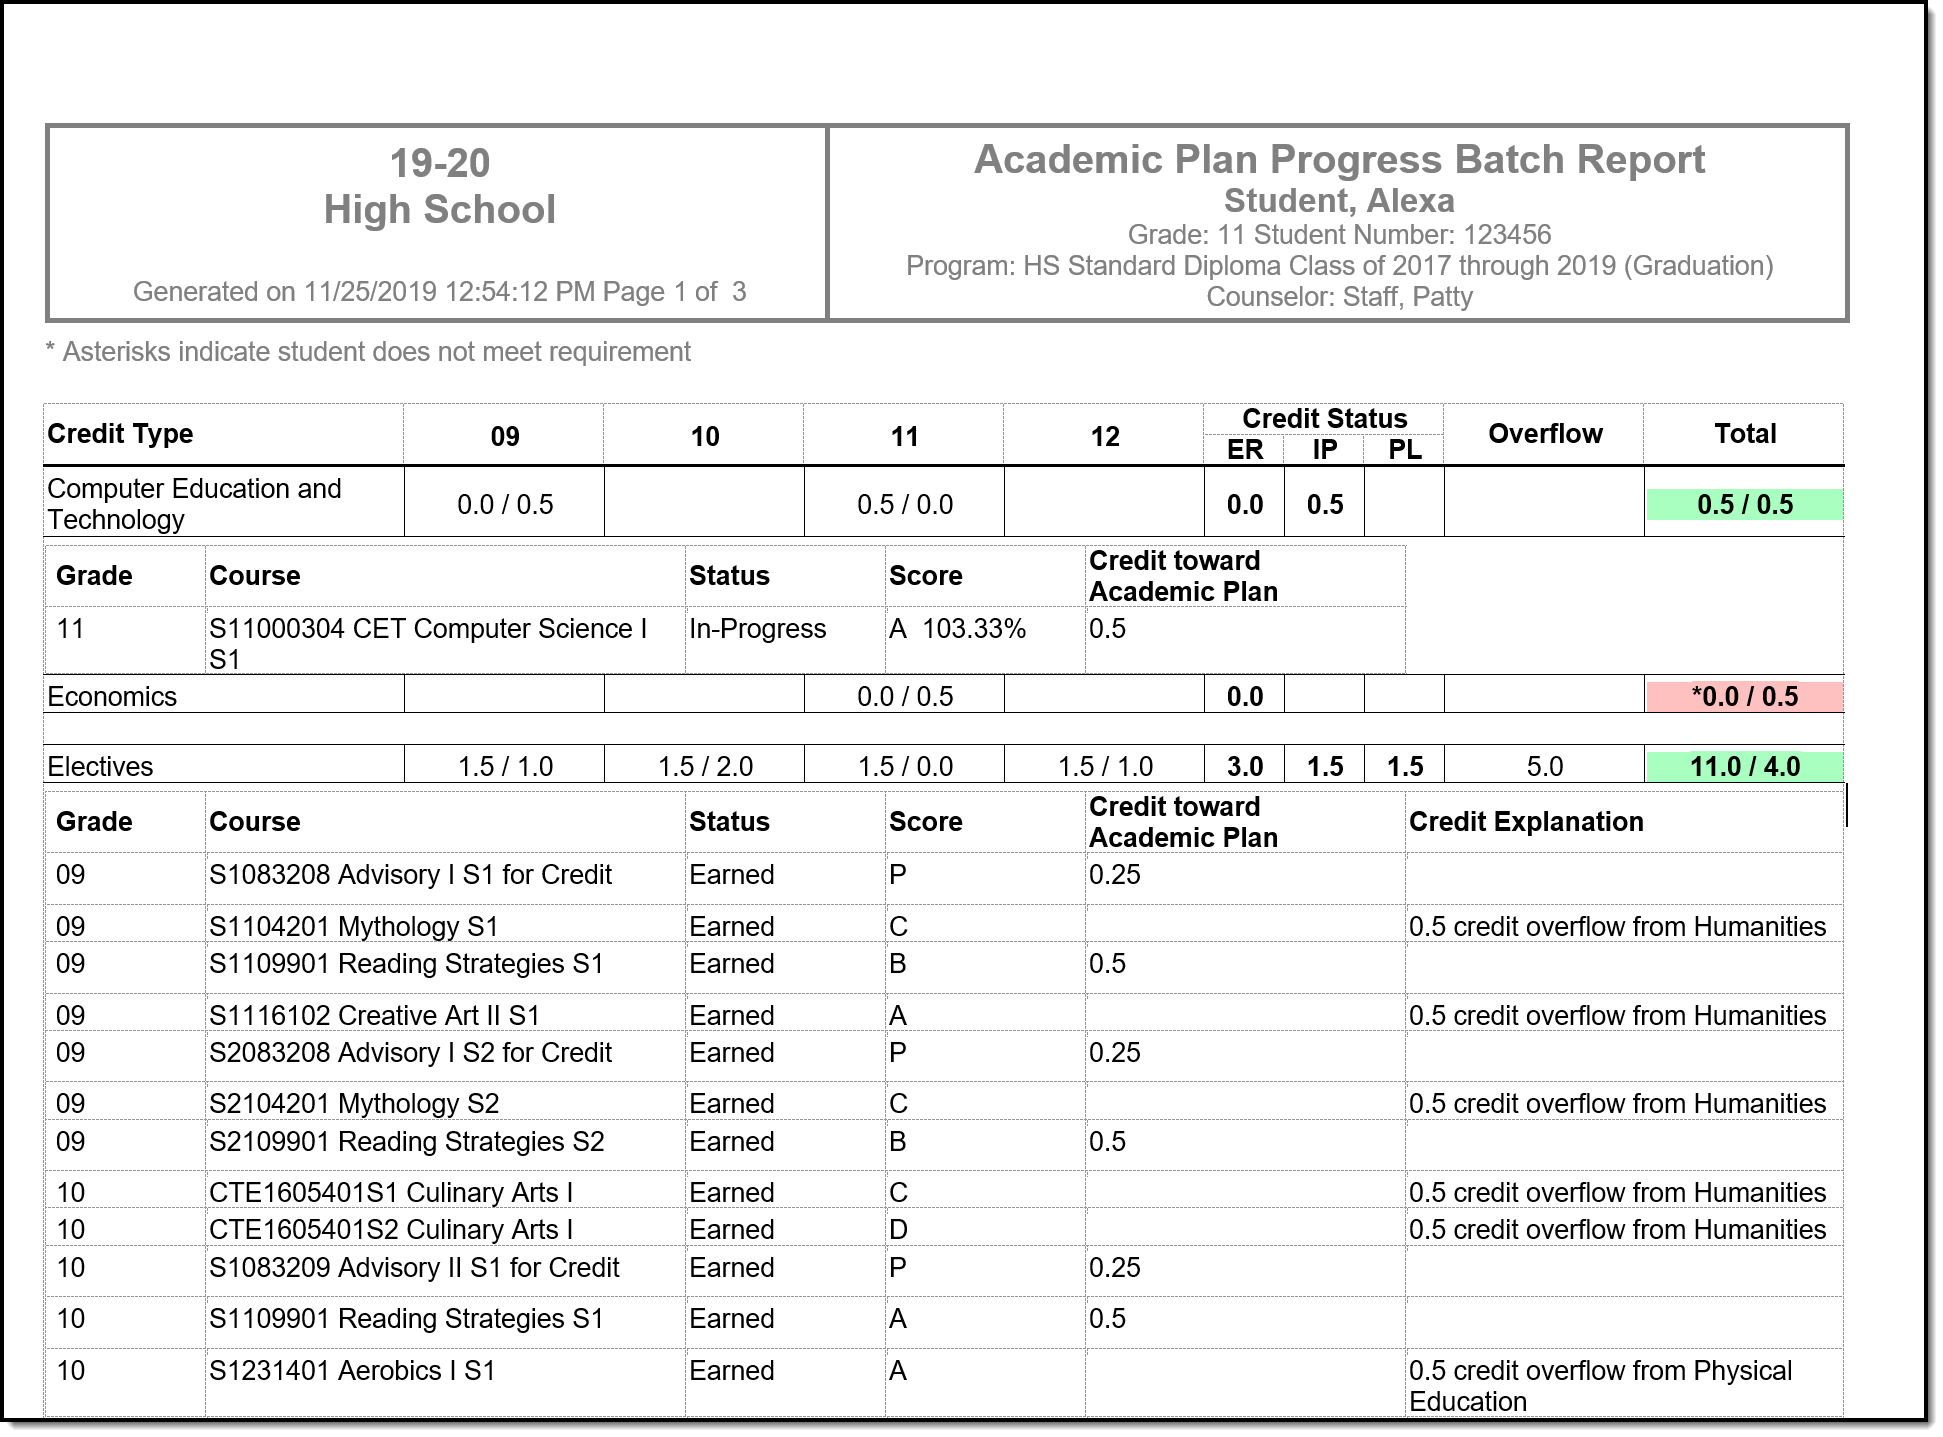 Academic Plan Progress Report, Detail View - DOCX Format
Academic Plan Status
The Academic Plan Status Report indicates whether a student's graduation or academic program is on-track to meet minimum program requirements to graduate. Use this report to look for missing data, errors in student plans, or signs that there may be an error in transcript data or in the setup requirements.
The Academic Plan Status Report indicates whether a student's graduation or academic program is on-track to meet minimum program requirements to graduate. Use this report to look for missing data, errors in student plans, or signs that there may be an error in transcript data or in the setup requirements. You can also use this report to find students who do not have an active assignment to a graduation or academic plan.
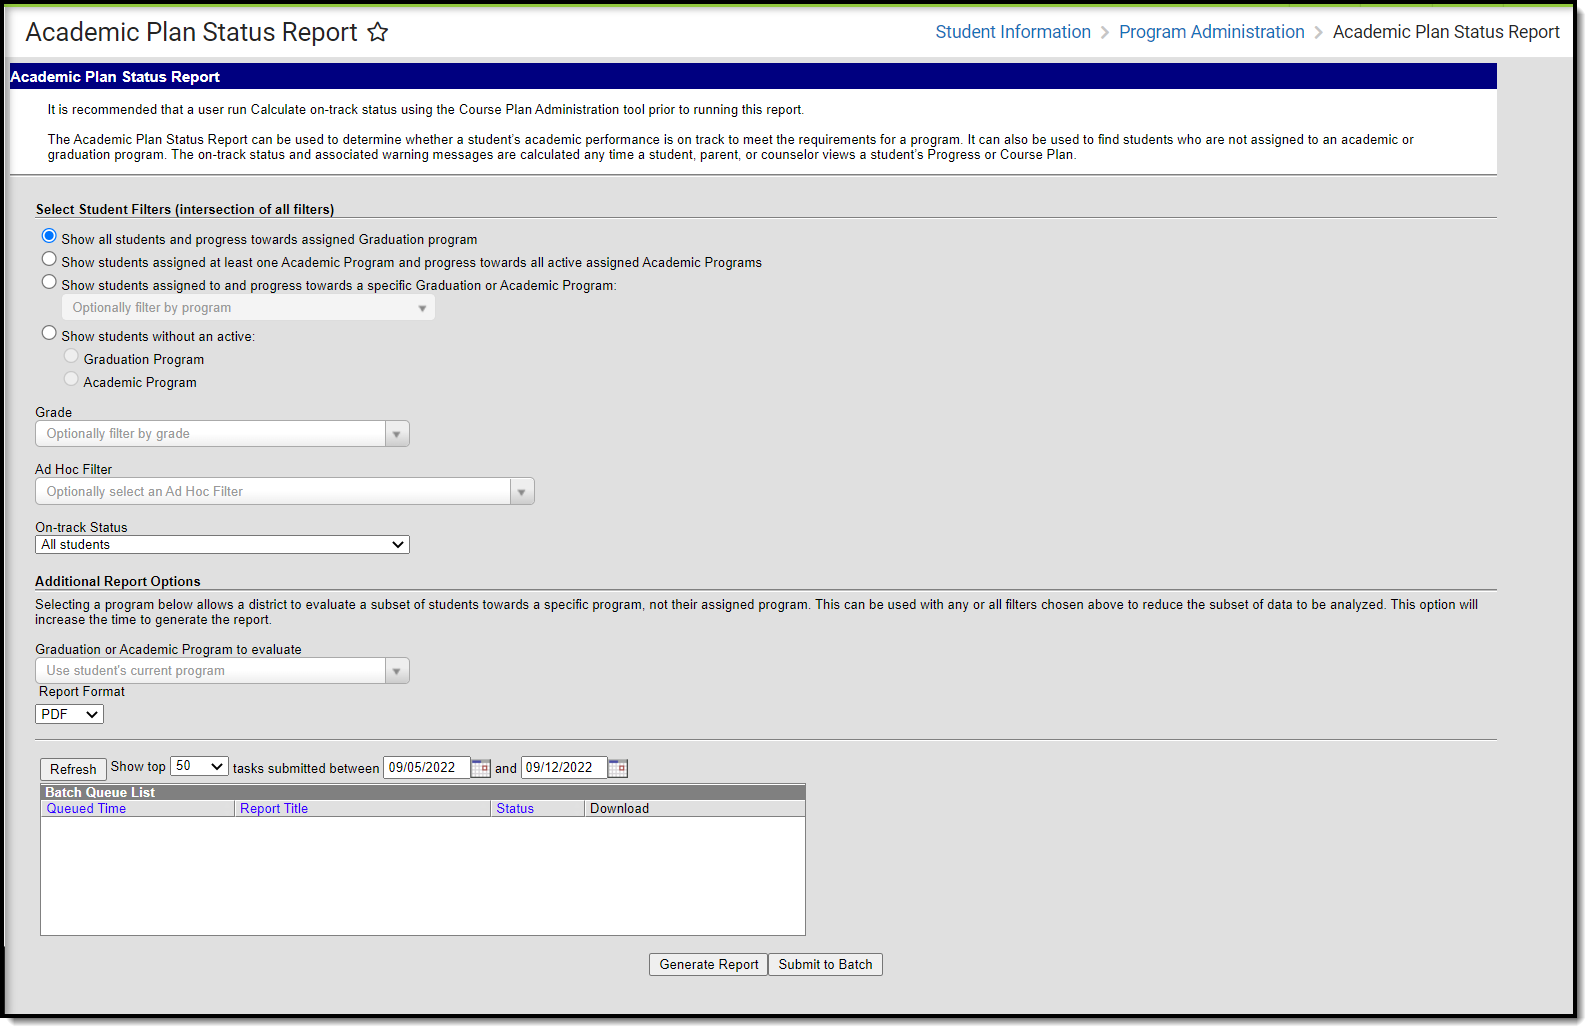 Academic Plan Status Report
See the Academic Plan Status Report Tool Rights article for information about rights needed to use this tool.
Report Logic
When used to evaluate student status, this report pulls on-track status and warning messages (missing data, no program assigned, list of credit requirements, etc.) from cached calculated values. These values are updated any time a student, parent or counselor views a student's academic plan. If a transcript post or grading window has passed since the students viewed their courses, update the calculated values using the Course Plan Admin tool.
On-track status is calculated in the following areas:
- Saving Graduation Progress from the Campus Portal (either by the student or parent)
- Saving Grad Progress information
- Saving Academic Plan information from the Campus Portal (either by the student or parent)
- Saving Course Plan information
- Saving Test Requirement information
- Running the Calculate On-Track Status option from Course Plan Admin
Report Editor
| Field | Description |
|---|---|
Select Student Filters Selecting student filters shows a student's progress in their assigned program. | |
| Student and Program Selection | Selection of one of the following radio buttons is necessary:
|
| Grade | Lists all grade levels in the selected calendar. |
| Ad hoc Filter | Lists all filters to which the user has access. |
| On-Track Status | Selection option returns just those students who are currently classified as the chosen status, based on the information in their Grad Progress tool. Options are:
|
Additional Report Options Selecting a program allows a district to evaluate a subset of students towards a specific program, not their assigned program. This can be used with any or all filters chosen above to reduce the subset of data to be analyzed. This option increases the time required to generate the report. The Submit to Batch option is recommended. | |
| Graduation or Academic Program to evaluate | Lists all active and inactive graduation and academic programs. The category assigned to the program displays in parentheses behind the program name. The selection is used as a comparison against the student's currently assigned academic program. |
| Report Format | The report can be generated in either PDF, CSV or DOCX format. |
| Report Generation Options | The report can be generated immediately using the Generate Extract button. When there is a larger amount of data chosen, use the Submit to Batch button, which allows the user to choose when the report is generated. See the Batch Queue article for more information. |
Generate the Plan Status Report to see Current Status
- Select one of the student filter options (described above) for inclusion in the report.
- Select the desired Report Format.
- Click the Generate Report button to display the results immediately, or click the Submit to Batch button to choose when the report generates.
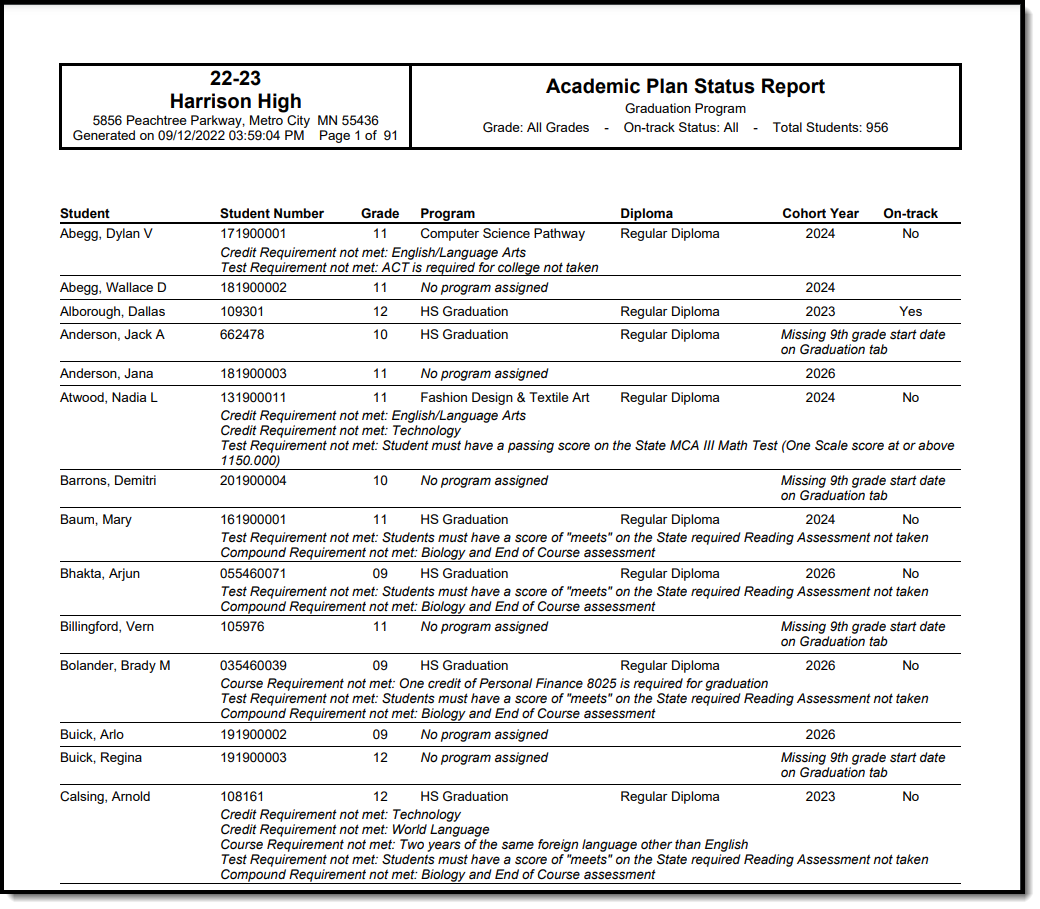 Show all students and progress towards assigned Graduation program option
Generate the Plan Status Report to see Progress Toward Another Program
A school year, school name and calendar must be selected in the Campus toolbar in order to generate this report.
- Select one of the student filter options (described above) for inclusion in the report.
- Select another Academic Program to Evaluate from the dropdown list.
- Select the desired Report Format.
- Click the Generate Report button to display the results immediately, or click the Submit to Batch button to choose when the report generates.
Because of the way the data is pulled from the tables to determine a student's progress towards another program, it is recommended to use the Submit to Batch process.
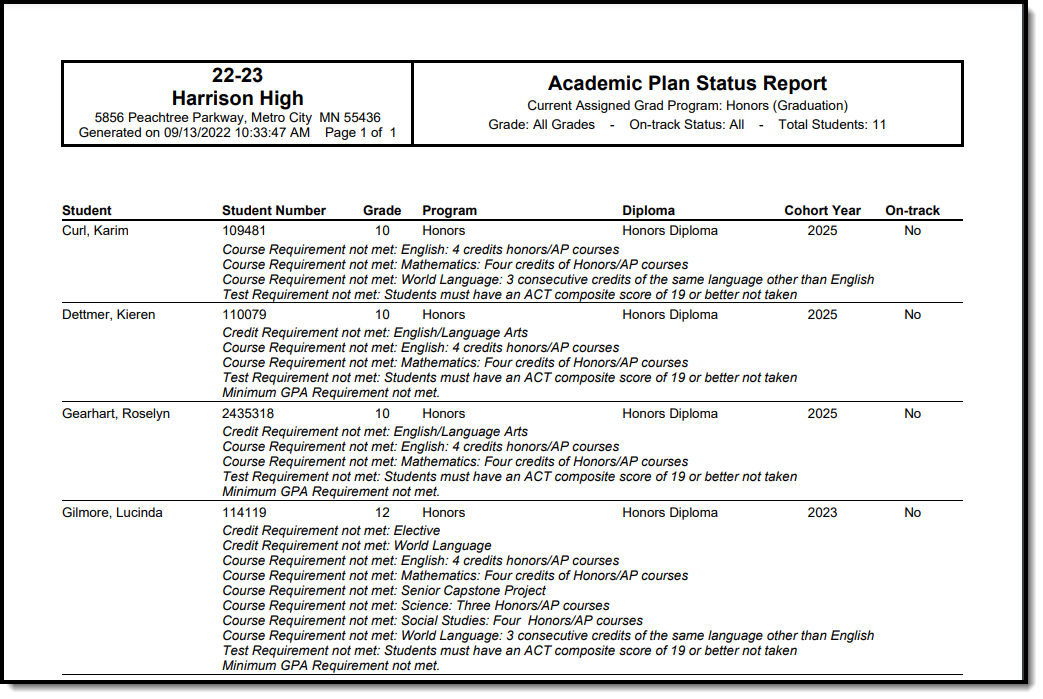 Show students assigned to and progress towards a specific Graduation or Academic Program option
Report Layout
| Data Element | Description | Type, Format and Length | Campus Database | Campus Interface |
|---|---|---|---|---|
| Student | Reports the student's last name, first name in alphabetical order | Alphanumeric, 50 characters | Identity.lastName Identity.firstName | Census > People > Demographics > Person Information > Last Name, First Name |
| Student Number | Reports the student's locally assigned student number. | Numeric, 12 digits | Person.student Number | Census > People > Demographics > Person Identifiers > Student Number |
| Grade | Reports the student's grade level of enrollment. | Alphanumeric, 2 characters | Enrollment.grade | Student Information > General > Enrollments > General Enrollment Information > Grade |
| Program | Reports either the student's currently assigned program or the selected program to see the student's progress towards that program. If the student is not assigned a program, No Program Assigned displays in this column. | Alphanumeric, 25 characters | Program.name | Student Information > Academic Planning > Program > Academic Program Detail > Program |
| Diploma | Reports the type of diploma the student receives upon graduation and successful completion of the assigned academic program. This is set on the Graduation Program tool. This field is blank when the report is generated for evaluating a student's progress towards another program. | Alphanumeric, 15 characters | ProgramParticipation. Diploma | Programs > Academic Programs > Diploma Type |
| Cohort Year | Reports the NCLB Cohort End Year assigned on the graduation tool. If this field is blank on the student's graduation tool, Missing 9th grade start date on Graduation tool displays in this column. | Numeric, 4 digits | Graduation.cohort YearNCLB | Student Information > General > Graduation > NCLB Cohort End Year |
| On-Track | Indicates the student's on-track status as either yes or no. See the Report Logic section for information on how this is calculated. If the student is on track and has met all requirements, the report indicates the type of diploma the student received and when. | Alphabetic, 3 characters Yes or No | Calculated value, data not stored | Calculated value, data not stored |
| Requirements Not Met | When students are missing requirements for graduation, those credit types are listed. This reports for each requirement that could be reported:
| Alphanumeric, 50 characters | Calculated value, data not stored | Calculated value, data not stored |
Finding Students without an Active Program
This report can also be used to find students who do not have an active assignment to a graduation or academic program.
 Show students without an active program option
Report Editor
| Field | Description |
|---|---|
| Select Student Filters |
|
| Grade | Lists all grade levels in the selected calendar. |
| Ad Hoc Filter | Lists all filters to which the user has access. |
| On-track Status | Not available when using these filters. |
| Graduation or Academic Program to evaluate | Not available when using these filters. |
| Report Format | The report can be generated in either PDF, CSV or DOCX format. |
| Report Generation Options | The report can be generated immediately using the Generate Extract button. When there is a larger amount of data chosen, use the Submit to Batch button, which allows the user to choose when the report is generated. See the Batch Queue article for more information. |
Generate the Report to find students without an Active Program Assignment
- Select Graduation Program or Academic Program from the Show students without an active: option.
- Filter by Grade or Ad Hoc Filter if desired.
- Select the desired Report Format.
- Click the Generate Report button to display the results immediately, or click the Submit to Batch button to choose when the report generates.
Report Layout
| Data Element | Description | Type, Format and Length | Campus Database | Campus Interface |
|---|---|---|---|---|
| Grade | Reports the student's grade level of enrollment. | Alphanumeric, 2 characters | Enrollment.grade | Student Information > General > Enrollments > General Enrollment Information > Grade |
| Student | Reports the student's last name, first name in alphabetical order | Alphanumeric, 50 characters | Identity.lastName Identity.firstName | Census > People > Demographics > Person Information > Last Name, First Name |
| Student Number | Reports the student's locally assigned student number. | Numeric, 12 digits | Person.student Number | Census > People > Demographics > Person Identifiers > Student Number |
Previous Versions
https://kb.infinitecampus.com/help/academic-plan-status-report-2124-2235
Course Plan Batch
The Course Plan Batch Report allows counselors and other administrators to view a PDF report of several students' course plans.
Tool Search: Course Plan Batch
The Course Plan Batch Report allows counselors and other administrators the ability to view a PDF report of several students' course plan. This same report can be generated one student at a time by printing the Course Plan Report from the student's Course Plan.
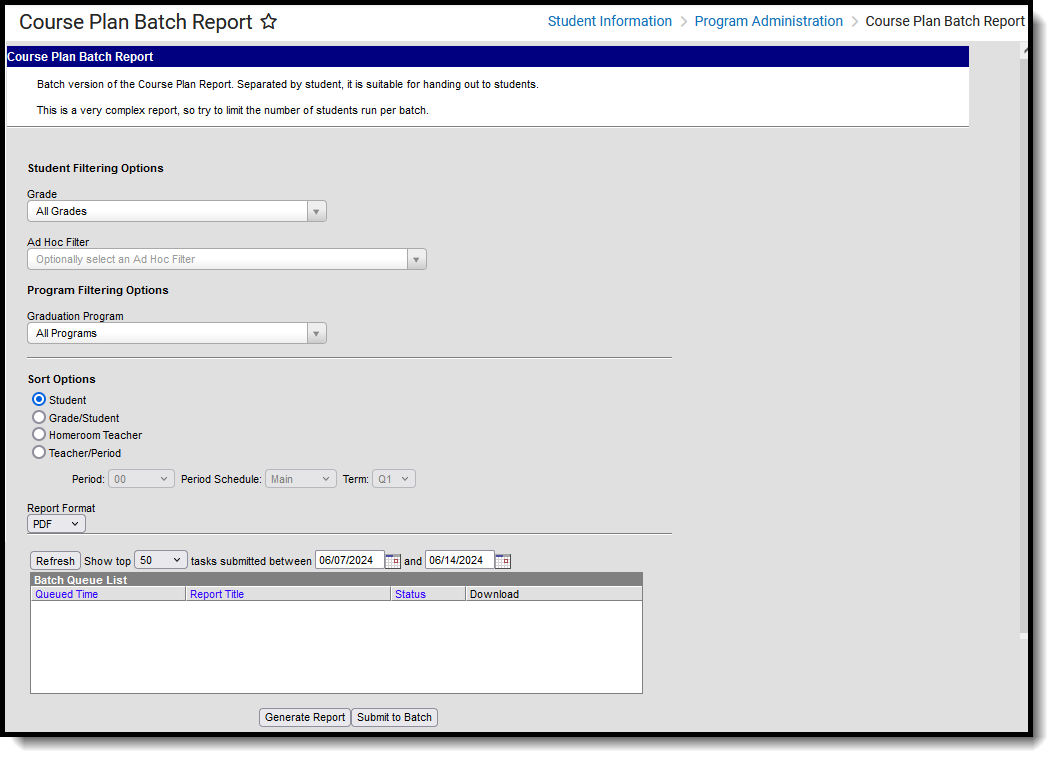 Course Plan Batch Report
See the Course Plan Batch Tool Rights article for information on available tool rights.
Report Logic
This report only generates information for the selected calendar in the Campus toolbar. Multiple calendars cannot be selected.
Only students who are assigned graduation programs are included in the report.
Report Editor
| Data Element | Description |
|---|---|
| Student Filter Options | |
| Grade | Filters the students included in the report to the selected grade levels of enrollment. All Grades can be selected. Because this is a complex report, it is recommended that a specific grade level be selected. |
| Ad hoc Filter | Select an existing filter of students. Only those students included in the filter are considered for inclusion in the report. This filter can be selected in addition to a grade level. For example, if the filter includes all students with the last name of A, and the grade level selection is set to 10, only students in grade 10 who also have a last name that starts with A are included in the report population. |
| Program Filtering Options | |
| Graduation Programs | Filters the programs included in the report to the selected graduation programs. The category assigned to the program displays in parentheses behind the program name. Academic programs are not included. |
| Sort Options | |
| Student | This option displays students alphabetical by last name. |
| Grade/Student | This option displays students first by grade level of enrollment (09, 10, etc.), then alphabetical by last name. |
| Homeroom Teacher | This option displays students by the homeroom teacher, then alphabetical by last name. |
| Teacher/Period | This option displays students by the selected teacher, period, period schedule and term selected in the corresponding dropdown list. Students who are scheduled as of the last calendar day print on the report. |
| Report Format | The report can be generated in either PDF or DOCX format. |
| Report Generation Options | |
| Generate Report | Use the Generate Report button to display the results of the report immediately. |
| Submit to Batch | Use the Submit to Batch option to determine when the report generates. Because this is a complex report, if your selected student number is more than 50, use the Submit to Batch option. |
Generate the Report
- Select the Grades to include in the report.
- Select the Ad hoc Filter to use to further narrow the results of the report, if desired.
- Select the desired Graduation Program.
- Select the desired Sort Options.
- Select the desired Report Format.
- Click the Generate Report button or the Submit to Batch button.
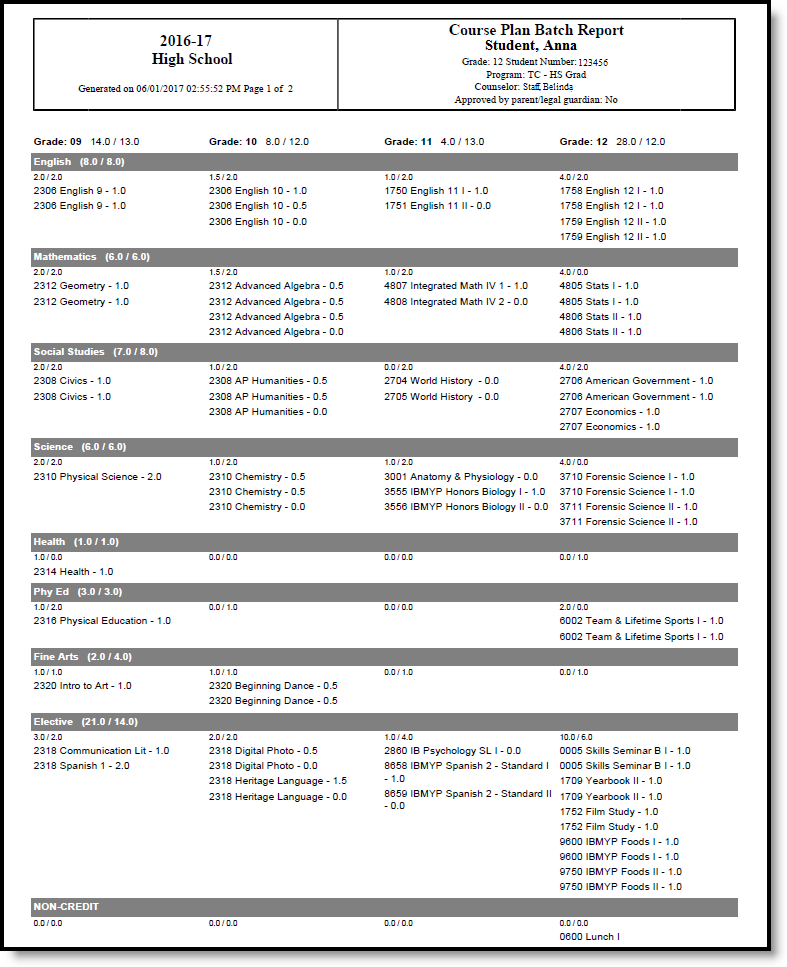 Course Plan Batch - PDF Format
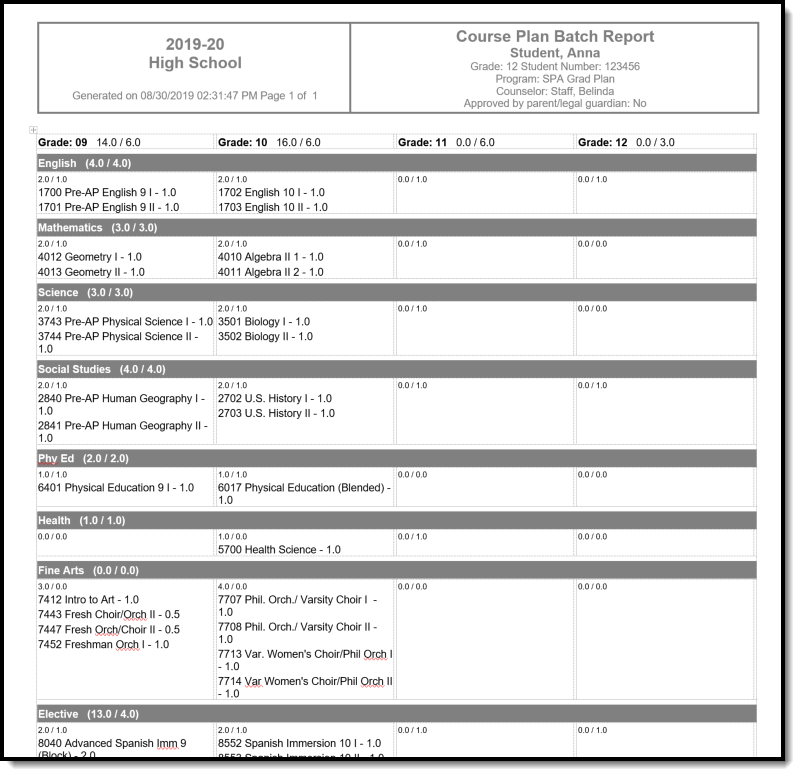 Course Plan Batch Report - DOCX Format
Course Projections Report
The Course Projections Report uses planned courses from student academic plans to make course projections for future years.
Tool Search: Course Projections Report
The Course Projections Report uses planned courses from student academic plans to make course projections for future years. Section counts are estimated based off of the value entered in the Max Students field on the Course Information editor.
 Course Projection Report
Submit feedback for the Course Projections Report by clicking the Feedback button in the bottom right hand corner. This takes you to the Campus Community Course Projections forum topic where you can add your suggestions for this report.
See the Scheduling & Courses Reports Tool Rights article for information about rights needed to use this tool.
Report Logic
Logic first looks for students who have a future enrollment in the selected school (not the current students who have an enrollment in the selected calendar). From those students who have future enrollments in the selected calendar, the Course Plan Data is used to determine which students are included on the report.
Generate the Course Projections Report
This report requires the selection of a Calendar in the Campus toolbar. To display current student and section counts for comparison to a future year, generate this report in the current calendar.
Click the Generate Report button. The results of the selected calendar display in PDF or DOCX format.
- If departments have been assigned to courses, the report sorts the results in Department order. Courses where a department is not assigned display first with a header of No Department Assigned.
- Years are sorted from active year (first column) up to three additional years in chronological order. In order for future years to display, student course plans must be populated for future years.
- For each year, a total count of the number of students who plan to take the course is listed, as well as a total count of how many sections are needed for each course in each school year.
- The Sections value is calculated based on the number of students who plan to take the course divided by the Max Students value of the course based on the scope year and calendar. If there is a remainder of students greater than 60% of a section, another section is added.
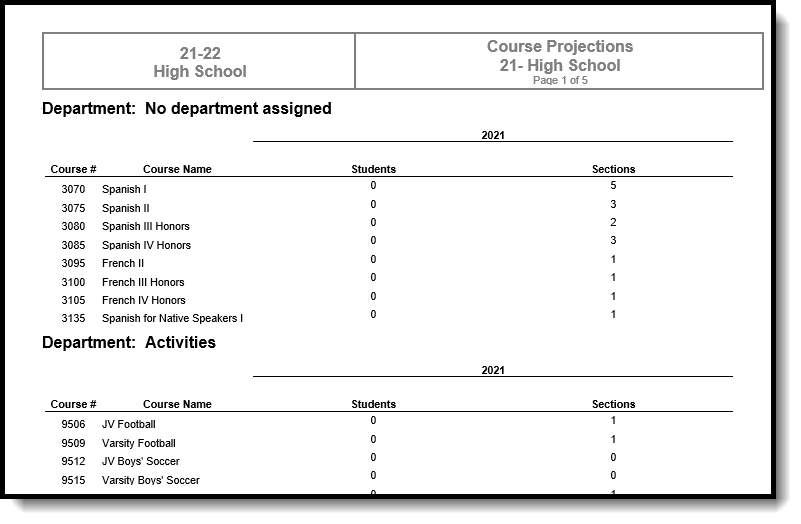 Course Projections Report for Current Year, DOCX Format
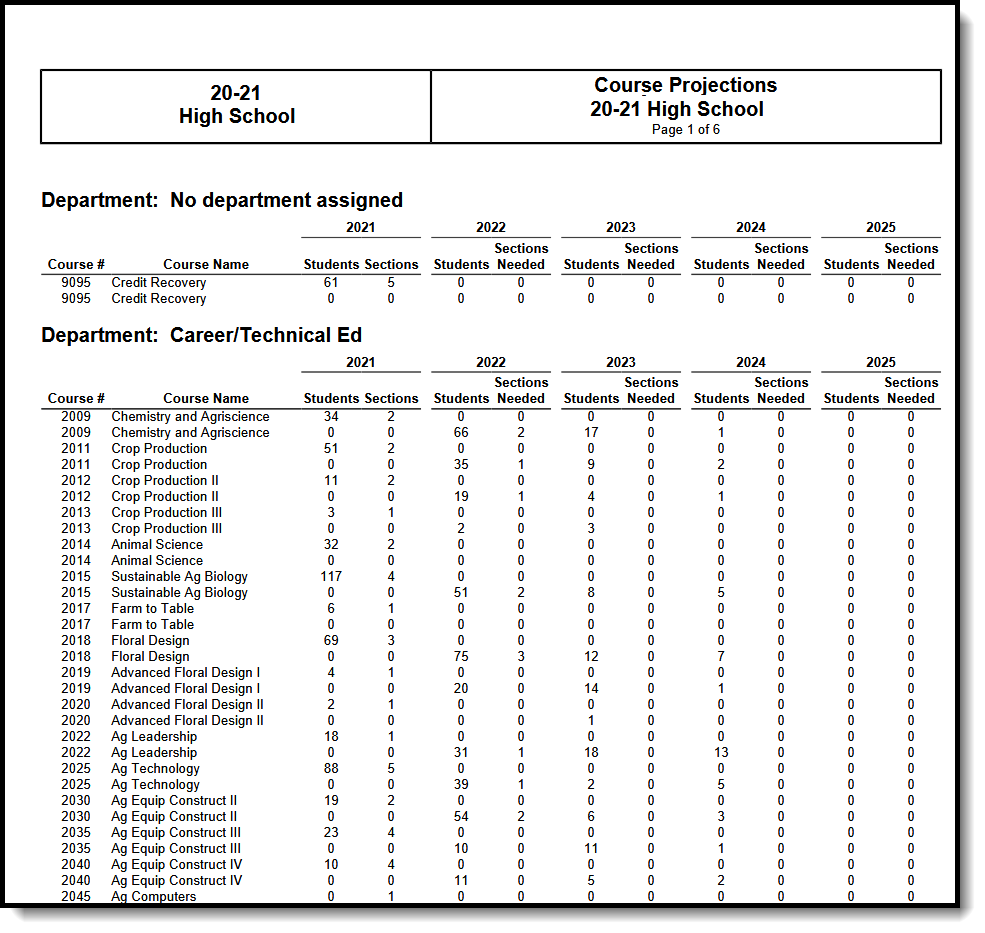 Course Projections Report for Future Years - PDF Format
Calculate On-Track Status
The Calculate on-track status mode of the Course Plan Admin tool calculates each student's status toward successful completion of the assigned Academic Program.
Tool Search: Course Plan Administration
The Course Plan Administration tool performs operations to lock and unlock course plans, clear parent/guardian approval, calculate program on-track status, post diplomas and planned courses to Course Requests for scheduling for multiple students at once, post certifications and seals, and update student status. Minnesota districts also see a mode to calculate direct post secondary admission tier. Use this tool after students have entered Course Plans and counselors have reviewed course plans.
In the Context Switcher, select a specific calendar to update Course Plans for just that school, or select All Schools to update Course Plans for all modifiable calendars to which you have access in the district.
Choose different options by selecting the appropriate mode from the Select Mode dropdown list.
 Course Plan Administration
See the Course Plan Admin Tool Rights article for information on available tool rights.
Calculate On-Track Status
This mode calculates each student's status towards successful completion of the assigned Academic Program. This process looks at each student's Progress or Course Plan tab and caches the calculation each time those tools are viewed or saved. This allows the status and corresponding error messages to be available in Ad hoc Reporting.
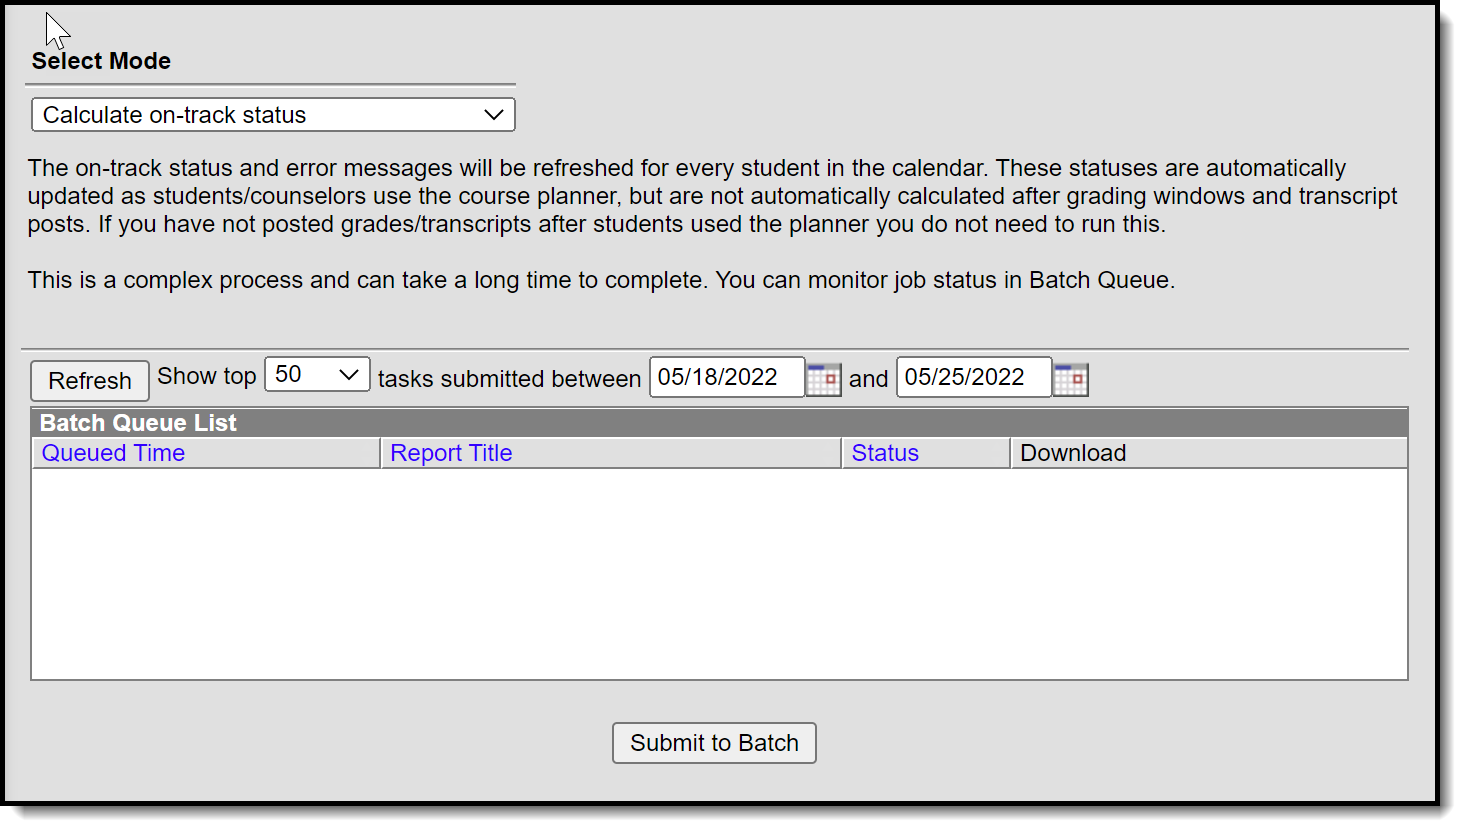 Calculate on-track status Mode
- Select the Calculate on-track status mode from the dropdown list.
- Click the Submit to Batch button. A Batch Queue Reporting Options window displays.
- Select the desired options of High Priority or Keep Until I Delete, and indicate the Start Date/Time.
- Click OK when finished.
- When the report has completed, click the Get the report link in the Batch Queue List. The report displays in PDF format, listing the operation performed, the calendar ID from the calendar selected in the Campus toolbar, and the number of calculations performed.
 Results
Clear All Parent and Legal Guardian Approvals
The Course Plan tool contains a checkbox that indicates the parent/guardian approved the student’s plan based on the parent’s selection of the Approved by parent/legal guardian checkbox on the Portal Academic Planner screen.
Choosing the Clear all parent/legal guardian approvals mode removes these marks, allowing an annual review to be performed. This action should be done before course plans are modified for the next school year.
 Clear all parent/legal guardian approvals Mode
- Select the Clear all parent/legal guardian approvals mode from the dropdown list.
- Click the Run button when finished.
- A pop-up message indicating approvals have been cleared displays. Click OK to acknowledge this.
Create Course Requests
This mode takes the courses selected in the students' course plan for the next grade level and creates them as scheduling course requests. This should be done after calendars and enrollments are rolled forward for the next school year, and teachers have entered Course Recommendations for students.
Once planned courses have been created as course requests, those courses are considered a priority and display in bold on the Request Batch Report .
- Courses from a course plan replace all previously created course requests for that student.
- Students without a course plan will leave their existing course requests unchanged.
- Changes to course plans will not automatically update course requests.
Ensure that you are creating requests in the future calendar that you are planning to schedule.
 Create course requests Mode
- Select the Create Course Requests mode from the dropdown list.
- Click the Run button.
- A pop-up message indicating course requests were saved displays. Click OK to acknowledge this.
Lock Course Plans
This mode locks courses in the student's Course Plan for the selected calendar for the grade level in which they will be enrolled. Locked course plans can only be modified by a counselor. Future years will remain unlocked.
 Lock course plans Mode
- Select the Lock Course Plans mode from the dropdown list.
- Click the Run button.
- A pop-up message indicating course plans have been locked. Click OK to acknowledge this.
Unlock Course Plans
This mode unlocks courses in the student's Course Plan for the selected calendar for the grade level in which the student is currently enrolled. When courses on a course plan are not locked, students have the ability to make changes using the Academic Planner tool in the Portal.
Plans that are locked can only be modified by a counselor.
 Unlock course plans Mode
- Select the Unlock Course Plans mode from the dropdown list.
- Click the Run button.
- A pop-up message indicating course plans have been unlocked. Click OK to acknowledge this.
Post Certifications
This mode will post certifications for students who have met the criteria previously set for an Academic Program.
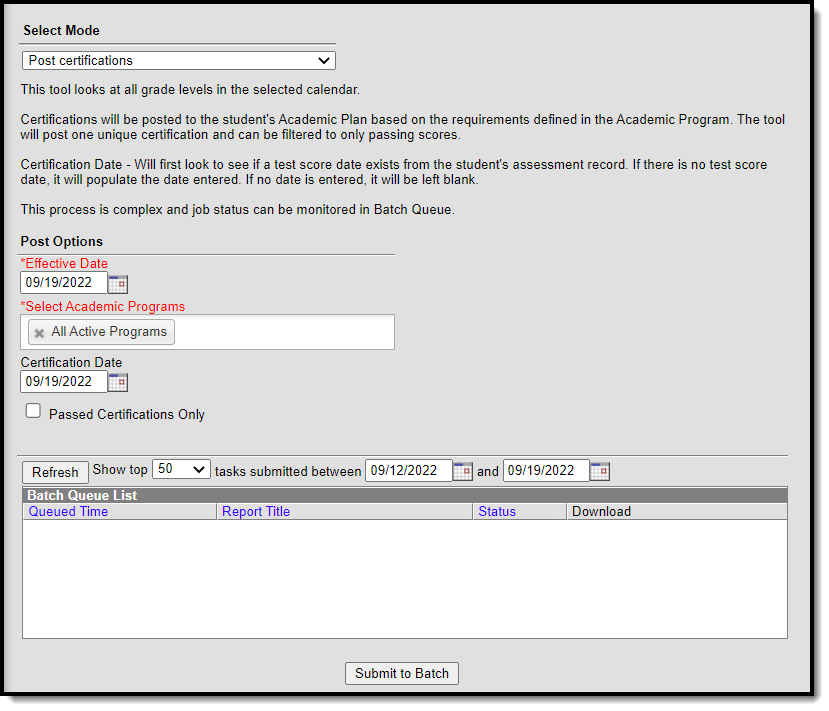 Post certifications mode
- Select the Post certifications mode from the dropdown list.
- Change the Effective Date if needed. It defaults to the current date.
- Choose program(s) to post certifications for from the Select Academic Programs options. You will only see programs listed here that have certification criteria defined for them in Academic Program Setup.
- Add a Certification Date if desired. This is not a required field. If a date is entered here, it will only be added for assessments that do not already have a date associated with them.
- Mark the Passed Certifications Only checkbox if you do not want to record attempted certifications.
- Click the Submit to Batch button. A Batch Queue Reporting Options window displays.
- Select the desired options of High Priority or Keep Until I Delete, and indicate the Start Date/Time.
- Click OK when finished.
- When the report has completed, click the Get the report link in the Batch Queue List. The report displays in PDF format, listing student number, student name, program name, certification name and passed status.
Post Diplomas
This option ONLY evaluates graduation plans for twelfth grade students.
This mode recalculates a 12th grade student's on-track status, and for those students who meet the requirements of their assigned graduation program, a diploma associated with their program is awarded to them.
- If a student's Graduation Diploma Type is already populated, the other Diploma fields and Enrollment fields will NOT be updated.
- If the student's on-track status is Yes and Diploma Type is empty, the Diploma Type field populates, along with the Diploma Date and Diploma Period (fall, spring, etc.).
- If the student's on-track status is No, none of the diploma fields will be updated.
To update the Enrollment End Date and End Status on the Enrollment record, the Enrollment End Date and End Status values must be entered on this tool. A student's enrollment record will only be updated if both of the enrollment fields are empty.
To end enrollments without populating the Diploma Type field on the Graduation record, use the Enrollment End Batch tool.
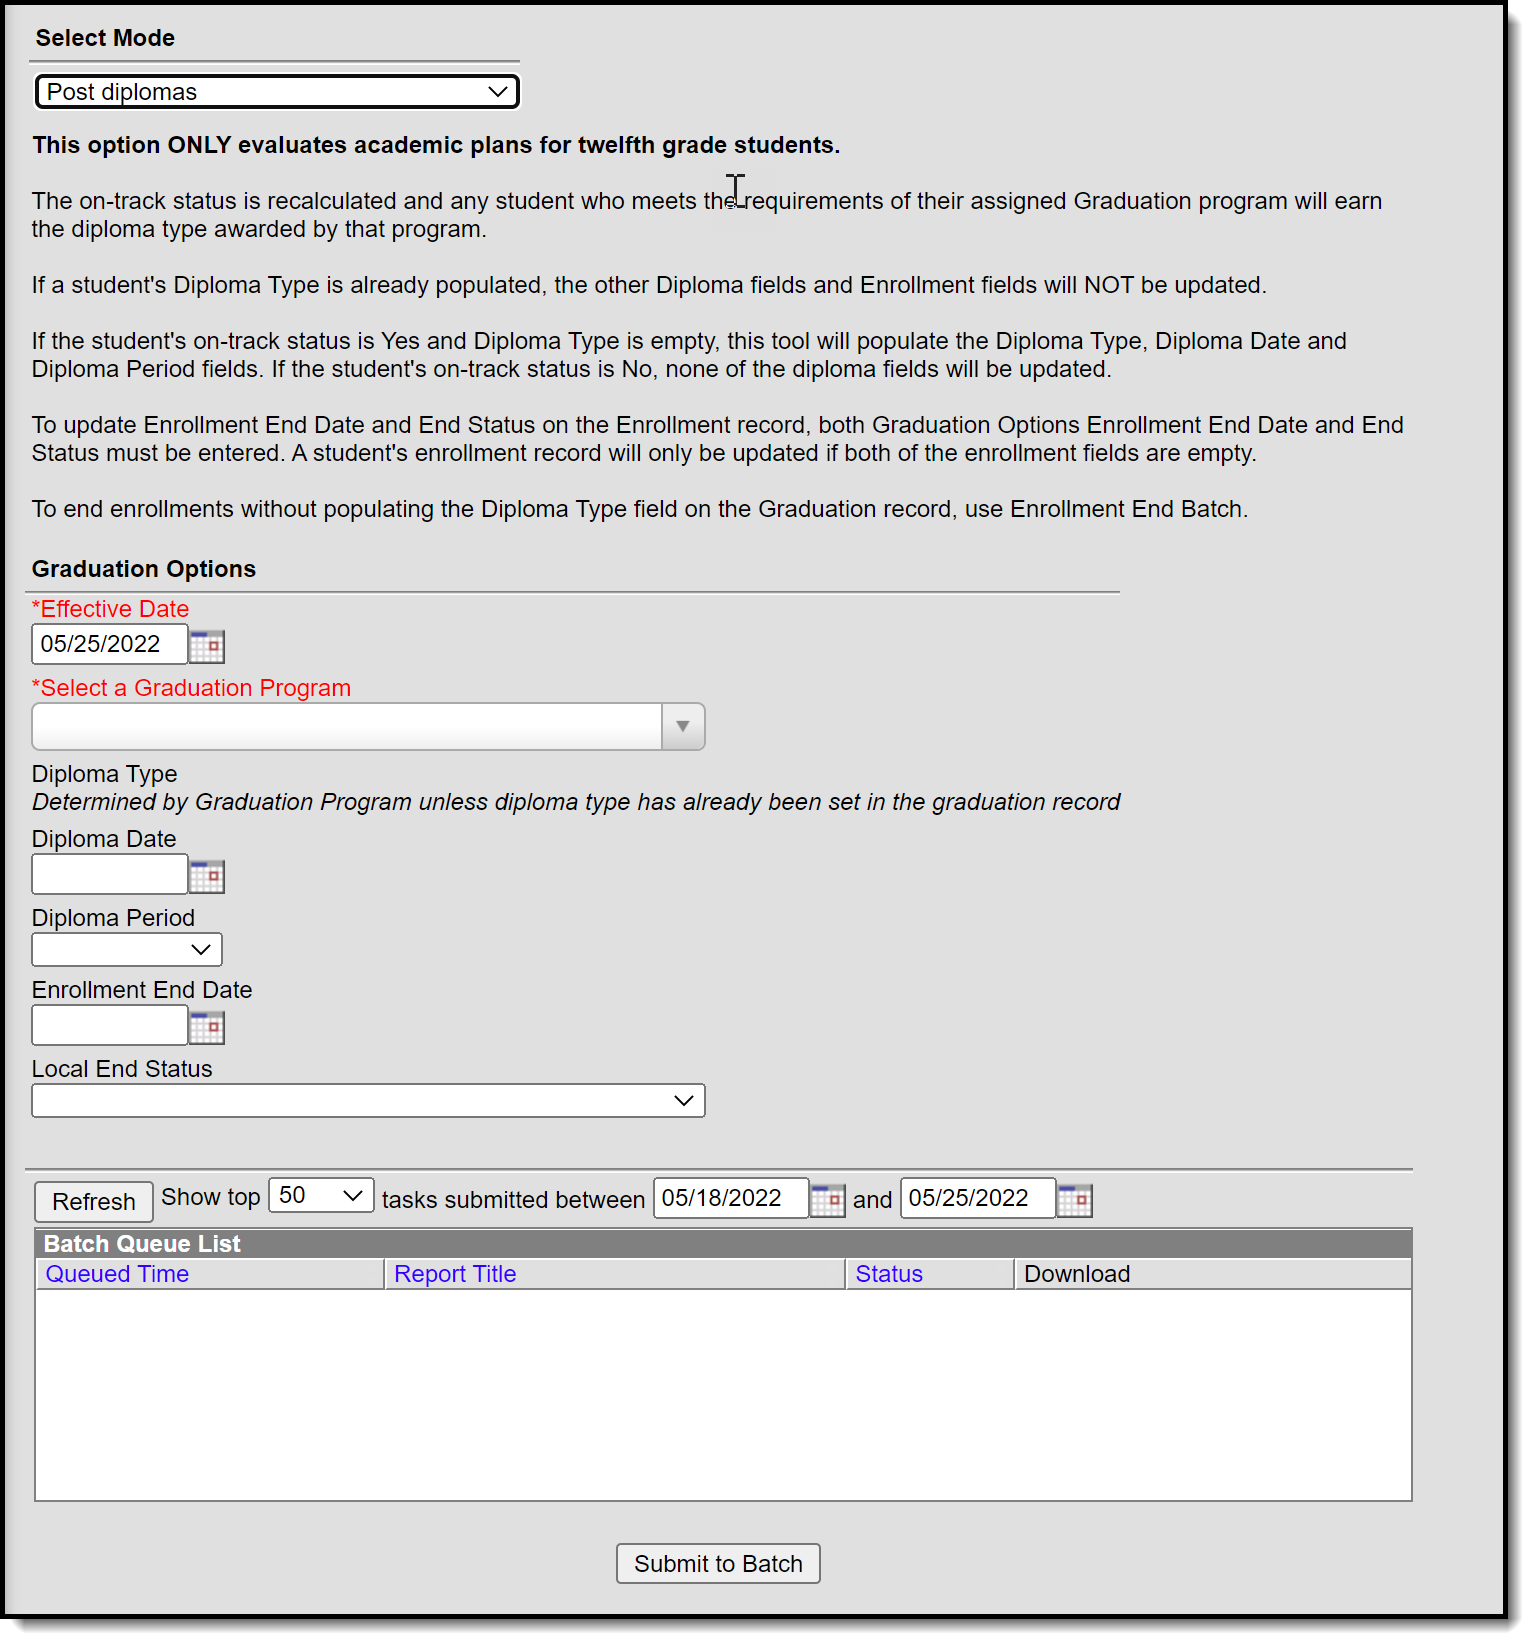 Post diplomas Mode
Graduation Options
The Post Diplomas mode contains the following fields that need to be populated before this mode is completed.
| Field | Description |
|---|---|
| Effective Date | Defaults to the current date. Students who do not have an active enrollment on the date entered will not have diplomas posted. |
| Select a Graduation Program | Selection indicates the program for which diplomas will be posted. All active graduation programs are available for selection. There is no logic associated with program hierarchy, meaning any program can be selected without adverse affects, as long as twelfth grade students are assigned to that program. |
| Diploma Type | The Diploma Type set on the Graduation Program is populated for the student on his graduation tab, unless this value has already been populated there. |
| Diploma Date | Indicates the date the diploma was received, usually the last day of school. This date is populated on the graduation tab. |
| Diploma Period | Indicates the time of year the student received the diploma. This date is populated on the graduation tab. |
| Enrollment End Date | Indicates the date the student's enrollment ended. This may be the same date the diploma was received or it could be a different date. It officially ends the student's enrollment, so ensure all grades and reporting have been completed before populating this information. |
| Local End Status | Indicates the reason the student's enrollment ended. For this purposes, use the reason most closely linked to student graduated. This value populates the student's Local End Status and State End Status fields on the enrollment record. |
- Do not run Post diplomas prior to final grading.
- Updating diploma fields and enrollment fields when the enrollment end date is before grading functions are completed will end each roster record before students have been graded. This causes the in-progress courses to be removed from the Grad Progress logic, and the Academic Plan Progress Report will show the student as not being on-track.
- Select the Post Diplomas mode from the dropdown list.
- Update the Effective Date if needed.
- Select a Graduation Program from the dropdown list.
- If necessary, enter a Diploma Date and Diploma Period.
- If necessary, enter an Enrollment End Date and Local End Status.
- Click the Submit to Batch button. A Batch Queue Reporting Options window displays.
- Select the desired options of High Priority or Keep Until I Delete, and indicate the Start Date/Time.
- Click OK when finished.
- When the report has completed, click the Get the report link in the Batch Queue List. The report displays in a new browser window, listing the operation performed, the calendar ID from the calendar selected in the Campus toolbar, and the number of diploma posted.
 Post Diplomas Result
Post Seals
The Post Seals mode is used to post seals for students who have met the requirements set for an academic program. A student must have a graduation record in order for seals to post. Seals will be posted to the Graduation tool.
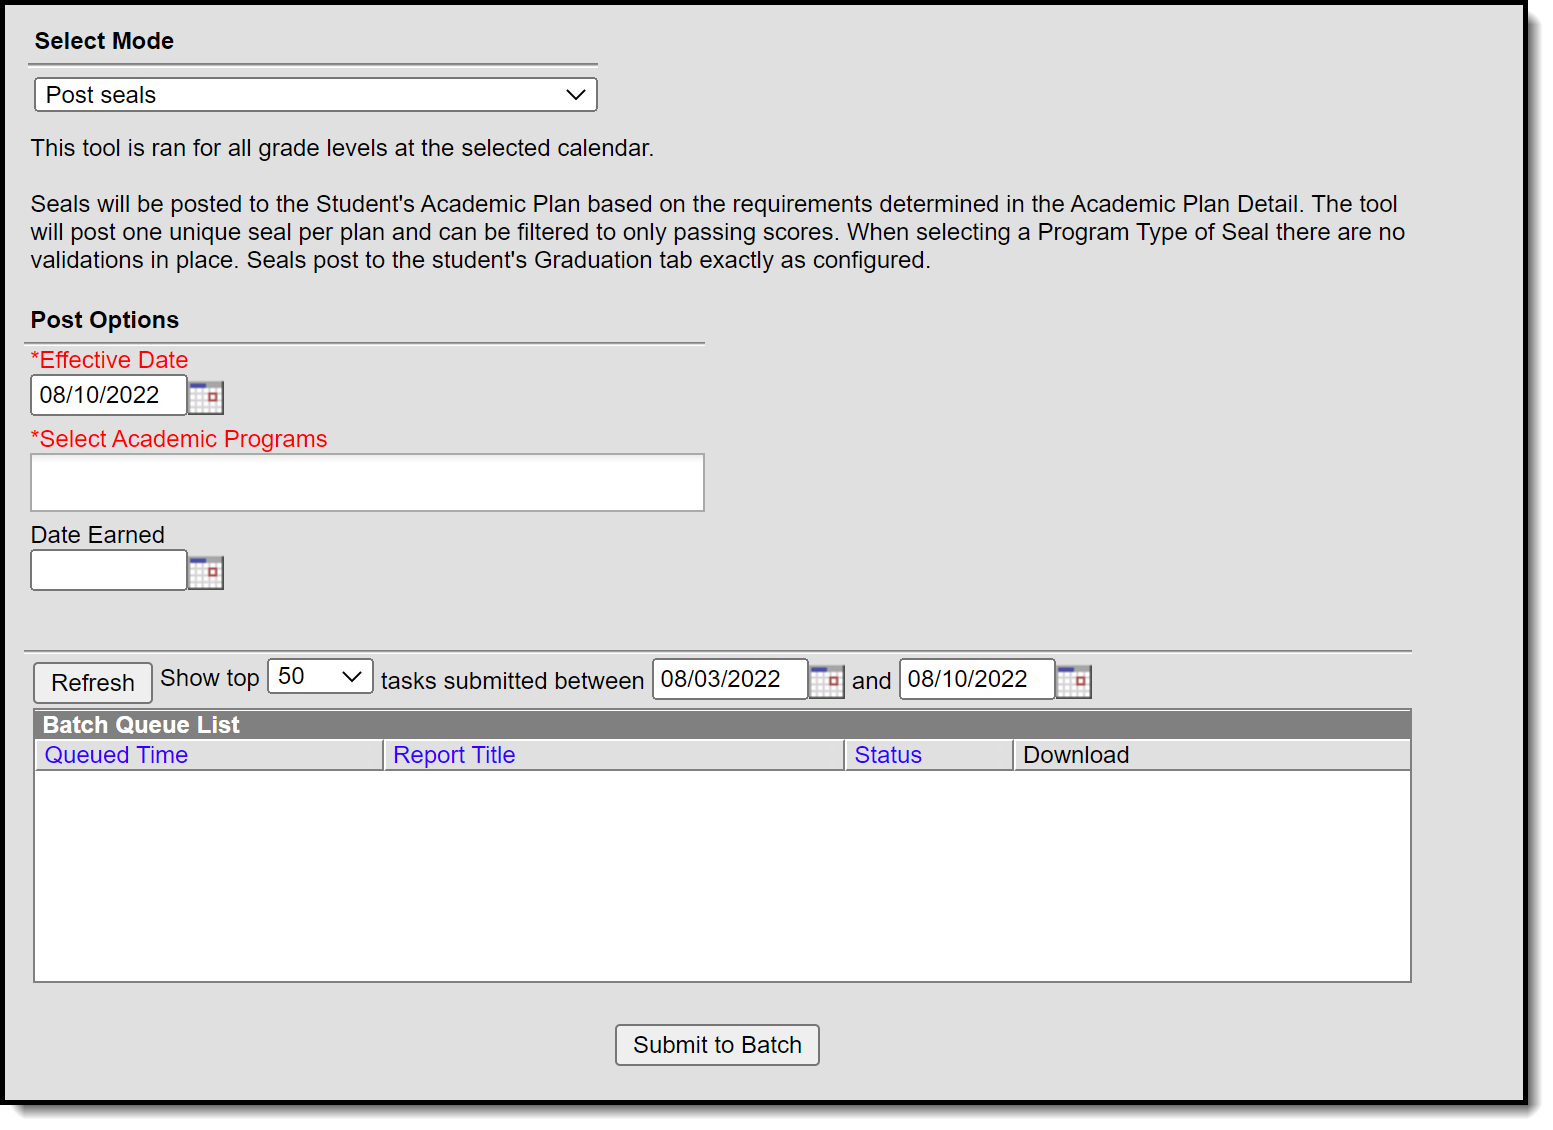 Post Seals Mode
In order for seals to post for an academic program to the graduation tool, Seal must be selected as the Program Type when the academic program is created in Academic Program Setup.
 Academic Program Detail
- Select the Post Seals mode from the dropdown list.
- Update the Effective Date if needed.
- Select the Academic Program(s) to post seals for.
- Enter a date in the Date Earned field.
- Click the Submit to Batch button. A Batch Queue Reporting Options window displays.
- Select the desired options of High Priority or Keep Until I Delete, and indicate the Start Date/Time.
- Click OK when finished.
- When the report has completed, click the Get the report link in the Batch Queue List. The report displays in a new browser window.
Calculate Direct Post Secondary Admission Tier (MN & WI)
This mode will calculate a student's highest tier attained for Direct Post Secondary Admissions (DPSA). This Calculation will cycle through GRAD Programs that have been identified lowest to highest for use in DPSA calculation. This process will then post the highest calculated on track Grad Program to each 12th grade students enrollment for the following fields DPSA calculated Tier & DPSA Reported Tier. This calculation will be run on demand and write or overwrite the calculated value each time the process is run. Upon completion of the calculation there will be a detail report displaying each student and the tier they were set to.
 Calculate Direct Post Secondary Admission Tier Mode
- Select the Calculate Direct Post Secondary Admission Tier mode from the dropdown list.
- Click the Submit to Batch button. A Batch Queue Reporting Options window displays.
- Select the desired options of High Priority or Keep Until I Delete, and indicate the Start Date/Time.
- Click OK when finished.
- When the report has completed, click the Get the report link in the Batch Queue List. The report displays in a new browser window, listing the student name, student number, calendar name, and tier status.
If no graduation program has the DPSA Tier field set, the report will display an error message indicating 'No active Graduation Program has DPSA Tier value set.
For Minnesota users, please see the Minnesota Direct Admissions Extract article for more information.
Update Student Status
This mode updates student status based on requirements set in academic plans. Updates to status are dependent on completion of the requirements that have been defined in the Compound Requirements tool for an academic program.
 Update Student Status Mode
- Select the Update Student Status mode from the dropdown list.
- Mark Include inactive Students if you wish to include students with an end date on their enrollment in the update.
- Mark Include end dated programs if you wish to include students who are no longer active in their assigned Academic Programs in the update.
- Click the Submit to Batch button. A Batch Queue Reporting Options window displays.
- Select the desired options of High Priority or Keep Until I Delete, and indicate the Start Date/Time.
- Click OK when finished.
- When the report has completed, click the Get the report link in the Batch Queue List. The report displays in a new browser window indicating the number of students whose status has been updated. For information related to which students are assigned which status, use the Ad hoc filter designer.

