This article was designed to assist Campus users in validating Campus-created XML files against state provided schema files. See the following steps for completing this process:
Step 1. Install XML Validation Software
Before XML files can be validated, users need to download and install software which facilitates the validation of an XML file against a schema file. For use in this article, and a quality, free product for validating XML files, the Microsoft XML Notepad 2007 software will be used.
XML validation can be done using any software designed to validate XML files against a schema file. Microsoft XML Notepad 2007 is only being used as an example of an available software solution.
Step 2. Access the State Schema File(s)
Once an XML validation software has been installed, users will need to download their state's schema file(s). Typically these files can be downloaded from the state's Department of Education website with an .XSD file extension.
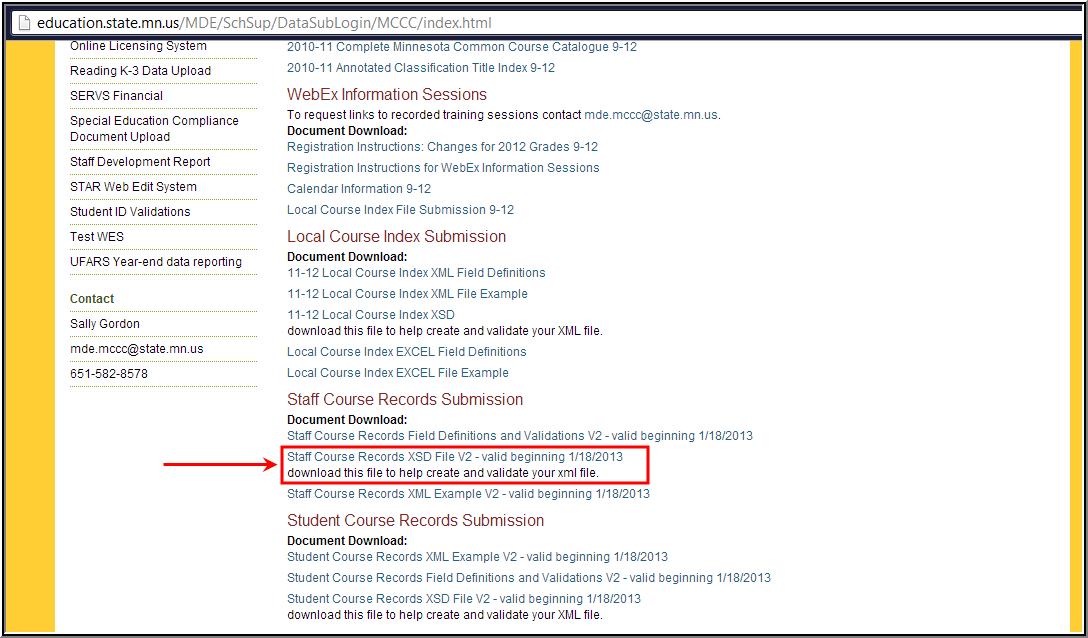
In the example below, the user is downloading the state schema file (.XSD) for the Staff Course Records file off the Minnesota Department of Education website.
Step 3. Generate XML Files within Campus
Once an XML validation software is installed and state schema file(s) have been locally saved, users are now ready to generate and save Campus-generated XML files.
In the example below, the user is generating and saving the MCCC Staff Course Record XML file within Campus.

Step 4. Load the Schema into the XML Validation Software
Now that XML validation software is installed, state schema file(s) are downloaded and Campus-generated XML files have been saved, users are now ready to load the state schema into the XML validation software.
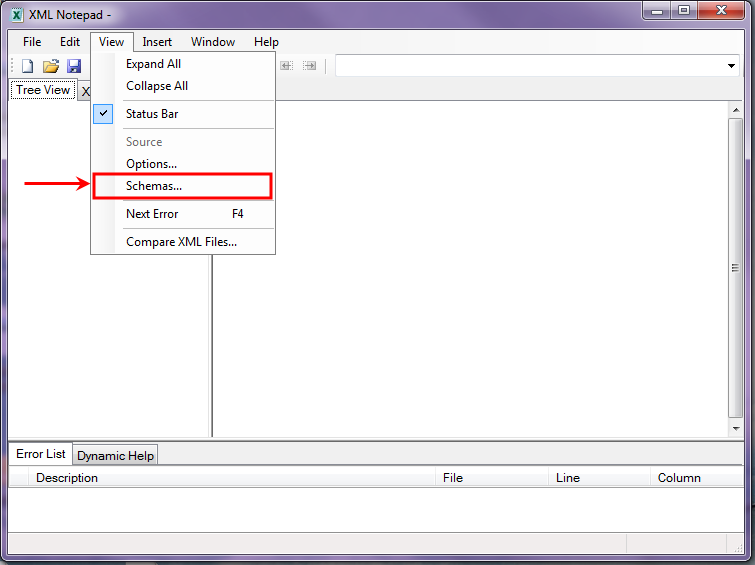
The first step in the process is to go to View > Schemas... (see the image below).
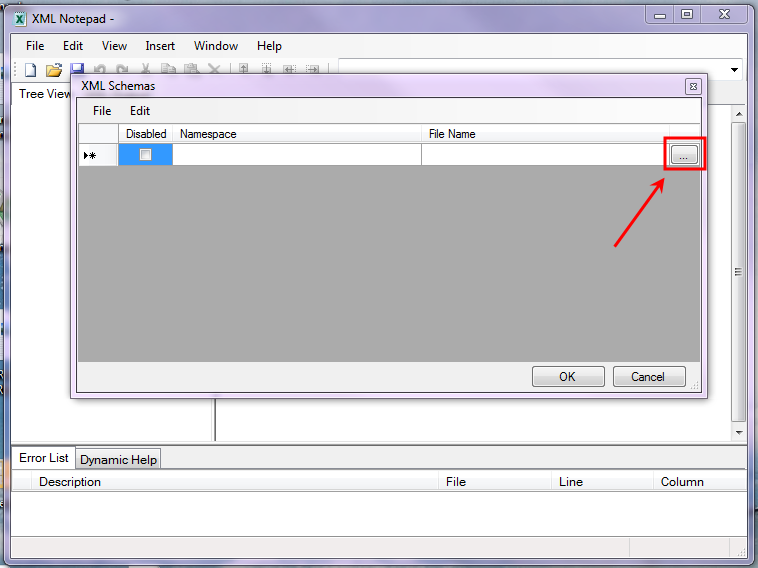
Select the ... box in the right-hand corner of the XML Schemas editor. The program will prompt you to locate the state schema file saved on your computer (or network).
Once the file has been selected, click the Open button.
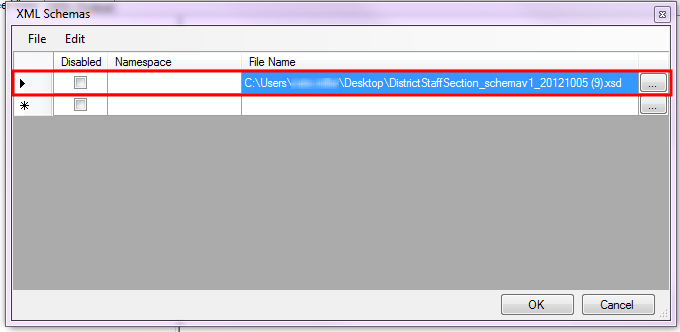
Once the schema file has been located and added, the schema file will appear within the XML Schemas editor (see the image below). This indicates the schema is now ready to validate against XML files.
Step 5. Validate an XML File Against a Schema File
Now that the state schema file has been loaded into the XML Notepad 2007 program, you can now validate the XML file.
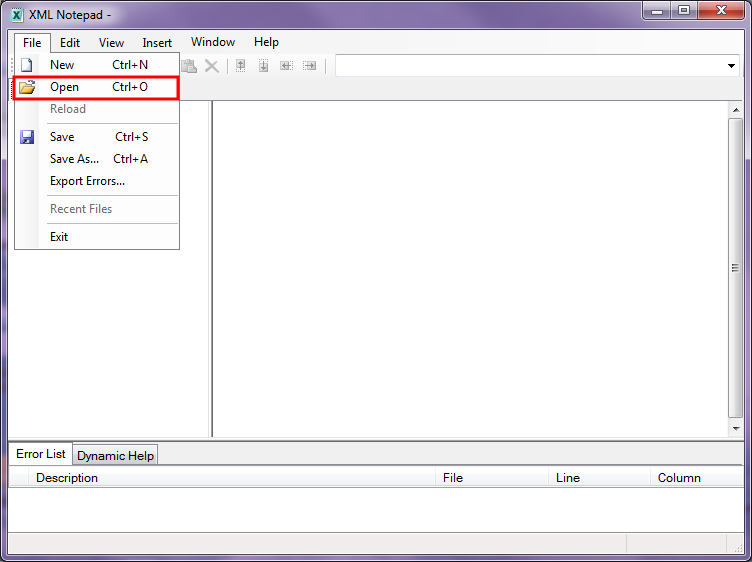
To validate the file, go to File > Open. The program will prompt you to locate the XML file saved on your computer (or network).
Once the file has been selected, click the Open button.
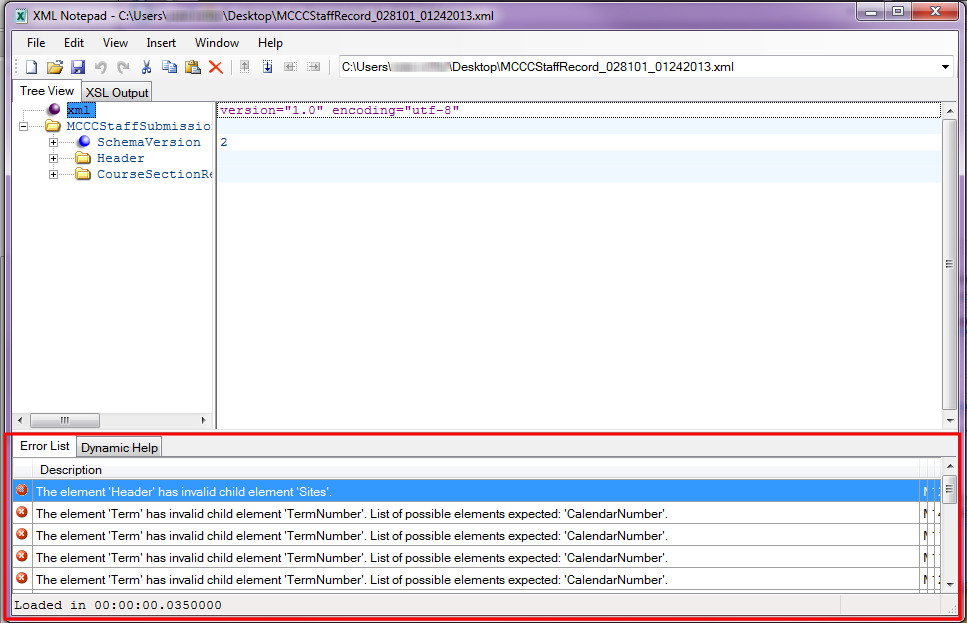
The XML file will automatically begin validating against the schema file with errors populating the Error List window (see the image below). You are now ready to begin analyzing XML file data errors.
Step 6. Analyze XML Validation Errors
Once the XML file has been validated against the schema, users need to analyze the errors within the Error List and rectify data issues. The most effective way to understand and correct XML file errors is to compare the error message against the file specifications and determine where in the Campus the affected data is entered and stored.

For example in the image below, the error message is indicating that the TermNumber element is reporting where the CalendarNumber element should be reporting data. This error is occurring because the CalendarNumber field has no data entered in Campus thus, XML logic removes the blank element from the XML file and the TermNumber element becomes the next element to report data.
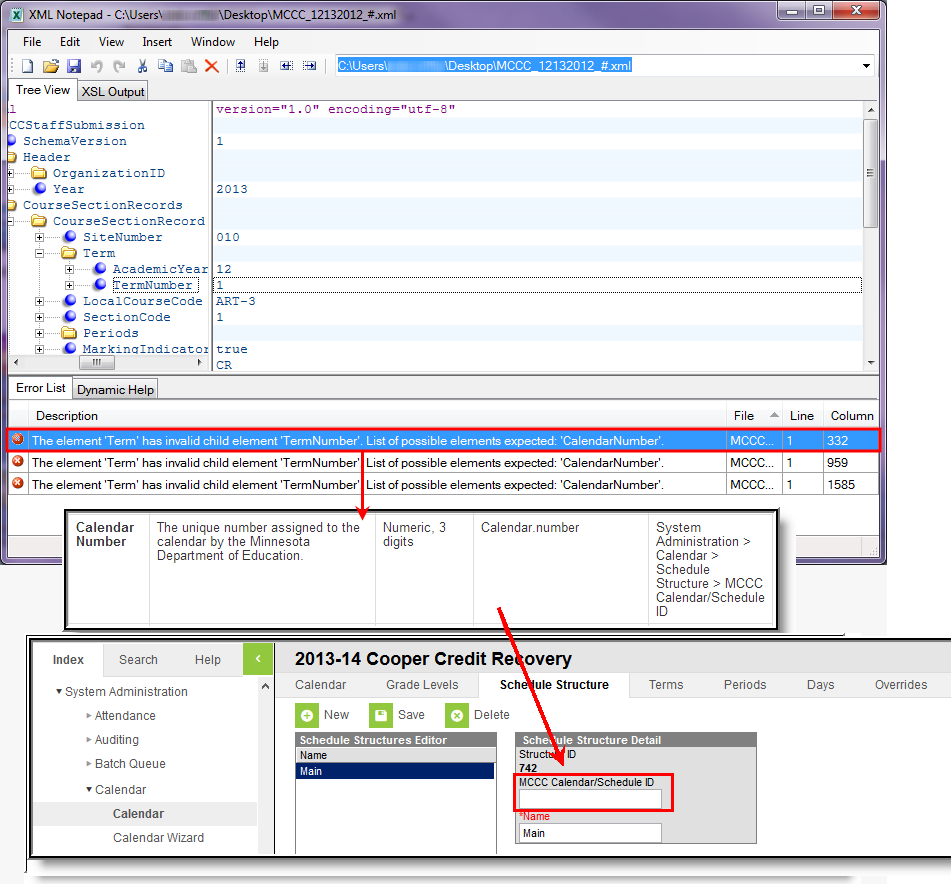
To correct this issue, the CalendarNumber element is identified in the file layout which indicates the Campus field location. As the image shows, the MCCC Calendar/Structure ID field used for reporting data in the CalendarNumber element has no data entered within Campus.
Once the user enters and saves the appropriate MCCC Calendar/Schedule ID for this calendar, the XML file will meet the state schema's requirements and no longer generate the error for the calendar.
