This article will walk you through the process of updating and adding a new Instruction Mode for a large set of students.
Currently, this document only covers how to do this process using the Import File option of the Federal/State Program Update Tool.
Additional information using the Add Participation/Delete Participation/Edit Participation options is forthcoming.
Adding and Updating the Instruction Mode for Students En Masse
- The first step in this process is to create an Ad hoc filter. Navigate to the Filter Designer tool (Ad Hoc Reporting > Filter Designer).
- Select a Filter Type of Query Wizard, a Data Type of Student, and click the Create button.
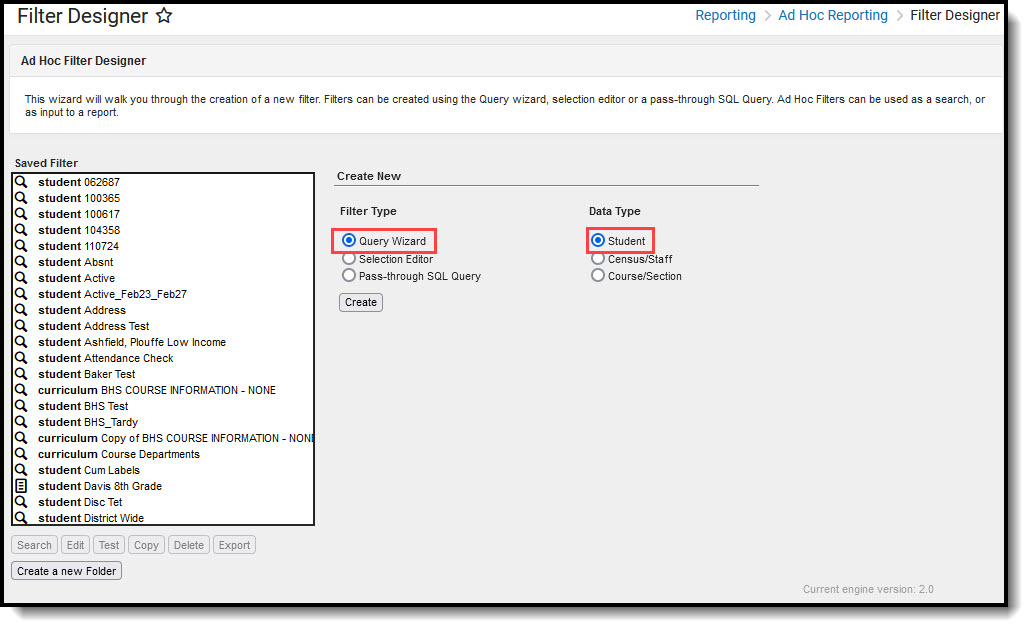 Filter Designer
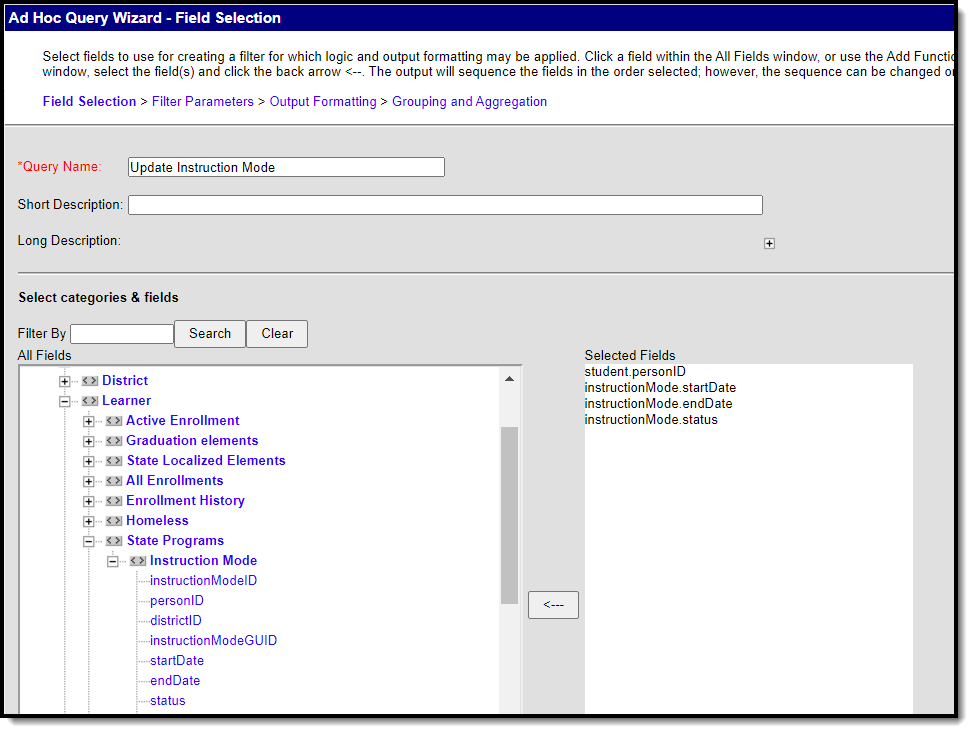
 - Give the filter a Query Name (preferably one you can easily identify later) and add the following fields to the filter
- Person ID - (Demographics > personID)
- Instruction Mode Start Date - (MA Instruction Mode > startDate)
- Instruction Mode End Date - (MA Instruction Mode > endDate)
- Instruction Mode Status - (MA Instruction Mode > status)
 Ad Hoc Query - Field Selection
- Save the filter.
- Now you need to export this filter into a CSV file. Navigate to the Data Export tool (Ad Hoc Reporting > Data Export).
- Select the following values:
- Click the recently created filter in the Saved Filter window,
- Select the school(s) to update Instruction Mode for (or leave blank if doing a district-wide change)
- Select Delimited values (CSV) radio button.
- Click Export. Save the file to your local hard drive or network. You will need access to this file shortly.
 Data Export Tool
- Go to the Federal/State Program Update Wizard tool.
Currently, this document only covers how to do this process using the Import File.
Additional information using the Add Participation/Delete Participation/Edit Participation options is forthcoming.
- Select the MA Instruction Mode, click the Add/Edit Participation radio button, and click Next.
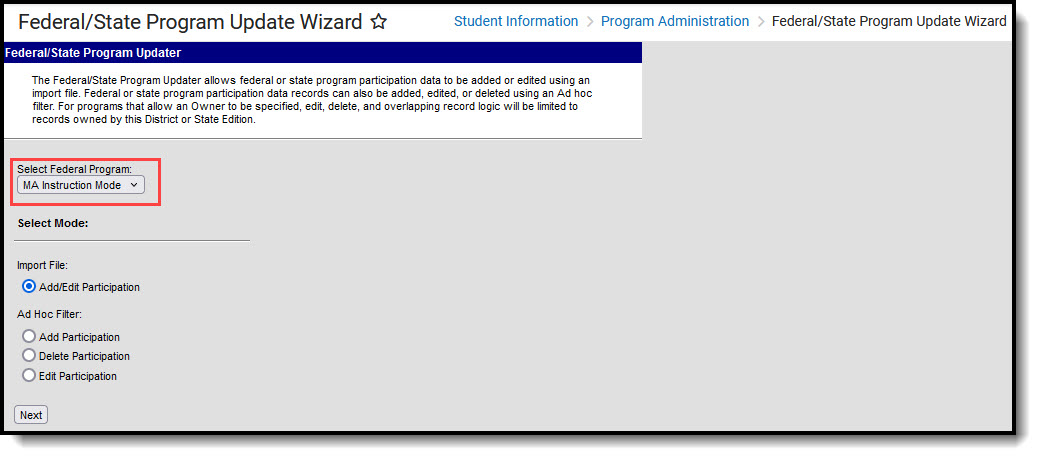 Federal/State Program Update Wizard
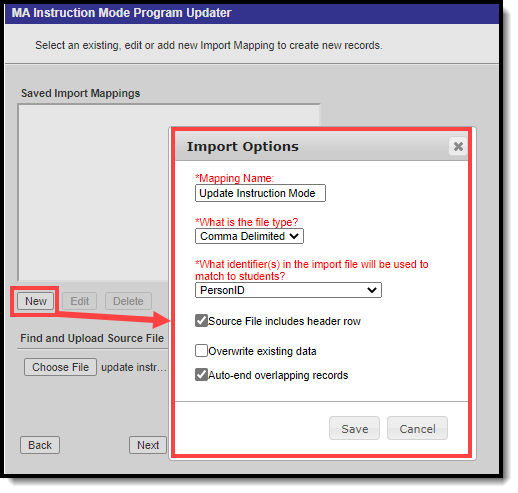
 - Click the New button and enter:
- Enter a Mapping Name.
- Select a file type of Comma Delimited.
- Select an identifier of PersonID.
- Mark the Source file includes header row checkbox.
- Mark the Auto-end overlapping records. This will allow you to enter a start date for the new Instruction Mode records that will auto-end date existing Instruction Mode records.
- Click Save. The new Import Mapping will appear in the Saved Import Mappings window.
 Import Options
The Overwrite existing data checkbox will erase any existing data and replace it with the Set Value for any fields set in the steps below. You should leave this field unchecked if you do not want to replace any existing data.
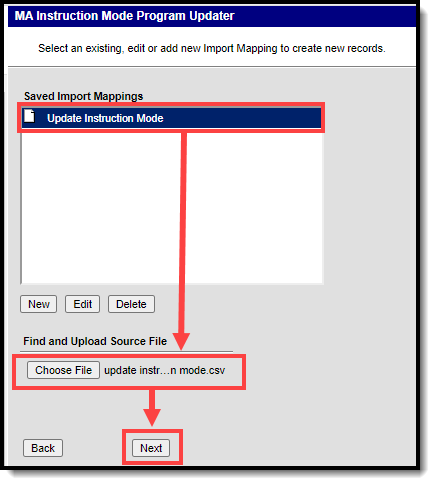
- Now that a mapping has been created, we can now import the CSV file and begin updating Instruction Mode data.
- Select the recently created import mapping
- Click the Choose File button.
- Locate the file on your drive and click OK. The file name should appear to the right of the Choose File button.
- Click Next.
 Choose File
- Now set the following values:
- PersonID - student.personID
- Start Date - Click the Set Value button and enter the date in which you want these students to have the updated Instruction Mode. Any existing Instruction mode records will be end dated to the day prior to this date and a new record with the Instruction Mode set below will be created.
- End Date - instruction.endDate
- Instruction Mode - Click the Set Value button the select the Instruction Mode value you want all students to now have. For example select 1 for In-Person.
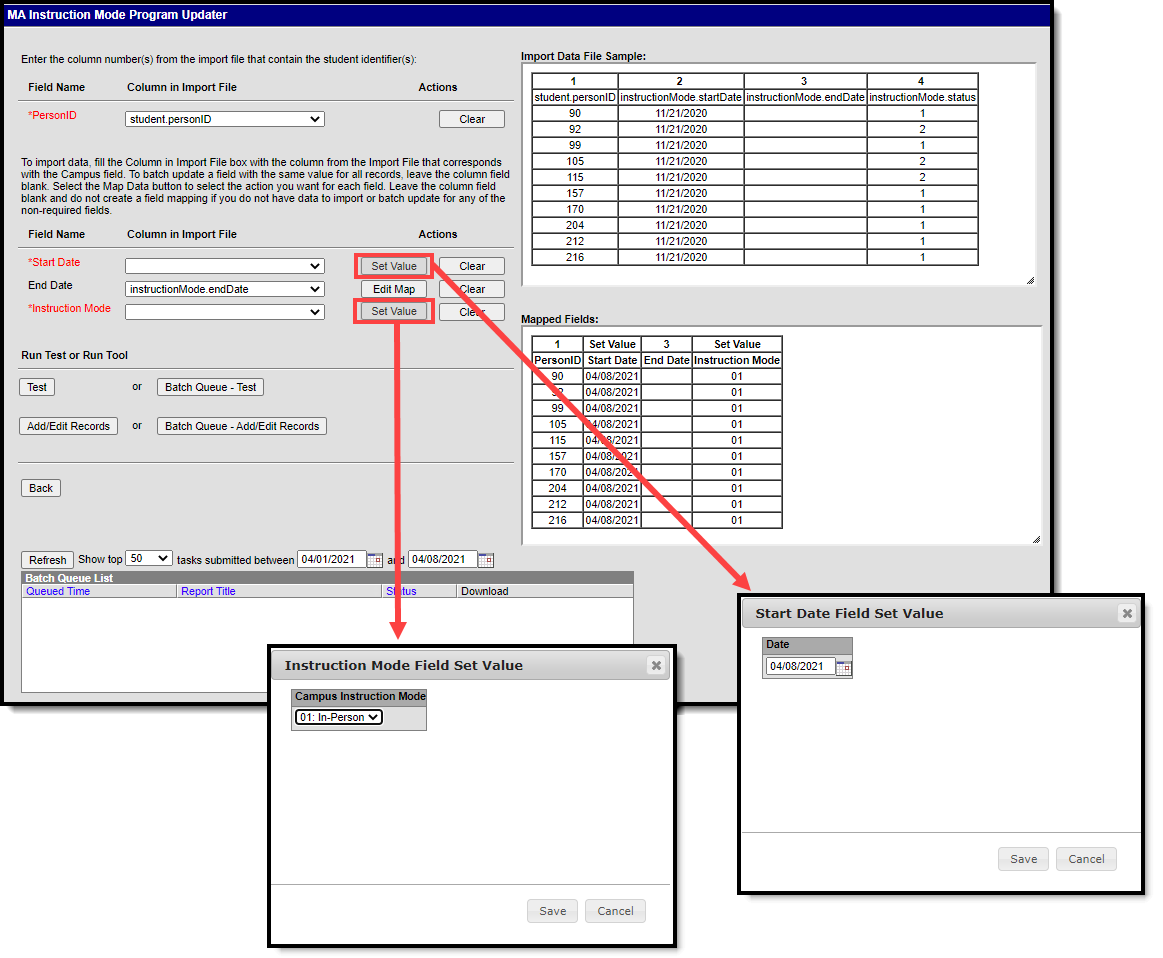 Setting the Values in the Federal/State Program Update Tool.
- Click Test to test and audit these updates to ensure they are making the data changes you want. The test report will show you which student records were auto-end dated with this change.
- Once you are done auditing and correcting any potential issues, you can initiate a change of Instruction Mode by clicking Add/Edit Records. A record of the changes made will appear.


That's it. Any Instruction Mode records prior to the Start Date entered in the Step 10 have been end dated and a new record with the entered Instruction Mode has been added. Any students in the filter who previously did not have an Instruction Mode record now have an Instruction Mode of the value set in Step 10.
