Tool Search: Roster Verification
Roster Verification Events track the amount of contact teachers have with students. The parameters of these events varies by state, so your verification events may not match the examples provided in this article.
See the Instruction Tool Rights article for more information.
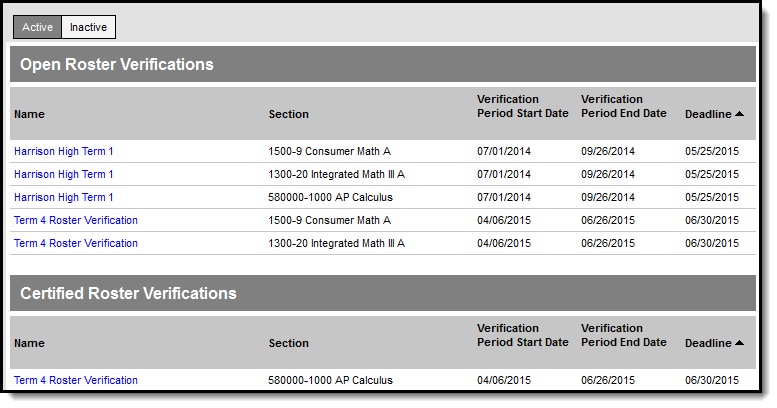
Roster Verification events assigned to you are sorted into four groups, two Active and two Inactive. Active events are still available for you to certify or recertify and are grouped by those that you haven't yet certified (Open) and those you have (Certified). Inactive events are those that have passed their Deadline and are grouped by events that you missed without certifying them (Expired) and those you completed (Certified).
Events in each of these sections can be sorted by clicking on any of the column headers.
Certifying Events
To certify an event, click on the event name to view your section roster.
Roster Verification is highly dependent on district setup based on state parameters. These instructions provide only an overview of the process. Please consult communications from your district for specific guidelines on how this tool should be used and how data should be entered.
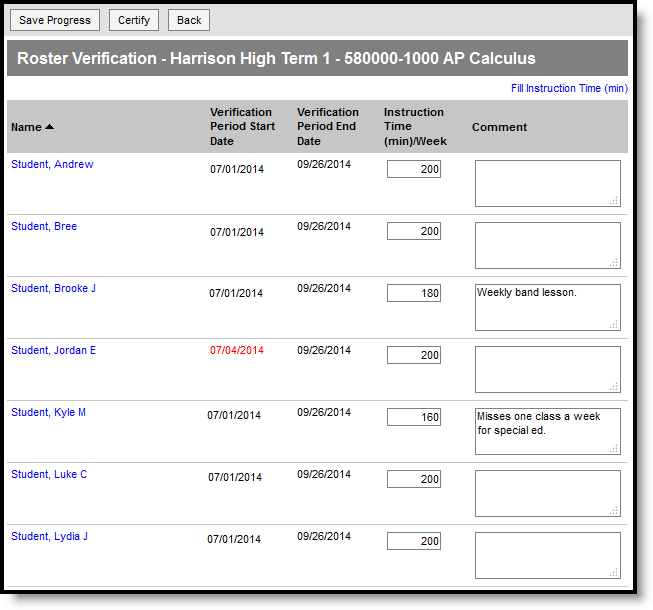
- Before you begin entering data, hover over the fourth column header (Instruction Time or Percentage, depending on district setup). Depending on administrator settings, hovering displays a tooltip that provides further instructions and clarifications concerning how contact time should be entered.
- Note any Verification Period Start or End Dates that display in red text. Red indicates that these dates are different from the Period Dates established by your district. Differences result from a student entering or exiting the section during the verification range. For example, in the image above, Jordan entered the section three days after the Start Date of the event.
- Enter contact time in the fourth column (Instruction Time or Percentage) based on the Verification Period Start and End Dates. The label for this column depends on your district and state's reporting requirements. In the example above, time is entered in Minutes per Week.
- Enter any Comments explaining contact time.
- Complete the event by clicking Certify. If you'd like to save without certifying, click Save Progress. Be aware that until you click Certify, the event is not complete.
- Click Back to return to the event list.
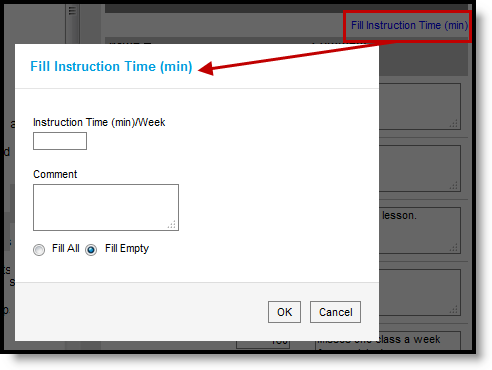
Save time by using the Fill options to enter the same value for all fields or all empty fields.
Once you've certified a roster, you can return to the event, make changes, and recertify as needed until the Deadline.


