Tool Search: Emergency Messenger
The Emergency Messenger allows you to quickly create and deliver emergency messages to staff or guardians. Unlike other Campus messages, an emergency message has no scheduled delivery window. All messages are delivered immediately or as quickly as possible. Emergency notifications are NOT limited to the allowed dialing window established by the Voice Settings tool.
Emergency message recipients must be specified each time a new message is sent--even when using a saved template.
Emergency Messenger can be used after you set up Messenger Settings.
Emergency Messenger respects the Active Year, Calendar Start/End Dates, Term Start/End Dates, and student enrollment status.
- Emails exceeding the amount set by the email service provider may fail due to controls set by the provider to prevent SPAM.
- Free email service providers also typically set the maximum number of emails that can be sent per day. After that limit is reached, usually in a 24-hour rolling period, additional emails will not be sent until the time passes.
- For more information about Google's sending limits, see the following articles:
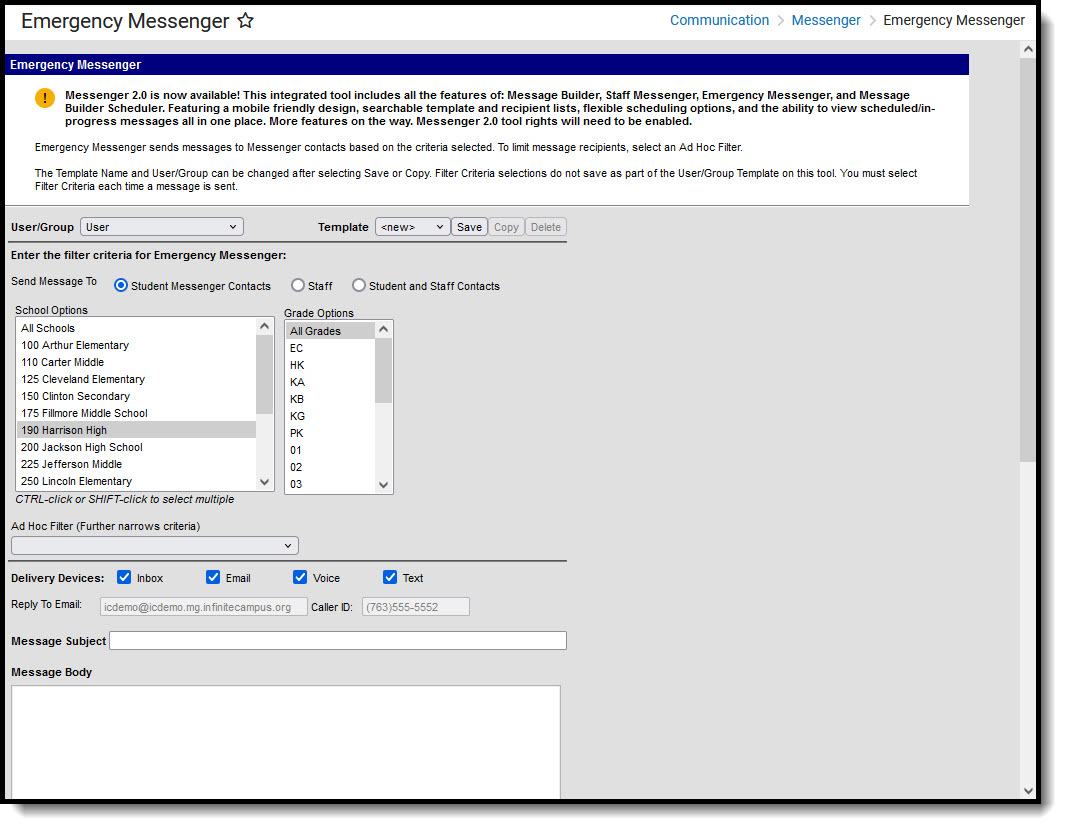 Emergency Messenger
 See the Emergency Messenger Tool Rights articles for information on available tool rights.
Emergency Message Logic
The Emergency Messenger sends messages to contacts based on the phone numbers and email addresses marked to receive emergency messages on the Demographics tool. For a person to receive an emergency message, the Emergency checkbox must be marked for a phone number or email address in the Personal Contact Information section. Phone numbers and email addresses that do not have the Emergency checkbox marked do not receive an emergency message.
For more information, please refer to the following articles:
Settings applied for general voice messaging in the Prompt Preferences also apply to emergency messaging. Any text or .wav files specified for voice messages are also appended to emergency messages, as are redial settings (configured on the Voice Settings tool).
Phone Recipient Confirmation
When voice messages are delivered, Shoutpoint may attempt to reach a recipient at multiple phone numbers. Shoutpoint continues to call recipient phone numbers until the recipient confirms the message receipt or until the maximum number of redials is met as allowed by the district (configured on the Voice Settings tool).
To confirm message delivery, a recipient must press "0" at the end of a voice message. This cancels all additional delivery and/or redial attempts for recipients with non-shared or non-extension numbers.
Confirming and canceling calls to other phone numbers works in the following way:
- Recipients can confirm calls on any phone number, even those shared with any other recipient in Campus.
- If a phone number contains an extension, recipients are not be able to confirm the call.
- Confirming calls to phone numbers for the same recipient does not cancel calls to any phone numbers which contain extensions.
- If multiple recipients share a phone number but have different Delivery Devices selected for the same Messenger tool (Voice/Text), Voice call confirmation does not prevent the Text message from going out to the other recipient.
Field Descriptions
| Field | Description |
|---|---|
| User/Group | This dropdown list allows you to save message templates to your user account or a user group to which you belong. |
| Template | This dropdown list displays a list of available templates. To create a new template, select <new> from this list. Templates save to either the User (default), or User Group where they are accessible to other members in the group.
Minimize future message setup time by creating and saving templates. Templates save:
|
| Filter Criteria | |
| Send Messages To | Emergency messages may be sent to the following recipients:
|
| School Options | This field determines which schools receive the message. The schools that display are a comprehensive list of schools to which you currently or previously had calendar rights. When the All Schools option is selected, only the schools where you are current year calendar rights are sent a message. |
| Grade | This field determines which grade(s) receive the message. |
| Staff Types |
This field determines the type of staff member who receives the message. |
| Ad hoc Filter | The Ad hoc Filter field allows you to limit the message recipients. The dropdown selector includes all Filters and Data Types available to you, but only one can be selected. If you choose to send messages to Student and Staff Contacts DO NOT use an Ad hoc filter based on a Student Data Type, or staff are NOT sent a message (with the exception of any staff who are also currently students). |
| Delivery Devices | |
| Inbox | The Inbox option is automatically selected. This option places a note in the parent's portal inbox that a new message is available. Infinite Campus strongly recommends leaving this option marked to ensure delivery to guardians with a Portal Account, but no other delivery device is marked for messages. |
| The Email option sends an email to the guardian's email address on record (entered in Census > Demographics). | |
| Voice | The Voice option calls the guardian's phone number on record (entered in Census > Demographics). |
| Text | The Text option sends a text message to the guardian's mobile device. Recipients who have indicated a desire to receive text messages must have the Emergency checkbox marked for Text (SMS) on the Personal Contact Information editor of the Demographics tool to receive text messages. |
| Message Details | |
Create and save templates with your name and contact information (email/phone) in the message body for guardians to reference. | |
| Reply to Email | This field displays the email address entered in Messenger Settings > Email Settings > Sender Email Address. This field cannot be changed. |
| Caller ID | This field displays the phone number entered in Messenger Settings > Caller ID Preferences. This field cannot be changed. |
| Sender Display Name | Entries to this field will be displayed in the recipient's email inbox for easier sender identification.
 This field is only available if the Allow Custom Sender Display Name checkbox is marked on the Email Settings tool AND Email is selected as a delivery device in the message template. |
| Message Subject | This field determines the text displayed in the email message's subject field. |
| Message Body | The message sent to the Portal Inbox, via email, and by TTS for Voice (if no .wav file) is uploaded.
Message Body supports the use of Chinese characters for email messages only. |
This option allows you to send a voice message. For more information about this feature, see the Messenger with Voice—Setup and Details article.
After browsing for the attachment, you must click the Upload button. The Attach File message displays on the screen when an attachment is properly uploaded.
Uploaded .wav files are played immediately after the Hello Message specified in the Prompt Preferences. | |
| Browse and upload an email attachment | This option allows you to add an attachment to the email. See the Digital Repository Preferences article for information about supported file types and sizes.
After browsing for the attachment, you must click the Upload button. The Attach File message displays on the screen when an attachment is properly uploaded.
This option is controlled by an email preference set by the District Administrator and may not be displayed in all districts. |
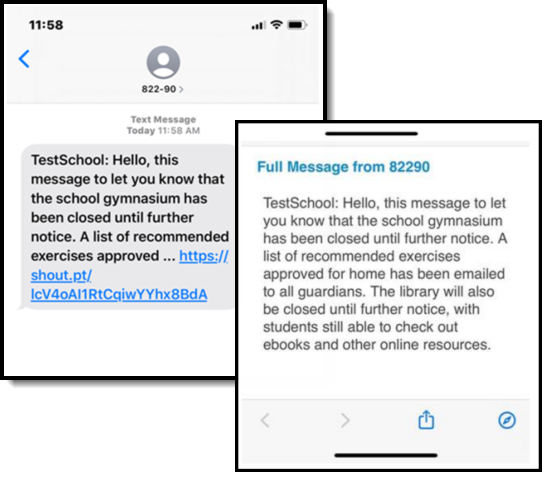
| Text Message | This field is used to enter the text message sent to mobile devices. The maximum length of a text message is set to 400 characters. When a text message reaches this length, a warning message displays indicating such. The message cannot be saved until the character limit is met. Campus recommends districts stay within a 140 single-text character limit. Messages that exceed this limit but still remain within the 400-character maximum threshold should note the following:
Existing text message templates still display in their entirety but must be modified to be within this limit before sending.
Users wishing to stop receiving text messages can text STOP to the shortcode. This results in the user receiving no further text messages from Campus, even if the user has the Text option marked on their Contact Preferences. Users need to go through the opt-in process again to start receiving texts at a later date. |
Create Templates
You can create and use templates or create emergency messages as needed.
A district may want to create message templates to use in emergency situations. For example, the district might create templates for emergency situations such as school closures. It is recommended that districts prepare for potential emergencies by creating templates beforehand; however, templates are not required. Templates can be saved only as text; .wav files cannot be saved because they cannot be customized for a date or time.
- Verify that the <New> value is displayed in the Template field.
- Select User (default) or a User Group to which the template should be saved from the User/User Group dropdown field. Templates saved under a User Group are available to other members of the group.
- Mark the checkbox next to the Delivery Devices to which you want to send the message.
- Enter a Sender Display Name (if enabled and Delivery Device *Email* is selected).
- Enter a Message Subject to summarize the content of the message.
- Enter the details of the message in the Message Body text box.
- Complete one of the following options:
- Click the Copy from Message Body option to send the same message as a text message (limited to 140 characters).
If not sending the same message, enter the text in the Text Message area.
Emergency text messages are only delivered to a recipient as a final attempt at contact. They are ONLY sent when all initial emergency phone calls and the scheduled number of redials have been attempted for the number without receipt confirmation from the recipient. Should the recipient confirm receipt of the message (by pressing "0" after listening), all text messages scheduled for delivery to that recipient's phone numbers are canceled. Additional phone calls and/or redials are also canceled.
- Click the Save button to the right of the Template field. A pop-up window will appear asking for the template's name.
- Enter the template name and click OK. The template is saved and available for selection within the Template field.
Send Emergency Messages
Messages should be sent through the Emergency Messenger tool only when the need for contact is immediate. Unlike other message types, emergency messages cannot be scheduled for a future date or time and are sent immediately after creation.
It is the district's discretion as to what is and is not an emergency message.
When a specific School is selected in the campus toolbar, that school is highlighted as the School Option. If the Campus toolbar has All Schools selected, specify a School Option before sending the message. Emergency message recipients must be specified each time a new message is sent—even when using a saved template. A message may be sent to student messenger contacts/guardians, staff members, or student and staff contacts.
Complete one of the following options.
Option
Description
Use an existing template
Select an existing template from the Template dropdown field. If the template was saved under a User Group, select the Group from the User/User Group dropdown field. The Message Subject, Message Body, and Text Message fields populate with the information from the selected template.
Create a new message
- Verify that the <New> value is displayed in the Template field.
- Enter a Message Subject to summarize the content of the message.
- Enter the details of the message in the Message Body text box.
Use the Field Descriptions to complete the Emergency Messenger editor.
The Ad hoc Filter includes all Filters and Data Types available to you, but only one can be selected. If you choose to send messages to Student and Staff Contacts, DO NOT use an Ad hoc filter based on a Student Data Type, or staff are NOT sent a message (except any staff who are also students).Browse and upload an email/voice attachment. (optional)
You must click the Upload button after browsing for the attachment. The Attach File message displays on the screen when an attachment is properly uploaded.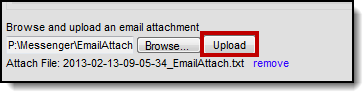
Test the Emergency Message.
The Test button allows the user to type in a single phone number and email address to which the voice or email message is sent for previewing. This feature should be used to test the text-to-speech pronunciation.- Click the Test button. The test pop-up window displays.
- Enter a Destination Phone # in 10-digit format (Enter your number for testing purposes).
- Select Send Test to prompt the call.
- Click OK on the verification.
- Wait several seconds.
- Answer the call and review the message for pronunciation, accuracy, and inclusion of .wav files, if uploaded.
Preview the Emergency Message recipients.
The Preview/Send button allows the user to preview and modify the recipients and numbers to which the emergency message is sent. The Preview button does not allow the user to listen to the message (which should be done through the Test button).Click the Preview/Send button. The following window displays.
The Recipient Count displays all eligible recipients; however, not all eligible recipients receive a message if they do not have any delivery devices available.The Process Inbox Count displays the number of recipients with Portal accounts.
The Email Count displays the number of recipients with email addresses marked to get Emergency messages.
The Voice/Text Count displays the number of recipients with phone numbers marked for Emergency messages for either Voice and/or Text (Text is available if purchased by the district).
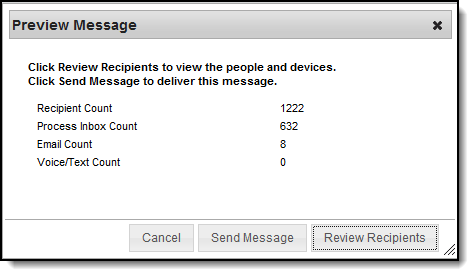
Click the Review Recipients button to display a list of individuals who will receive the message. All recipients and phone numbers to which the message is sent are displayed for verification. To exclude particular recipients and/or their phone numbers, remove the flag of the appropriate checkboxes.
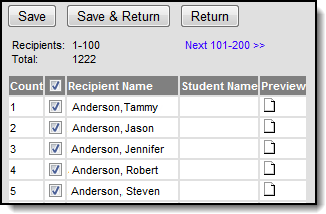
- Click Save & Return or Cancel.
Click the Send Message button. The message is immediately sent to the selected recipients.
Infinite Campus recommends testing and previewing the message BEFORE sending.


