Tool Search: School Store
Parents can pre-order lunch via the Campus School Store even if your district does not use Campus Point of Sale. This contactless meal service option does not charge food service accounts. Instead, it reserves meals for students. Food Service employees can export a report of these orders which can be used to create labels that are affixed to lunches as they are packed for delivery. After the meal is delivered to the student, their Food Service account can be charged for the meal. One option for quickly recording meals is to use Continuous Serve.
This article assumes that your district has already created stores for each of your schools. If you do not have any school stores set up, see the School Store article for detailed information about that process.
This article walks you through setting up pre-ordering in the School Store. As you become more familiar with the School Store, you can set up and organize items in each store in a way that works best for your schools.
Before You Begin
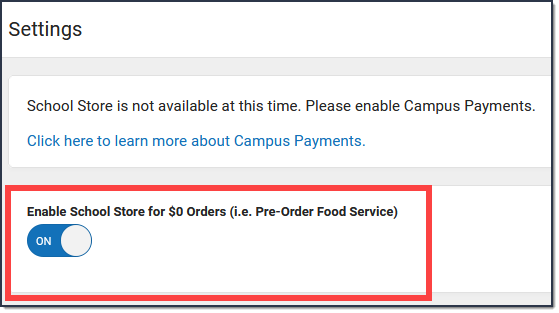
If your district does NOT use Campus Payments, go to System Administration > School Store > Settings and set the Enable School Store for $0 Orders (i.e., Pre-Order Food Service) toggle to ON.
Check with your System Administrator and make sure you have tool rights to System Administration > School Store.
Step 1. Set up "Student Lunch" Product Type
Tool Search: Product Types
Product Types are assigned to Products and to Fund Accounts. When a product is purchased, funds are deposited into the bank associated with the Fund Account to which you assigned the Product Type. Product Types are not unique for each school. Once a Product Type is added, it is available to every school in the district. You cannot delete a Product Type if it's tied to an active product in the Inventory. However, you can edit the Product Type.
- Select School Store > Administration > Product Types.
Result
The Product Types screen displays.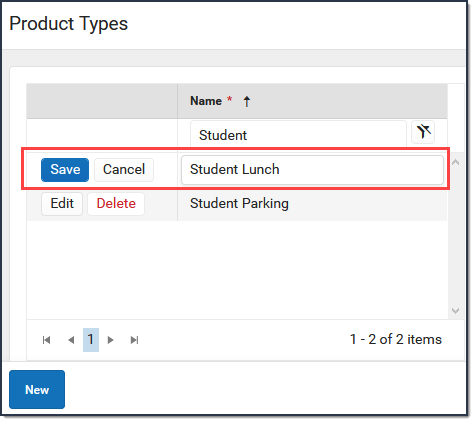
- Click the New button.
Result
A blank row displays. - Enter Student Lunch in the Name field.
- Click the Save button.

Step 2. Create "Food Service Pre-Orders" Category
Categories are how similar products are grouped together in the store. When a portal user selects a category, only the products assigned to that category display. Inactive categories do not appear in the store.
If you select All Schools in the Campus toolbar, you can see all of the Categories for every school.
- Select School Store > Administration > Categories.
Result
The Categories screen displays. - Click New in the action bar.
Result
The Category panel displays. The Active checkbox is automatically selected.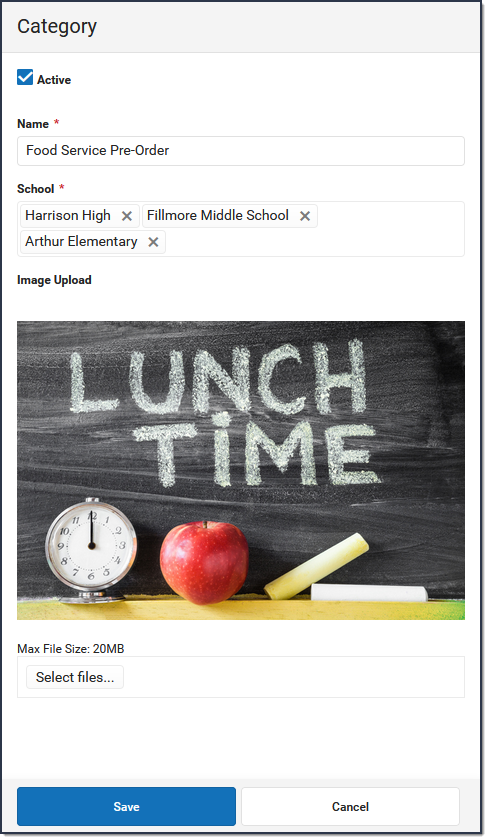
- Enter Food Service Pre-order in the Name field.
Select the Schools where you want the category to be available.
This field only displays schools to which you have tool rights.Use the Select Files option to upload an image for the category.
The image must use one of the following extensions: .jpg, .jpeg, .png, or .gif.
- Click Save.
Result
The Category is ready for you to add Products.

Step 3. Set up Products
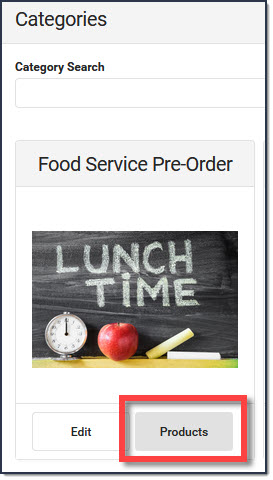
Products are set up using the Product progress tracker. To get started, select All Schools or a specific school in the Campus toolbar, then click the Products button on the Food Service Pre-Order Category.
There are two suggested methods for setting up Products. For both options, you can select Student Lunch as the Product Type (you created the Product Type in Step 1).
| Method | Description |
|---|---|
| Weekly Meals | If food service options are not as complex, one item for "meals for a week" can be created in the school store with an attribute for each day's meal and drink combination. 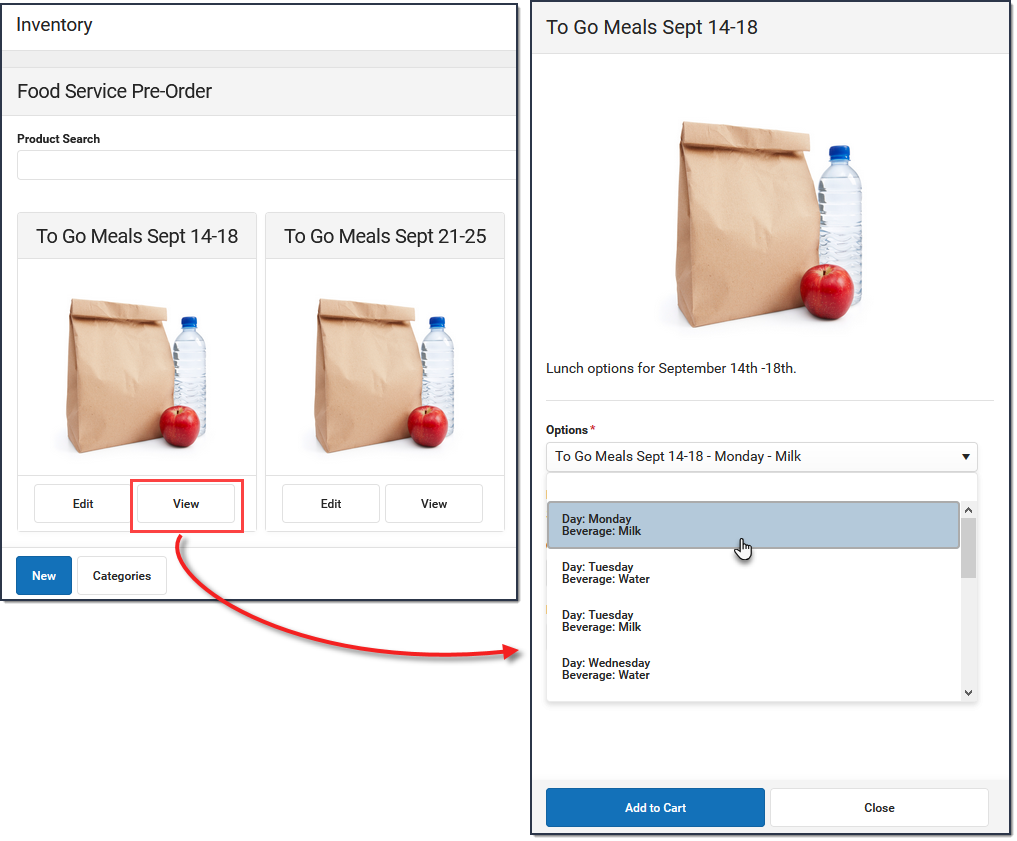 |
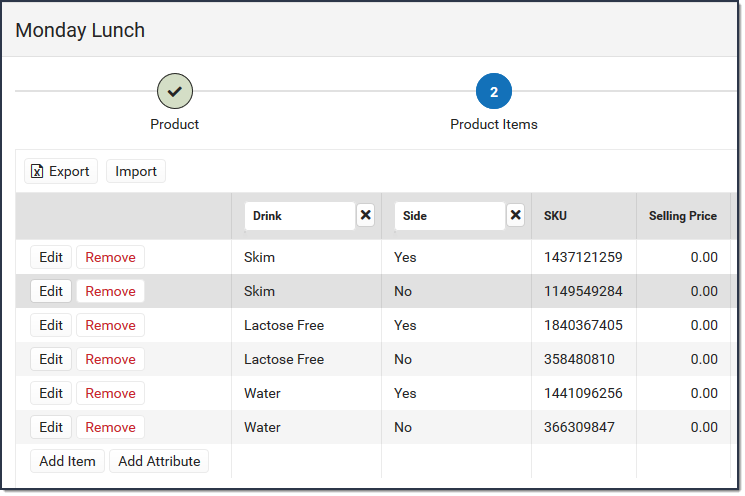
| Daily Meals | With this method, you can create a product for each day and meal. So, you could create one product for Monday breakfast, another for Monday lunch, and so on. With this method, you can also set up unique options for each product. For example, you could set up an option that allows parents to order a specific type of milk with the meal.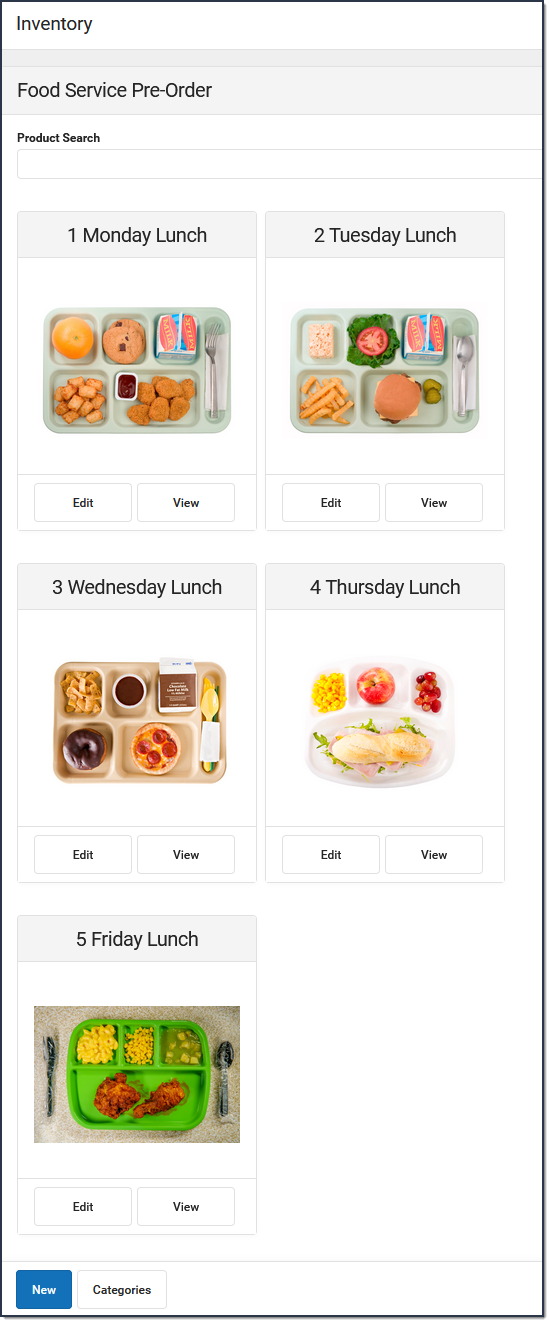 |
Tips for Setting up Products
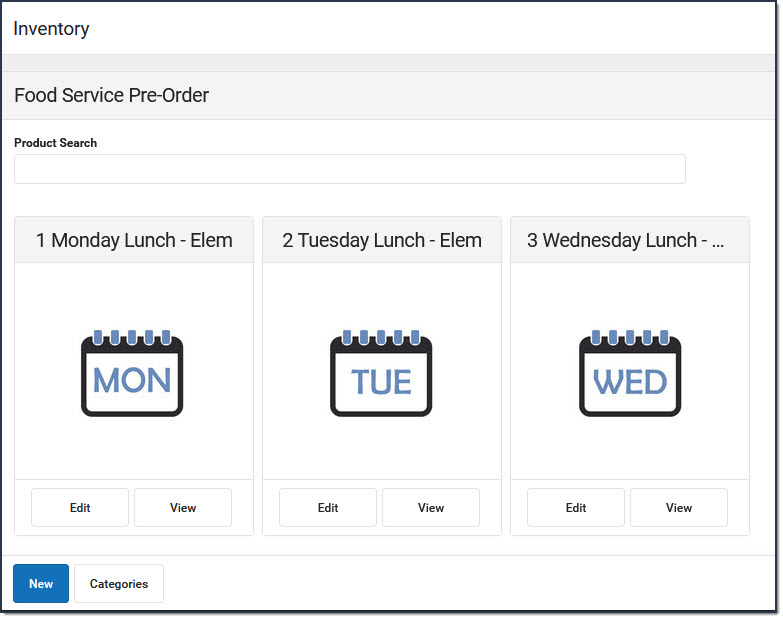
- For each school level, create products for each day; e.g., Monday Lunch, Tuesday Lunch, etc.
To help parents, you could also label each meal to include the school level; e.g. Monday Lunch (Elementary).
- Do NOT use inventory tracking in any mode if you're planning to reuse the product.
- Upload a PDF of the menu for the day, week, month or include a link in the description to the menu.
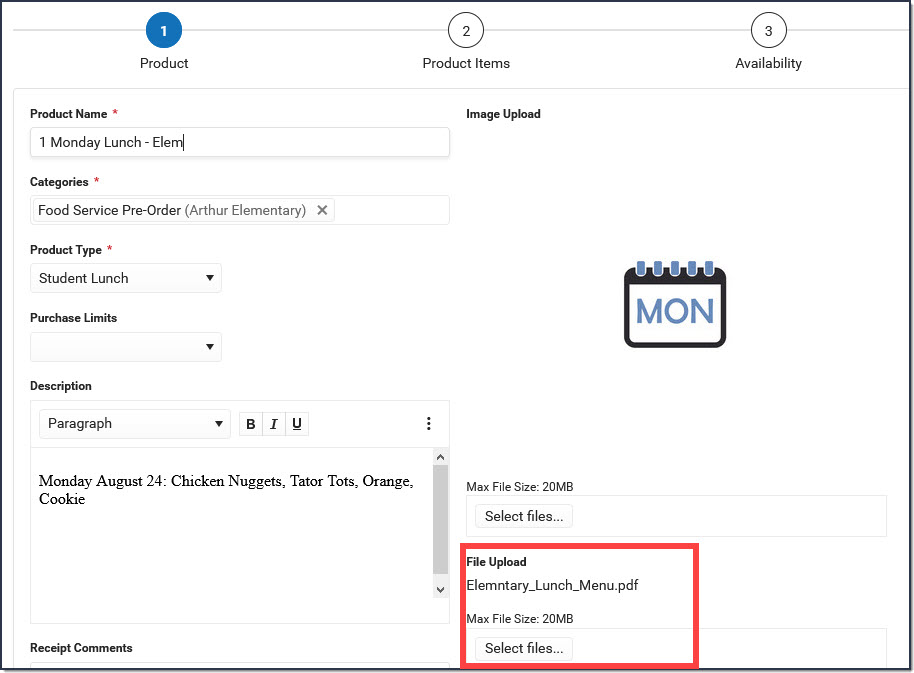
- Keep the product items as simple as possible. For example, on Monday's Lunch you could offer a Drink and Side as the attributes. This allows your menu to be flexible and still be reusable each week.
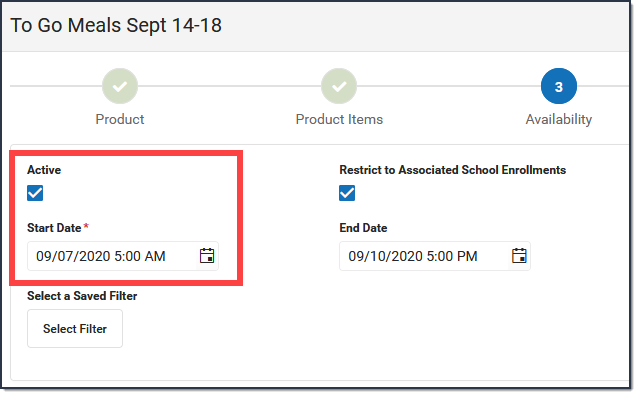
- Set the Start Date to the first day you want to allow any orders to occur. When you want to stop accepting orders for a specific product, clear the Active checkbox.


For more detailed information about setting up Products, see the School Store article.
For information about contactless Food Service, see the Contactless Food Service FAQs and Contactless Food Service Best Practices.
