Flags

Classic Path: Program Admin > Flags

Search Terms: Flags Setup

Flags provide a way of labeling students for things such as food allergies and contact restrictions. Any number of flags can be created for a school or district, and any number of flags can be assigned to a student.
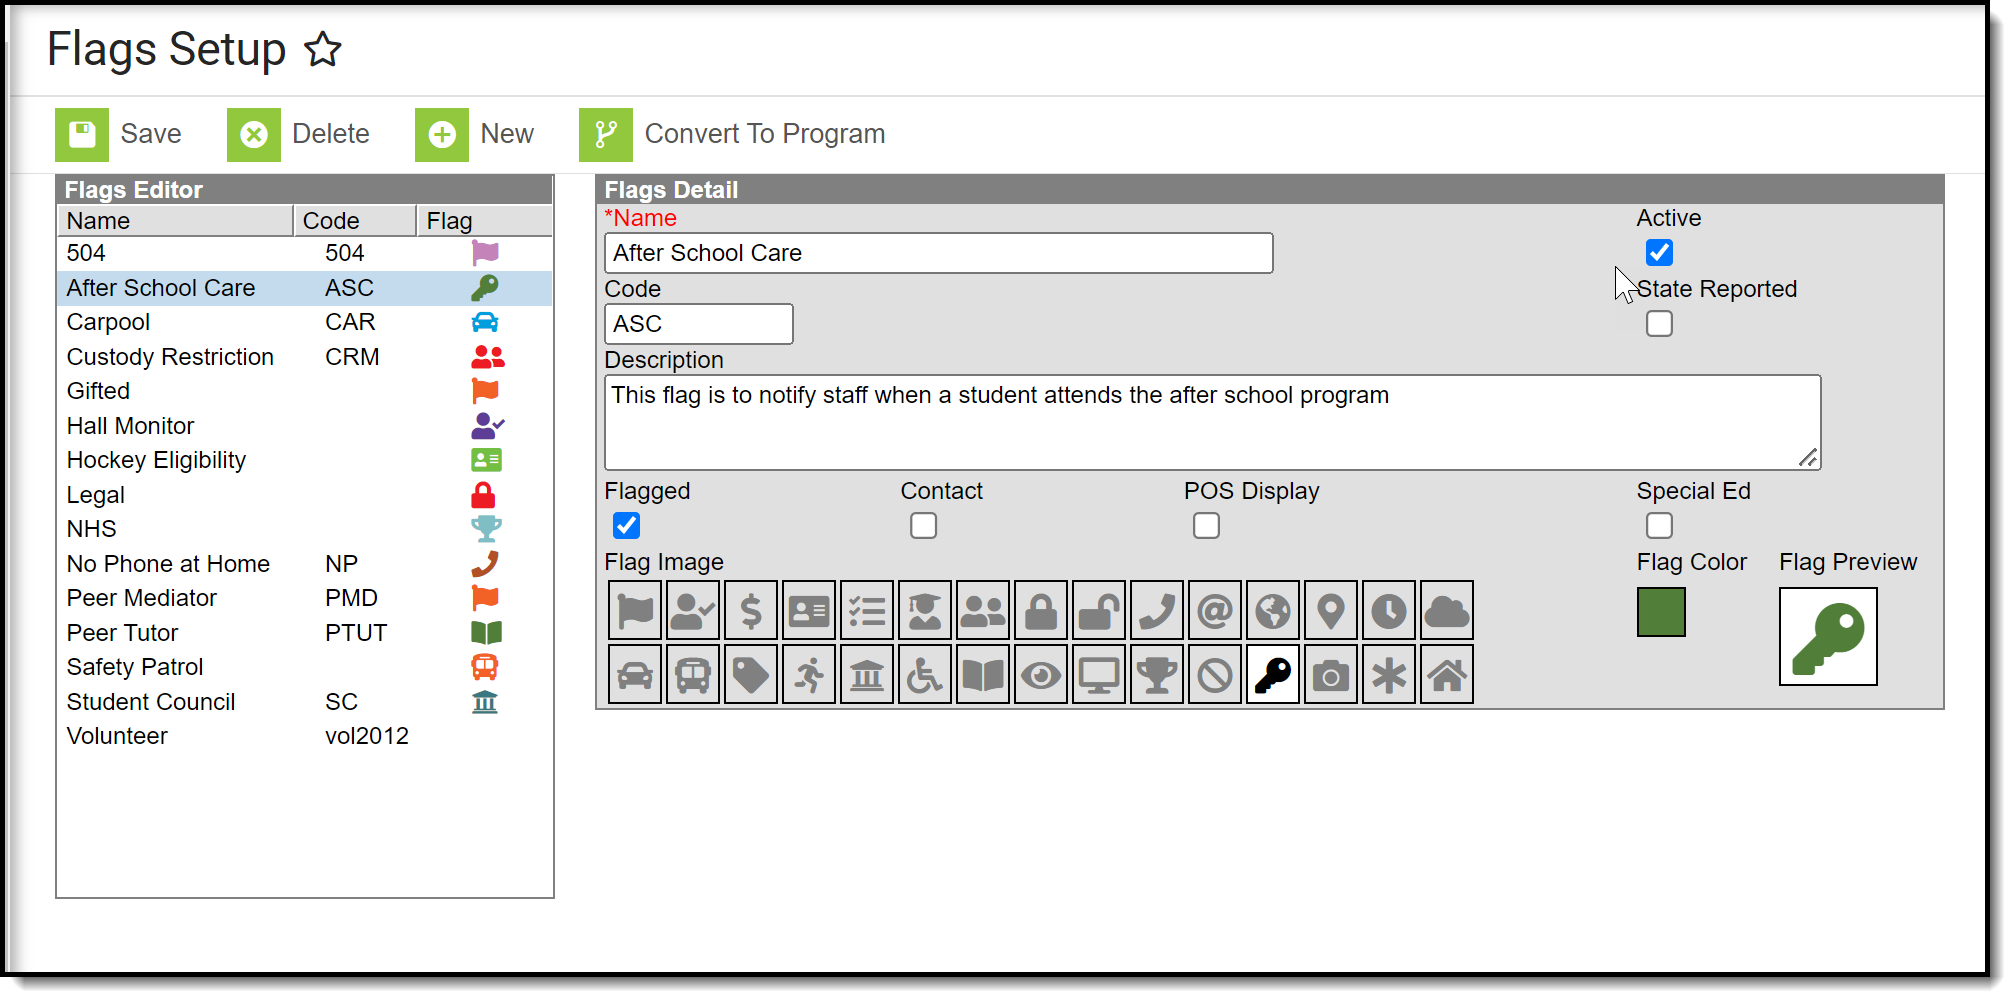
Flags Setup

Flag Checkboxes

When creating a flag a series of checkboxes appear in the Flags Detail editor.

Checkbox

Description

Flagged

When marked indicates that a flag should display next to the student's name. An image and color must be selected to display in the header.

Contact

When marked indicates the student has a note on record regarding who can be contacted on the student's behalf. Additional tool rights need to be assigned for users to view, add or modify contact-related flags for students. In order for this flag type to display next to the student's name, the Flagged checkbox must also be selected.

POS Display

When marked indicates the flag displays next to the student's name on the Point-of-Sale terminal. In order for the flag to display on the POS Terminal, you must also add a note to the User Warning field when you assign the flag to a student (Student Information > General > Flags). If a note is not added in the User Warning field, the flag does not display. In order for this flag type to display next to the student's name, the Flagged checkbox must also be selected.

Special EdWhen marked indicates the student participates in Special Education. Only those with tool rights for the Special Education flag will be able to view this flag in the header next to a student's name. This flag also appears in the IEP column on section rosters and related tools for students it is assigned to.

State Reported

When marked indicates the program is reported in state extracts as a means of tracking student progress. Additional tool rights need to be assigned for users to view, add or modify state reported-related flags for students. In order for this flag type to display next to the student's name, the Flagged checkbox must also be selected.

Vocational

Not available in all states. When marked indicates the program is considered vocational more than academic. In order for this flag type to display next to the student's name, the Flagged checkbox must also be selected.


When a flag is marked as Flagged, an image and a color can be selected for the flag. This image displays next to the student's name in the header, as shown in the image below. The default selection is the flag icon and the color orange. 

Default Flag Image and Color

When this flag is assigned to a student the flag displays next to the student's name.

Flag Display 

To assign a medical alert flag, Health Conditions must be set to display a flag. See the following articles for more information:

Create Flags

  1. Select the New icon. A Flag Detail editor will appear to the right.
  2. Enter the Name of the flag.
  3. Enter a Code for the flag. This code can be a district-defined code or a state-defined code.
  4. Enter a Description of the flag.
  5. Mark the Flagged checkbox if this flag should display next to the student's name. If yes, then select a Flag Image and a Flag Color. There are 30 images and 12 colors to choose from.
  6. Mark the other checkboxes (Contact, POS Display, Special Ed, State Reported) if applicable to this flag.
  7. Select a Flag Image to appear next to a student's name when this flag is assigned. This image will only display if flagged is selected.
  8. Click the Save button when finished. The new flag will appear in the Flags Editor tree.

After creating flags, assign the flags to students, either manually on the Student Flags tab or using the Batch Assignment Tool.

Only active Flags can be assigned to students. Active flags display first in the Flags Editor list. Deactivated flags do not have the Active checkbox marked and display in gray text at the bottom of the Flags Editor list.

Deactivated Flag

If a flag has the Active checkbox unmarked after it is assigned to a student it displays in red text. The deactivated flag still displays in the student header until it has an end date applied. 

Deactivated Flag Assigned to Student

Convert Flags to a Program

Flags and Programs Are Not the Same

Campus allows the tracking of both Flags and Programs separately. There is little difference between these two, and a district may have a flag called After School Club. A program could also be created with this name.

Programs cannot have flag images associated with them. Like flags, programs can be state reported.

Flags that have been associated with students by a third party system cannot be converted to a program using the Convert to Program tool.

If there are flags that would be better suited to be programs, use Convert to Program. This option requires the user to have full tool rights to (RWAD) to Program Admin > Flags. 
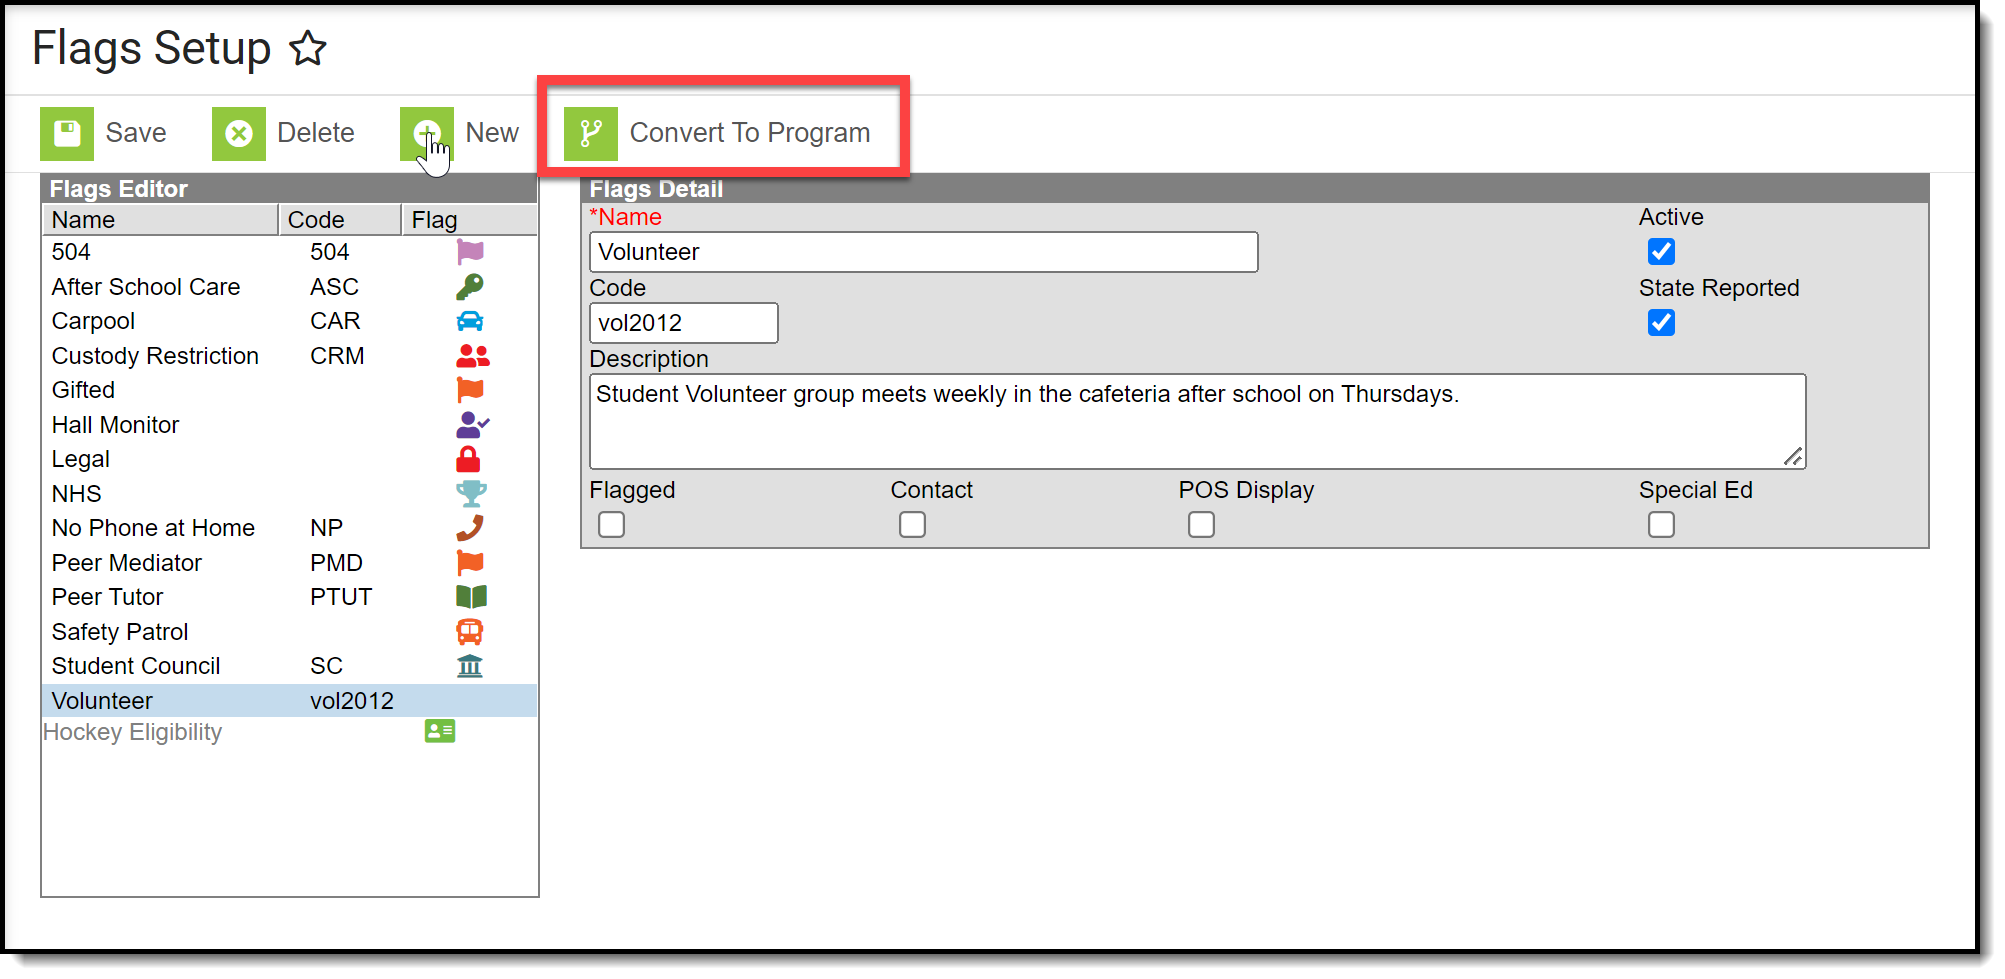
Convert to Program

  1. Click the Convert to Program button. A warning message displays explaining what happens, as follows:
    1. The image associated with the flag no longer displays next to the student's name.
    2. User warnings associated with the student are erased.
    3. Participation details move to the Program Participation > Programs tool.
  2. Click OK to continue the conversion process. A confirmation message displays. The flag that was converted no longer displays in the Flags Editor; it is visible in the Programs editor.

After the conversion, if there was a flag image associated with the flag that is now a program the image no longer displays next to the student's name. The program is listed in the Program Participation Programs editor. All other data entered as part of the flag converts to the equivalent program data fields.

When a flag is converted to a program, the Sessions checkbox cannot be added.