Sometimes, it can be useful to rename multiple files at once. For instance, when using the Data Extract Zip Tool's Student Photo Extract feature, photo files are saved on Infinite Campus servers in the format [PersonID].jpg, and this is how they are exported. However, your district may prefer that the exported photo files be named using the format [Student Number].jpg instead of [PersonID].jpg.
There are several bulk rename tools available that can help with this process. These tools can rename files in bulk based on a CSV file that maps old filenames to new ones. Typically, they require a CSV file with two columns: the first column contains the old filenames, while the second column contains the desired new filenames. You can obtain this information from Filter Designer, export it as a CSV mapping, and then use that CSV file with the bulk rename tool of your choice.
Bulk File Rename Tools
These are several bulk rename tools commonly suggested in online support communities that can rename files based on a CSV mapping (this list is not exhaustive):
Infinite Campus does not endorse or promote any specific resource from this list. Before proceeding, we encourage you to thoroughly review the content offered to ensure it meets your needs.
Bulk renaming consultations are outside the scope of Campus Support. Please utilize that tool's support team/documentation if in need of assistance.
- NB Renamer (Windows) - Documentation
- F2 (Windows, Linux - command line tool) - Documentation
- Transnomino (macOS) - The "Conversion" feature accepts a CSV file.
Other Options
Another common approach is a batch rename script written in PowerShell, Python, Perl, Bash script, etc. Scripting consultations are outside the scope of Campus Support, but various online support communities are available:
Generate an Old-to-New Filename CSV Mapping
The following are steps on how to use Filter Designer to create an old-to-new filename mapping CSV.
For this example, we will be creating a [PersonID].jpg to [Student Number].jpg CSV mapping
Create the Filter
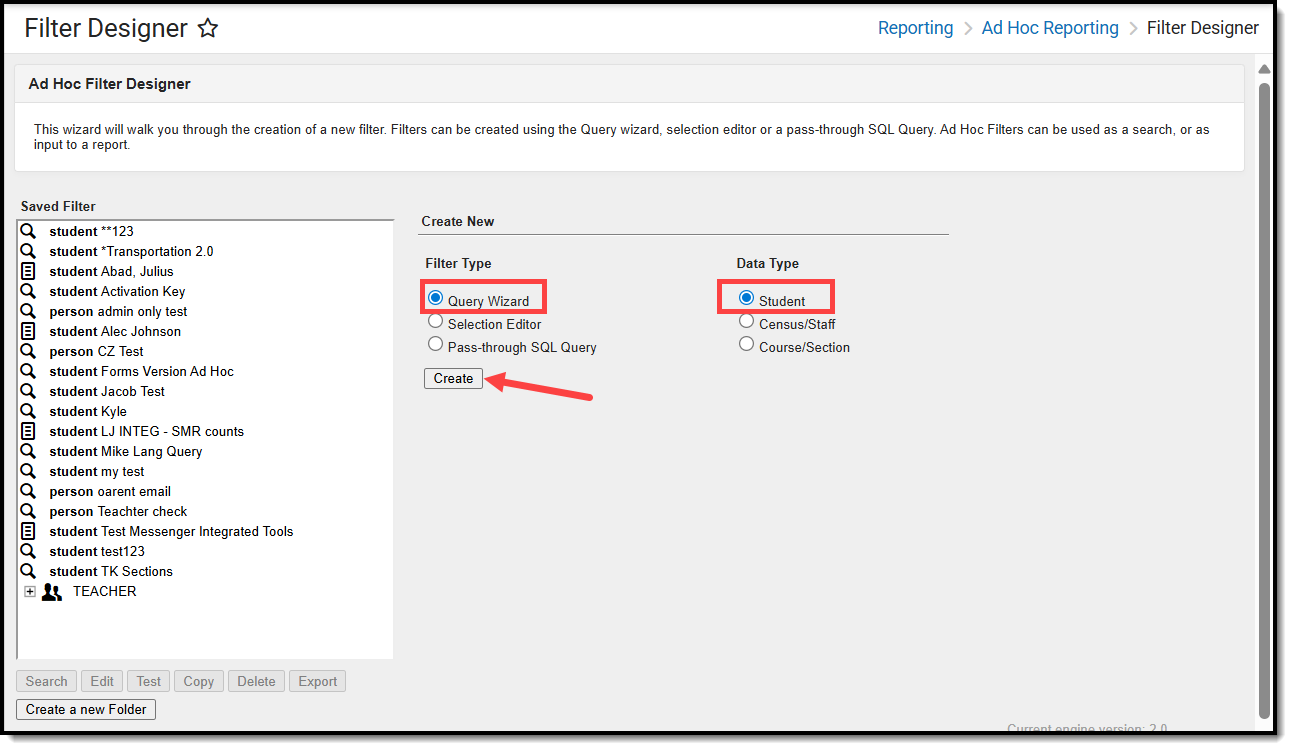
- Navigate to Filter Designer.
- Select a Filter Type of Query Wizard and a Data Type of Student.
- Click Create.
Add a "current file name" Column
For our example, we are putting PersonID plus ".jpg" together in one field as a function:
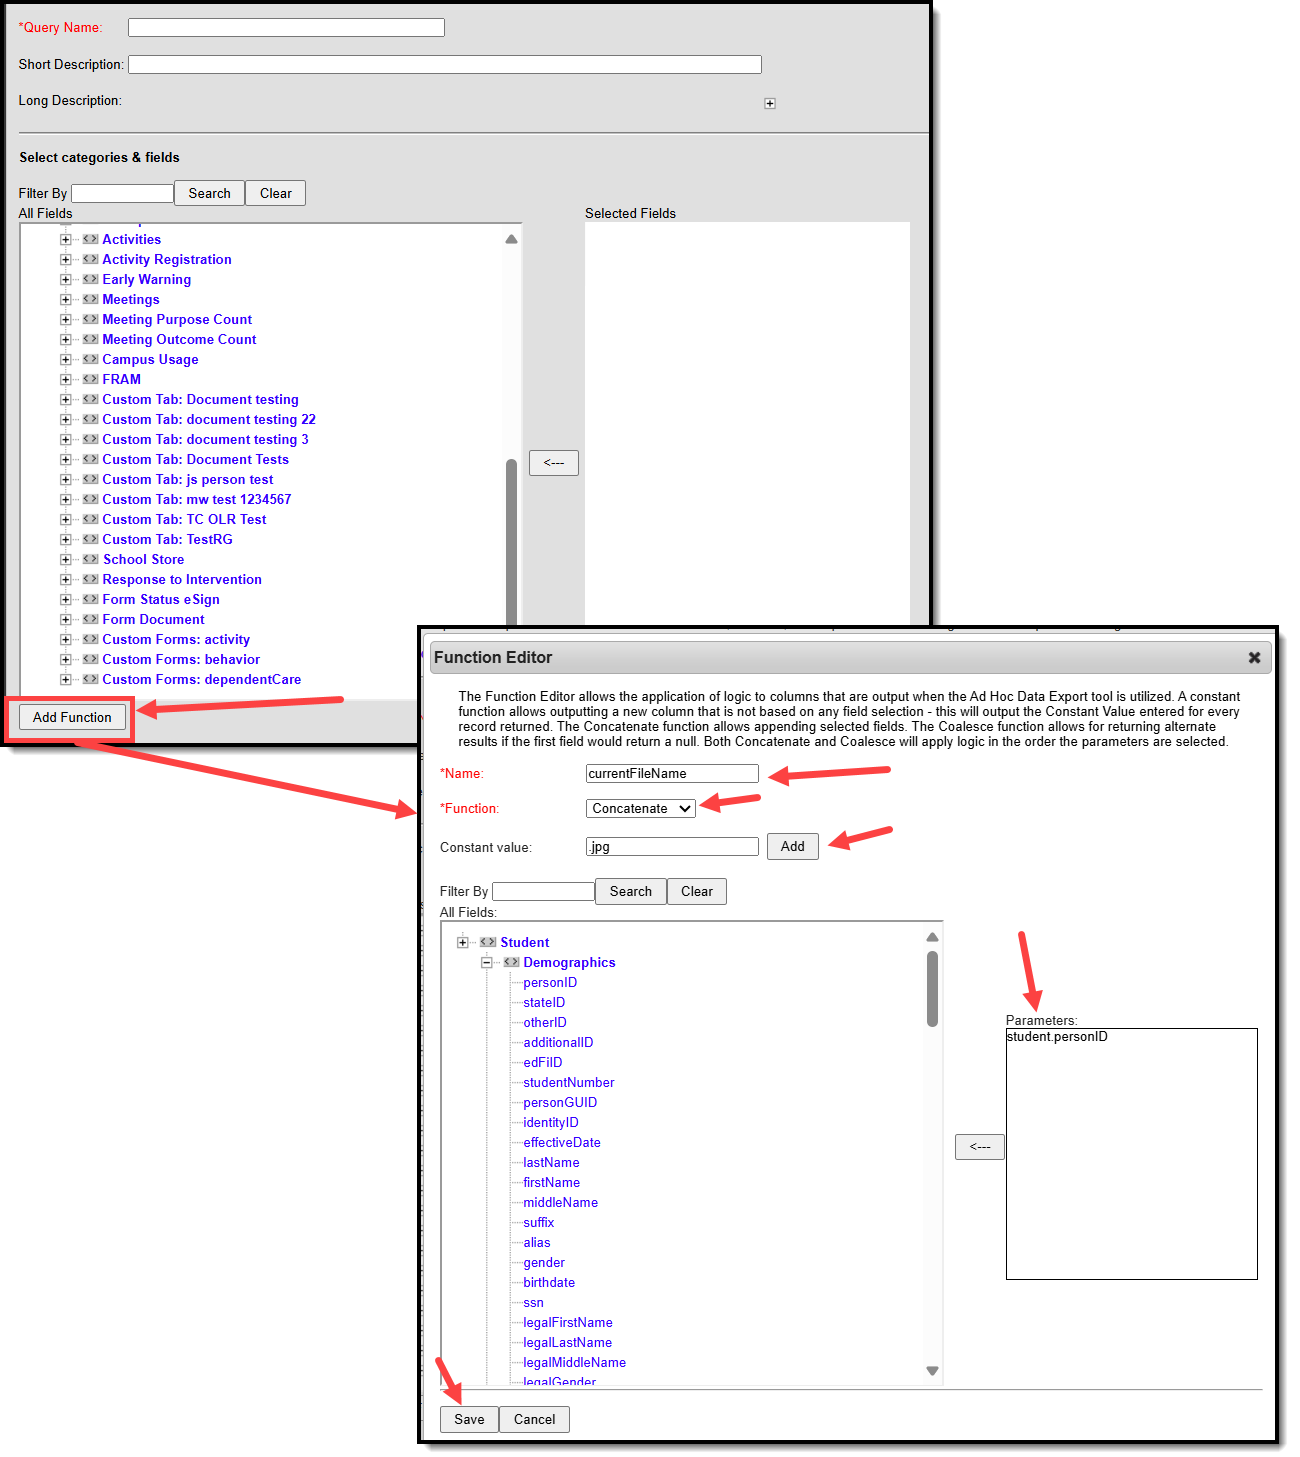
- Click Add Function
- Give the function a Name: Can be anything.
- For example, currentFileName
- Select a Function of Concatenate
- Select the database field.
- For our example, we will add Student > Demographics > PersonID
- Enter your Constant Value and click Add
- For our example, we will use .jpg. This means PersonID concatenated with .jpg.
- Save the function
Add a "new file name" Column
You'll want whatever identifier you're renaming the files to, plus the extension as a function:
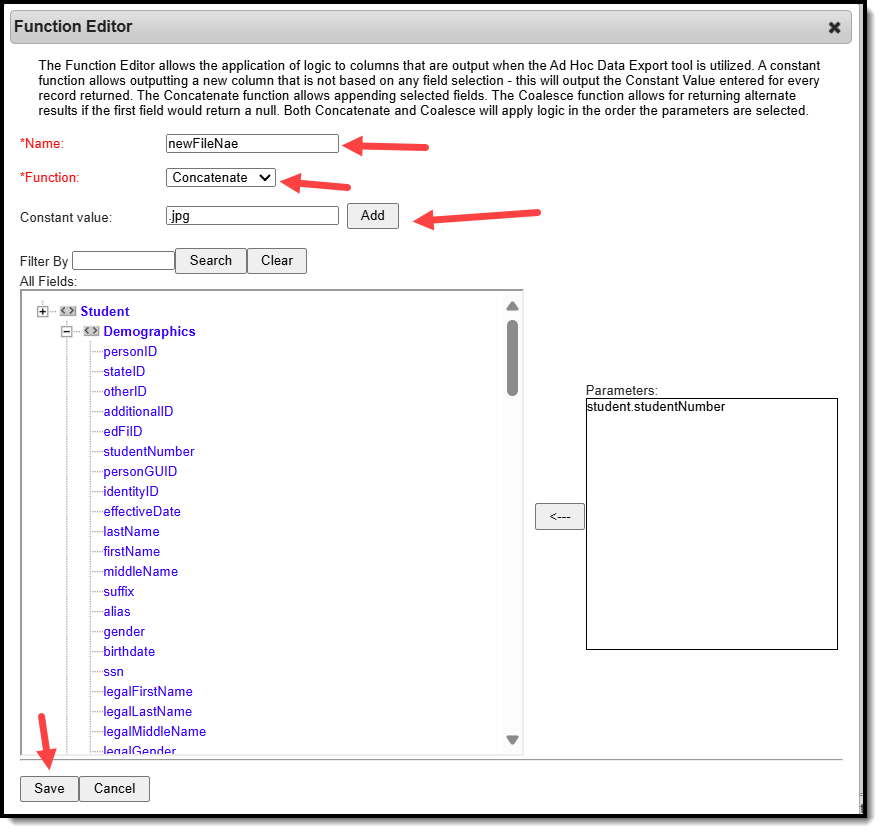
- Select Add Function
- Give it a Name.
- Can be anything. For example, newFileName
- Select a Function of Concatenate
- Add whatever field you want the files named after.
- For example, we want to replace the old files of PersonID with Student > Demographics > StudentNumber
- Add a Constant Value and click Add
- For our example, we want .jpg as the extension added to the Student Number
- Select Save
- Give the filter a Query Name and click Save to save the filter.
Export the filter as a CSV file
Now you should export the filter
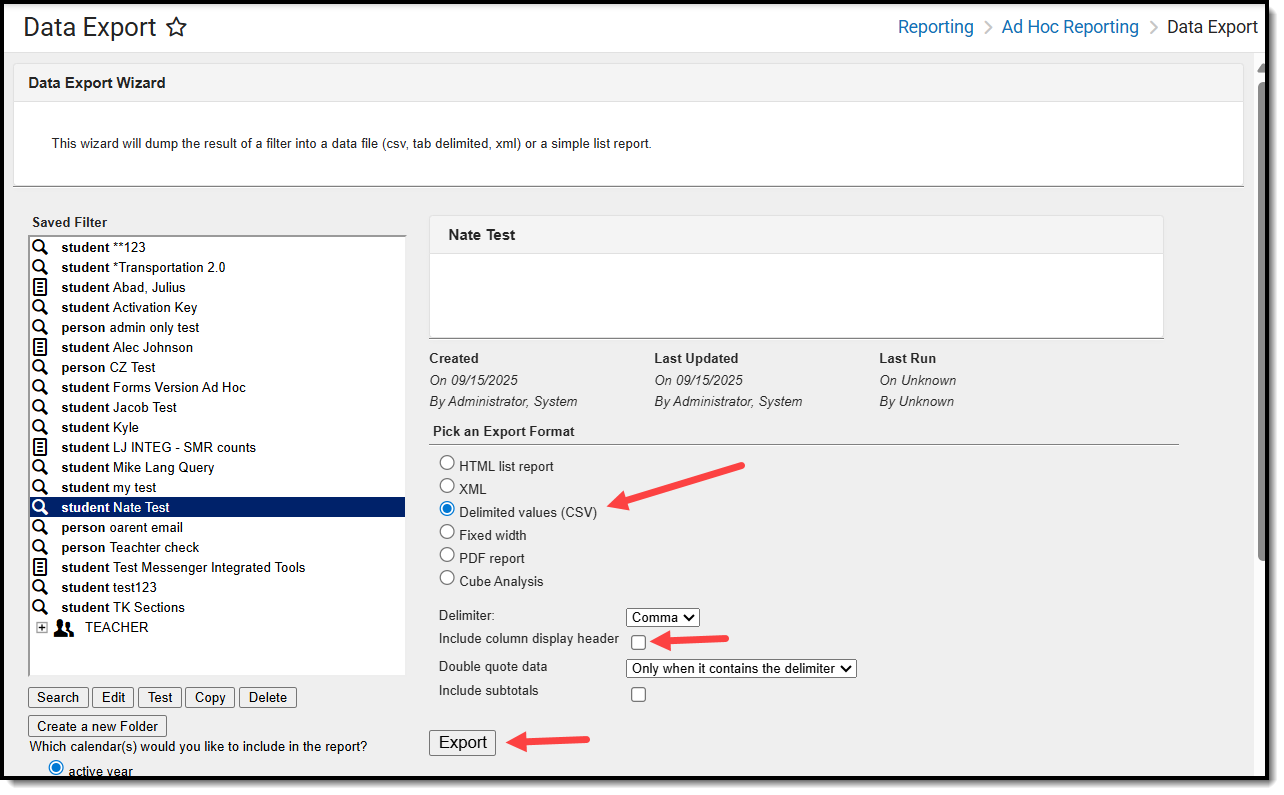
- Navigate to Data Export
- Select the filter you just created and saved.
- Pick an Export Format of Delimited values (CSV)
- Unmark the Include column display header checkbox.
- Leave other settings at their default
- Select Export
Use the resulting CSV file in the bulk file rename tool of your choice.
