Facilitate a Group as an Owner
Last Modified on 03/11/2026 1:20 pm CDT
Tool Search: Groups
Groups are a communication tool for conducting one-way and two-way conversations between group members. Groups can be created for use by clubs, organizations, events, and interests.
Being a Group Owner gives you additional options for facilitating groups, including creating and moderating groups, and resolving flags.
Access to the Groups tool as an Owner is granted via the Group Owner tool right in Communication > Groups Management.
Create a New Group
- Click Create New Group at the bottom of the Groups tool.
- Enter a Group Name. The name must be unique across groups in the district.
- Select a School to associate with the group.Choosing a school does not limit who can be in the group but it does affect the Group Administrator role. All Group Administrators can view any groups that have All Schools selected and any School to which they have calendar rights.
- Designate Group Owners. You are listed by default. You can add other owners and remove yourself as owner if desired, although the group must have at least one.
- Select a Group Privacy option:
- Private: These groups can only be joined via the Access Code provided.
- Public: Participants can search for these groups and request to join them, or join via Access Code. For public groups, mark Enable Access Code to add a code to the group.
-
You can use the generated Access Code or type a custom code if desired. Generate a new Access Code if needed. When a new code is generated and saved for an existing group, the old code will no longer allow users to join the group.
|
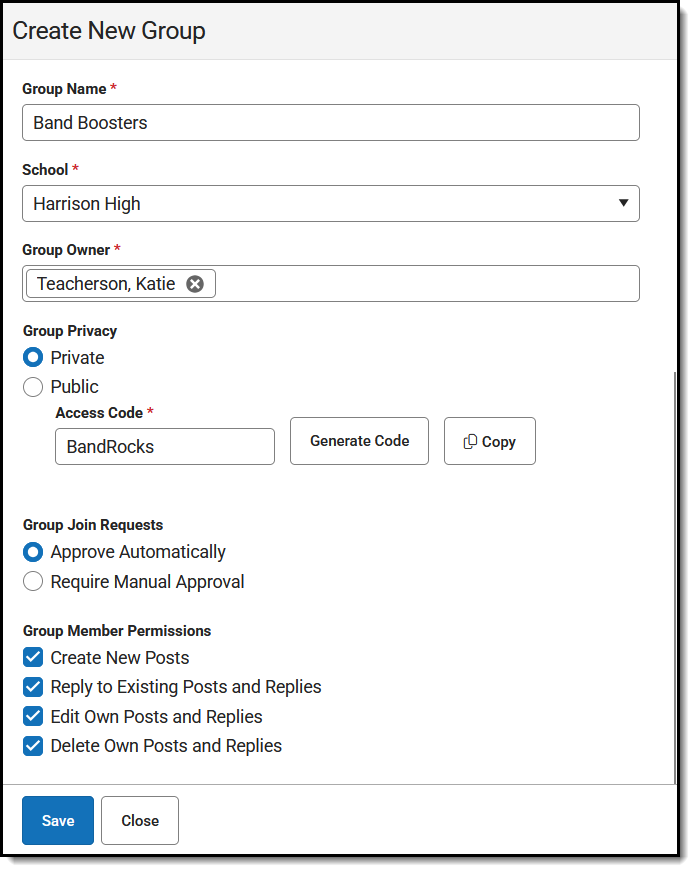 |
- Indicate how Group Join Requests should be handled:
- Approve Automatically when someone requests to join the group, without an owner needing to review and approve the request.
- Require Manual Approval by an owner when someone requests to join the group.
- Set Group Member Permissions to determine how group members can participate in the group. Options are:
- Create New Posts
- Reply to Existing Posts and Replies
- Edit Own Posts and Replies
- Delete Own Posts and Replies
- Upload Images/Attachments (only displays if CDR is enabled)
-
Even when editing and deleting posts are allowed, a record of group activity is available for group owners to view historical data via the View History report.
- Click Save to finish creating the group.
|
When you save a new group, the group is automatically opened to the Posts tab, where you can create the first post for the group.
View the My Groups Screen
The first page of the Groups tool sorts the groups you belong to into three tabs:
| Owned |
Joined |
Archived |
| These are the groups where you are listed as a Group Owner on the settings tab. You have greater access to these groups, including managing members and settings. |
Even with the Group Owner tool right, you may participate in groups where you are a regular member and not an owner. For groups in this list, your level of participation is governed by group settings the same as other members. See the Participate in Groups as a Member article for more information. |
If any groups you own have been archived, they are listed on this tab. |
View a Group as an Owner
Groups where you are the owner show with three tabs:
Posts
The Posts tab collects all of the posts and replies for a group.
From here, you can create posts, respond to other participants, resolve flags, and view the history of the group.
Participants
The Participants tab includes requests to join the group, the list of participants with options to filter that list, and participant management options.
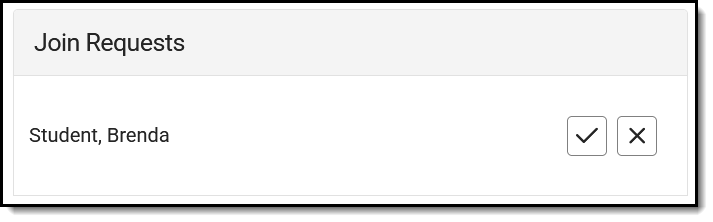 Join requests are listed at the top of the screen. Join requests are listed at the top of the screen. |
Join RequestsIf a group is set to Require Manual Approval, participants who request to join the group are listed in the Join Requests at the top of the participants screen. Click the checkmark to accept the request or the X to reject it. |
Filter Participant List
Filter participants using the following options:
- Participant Name - search for a name to find a specific participant.
- Group Role - filter participants by Owners or Members of the group.
- Campus Role - filter participants by Students, Staff, and Others (not students or staff).
- Status - filter participants by those who are Unmuted or Muted. See below for more information.
Click Apply Filters to filter the participant list before or Reset Filters to restart. Collapse and expand the Filter section if desired using the -/+ icon at the top right.
|
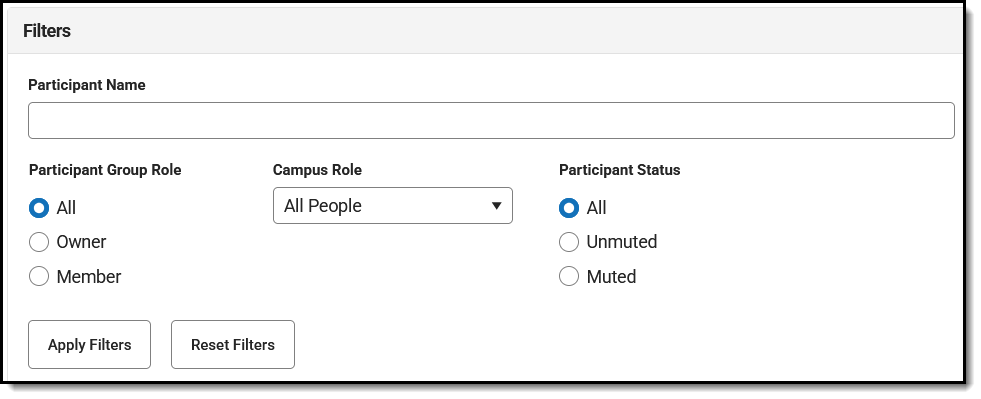 Filter the participant list by name, role, and status. Filter the participant list by name, role, and status. |
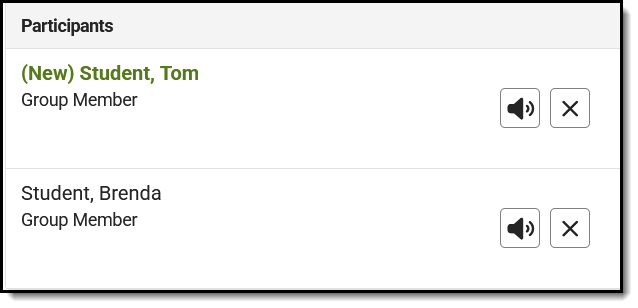 Manage participants using the buttons in the list. Manage participants using the buttons in the list. |
Participant Management Options
In the participant list includes the name and Group Role, and, if applicable, their Campus Role and ID number. The following options display for each participant:
- The mute icon indicates if the participant is unmuted or muted. If the mute icon displays with an X, the participant is muted and cannot post or reply in the group. If the mute icon does not have an X, the participant is not muted and can post/reply if group settings allow. Click the mute icon to mute or unmute the participant.
- Click the X to remove and/or Block the participant from the group. When you click this button, a popup displays giving you the option to remove the participant from the group or remove and block them. Removed participants can rejoin or be readded to the group. Blocked participants cannot.
|
Add Participant
From the Participant tab, click Add Participant to open a search panel where you can search for users to add to the group by First Name, Last Name, and Campus Role.
|
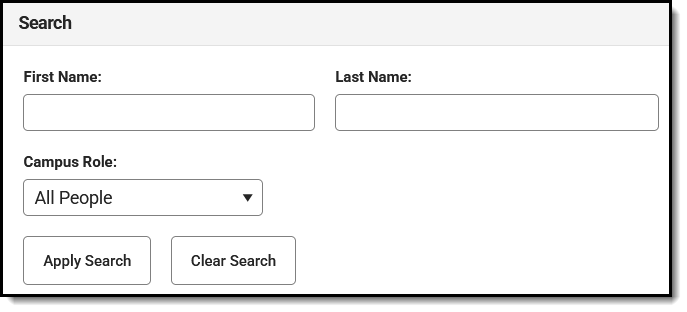 Search for users to add them as participants. Search for users to add them as participants. |
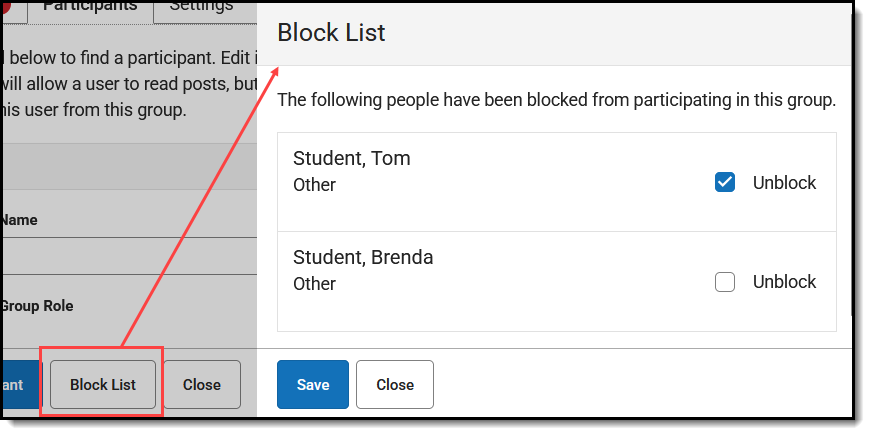 Open the Block List to review blocked participants and unblock them. Open the Block List to review blocked participants and unblock them. |
Block List
If participants have been blocked from the group, a Block List button displays at the bottom of the screen.
The Block List lists all participants who have been blocked.
|
Settings
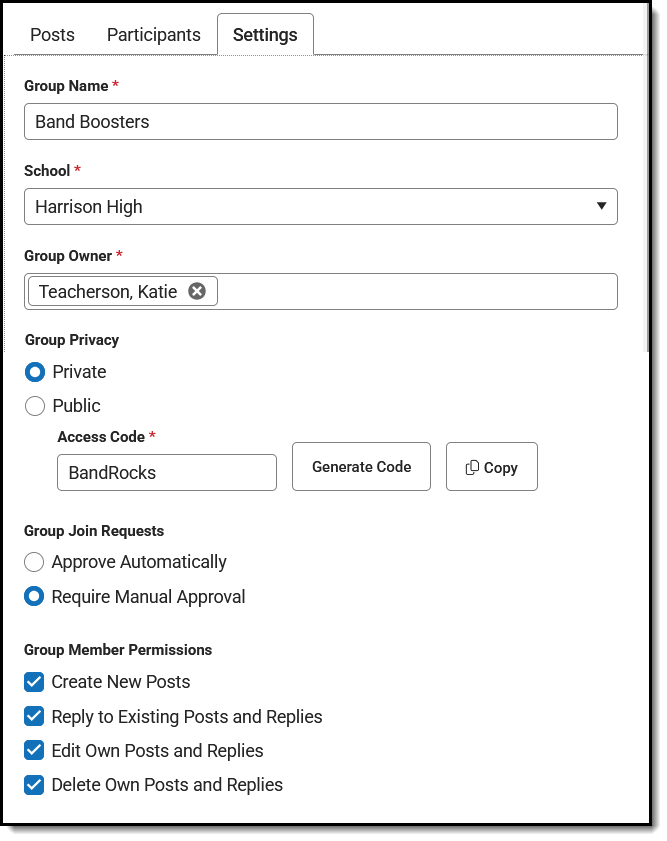
The Settings tab matches the options available when you created the group:
- Group Name: Name displays for all members and must be unique.
- School: The School associated with the group. Choosing a school does not limit who can be in the group but it does affect the Group Administrator role. All Group Administrators can view any groups that have All Schools selected and any School to which they have calendar rights.
- Group Owner: Participants with an Owner role in the group. Groups must have at least one owner.
- Group Privacy: Whether the group is public or private.
- Private: These groups can only be joined via the Access Code provided.
- Public: Participants can search for these groups and request to join them, or join via Access Code. For public groups, mark Enable Access Code to add a code to the group.
- You can use the generated Access Code or type a custom code if desired. Generate a new Access Code if needed. When a new code is generated and saved for an existing group, the old code will no longer allow users to join the group.
|
 Use group settings to manage access and permissions for the group. Use group settings to manage access and permissions for the group. |
- Group Join Requests: Whether participants need approval to join the group.
- Approve Automatically when someone requests to join the group, without an owner needing to review and approve the request.
- Require Manual Approval by an owner when someone requests to join the group.
- Group Member Permissions: How members can participate in the group.
- Create New Posts
- Reply to Existing Posts and Replies
- Edit Own Posts and Replies
- Delete Own Posts and Replies
- Upload Images/Attachments (only displays if CDR is enabled)
-
Even when editing and deleting posts are allowed, a record of group activity is available for group owners to view historical data via the View History report.
|
Archive a Group
Archive groups that are no longer in use to remove them from the groups list of participants. For group owners, archived groups display in the Archived tab on the main Groups screen. This tab only displays if you are the owner of an archived group.
Archived groups can be unarchived by clicking the group name in the Archived list, clicking the Settings tab, and clicking Unarchive Group at the bottom of the screen.
Leave an Owned Group
Groups must have at least one owner. To leave a group you own, assign a new Group Owner in the Settings tab and remove yourself from the Group Owner field. When you save that change, you can no longer interact with that group as an owner. You can also leave the group by clicking Leave Group from the Groups List, if there is at least one other Owner assigned.
Notifications
View notifications by clicking the bell icon at the top right of the screen. Group owners receive notifications in the following instances:
- A post or reply has been flagged.
- There is a pending join request.
- An additional Group Owner has been added.
- The group Access Code has been changed.
- The user has been removed as a Group Owner.


 Use group settings to manage access and permissions for the group.