Tool Search: Resync State Data - Selective Sync
The Selective Sync tool allows system administrators to manually sync Person/Identity and Enrollment records for a specific set of users. This tool provides an easy way to correct data discrepancies found between state and district databases while producing minimal performance impact.
This tool works the same for both State and District users. Records are identified by district personIDs (when syncing PersonIdentity) or district enrollment IDs (when syncing for Enrollment).
 Resymc State Data - Selective Sync
See the Resync State Data Tool Rights article for information about related tool rights.
Syncing Objects for Specific Users
Users are highly encouraged to run the Verification Summary prior to using the Selective Sync tool to assist in identifying issues.
An individual or group of identity or enrollment records can be (re)synced based on the personIDs (PersonIdentity) or enrollmentIDs (Enrollment) entered.
If the personID or enrollmentID does not match an existing record, no change will occur. If ID numbers are entered incorrectly (but match existing records), data will merely be (re)synced to the state to ensure both databases match.
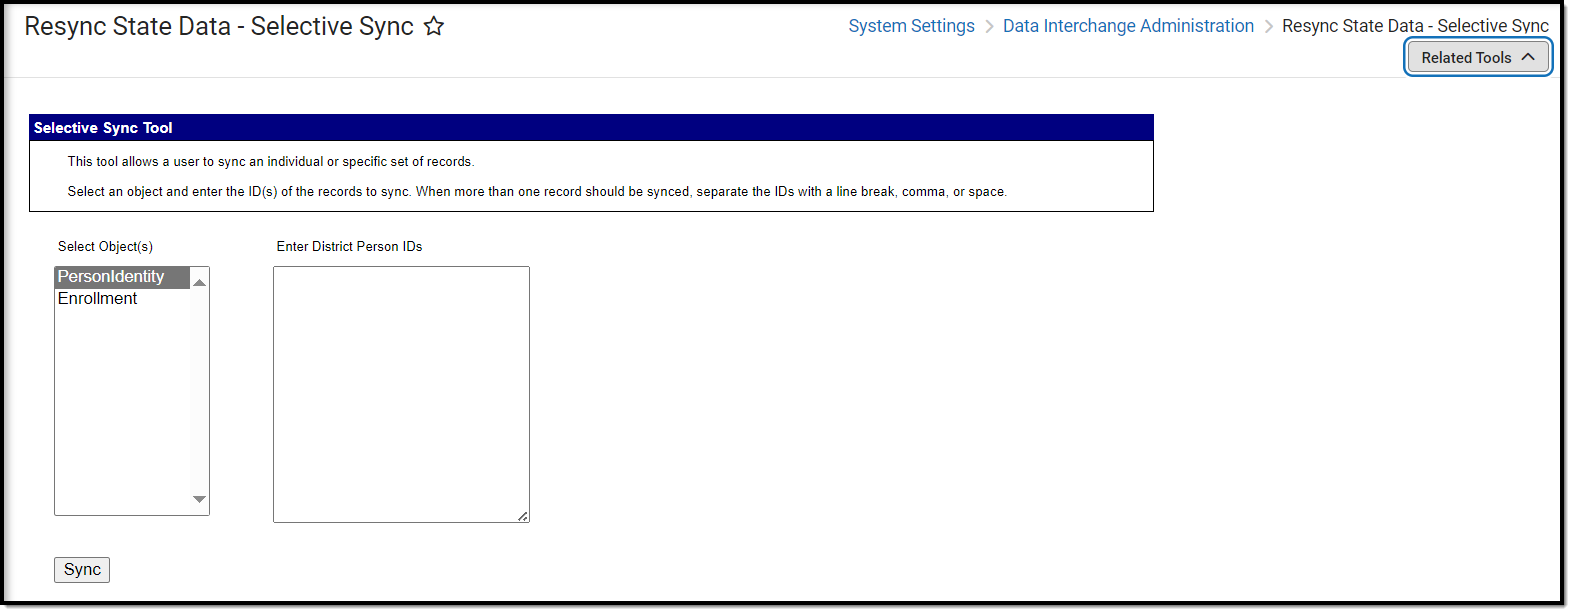
 Selective Sync Tool
Users are highly encouraged to run the Verification Summary to ensure previously identified issues were resolved.
To (re)sync an object:
- Select the Object.
- PersonIdentity - Selecting this object will (re)sync Person/Identity data for all users matching the PersonIDs entered.
- Enrollment - Selecting this object will (re)sync all Enrollment record data matching the enrollmentIDs entered.
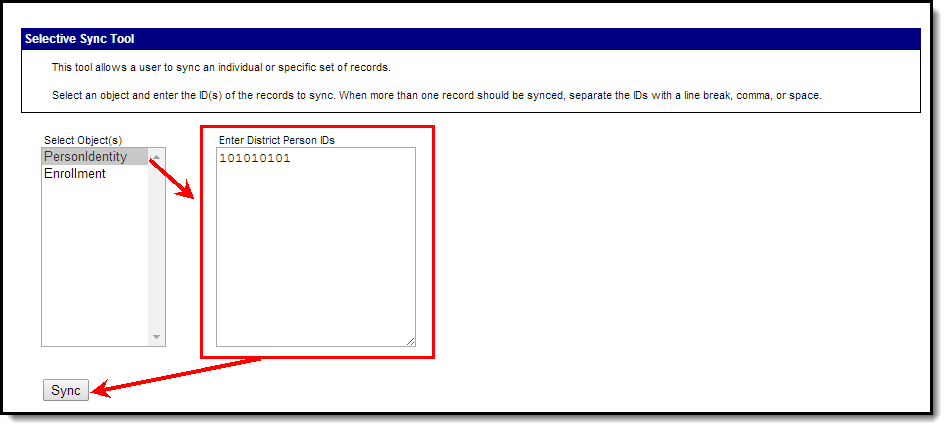
- Enter the PersonID or EnrollmentID of each person/enrollment you wish to (re)sync. See the Finding ID Fields for Re-syncing Data section for more information on finding specific personID and enrollmentID values.
- Select the Sync button. Identified records will now (re)sync the object's data between the state and the district. The message to the left of the View History link will show the current progress of the (re)sync request.
- Once (re)syncing is complete, users can view the syncing history to see which records (re)synced successfully or unsuccessfully.
Viewing the Sync History
Users can view a history of each (re)sync request by selecting the View History icon. Once selected, a table showing the time, who initiated the sync, and its details appears.
If this table is blank, it means the history has been cleared via the Clear History button or no sync event has been requested.
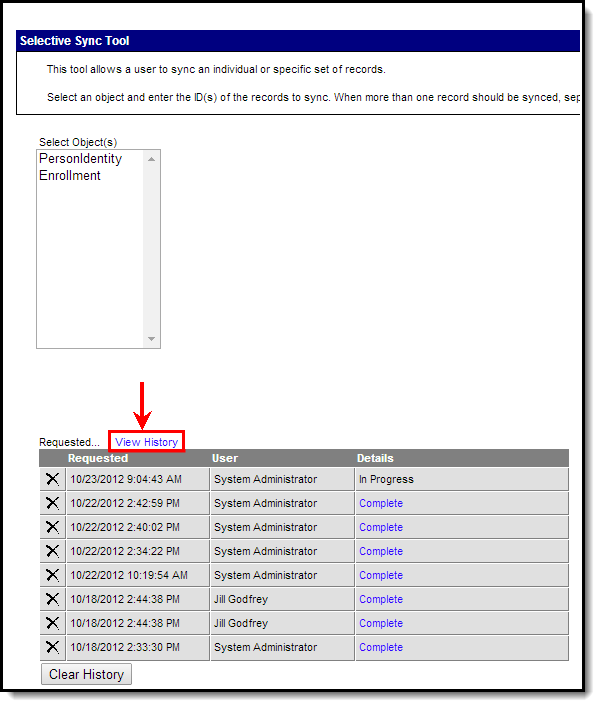 Sync Tool History
To view more details about a specific (re)sync event, click Complete. To generate a report displaying all records that successfully and unsuccessfully synced for the event, click the blue Keys hyperlink, select a Report Format, and click Generate Report.
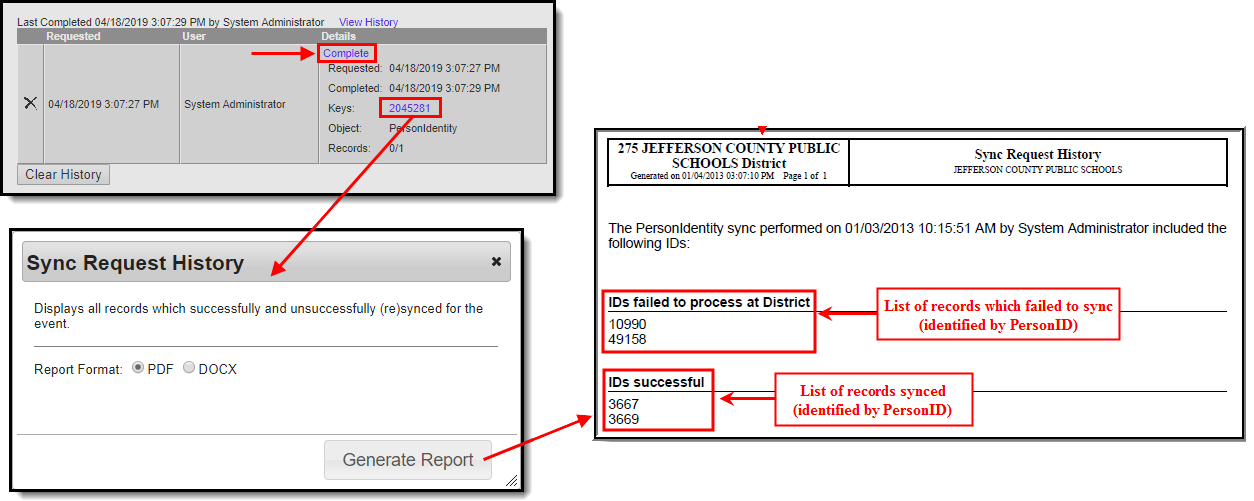 Sync Request History Report
Correcting Record Sync Failures
When records fail to properly sync to the state, it is often because the parent object needs to be (re)synced. To (re)sync the parent object, go to the Resync State Data tool, identify the parent object, mark the Check dependencies checkbox and select the Send Resync button. See the Resync State Data (District) article for a detailed walkthrough of this process and an explanation of object hierarchies.
Finding ID Fields for (Re)Syncing Data
To identify records that may be incorrect and require a manual (re)sync, users are encouraged to generate the Verification Summary for the desired object.
To find individual Person or Enrollment IDs, see the following sections:
To Find Person IDs
The personID is displayed at the top of the Demographics tab.

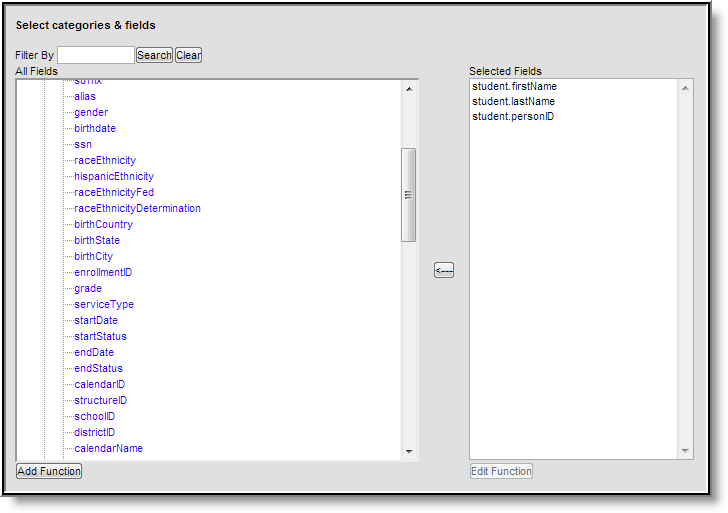
Users can also view personIDs per person by creating an Ad hoc filter that includes the student.personID (to find students) or individual.personID (to find all non-students) fields. Users can also generate the Verification Summary for the PersonIdentity object to identify records that may need to be (re)synced.
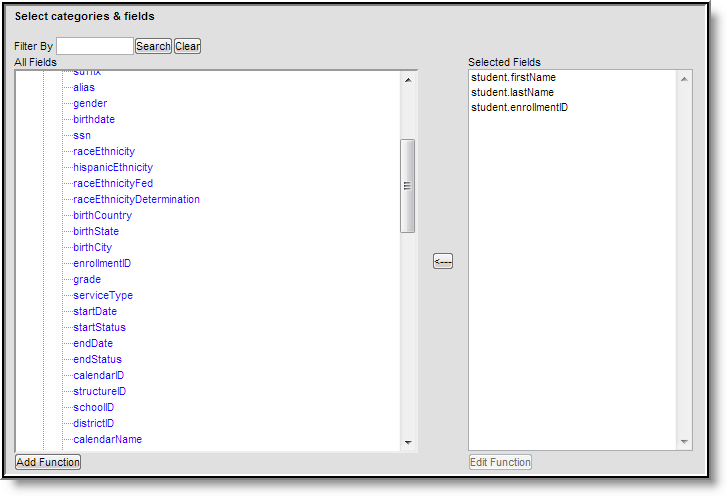
Below is an example of a filter to view student person IDs (listed with the student's first and last name).
To Find Enrollment IDs
To view enrollmentIDs per person, users can create an Ad hoc filter which includes the student.enrollmentID (to find students) or individual.enrollmentID (for all non-students) fields. Users can also generate the Verification Summary for the Enrollment object to identify records that may need to be (re)synced.
Below is an example of a filter created to view student enrollmentIDs (listed with the student's first and last name).