Tool Search: Locker
Administrative tools available for the maintenance of student lockers include the ability to end student lockers, schedule student lockers and rotate locker combinations. Reports are also available that will print student locker assignments, a list of lockers not in use and students who do not have lockers assigned.
See the Tool Rights article for descriptions of tool rights for this area.
Prepare to Enter Locker Data
Topic | Tool |
|---|---|
Create Locker Types | |
Create and define Locker Locations | |
Create and define Lockers using a padlock or no lock | |
Create and define Lockers with a Built-in Lock | |
Create and define Locks |
Locker Maintenance and Student Locker Management
Topic | Tool |
|---|---|
Apply new locker combinations | |
Assign a locker to a student | |
Assigning or ending lockers to multiple students | |
End a locker assigned to a student | |
Assign lockers to students in a course section |
Generate Locker Related Reports
Topic | Tool |
|---|---|
Generate a report showing assigned locker combinations and locker sequence | |
Generate a report listing students without assigned lockers | |
Generate a report of vacant lockers |
Locker Types and Lock Types
Lockers Types need to be created before lockers, locks, locker assignments and any other locker management task can be completed. Lock Types already exist but can be added to if additional types of locks are needed.
Locker types allow users to group and identify lockers based on the locker use within the school.The creation of locker types is a two-part process:
- Part 1 - The attribute detail record needs to be reviewed for proper district use.
- Part 2 - The dictionary items, or types of lockers) need to be created.
Modifying the Campus Attribute Detail is an option for districts. The locker process will work without modification to this area.
Locker types are used when finding lockers or when creating new lockers, and when generating locker reports.
Modify the Campus Attribute Detail for Lockers
Tool Search: Attribute/Dictionary
- Locate to the Locker option in the Campus Attributes/Dictionary Editor.
- Select the Locker Type item within the Campus Attribute Editor list. Required fields will be populated for use already - Display Name, Object, Element and Data Type. Do not modify this information.
- Enter a Default Value for the Locker Type, if any. A value entered in this field is used in ad hoc reports and the database as an assumed value when the attribute is null (has not otherwise been edited).
- Enter the Max(imum) Size of the attribute. This is the maximum number of characters allowed for this field.
- Enter a Seq(uence) for the attribute. A value entered in this field orders the attribute as it relates to other fields used.
- Determine if this item should be hidden, and mark the Hide checkbox accordingly. A checkbox in this field indicates it will not be displayed in the user interface on the tab.
- Determine if this item is required entry for the user, and mark the Required checkbox accordingly. A checkbox in this field indicates a user must enter a value on the tab or the information cannot be saved.
- Enter any Comments for this attribute as needed.
- Click the Save icon when finished. The dictionary items can now be entered.
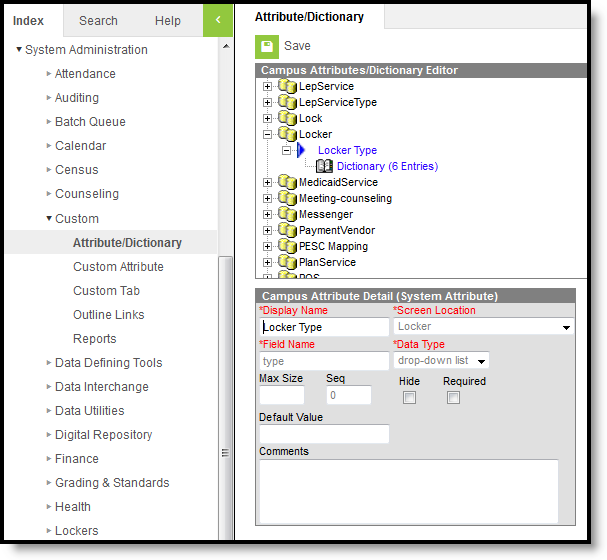 Locker Type Attribute
Add Locker Types
- Expand the Locker Type attribute item by clicking on the plus sign next to Locker Type.
- Select the Dictionary link. A Dictionary Detail table will appear.
- Select the Add Campus Dictionary button. An additional row appears allowing for new locker type information to be entered.
- Enter the locker Code. This code appears as a prefix describing the locker type for locker search results when using the Find locker search tool.
- Enter the Name of the locker type. This name will describe the locker type and appear as the main identifier in all Locker Type dropdown lists.
- Enter the Sequence. This is the order in which locker types appear within Locker Type dropdown lists.
- DO NOT enter values in the Value or Standard Code fields. These items are not used for locker types and should be left blank.
- Mark the Active checkbox. This will make the locker type active within the system and appear in Locker Type dropdown lists.
- Add additional items by selecting the Add Campus Dictionary button as often as needed.
- Click the Save icon when finished. Locker type values will be saved.
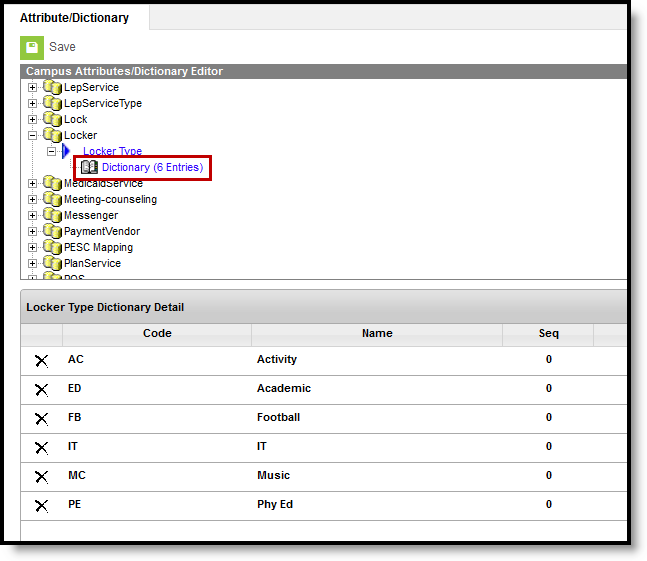 Adding Custom Locker Types
The Student Summary tool displays Academic Locker information based on the code of ED assigned to the locker type. If this code is modified, locker information does not display on the Summary Tab.
Add Lock Types
Two lock types are already available in the Attribute Dictionary.
- BL - Built into Locker
- PD - Pad Lock
These lock types are assigned to locks and are used to track combinations for lockers. No additional lock types should be needed. If there is a situation where these two types do not meet the needs of the district, follow the procedures above for adding additional dictionary items.
