Case Management Process
The case process begins when the Authorized Contact submits a problem or request that cannot be resolved using the self-service options available on Campus Community (24/7 online portal).
1. Submit a Case
Authorized Contacts initiate support by submitting a case via the Support Case Portal.
- Select the correct case type and indicate the module; this helps route your case to the appropriate team.
- Provide a detailed description of the issue - “A problem well stated is a problem half solved.”
- Include replication steps
- Indicate urgency, impact, and due dates for time-sensitive issues.
All case activity is documented in the Support Case Portal. Authorized Contacts can communicate directly with the assigned Case Owner, and add comments or attachments to the case
Note: For critical issues, the Authorized Contact should follow up with a phone call after submitting the case.
2. Case Review & Troubleshooting
Each case undergoes an initial review to assess impact and determine next steps. An impact assessment can include, but is not limited to, consideration of the following:
- Workflow disruption.
- Inability to perform daily functions.
- Availability of a workaround.
- Number of schools/districts affected.
- Number of users impacted.
3. Case Escalation Guidelines
Our escalation process is designed to be transparent and customer-focused, ensuring that Authorized Contacts are kept informed throughout the resolution journey. Our goal is to resolve cases without escalation. Approximately 70% of cases are successfully handled at the initial support level. If needed, a structured escalation path is followed, and a note is added to the case to notify the Authorized Contact.
- Product Defects:
- Issues are replicated and tested across environments.
- Confirmed defects are linked to development for tracking, and the case status is updated to "Assigned to Development".
- Once resolved, the case status is updated to “Available in Release.” These corrections are also documented in our Release Notes and published on Campus Community for each release, ensuring clear and consistent communication.
Note: If a broader issue is impacting multiple districts, a status banner will appear in the Support Case Portal with updates and instructions.
4. Resolution & Pending Customer Verification
Once a solution is provided:
- A written resolution is documented in the case.
- The case status is updated to Pending Customer Verification.
- To confirm resolution, we follow a 3x10 follow-up process:
- Three follow-up attempts within ten business days.
- If no response is received by day 10, the case will be closed.
5. Closing Cases
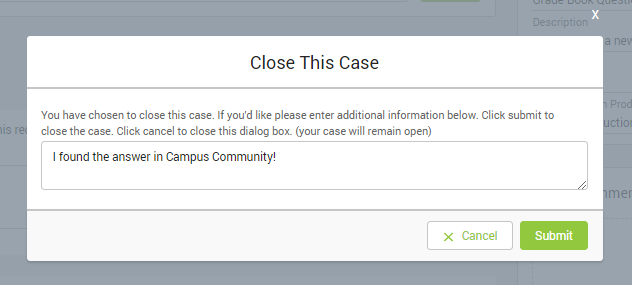
If a case is complete or no longer needs a response from Campus, the Authorized Contact should click the Close This Case button, which is available when viewing the details of a specific case.

When you close a case, a dialog box will appear prompting you to enter the reason for closure. After you click Submit, the case status will change to Closed, and the information you entered will populate the Resolution field on the Case Details page.
If additional assistance is needed, the case may be reopened within 60 days of closure. Our goal is to ensure the issue is fully resolved to the customer’s satisfaction, not simply to close the case.
 Closing a Case
6. Re-Opening Closed Cases
If a closed case requires further assistance from Campus, re-open the case using the Re-Open Case button on the case details screen.
 Re-Open Case
Re-opening the case will set the case status to Re-Opened and will notify Campus.
 Viewing a Re-opened Case
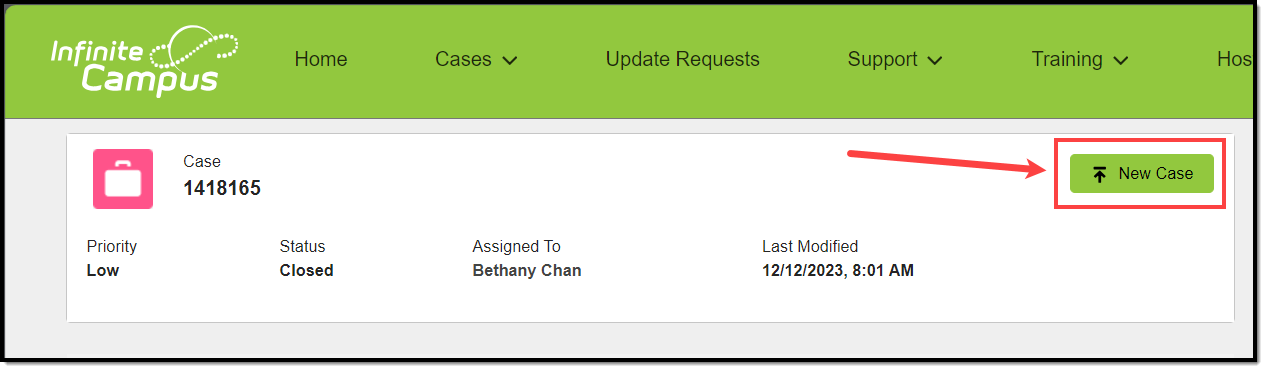
Important: Cases closed for 60 days or more cannot be reopened because our product evolves monthly. New features, requirements, or processes may apply, and reopening an old case could result in outdated or incomplete solutions.
To address a related issue, please create a new case:
- Click the New Case button at the top of the screen.
- You’ll be redirected to the home page, where you can start a new case.
- If applicable, reference the original case number in your new case for context.

Note: For case visibility - All Authorized Contacts within a district can view and comment on all cases for their district.
Case Search
The Support Portal provides Authorized Contacts access to view and post comments on all cases for their district. A list of all cases is presented by default when selecting Cases > View Cases from the dropdown list. Cases are sorted by last modified date and columns can be toggled to quickly sort by status, modified date, module, etc.

Refining Case Results
- Click the funnel icon to open filter options.
- Apply multiple filters to narrow results - only cases matching all selected criteria will appear.
Example: Filtering by Subject = “Grade Book issues” and Created By = Selected Contact will return only cases that meet both conditions. Using just Subject = “Grade Book issues” will show all cases with that subject, regardless of who created them.
Using Dropdowns for Precision
- When available, use dropdown menus to refine your search further.
- For fields like Subject, you can choose operators such as:
- Equals
- Not Equals
- Starts With
- Ends With
- Contains
- Does Not Contain

The following fields are available.
| Option | Description |
|---|---|
| Case Number | Enter the number assigned to the case when it was created. |
| Subject | Enter the title of the case or a keyword that can be used to locate the case. Entering a phrase like "grade book issues" might not return results, but "grade book" will. |
| Status | Indicates the current status of the case. See the Case Status Workflow for details on how statuses progress. Status Options:
|
| Priority | Indicates the level of urgency associated with the case. Options are:
|
| Module | Relates to the area within the Campus product where the issue is occurring. |
| Case Type | Indicates the type of case that was entered. Options are:
|
| Contact | The Authorized Contact assigned to the case. |
| Recent Activity | Date the case was last updated or last communicated on. |
| Account | Name of the district associated with the case. |
Search Results
The number of Results returned is displayed at the top of the Cases window. The number of cases returned per page is automatically set to 20. This number can be changed by updating the Page Size value that displays at the bottom of the cases list. When this value is changed, the number of pages also changes. Advance to a new page in the search results by choosing a new page number under the Page dropdown.

Viewing and Communicating on Cases
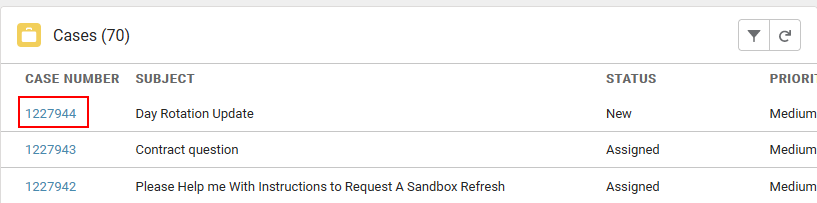
Clicking on a Case Number will open it to view, add attachments, share an update, or close the case.
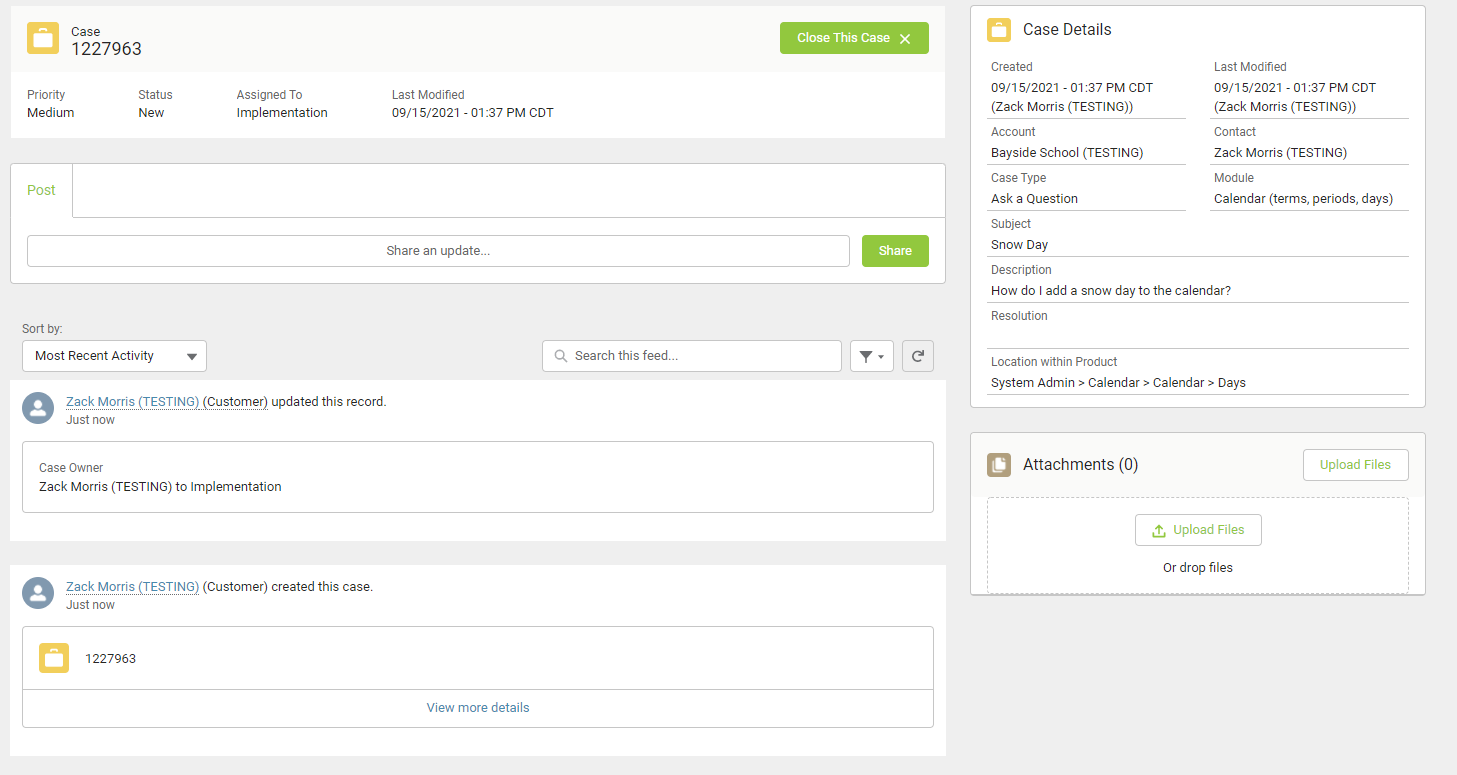
The top panel of a case displays important information, including its Case Number, Priority, Status in its life cycle, who the case is assigned to, and recent activity. Cases may be closed (or reopened) using the button at the top. 
Case Details on the right side of the screen includes the information provided at the time of case creation, and/or case qualification information added by Support.
All attachments (added by the district or Infinite Campus) display in the Attachments area for easy access. Click on the text Attachments to expand the box and view additional details.

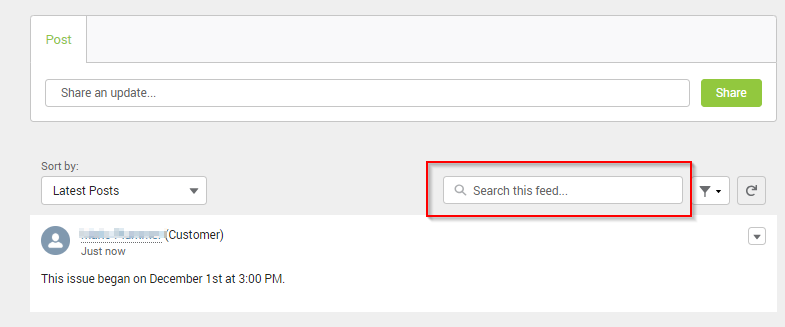
Written case communications between Authorized Contacts and Infinite Campus are called Posts. Posts display in the case's Feed with the most recent at the top. Posts may be searched using the "Search this feed" box.
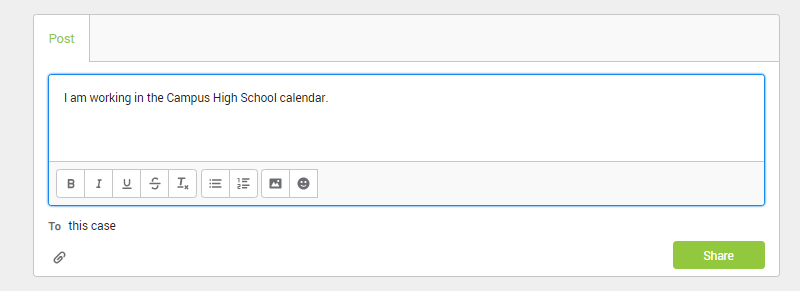
To add a Post to a case, click into the Post box that says "Share an update". An editor box will appear. Type your message into the editor and hit Share to submit. Note that you may format your text, add bullets or numbers to your steps, or add saved images directly into your Post. The paperclip icon may also be used to attach files to your post. Up to 10 attachments can be added at the same time. Max file size is 15MB.
Manage Notification Recipients
The Manage Notification Recipients tool allows districts to manage who receives notifications on a case. All Authorized Contacts who have access to modify cases can see this tool and be added or removed as a recipient. Read-Only contacts can also see this tool, but they can only add or remove themselves as a recipient.
The Manage Notification Recipients tool for Authorized Contacts:
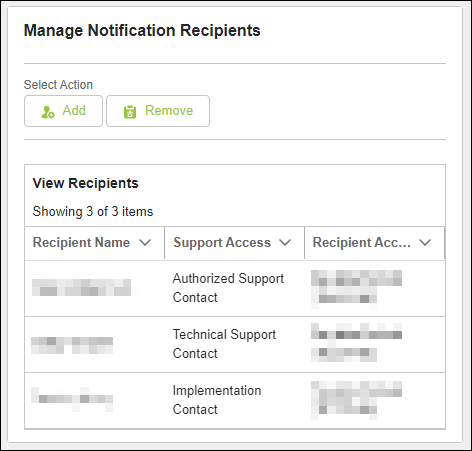 The Manage Notification Recipients tool for Support Contacts
To add a Contact as a notification recipient:
- Click Add.
- From the contacts list, select which contact(s) to add and click Next. Non-contacts and Read-Only contacts are not listed.
- Confirm the contact(s) to add and click Next.
- Once the contacts have been added successfully, click Finish.
To remove a Contact as a notification recipient:
- Click Remove.
- From the contacts list, select which contact(s) to remove and click Next. The case owner cannot be removed as a notification recipient and will not be listed as an option.
- Confirm the contact(s) to remove and click Next.
- Once the contacts have been successfully removed, click Finish.
The Manage Notification Recipients tool for Read-Only Contacts: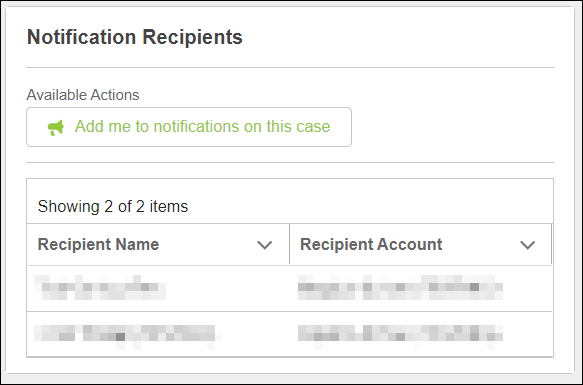 The Manage Notification Recipients tool for Read-Only Contacts.
To add or remove a Read-Only Contact as a notification recipient, click Add me to notifications on this case or Remove me from notifications on this case.
Case Status Workflow
The following workflow demonstrates how a case moves through our system based on the Status of the case.
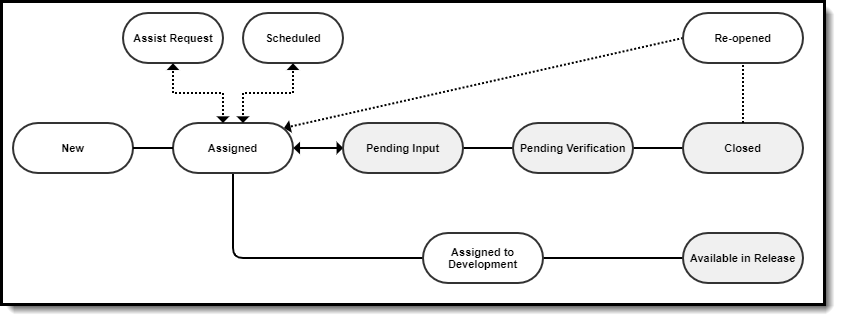
Cases created by an Authorized Contact start as New and enter a queue.
The case moves to Assigned once it's assigned to an Infinite Campus resource (case owner).
From there, the case may move into Assist Request temporarily if the case owner is involving other resources to assist with the case (a specialist, development resource, or another department, etc.) or into Scheduled if some action required to meet the request has been scheduled to take place on a future date (e.g., planned training).
When the case needs a response from the Authorized Contact, it is moved into Pending Customer Input or Pending Customer Verification. It is moved into Pending Customer Input when a response or clarification is needed from the Authorized Contact. It is moved into Pending Customer Verification when things have reached the point of a possible conclusion, for the Authorized Contact to verify that nothing else is needed.
If the case has been escalated to Infinite Campus Development to modify functionality in the product (e.g., to resolve an issue), the case will move into Assigned to Development and be attached to a development issue for tracking. Once Campus Development's work is complete and released, the case will move into Available in Release.
Otherwise, the case will move into a Closed status once the case has been resolved. If the case is Pending Verification, three follow-up attempts are made within ten business days before a case is closed.
Cases can be reopened by Authorized Contacts for 60 days. Re-opened cases move into Re-Opened status.
