Point of Sale 1.0 has been deprecated as of 7/1/2023. Please see the Migration Checklist (POS 2.0).
Classic View: Point of Sale > Administration > Application Manager
Search Terms: Application Manager
The Class Serve option may be used when a meal, snack or milk is served in the classroom during the school day. The teacher of that course may then record the students who received the item and have the cost of the item deducted from the student’s POS Account balance. The following information describes the setup required in order to implement a class serve option.
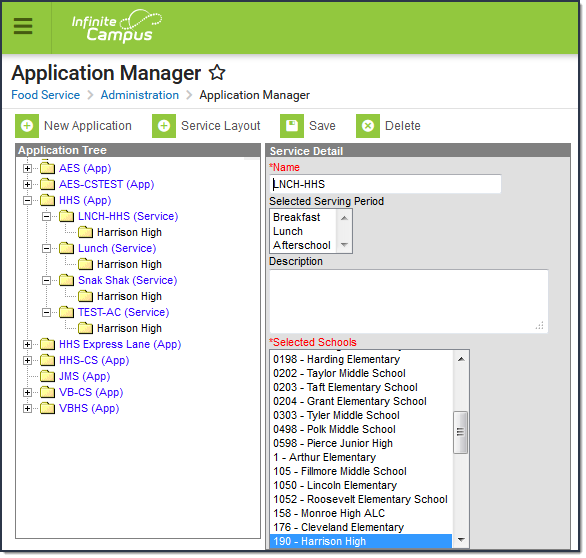 Application Manager
Create a New Application
Applications provide a central location for grouping services based on location or types of service.
If the district is also using POS Terminals, they may choose to add a Class Serve service to an existing Application.
Before applications and services can be created, Item Categories and Purchasable Items must first be defined.
 New Application
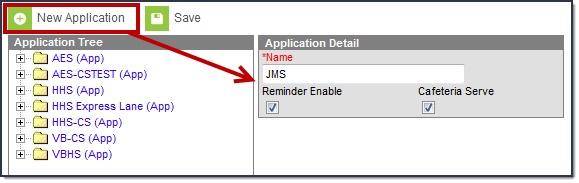
- Select the New Application button. The Application Detail editor will appear to the right of the Application Tree.
- Enter a Name for the application.
- DO NOT mark the Reminder Enable or Cafeteria Serve checkboxes. These fields are not used as part of Class Serve.
- Select the Save icon. The application will appear in the Application Tree in alphabetical order.
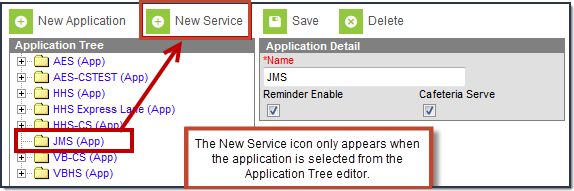
Once the application is created, services need to be created for the application.
Create New Services
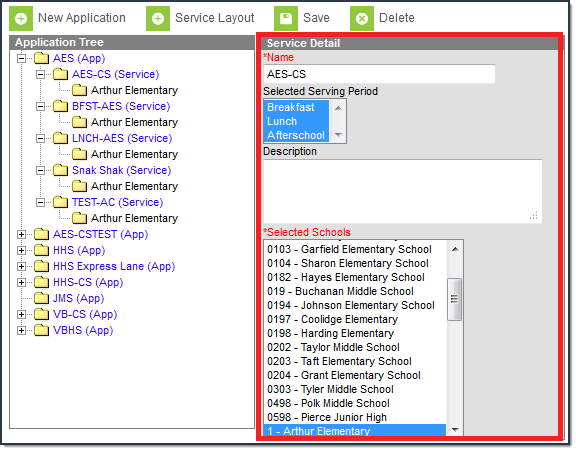
Services define what item(s) are being served during what serving period(s) and within what school(s).
Before services can be created, Item Categories and Purchasable Items must first be defined.
 Adding Services to an Application
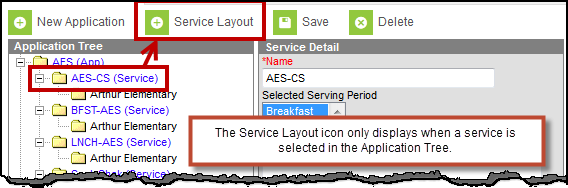
- Select the application for which to assign service from the Application Tree.
- Click the New Service icon. The Service Detail editor will appear to the right of the Application Tree.
- Enter the Name of the service.
- Select the Serving Period(s).
- Enter a Description about the service.
- Select which Schools are allowed to use this service.
- Click the Save button. The service and assigned schools will appear below the corresponding application in the Application Tree.
- Repeat this process for as many services or menu tabs needed for the application.

Create Service Layouts for Class Serve
Once services are created for an application, the Service Layout should be defined and saved. The service layout for Class Serve determines which items are available for teachers to check off during a Class Serve period. The menu screen will NOT be seen by teachers at that time, they will only see a list of items.
Service Layout uses a Java applet to open. Users must install the Java application in order to use this feature.
 Service Layout Button
- Select the service from the Application Tree and click the Service Layout button. If this is the first time running the Service Layout tool, a separate window will appear asking the user to download a java-specific file.
- Ensure a current version of Java is installed on the computer and open the java file provided by the Application Manager tool.
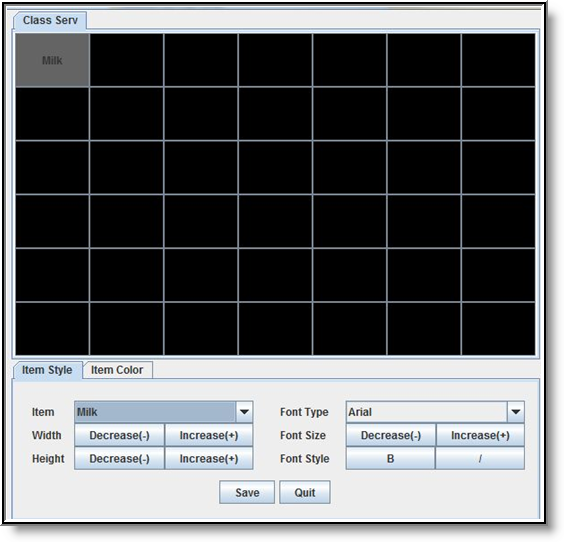

To set up the Service Layout, select each open square and complete the following steps.
- Assign an Item to the square.
- Increase(+) or Decrease(-) the width of the item square selected.
- Increase(+) or Decrease(-) the height of the item square selected.
- Determine the Font Type of the item text.
- Increase(+) or Decrease(-) the font size.
- Select the Font Style.
- Repeat Steps 1 - 6 until all appropriate items have been added to the Service Layout screen.
- Select Save.
