Tool Search: Health Screening Batch Entry Wizard
The Health Screening Batch Entry Wizard allows health staff to enter screenings that occurred on the same date with the same results to be mass entered for a selected group of students, either by a grade level or a class. This will allow quick entry of basic screening data for many students at one time. Individual student screening records can be edited in the Health Screenings tab if necessary.
 Health Screening Batch Entry Tool
See the Health Screening Batch Entry Wizard Tool Rights article for information about rights needed to use this tool.
Things to Know
- A calendar must be selected in the Campus toolbar in order to batch enter screenings.
- Only Hearing, Vision, Scoliosis, and Dental screenings can be entered using this tool.
- If a student has an existing screening with the same screening date, screening type, and test type, the Status chosen in the Batch Entry tool overwrites the current status associated with the existing screening record.
- If the screening date, screening type, and test type do not match an existing screening, a new record is added to the student's Screening tab.
- Detailed information about the screening will NOT populate the screening record. For example, when batch-entering a Vision screening, only the date of the screening, the test type (exam or screening), and the status of the screening populate. Specific fields on the vision screening record are not populated (like acuity fields or the color blindness test). These fields must be entered and saved separately for each student.
Health Screening Batch Entry Editor
| Field | Description |
|---|---|
Screening Date Required | Indicates the date the screening occurred. This field defaults to the current date but can be modified as needed by entering a new date using the calendar icon. Only students who are actively enrolled (Select a Grade) or who are currently enrolled in a course section (Select a Teacher) are listed. Students who have an ended enrollment are not listed. |
Screening Type Required | Indicates the type of screening. Only Hearing, Vision, Scoliosis and Dental screenings can be selected. |
Test Type Required | Based on the selected screening type, this option indicates which test was used in the screening. For example, when the Screening Type is Vision, the Test Type can either be a Vision Exam or a Vision Screening. |
Test Status Required | Indicates the students' results of the screening. All selected students are assigned this status. |
Examiner | The personnel who performed the health screening. This field displays when the Screening Type is selected. |
| Select a Grade | A set of students can be selected by choosing a grade level. Only those grade levels in the selected calendar display. |
| Select a Teacher | A set of students can be selected by choosing a teacher's name, and then narrowing to a specific course name/section number option. This lists teachers who have an active district assignment record and are marked as Teacher on that district assignment record at any time during the selected calendar's start and end dates. The course/section dropdown lists the courses in which the selected teacher is the Primary Teacher as noted on the Section Staff History record at any time within the calendar's start and end dates. |
| Select Students | Once a grade level or teacher and course/section combination is chosen, a list of students displays. Select the All Students option, or navigate through the list and select the specific students using CTRL-click or SHIFT-click. |
Use the Screening Batch Entry Tool
- Verify a year, school and calendar is selected in the Campus toolbar.
- Enter the desired Screening Date.
- Select the Screening Type from the dropdown.
- Select the Test Type from the dropdown.
- Select the Test Status from the dropdown.
- Enter an Examiner, if desired.
- Filter the available list of students by choosing a Grade level from the Select a Grade dropdown or Select a Teacher from the dropdown.
- If a Teacher is selected, choose the desired Course/Section combination taught by the selected teacher.
- Select the appropriate students from the populated list.
- Click the Submit button.
The tool will process the entered data and add the chosen screening to the selected students as of the entered screening date. When complete, a confirmation message displays indicating the new record was created for the student. Navigate to the student's Screenings tool to verify the addition.
Screenings entered using the Batch Entry tool display on the Screenings tab with a Batch Entry comment.
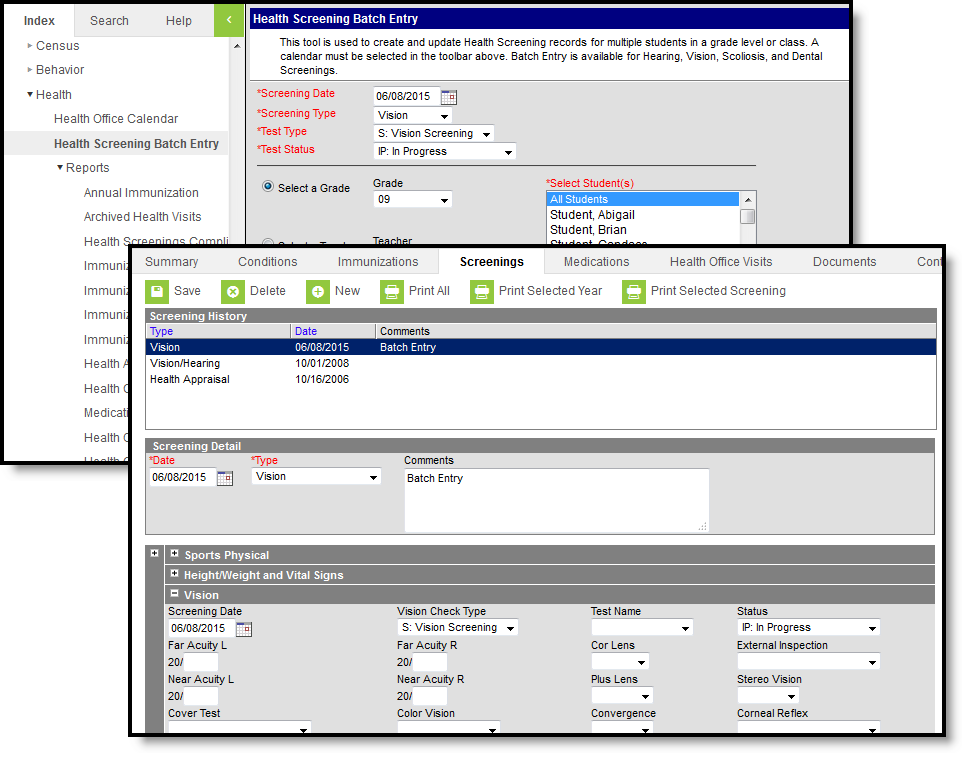 Student Screenings Tool with Batch Entry Screening Record
