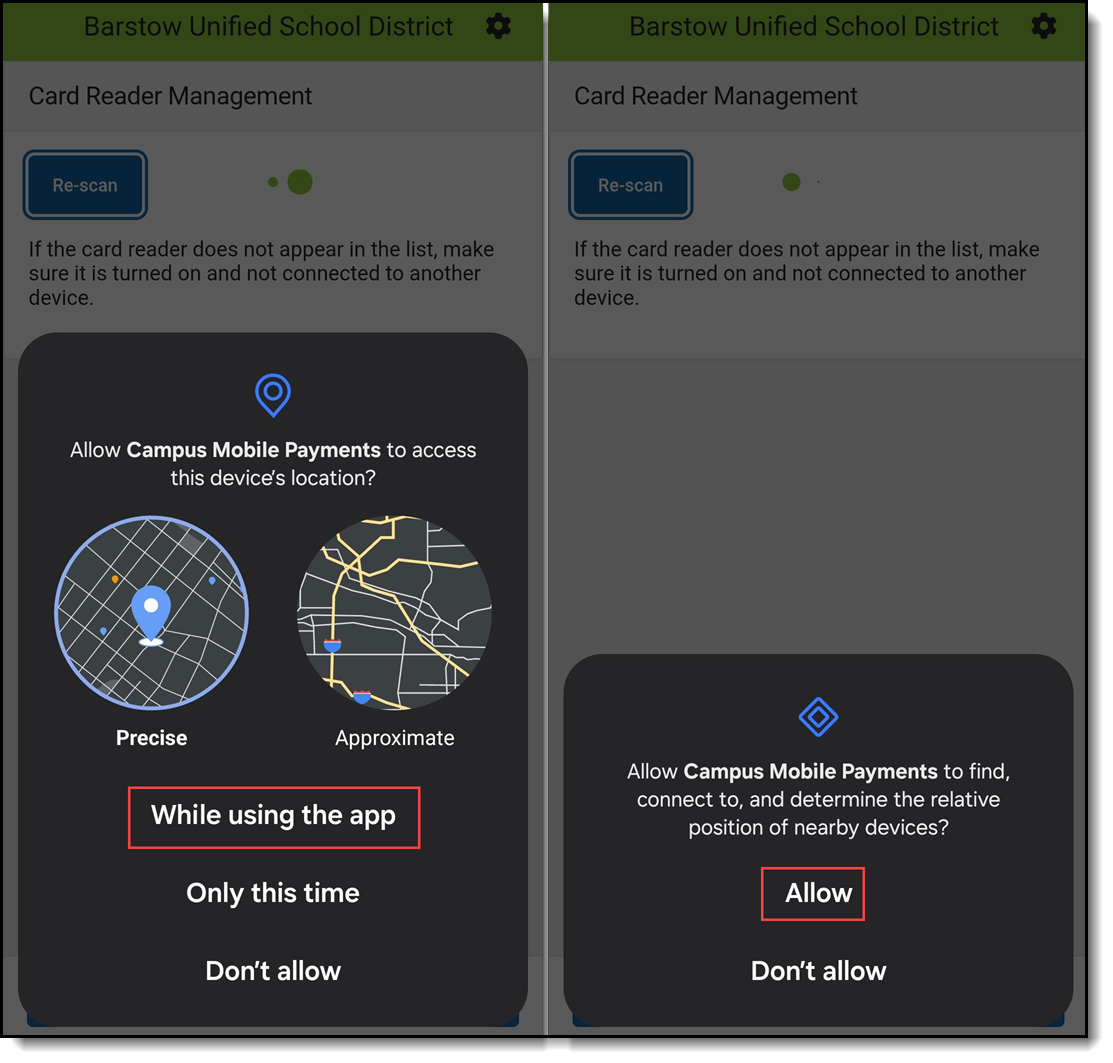
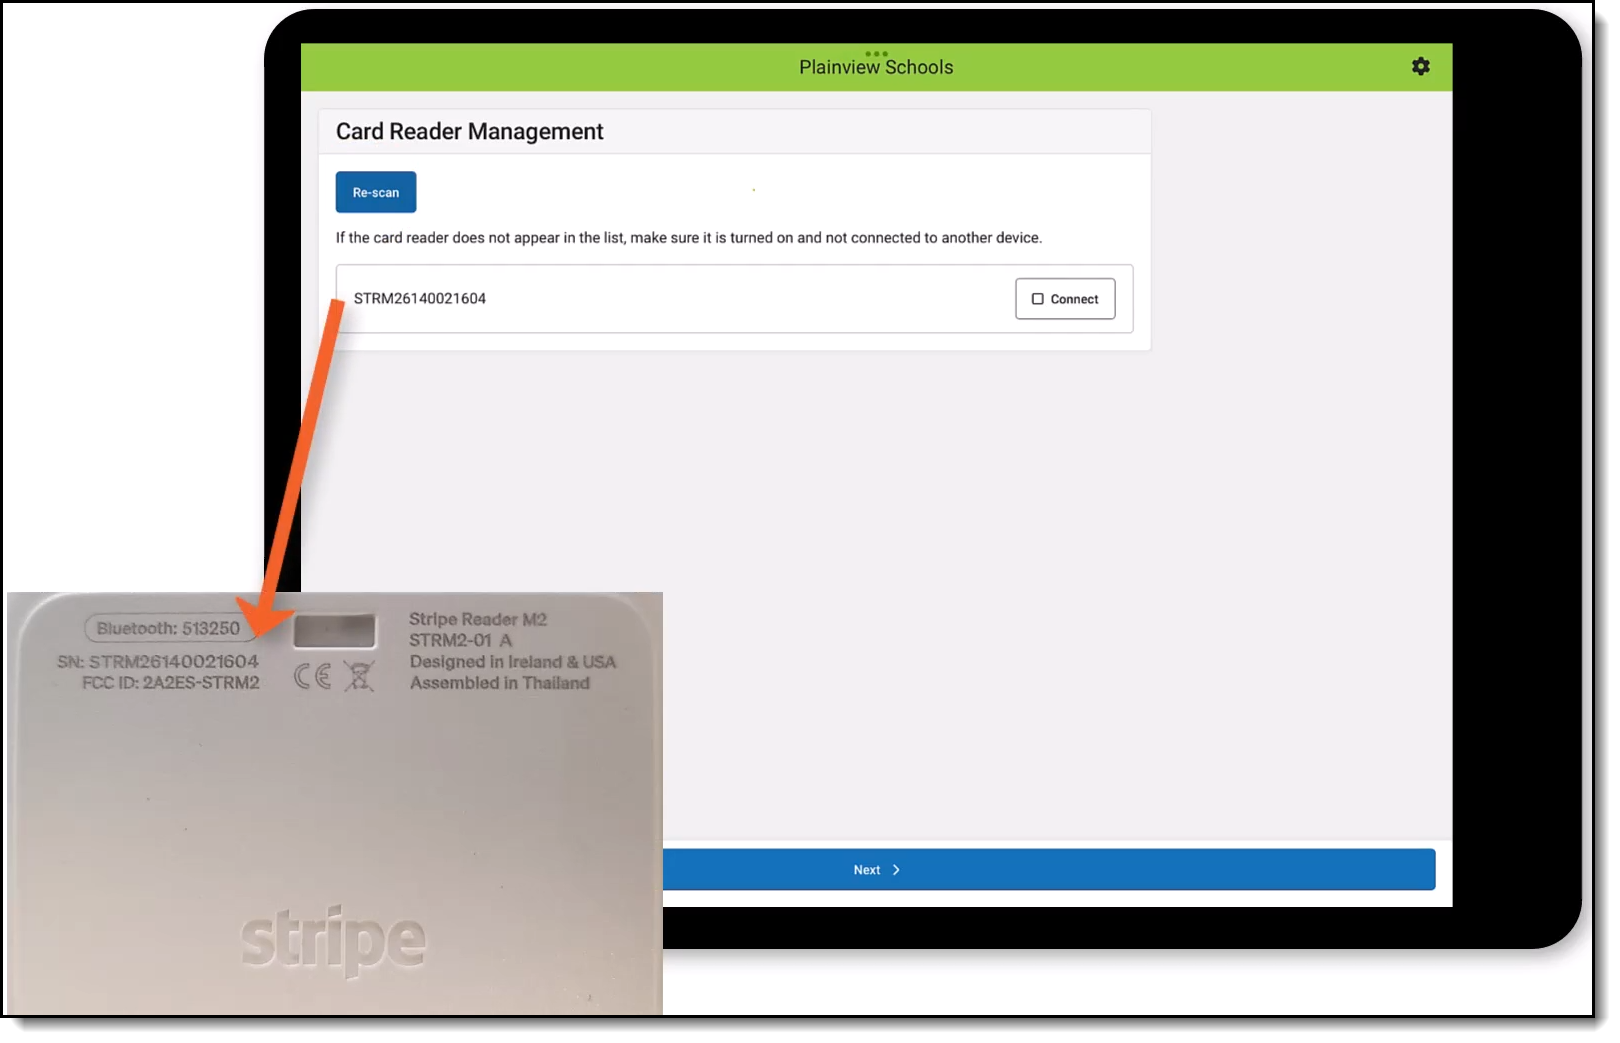
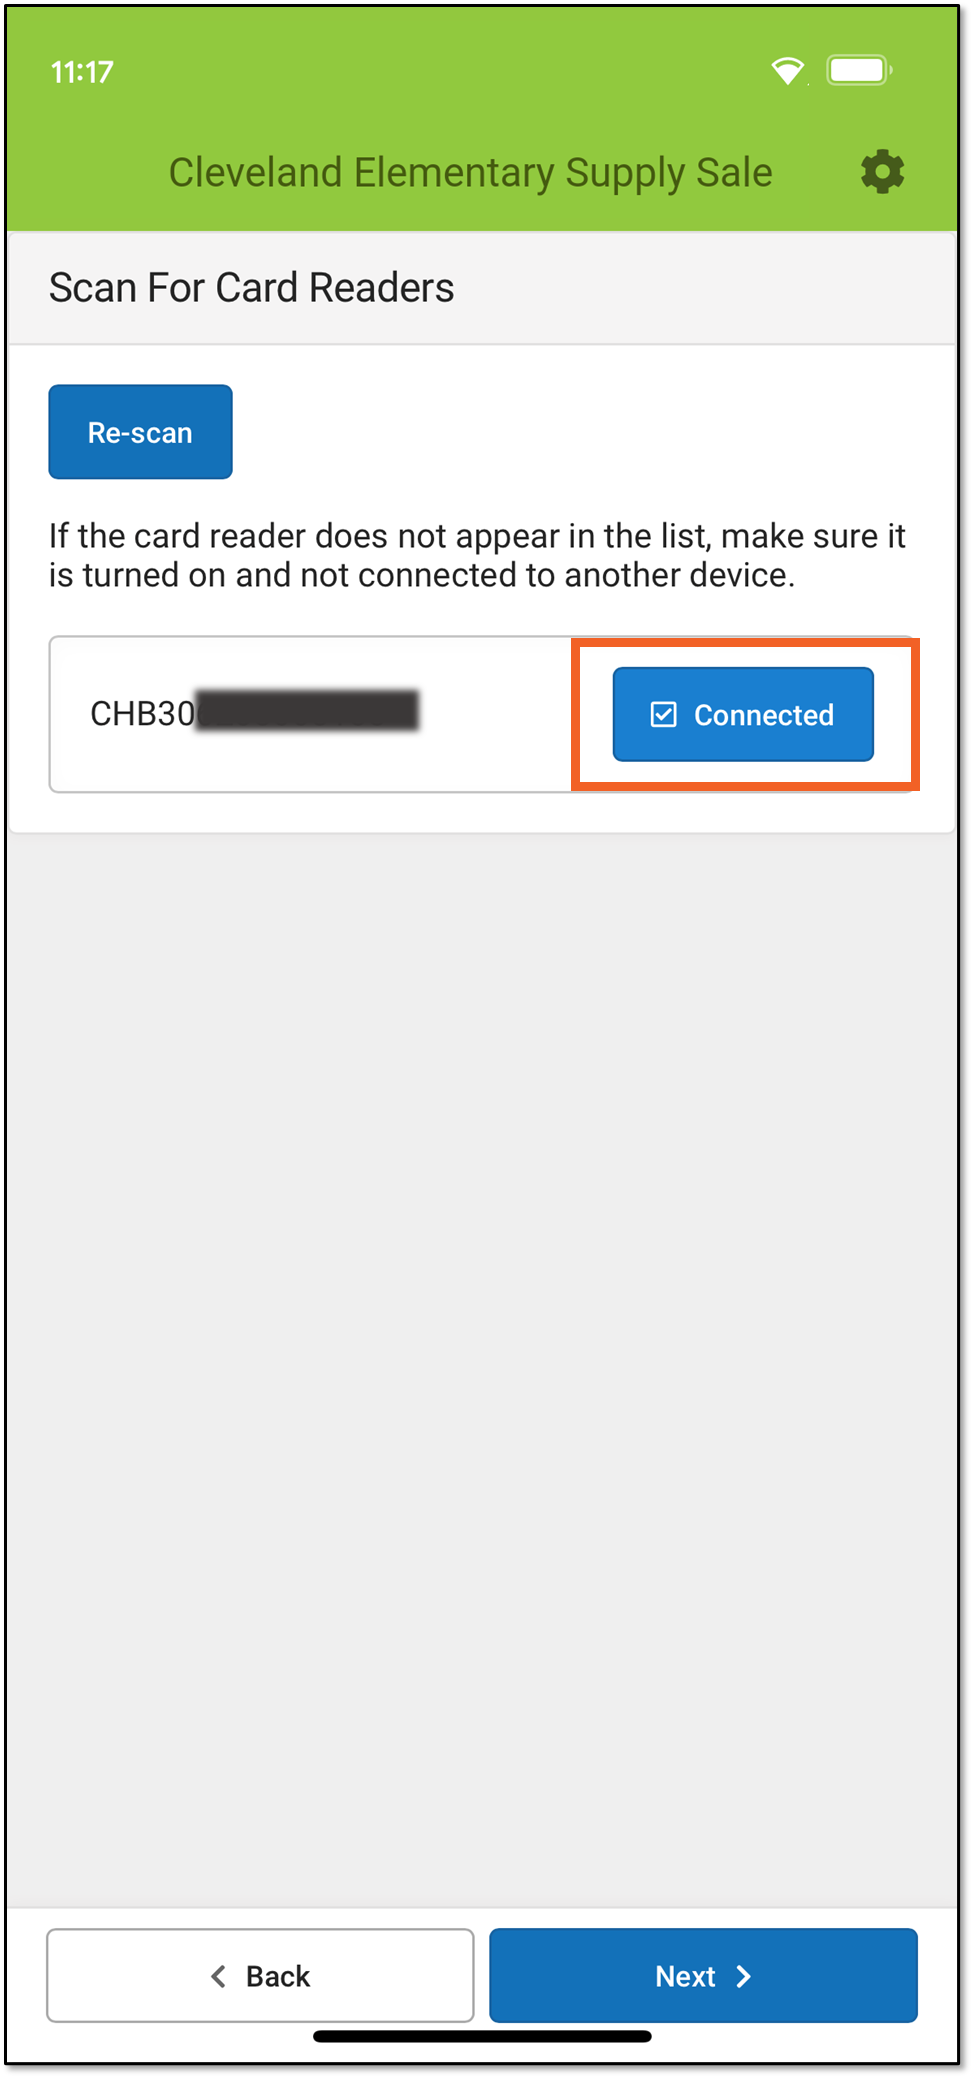
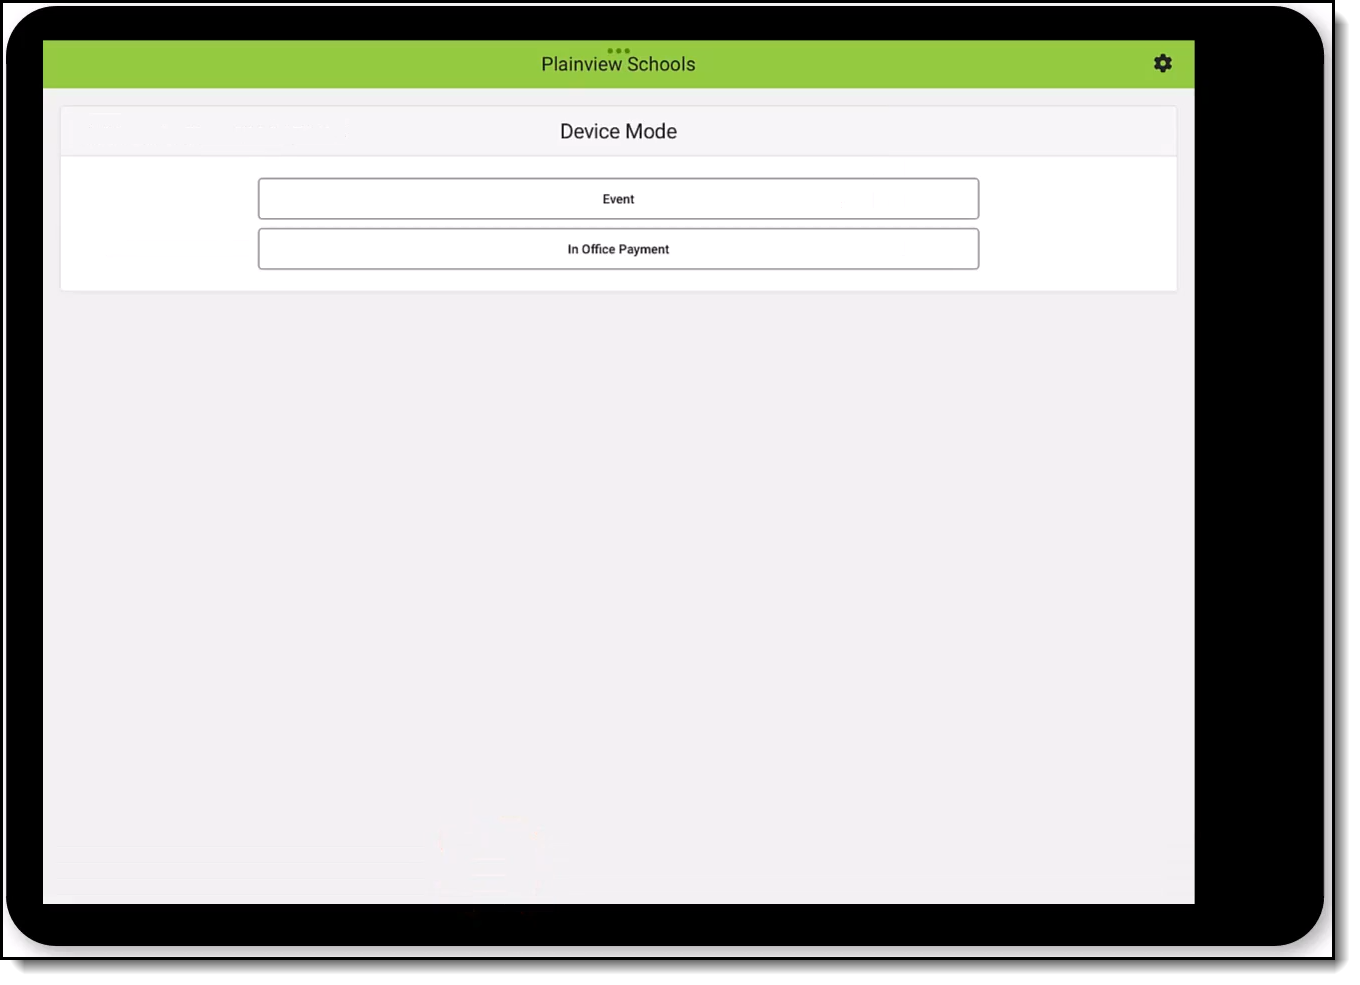
In this study guide about Integrated Card Swipe functionality, you will learn to enter payments and deposits using a card reader, run the Fee Audit and Food Service Deposit reports, and use the Payments Reporter to view transactions that were processed using Campus Payments.
Enter Fee Payments (Detailed)
Credit/debit card payments can be recorded for a student, person or an entire household. The documentation explains how fees work, the setup of fees, and creating, paying, adjusting, and voiding fees.
Student Fees
A credit/debit card payment can be applied to one or multiple fees on the student's Fees tool. This topic shows how to make a payment using a card reader and by entering the payment manually.
Tool Search: Fees
The Student Fees page lists all transactions assigned to a person, including all payments, adjustments, current balance due and existing surplus. If a person has reached the maximum fee amount established by the school and/or district, it will be indicated.
- Assign fees
- Adjust fees
- Record fee payments
- Void an assignment, adjustment, or payment
- Manage fee documents
- Print fee statements
Student Surplus
- Make a deposit to student surplus
- Auto-pay fees with surplus balance
- Refund student surplus
Complete these steps if you do not have a Desktop Card Reader.
- Click the Make Payment button.
Result
The Card Present Processing window displays. - Select Manual Entry in the Processing Mode dropdown list.
- Fill out the following fields.
- Card Number
- Card Expiration
- Name on Card
- Address
- Zip Code
- Click the Submit Payment button.
Result
If the transaction is successful, the receipt displays and you can print the receipt from your browser. A receipt is emailed if an email address was entered in the Email field. This email is not included in the Sent Message Log. - Click the Close button.
Result
The payment displays below the fee(s) with the type and date of the payment, the amount paid in the Credit column and Balances and Totals updated accordingly.
Applies to Payments and Adjustments, indicating the amount that was deducted, through either payment or removal because of an adjustment.
Complete these steps if you do not have a Desktop Card Reader.
- Click the Make Payment button.
Result
The Card Present Processing window displays. - Select Manual Entry in the Processing Mode dropdown list.
- Fill out the following fields.
- Card Number
- Card Expiration
- Name on Card
- Address
- Zip Code
- Click the Submit Payment button.
Result
If the transaction is successful, the receipt displays and you can print the receipt from your browser. A receipt is emailed if an email address was entered in the Email field. This email is not included in the Sent Message Log. - Click the Close button.
Result
The payment displays below the fee(s) with the type and date of the payment, the amount paid in the Credit column and Balances and Totals updated accordingly.
A check mark in the Do Not Accept Check box indicates a NSF(No Sufficient Funds) Block has been set for the patron, indicating that the district has had to collect money from this patron. This is a visual flag to warn staff members not to accept checks from this person.
A checkmark for patrons in this area does not prevent check deposits. An alert will appear to the staff member attempting to deposit a check for a "blocked" patron, but that staff member may bypass the warning and continue depositing the check.
Complete these steps if you do not have a Desktop Card Reader.
- Click the Process button.
Result
The Card Present Processing window displays. - Select Manual Entry in the Processing Mode dropdown list.
- Fill out the following fields.
- Card Number
- Card Expiration
- Name on Card
- Address
- Zip Code
- Click the Submit Payment button.
Result
If the transaction is successful, the receipt displays and you can print the receipt from your browser. - Click the Close button.
Result
The new deposit is listed in the Deposit History editor.
The net total of deposits. If a deposit has been voided, this total will reflect that adjustment.
This is the amount of the total deposit listed in the Payment Amount field that will be applied to this account.
If the Fill button has been used, this field will be auto-populated with a specific amount:
- If the Deposit % column contains a value, the Amount field will reflect that value as a percent of the Payment Amount field (e.g., if the Deposit % field has a value of "40" and the Payment Amount field has a value of "100," the Amount field will contain a value of "40").
I f the Deposit % column does not contain a value, the Amount field will reflect a value that is an equal division of the Payment Amount field dispersed among all accounts of the household (e.g., if there are 2 accounts attached to the household, and the Payment Amount value is "100," each Amount field will contain a value of "50").
If the Fill button has not been used, or if the auto-populated amounts should be adjusted, the Amount field may be manually edited.
- Click the Process button.
Result
The Card Present Processing window displays. - Select Manual Entry in the Processing Mode dropdown list.
- Fill out the following fields.
- Card Number
- Card Expiration
- Name on Card
- Address
- Zip Code
- Click the Submit Payment button.
Result
If the transaction is successful, the receipt displays and you can print the receipt from your browser. - Click the Close button.
Result
The new deposit is listed in the Deposit History editor.
Selecting this option will include all fee payments that have been voided for the indicated students and calendar(s) in the entered date range.
The report editor fields have a significant impact on report results. See the following topics for detailed information about each field.School and Period OptionsGrouping and Sorting OptionsDeposit Slip OptionsReport Format Options
The report editor fields have a significant impact on report results. See the following topics for detailed information about each field.
These options allow the user to choose the sorting method of deposit transactions in the report results:
- Transaction Date - When this option is selected, the deposit transactions will be sorted by the date on which they occurred.
Post Date- When this option is selected, the deposit transactions will be sorted by the date on which they posted to the Campus server.
The Transaction Date and Post Date are often the same; however, differences occur if the network is interrupted before all transactions can be posted. In this event, the transaction messages are stored in a queue until the network is reconnected and the messages can be processed.
Payment options allow you to specify the type of deposit transactions to be included in the report results.
Online - When this checkbox is marked, transactions made online, through the My Cart tool, are included in the report results. This only applies in districts where the Payments feature is enabled.
When you select this option, the Deposit Report includes Online Payments for ALL schools regardless of the School selected in the School field.
- In Office - When this checkbox is marked, transactions made at a location selected in the Select Deposit Locations area are included in the report results. The option to select Deposit Locations only displays when In Office is marked. Campus assigns the deposit location when you manually enter the deposit.
POS Deposit - When this checkbox is marked, cash or check deposits made at a Point of Sale terminal are included in the report results. The option to select terminals only displays when POS Deposit is marked.
Campus limits the POS terminals available for selection to the terminals that are available at the School selected on the report editor.
When multiple schools are assigned the same application, the same terminal will display under multiple schools. To see all deposits made on the terminal regardless of where the students are enrolled, select District (All Schools) in the School dropdown list and select the terminal under one of the schools with which it is associated.
- Guardian Name - When this options is selected, the deposit transactions are sorted by the guardian of the household for which they were made.
- Deposit Amount (Desc) - When this option is selected, the deposit transactions are sorted by the amount of the deposit, from the largest to the smallest amount.
The amount of money deposited into the patron's account. If the amount is crossed out, this indicates the deposit was voided and information about the date of the transaction void is listed below the Transaction Date, Post Date and Student (Student#) columns.
The amount of money deposited into the patron's family account. If the amount is in red font, this indicates the deposit transaction was voided.
Person Fees
This topic shows how to make payments for fees using a card reader and by entering the payment manually from the Fees tool in Census >Person.
Tool Search: Fees
The Fees tool lists all fees that have been assigned to a person, including all payments and adjustments and a total of how much is still owed or if a surplus exists. If the person has reached the maximum fee amount established by the school and/or district, that will be noted in the Fees Editor.
If a fee was paid using an online payment, the fee Assignment, Payment or Adjustment CAN be voided or exempted.
The other option is to use the Payments Reporter to refund the payment.
Assign and Edit Fees
For a fee to appear in the Fees Editor, it must first be assigned to the person, either individually or en masse using the Fee Wizard in the Fees section. Fees available for assignment depend on the options set by the school or district and are created in the Fees tool. Only fees that are marked as active can be assigned to students.
Once a fee is assigned to a person, it cannot be deleted, only voided.
Assign a Fee
- Click the New Fee Assignment button.
Result: The New Fee Assignment panel displays. Select a Fee from the dropdown list.
If the fee amount is predetermined, this value appears after the fee description. Otherwise the value will show as 0.00.
If the fee amount is variable, an asterisk (*) appears after the amount.- If applicable, enter the Amount of the fee.If the description of the fee ends in an asterisk (*), the fee amount can be edited.
- Enter a Due Date for the fee in mmddyyyy format. Clicking the date field opens a calendar of the current month which defaults to the current date.
- If the person is exempt from paying this fee, mark the Exempt checkbox.
- Select the Calendar to which the fee should be assigned.The enrollment record from the school/calendar selected in the toolbar is selected by default.
- Enter any comments related to the fee assignment in the Comments field.
- Click the Save button.
Result
The new fee displays in the Fee Editor with the Unpaid Fees total adjusted appropriately.
Edit a Fee Assignment
Once a fee is assigned, click the Assignment line to display the Assignment panel. The Assignment panel displays the Fee, the Amount and the Due Date, the Exempt checkbox, any Comments attached to the fee, the calendar in which the fee was created and the name of the user(s) who created and modified the fee. To edit a Fee Assignment,
Only the Due Date, Exempt, and Comments fields can be modified in this panel. To change the amount of a fee, make an adjustment.
Adjust Fees
Fee adjustments are used to modify the amount due for a fee. Fee adjustments may only be made for up to the amount of the fee assignment.
Make an Adjustment
- Select the Fee Assignment(s) for which the adjustment is being made.
Result: The Assignment panel displays. - Click Make Adjustment button.
Result: The Adjustments panel displays. Enter an Adjustment Date in mmddyyyy format.
Click the date field to open a calendar of the current month which defaults to the current date.
- If applicable, select the Adjustment Type such as Activity Cancelled, Cost Adjustment or Uncollectible.
Enter the amount to be removed from the fee(s) in the Adjustment Amount or % field.
The subtracted amount cannot exceed the amount of the fee assignment. Enter a dollar amount in the Adjustment Amount field OR a Percentage amount (do not enter the '%' sign, just numeric up to three decimal points, like 10 or 10.567).- Enter any Comments associated with the adjustment.
- Click Save when finished.
Result: Upon saving, the entered adjustment displays below the fee to which it was applied with the date of the adjustment, the amount deducted in the Credit column.
Edit an Adjustment
Once an adjustment is made, clicking on the adjustment displays the Adjustment panel which includes the adjusted Fee, the Adjustment Date, the Adjustment Type, any Comments attached to the adjustment, the calendar in which the adjustment was made and the name of the user(s) who created and modified the adjustment.
Only the adjustment Type and Comments can be added or modified in this panel. Click Save when finished.
Making Adjustments After an Online Payment is Made
Users have the option to void a payment made online using the Fees tool, or refund the payment amount using the Payments Reporter tool.
These options are also available when adjustments are made after a fee assignment was paid online. Below is an example.
- A parent paid for a fee online for $100.
- An adjustment for $30 was made after the payment was made.
- This message appears when the amount of the adjustment is refunded to the parent.
- Clicking Continue does the following:
- The payment amount of $100 is voided and a deposit is made into the surplus.
- A withdrawal of $70 is made to pay for the new fee amount.
- A surplus of $30 remains. The online payment can NOT be refunded in the Payments Reporter tool.
- Clicking Cancel does not make the adjustment. The adjustment has to be made as a partial-return in Payments Reporter.
Pay Fees
Fees can be paid one at a time or you can pay multiple fees with a single payment.
Example of Paying Multiple Fees with One Payment
Make a Payment
- Click the Make Payment button at the bottom of the screen.
Result: The Payment panel displays all fees from all years for which a payment is needed.
Click here to expand... - Enter a Payment Date in mmddyyyy format.
- Enter the amount of the payment using one of the following options.
Enter any Comments associated with the payment.
Select one of the following Payment Methods and complete the payment.
Payment Panel
Only Comments can be added or modified in this panel.
After a payment is made, you can click the payment to display the Payment panel. This panel includes the Payment Date, the total Amount, the Payment Method, and any Comments attached to the payment. The calendar in which the payment was made and the name of the user(s) who created the payment also display.
Below the Comments section, the panel displays all fees paid with that payment, the due dates of each fee, and the amount paid for each fee.
Void a Fee Assignment, Payment, or Adjustment
Transactions may NOT be deleted. Instead, they are voided which reverses the transaction. The procedures in this article describe voiding Fee Payments and Adjustments that were entered using the Fees tool in Campus.
Important Information About this Process
- Deposits cannot be voided, only refunded.
- Voiding a Fee Assignment also voids all Payments and Adjustments attached to the assignment.
- If a payment transaction originally included surplus funds which were then reallocated to another fee, the original payment cannot be voided. Later payments made with the surplus funds must first be voided before the original payment can be voided.
- When voiding a fee that was paid using an online payment, this message appears:
Clicking Continue voids the payment and deposits the amount of the online payment into the surplus, and the payment can NOT be refunded in the Payments Reporter tool.
Clicking Cancel does NOT void the online payment through the Fees tool. Instead, you can use the Payments Reporter to refund the payment.
Void an Assignment, Payment, Or Adjustment
- Select the Assignment, Adjustment or Payment and click the Void button.
Result: A Void Detail screen displays. - Enter a Void Date in mmddyyyy format. Clicking the date field will open a calendar of the current month below. This field defaults to the current date.
- Select a Void Reason from the dropdown list, such as Activity Cancelled, Office Mistake or Uncollectible.
- Enter any Comments associated with the void transaction.
- Click Void when finished.
Result: After a Payment or Adjustment is void, Campus adds a line to the editor to reverse the credit. When an Assignment is void, Campus adds a line to reverse the debit and labels the assignment as Void.
Make a Deposit (Surplus)
Deposits create a surplus that can be applied to future fee assignments.
- Click the Make Deposit button.
Result
The Payment panel displays. - Enter the amount of the deposit in the Payment Total field.
- Enter the Payment Date in mmddyyyy format.
- Select a Payment Method from the dropdown list.
- Cash
- Check - enter a Check #
- Record Credit/Debit Card - enter a Reference #
- Enter any Comments associated with the deposit.
- Click Make Deposit.
Result
The Surplus amount is updated and can be applied to an unpaid fee at any time.
Make Refund from Surplus Amount
Deposits create a surplus that can be applied to future fee assignments.
- Click the Make Deposit button.
Result
The Payment panel displays. - Enter the amount of the deposit in the Payment Total field.
- Enter the Payment Date in mmddyyyy format.
- Select a Payment Method from the dropdown list.
- Cash
- Check - enter a Check #
- Record Credit/Debit Card - enter a Reference #
- Enter any Comments associated with the deposit.
- Click Make Deposit.
Result
The Surplus amount is updated and can be applied to an unpaid fee at any time.
Fees assigned to an individual can be viewed and managed from the fees tool in Census > People.
Household Fees
A credit/debit card payment can be applied to one or multiple fees on the household's Fees tool. The desktop card reader allows you to swipe a credit/debit card or enter the card holder's information manually.
Tool Search: Fees
The Household Fees tool displays fees transactions for all members of a household, including fee assignments, payments and adjustments.
If the household has reached the maximum fee amount established by the school and/or district, that will be noted in the Fees Editor.
If a school or district has a household maximum set, individuals' fees should be managed here, on the Household Fees tool.
Deposits cannot be made in the Household Fees tool. Deposits can be made in Student Fees or Person Fees; however, surplus values do appear in the Household Fees Editor.
See the Fees page for additional information on tasks that can be performed on all Fees tools.
Household Fees Logic
Fees are not directly tied to a calendar: if fees remain unpaid from a previous year, they will appear in the Unpaid Fees amount. However, the calendar selected in the Campus Toolbar controls the calendar in which the fee is assigned.
Inactive students with previous enrollments can pay old, unpaid fees and students with future enrollments can pay unpaid fees on future calendars using Online Payments.
Fees are assigned to a person and are not dependent on an enrollment. Therefore, the fees listed for a person can include fees assigned by other schools.
Calendar rights are enforced when assigning fees to individuals. Users will only be able to select fees that are created for a school to which they have rights. Fees created for use by all schools in the district will also display.
Primary vs. Secondary Households
When managing fees for students who belong to multiple households, or for blended households which include students with primary and secondary memberships in the household, the following items should be considered:
- Only members indicated as primary can be assigned fees in the Household Fees editor.
- Only fees assigned to members indicated as primary will calculate towards the Household Fee Maximum.
- If a student has primary household memberships in two households, the Household Fee Max does NOT apply for any person in the household. However, the Student Fee Max (if set) does apply to all students in the household.
Fees Editor
The Fees Editor itemizes all fees assigned to each member of a household, including totals of how much was charged, how much was paid and the remaining debt or surplus. The following table describes all of the columns found in the Fee Editor.
The following table describes all of the columns found in the Household Fees Editor.
Assign a Fee to Family Members
You can use the Household Fees tool to assign Fees to an individual household member or to multiple household members at the same time.
Assign a Fee
- Click the New Fee Assignment button.
Result: The New Fee Assignment panel displays. - Select a Fee from the dropdown list.
Tip: This list is populated with values set in the Fees section.If the fee amount is predetermined, this value will appear after the fee description. Otherwise the Amount displays as 0.00. If the fee amount is variable, an asterisk (*) will appear after the amount. - If applicable, enter the Amount of the fee.
Tip: If the description of the fee ends in an asterisk (*), the fee amount can be edited. - Enter a Due Date for the fee in mmddyyyy format.
Tip: Click the date field to open a calendar where you can pick the date. - Mark the Exempt checkbox if the person is exempt from paying this fee.
- Select the checkbox next to the member(s) of the household to whom the fee should be Assigned.
- Select the Calendar of enrollment for each individual from the dropdown list.
Tip: The current calendar of enrollment is automatically selected. - Enter any Comments related to the fee assignment in the Comments field.
- Click the Save button when finished.
Result: The new fee displays in the Fee Editor with the total adjusted appropriately.
Edit a Fee Assignment
Once a fee has been assigned, clicking on the fee displays the Assignment panel. Only the Due Date, Exempt Status and Comments can be modified in this window.
Click Save when finished. To change the amount of a fee, Make an Adjustment.
Adjust Fees for Household Members
Fee adjustments are used to modify the amount due for a fee. Fee adjustments may only be made for up to the amount of the fee assignment.
Make an Adjustment
- Select the Fee Assignment to which you want to make an adjustment.
Result: The Assignment panel displays. - Click the Make Adjustment button.
Result: The Adjustments panel displays. - Enter an Adjustment Date in mmddyyyy format.
Clicking the date field opens a calendar from which you can pick a date.
- Select the Type of adjustment. (Optional)
- Enter any Comments associated with the adjustment.
- Enter the amount to be removed from the fee(s) in the Amount or % field.
The subtracted amount cannot exceed the amount of the fee assignment. Enter a dollar amount in the Amount field OR a Percentage amount (do not enter the '%' sign, just a number up to three decimal points like 10 or 10.567).
- Click Make Adjustment when finished.
Result: The entered adjustment displays below the fee to which it was applied with the date of the adjustment, the amount deducted in the Credit column and Balances and Totals updated accordingly.
Edit an Adjustment
After an adjustment is made, clicking on the adjustment displays the Adjustment panel which includes the adjusted Amount, the Adjustment Date, the Type of adjustment, as well as any Comments attached to the adjustment.
Only adjustment Type and Comments can be added or modified. Click Save when finished.
Record Household Fee Payments
Fees can be paid one at a time or you can pay multiple fees with a single payment. You cannot use the Household Fees tool to pay more than the required balance.
Make a Payment
- Click the Make Payment button at the bottom of the screen.
Result: The Payment panel displays all fees from all years for all household members for which a payment is needed. - Enter a Payment Date in mmddyyyy format.
- Enter the amount of the payment using one of the following options.
Enter any Comments associated with the payment.
Select one of the following Payment Methods and complete the payment.
Void Fees for Household Members
Fee Assignments, Payments and Adjustments cannot be deleted. Instead, they are voided, which reverses the transaction.
Important Information about Voiding Fees
- Deposits cannot be voided, only refunded in the Census People Fees tool.
- Voided fees are not visible on the Portal.
- Voiding an Assignment also voids all Payments and Adjustments attached to the assignment.
- After you void a Payment, the Fees tool displays any deposits made as a result of the payment.
- When voiding a Payment, indicate What to Void.
- Void payment to this fee and create deposit will void the selected payment only and create a surplus with the amount paid.
- Void payments to all fee assignments paid with this fee payment will void the selected payment and any other payments made in the same transaction. All payments made in the transaction payment are listed in the payment transaction table.
Void an Assignment
When voiding a fee assignment that was paid using an online payment, this message appears:
- Clicking Continue voids the payment and deposits the amount into the surplus, and the payment can NOT be refunded in the Payments Reporter tool.
- Clicking Cancel does NOT void the online payment through the Fees tool. Instead, you can use the Payments Reporter to refund the payment.
- Select the fee assignment you want to void.
Result: The Assignment panel displays. - Click the Void button.
Result: The Void Assignment screen displays. - Enter the Void Date and select a Void Reason. Comments are optional.
- Click Void.
Void a Payment
When voiding a fee payment that was paid using an online payment, this message appears:
- Clicking Continue voids the payment and deposits the amount into the surplus, and the payment can NOT be refunded in the Payments Reporter tool.
- Clicking Cancel does NOT void the online payment through the Fees tool. Instead, you can use the Payments Reporter to refund the payment.
- Select the fee payment you want to void.
Result: The Payment panel displays. - Click the Void button.
Result: The Void Payment screen displays. - Enter the Void Date and select a Void Reason. Comments are optional.
- Select What to Void.
- Void payment to this fee and create deposit will void the selected payment only and create a surplus with the amount paid.
- Void payments to all fee assignments paid with this fee payment will void the selected payment and any other payments made in the same transaction. All payments made in the transaction payment are listed in the payment transaction table.
- Click Void.
Void an Adjustment
- Select the fee adjustment you want to void.
Result: The Adjustment panel displays. - Click the Void button.
Result: The Void Assignment screen displays. - Enter the Void Date and select a Void Reason. Comments are optional.
- Click Void.
Void Fee Adjustment Example
Print a Fee Billing Statement for a Household
To print a report detailing what fees remain unpaid, select the Years to Print then click the Print button.
The Fee Billing Statement generates in a PDF format that can be printed, folded, and mailed to the household's primary address. Beside the address appears a summary of information about the individual and a list of totals, including the number and value of all fees incurred, the district-determined fee maximum if applicable and the total amount paid. The Balance Due follows this list, in larger font and underlined.
The Fee detail section lists the fees assessed to the person, the due date, the fee amount and any adjustments or payments that have been made. The total balance due appears at the end of the list.
Fees assigned to a household can be viewed and managed from the fees tool in Census > Households.
Enter Fee Payments (Summarized)
This topic shows how to pay fees using cash, check, or credit/debit card.
Enter Food Service Deposits
Deposits made to food service accounts can be entered for an individual or a household using the FS Deposit tool.
Deposit for an Individual
The FS (Food Service) Deposit tool allows district staff to enter new deposits using a desktop card reader. The credit/debit card can be swiped or the cardholder's information can be entered manually. In general, the FS Deposit tool is used for a district or school staff member whose account is not attached to a household record in Campus.
Tool Search: Food Service Deposit
This functionality is only available in districts that have purchased Campus Point-of-Sale as add-on functionality.
The Food Service Deposit tool allows a district to enter new deposits, void existing deposits and review account balances for a patron with a POS account. In general, this tool is used for a district or school staff member whose account is not attached to a household record in Campus.
Deposits for student patrons should be handled through the Household FS Deposits tool, which allows a deposit to be dispersed among various members of a household.
View Existing Deposits
The Food Service Deposit tool is designed for making and tracking individual deposits to food service accounts. Deposits made through the Household FS Deposits tool will show the amount of the deposit specifically allocated to the account being viewed (e.g., if a household deposit of $100 is split between two patrons, this tool will only show the $50 applied to this account).
This tool will only display deposit transactions. For a complete summary of all account activity (e.g., deposits, purchases, adjustments), please view the account Journal tool.
Individual Food Service Deposit Tool
Field Descriptions
Create a New Deposit
- Select the New Deposit icon. A New Deposit Detail table will appear.
- The deposit Date is auto-filled with the current date, but may be adjusted, as necessary.
- Enter the Payment Amount. This dollar amount can be entered in whole or dollar/cent values (e.g., 100 or 100.00).
- Enter any relevant Comments for this deposit.
- Select a Payment Location.
- Complete the deposit using one of the following Payment Methods.
Void a Deposit
- Click the deposit that you want to void in the Deposit History editor.
- Click the Void Transaction button.
Result
The Deposit Void editor appears. - Select the Reason for Void.
- Add comments in the Description field.
Comments display as the Description in the Deposit History editor. - Click Save.
Voiding a Transaction
The void and original transactions will both display in red text:Example Void Deposit
Managing Documents
To view documents, click the Documents button on the action bar. Users with the appropriate tool rights may also complete the following tasks.
- Upload Documents
- Delete Documents
- Replace Documents
- Edit a Document Name or File Description
- Download Documents
Food Service deposits for an individual patron can be managed using Food Service Deposit.
Deposit for a Household
The Household Food Service Deposit allows district staff to enter new deposits using a desktop card reader. The credit/debit card can be swiped or the cardholder's information can be entered manually. In general, Household Food Service Deposit is used for students or other individuals whose account is attached to a household record in Campus.
Tool Search: Food Service Deposit
This functionality is only available in districts that have purchased Campus Point-of-Sale as an add-on functionality.
The FS Deposit screen allows a district to enter new deposits, void existing deposits and review account balances for any patron in a household. In general, this tool is used to manage deposits made to student accounts.
All members of the household will be shown in the Household Member Deposits List editor. However, only the members who have Food Service accounts will appear in black text and have a Deposit Detail editor to track their deposits. Members of the household who do not have an account are shown in gray text.
When a new deposit is to be added to a household, the funds may be dispersed in a variety of manners:
- Funds may be distributed based on the setup of deposit percentages saved for the household.
- Funds may be equally distributed among patrons.
- Funds may be unequally distributed among patrons.
- All funds from the deposit may be distributed to one patron.
To view the details of an existing deposit, click on the deposit in the Deposits Detail editor. The details cannot be edited, as they are read-only.
The Do not accept check area of the Check editor displays a checkmark for household members who should not be allowed to pay with a check. Please see the Create an NSF Block article for more information.
Household Food Service Deposit
Field Descriptions
Household Member Deposits List Editor
Deposits Detail Editor
Add a Deposit for One Household Member
To specify a deposit for only one individual within the household:
- Select the Click to add a new deposit link on a patron's Deposits Detail editor, OR
- Click the New Deposit icon from the action bar and select the name of the individual patron from the Member field.
Deposit Detail Editor
Deposit Detail Editor Field Descriptions
A Deposit Distribution editor will appear for each account attached to the household:
Make a Deposit for All Household Members
Entering a Payment Amount and clicking the Fill button will auto-divide the amount among the accounts. If deposit percentages are established, the Payment Amount will be divided accordingly. If deposit percentages are not set up, the Payment Amount is dispersed equally among accounts.
- Select the New Deposit icon from the action bar. The Deposit Detail editor will appear.
- Select "All" from the Member field. If the deposit should only be attributed to one member, select his/her name from this field instead.
- Enter or select a Payment Date.
- Enter a Payment Amount.
- Select a Payment Type.
Click here to expand... - Enter additional details in the Comments field. This text will be displayed in the Description column of the Deposits Detail editor.
- Select a Payment Location to indicate where the deposit was entered.
- Verify the Amount. If necessary, this field can be manually edited.
- Click the Fill button to disperse the Payment Amount among the accounts. The dispersal amount will automatically appear in the Amount field of each member's account Deposit Distribution editor.
Void a FS Deposit Transaction
- Expand the Deposits Detail editor of the proper patron within the household.
- Select the deposit transaction to void.
- Click the Void Transaction icon in the action bar. The Deposit Void editor will appear.
- Select a Reason for voiding the deposit.
- If desired, enter a Description for the void. Text entered in this area will show up in the Description column of the Deposits Detail editor.
- Click Save to void the transaction.
- Click Yes on the pop-up window to finalize the void.
Upon reopening the Deposits Detail editor for the patron, the Date of the reversed transaction will appear in bright red text, indicating that it was voided. The Date of the original transaction will appear in dark red text.
Deposits and related preferences for patrons in a household can be managed using Household Food Service Deposit.
Reports
Fee Audit Report
The Payments mode of the Fee Audit Report provides information about payments made to fee assignments, including payments made using the integrated card swipe.
Tool Search: Fee Audit Report
The Fee Audit Report in Payments mode collects information about payments made to fee assignments based on the options selected in the wizard.
Payments Mode Report Logic
The following logic applies to the calculations used when reporting fee totals in the Payments Mode.
- Any voided payments that are returned (canceled) are not included in report totals.
- Any voided payments that are converted into a deposits are included in report totals.
- Adjustments are not considered payments and are not included in report totals.
- Over-payments (deposits) are included in report totals.
- Deposits made when the student is not affiliated with any fee assignments and has a zero balance or a surplus balance are included in report totals.
- Payments made out of surplus balances are included in report totals.
-
When optional fees are paid, the payment is assigned to the student's primary calendar of enrollment. If there is more than one primary enrollment, Campus uses the oldest active calendar of enrollment.
When a payment is made for multiple fees and one of those fees is voided after the payment is made:
- Generating the report for All Payments (Excluding Voids) does not include the voided payment. All other non-voided fees from the payment do still display.
- Generating the report for Voided Fee Payments displays only the voided payment. All other non-voided fees made in that same payment do not display.
Fee Definitions
For the purpose of this report, the following definitions apply.
Payments Mode Report Editor
The following options are available on the Payments Mode Report Editor.
Transaction Selection
Sort By Options
The Fee Audit report in payment mode can be sorted in the following ways:
- Payment Date - payments are listed in date order, with the most recent payments first.
- Payment Amount - payments are listed in amount order, with the highest payment amounts first.
- Payment Type - payments are listed in the following order: Cash, then Check, then Credit Card, then Online payments.
- Student Name - students are listed in alphabetical last name order.
- Fee - fees that were payed are listed in alphabetical order.
Generating the Fee Audit Report in Payments Mode
Mode Selection
- Select Payments as the Mode for which the report.
- Click Next to proceed to the next screen.
Report Options
- Indicate which Fee(s) should appear in the report.
- Select which Calendar(s) should appear in the report.
- Indicate which students should appear in the report by selecting an Ad hoc Filter or a Grade Level.
- Indicate which type of Transaction(s) should appear in the report.
- Select the desired Sort Option.
- Select whether you want to Show Fee Comments.
- Select the Report Format.
- Click Run Report to generate the audit report in PDF format.
Sav
This video covers all of the modes of the Fee Audit Report.
Reports for different fee transactions can be generated from the Fees Audit Report.
Food Service Deposit Report
The Deposit Report generates a list of check, cash, and credit card deposits made through the FS Deposit for an individual or a household. The report also provides information about deposits made directly at a Point of Sale Terminal or online by a parent or guardian.
This functionality is only available to districts that have purchased Campus Point of Sale as add-on functionality.
Classic View: Point of Sale > Reports > Deposit Report
Search Terms: Deposit Report
Field Descriptions (Deposit Report)
The following sections explain how the report editor fields impact report results.
School and Period Options
Parameters define the scope of the report, per the Which school and period would you like to include in the report? section.
Grouping and Sorting Options
Grouping and sorting options define how the deposits display on the report, per the Which type of report would you like to generate? section.
Deposit Slip Options
Deposit Slip Options allow you to associate a Deposit Slip number and dollar amount to the Deposit Report being generated. This information can be retrieved later in the Deposit Slip tool.
Report Format Options
Users have the option to generate the report as a PDF file or CSV file.
If your Deposit Slip is greater than 25 characters, it is best to use the CSV Report Format. If you choose the PDF format instead, the Deposit Slip and Deposit Actual Amount will not display correctly in the report header.
Generate or Submit to Batch
Users have the option of submitting a report request to the batch queue by clicking Submit to Batch instead of Generate Report. This process allows larger reports to generate in the background, without disrupting the use of Campus. For more information about submitting a report to the batch queue, see the Batch Queue article.
Analyzing Report Results
The following sections break down each column of each report in order to allow better analysis of results.
The Deposit Report always presents results in the following order:
- Online Payment Deposits
- In Office Deposits
- POS Terminal Deposits
Grouped By Location
The Group By Location option generates a report listing each deposit transaction per location.
Deposit Report (grouped by Location)
Grouped By Household
The Group By Household option generates a report listing all transactions per household.
Deposit Report (grouped by Household)
Save
Save
The Deposit Report generates a list of check, cash and credit card deposits made through the Household FS Deposit and Person FS Deposit tools used by school staff, as well as deposits made directly at a Point of Sale Terminal and online. The Deposit Report can also be saved as a snapshot so the history of the report will be saved.
Payments Reporter
The Payments Reporter details all transactions that were completed through the online payment process. With this tool, you can check the status of a specific payment and issue refunds.
Tool Search: Payments Reporter
The Payments Reporter details all transactions that were completed through the online payment process. With this tool, you can check the status of a specific payment, issue refunds, and revoke transactions.
Important Information about this Tool
- Campus automatically voids all returned transactions. The original transaction appears with the Returned status and the correcting transaction appears with the Return Void status. Transactions may be returned if the account is not valid or has insufficient funds.
- Transaction fees are never refunded.
- Payments with the Transaction Status Resolved can only be refunded if the transaction was resolved by Campus Support. If you need to refund a payment that you manually resolved, contact Campus Support for assistance.
- When a payer makes a purchase for $0.00, Campus assigns a reference number but a Payment Method does not appear in the report. In addition, Service Fees are not applied when the total is $0.00.
- A Deposit Date does not display either unless the zero dollar purchase was purchased with other items for which the payer was charged and the transaction is processed.
- If an E-check fails, it can occur up to 10 business days after settling. If there is a failure, the amount of the E-check is automatically returned.
- Refunds (full or partial) for echecks are not allowed until there is a Settlement Date.
- Refunds for echecks are processed 12 days after the transaction's Payment Date. This ensures funds have cleared before the refund is processed.
- All refunds that are requested between 5:45 p.m. and 6:00 p.m. Eastern Time will not process until 12:00 a.m. the following day. For example, a refund requested at 5:45 p.m. on September 1st will be processed at 12:00 a.m. on September 2nd. This rule applies to all payment types except for echecks which cannot be processed until 12 days after their transaction's Payment Date.
- If a transaction is disputed, a chargeback fee is assessed. These can be searched for in the Description column as 'Chargeback'. When clicked, the Payment Transaction history will appear showing all the fees associated with that transaction.
About the Deposit Process
The deposit process runs daily before 5:45 PM Eastern Time (ET). The deposit job must complete by 6:00 PM Eastern Time (ET); otherwise, the payment platform moves the request date forward one day to ensure the deposit job has enough time to complete.
The deposit process does not run on weekends (Friday, Saturday, Sunday) or holidays.
Tips for Searching
- You can search for transactions according to their Payment Date or Deposit Date. Click the Show Filters button, then select the option you want to use in the View By field and enter the appropriate start and end dates.
- To include district payments such as Service Fees in your search, click the Show Filters button then toggle Include District Payments to ON. If you want to see payments made to your school only, set the toggle to OFF.
This toggle is only available if your system administrator has assigned the appropriate tool rights. - If you select All Schools in the School dropdown list, only payments made to the district display. However, you can set the Include School Payments toggle to On to include payments from all schools in the district.
- Search results are grouped by Fund ID.
- Select an individual line to see the entire transaction in the Payment Transaction panel.
- Sort results by Deposit Date and Deposit Amount when trying to perform a bank reconciliation.
- You can sort the results by clicking a column heading. Each click changes the data in ascending or descending order.
- You can add filters to narrow the report's results. For example, you can find payments that were made on a specific date or Transaction Status.
Tip: The Payment Reference Number for transactions from the new payment platform begins with p1_txn. To exclude Vanco transactions and only see transactions from the new payment platform, use p1_txn in the Payment Reference Number column to filter your report's results.
Transaction Status Descriptions
View Details for a Single Transaction
To view details for a single transaction, click the transaction you want to view. The Payment Transaction panel displays details for the transaction.
Since lines on the Payments Reporter are grouped by Fund ID, this is a good method for viewing the entire transaction.
Issue a Full Refund
Tips
- This option is only available if your system administrator has assigned the appropriate tool rights.
- The Transaction Fee cannot be refunded.
- The Service Fee can only be returned if your District has enabled Service Fee refunds in the Payment setup.
- If you do NOT refund Service Fees, the Service Fee stays in a Completed status.
- Refunds for echecks are not allowed until there is a Settlement Date.
- Click the transaction you want to refund.
Result: The Payment Transaction panel displays. - Click the Preview Refund button.
Result: The Payment Refund panel displays. -
Enter the reason for the refund in the Refund Comments field. (optional)
This comment will display on the offset transaction's details. -
Complete one of the following options. Options that display depend on whether your district allows partial refunds.
Result: A confirmation message displays. - Click OK.
Result
- The Payments Reporter screen displays. Campus updates the original Transaction Status to RETURNED and adds an offset entry with the Status RETURNEDVOID on the refunded lines.
- Campus also updates the original payment transaction's details. After a refund is made, the details include a Return Date and the Offset Transaction Reference Number.
- Refunds may incur an additional Transaction Fee based on your district's contract with the payment vendor.
Issue a Partial Refund
Tips
- This option is only available if:
- Your system administrator has assigned the appropriate tool rights.
- Your district has enabled partial refunds in the Payment setup.
- The Transaction Fee cannot be refunded.
- Refunds may incur an additional Transaction Fee based on your district's contract with the payment vendor.
- The Service Fee can only be returned if your District has enabled Service Fee refunds.
- If an item is already partially returned, you cannot make additional refunds on the same item.
- Partial refunds appear in the Payments Reporter with a status of Partial Return and an offset transaction number.
- Refunds for echecks are not allowed until there is a Settlement Date.
- If split fees is enabled, districts may opt to refund only the service fee related to the specific product being returned, rather than the entire service fee if a full refund option is enabled.
- Click the transaction you want to refund.
Result The Payment Transaction panel displays. - Click the Preview Refund button.
Result The Payment Refund panel displays. Only items eligible for a refund displayed on the screen.
Click here to expand... -
Enter the reason for the refund in the Refund Comments field. (optional)
This comment will display on the offset transaction's details.
Click here to expand... - Mark the checkbox(es) next to the item(s) you want to return.
Click here to expand... -
Verify the Amount(s) you to refund.
You can change the amount to be less than the amount that was paid.
Click here to expand... - Verify the Return to Inventory checkbox is marked next to the item(s) you want to return to inventory. (optional)
Click here to expand... - Click Submit.
Result: A confirmation message displays. - Click OK.
Results- The Payments Reporter screen displays. Campus updates the Transaction Status to RETURNED and adds an offset entry with the Status RETURNEDVOID on the refunded lines.
- Campus also updates the payment transaction's details. After a refund is made, the details include a Return Date and the Offset Transaction Reference Number.
- Refunds may incur an additional Transaction Fee based on your district's contract with the payment vendor.
Revoke a Transaction
You can revoke transactions that did not process. Only transactions that are in a Pending, Exception, or Canceled status can be revoked. When revoked, Campus updates the Transaction Status for all lines in the transaction to Revoked and line item balances do not change.- Select the transaction you want to revoke.
Result: The Payment Transaction panel displays. - Click the Revoke button.
Result: A confirmation message displays. - Click OK.
Result: The Payments Reporter screen displays. Campus updates the Transaction Status to Revoked and line item balances do not change.
Resolve a Transaction
If the transaction was processed but still appears to be in an Exception, Canceled, or Pending Status in the Payments Reporter, you can manually resolve the transaction. Please note, Resolved transactions may not display a Deposit Date in the Payments Reporter tool.Before you Begin
To manually resolve a transaction in Campus Payments, you must contact Campus Support to get the Payment Reference Number.
- Select the transaction you want to resolve.
Result: The Payment Transaction panel displays. - Enter the Payment Reference Number in the Payment Reference Number field.
- Click the Resolve button.
Result: A confirmation message displays. - Click OK.
Result: The Payments Reporter screen displays. Campus updates the Transaction Status to Resolved and payments are posted to the Food Service and Fee Accounts.
Select Columns to Display
The column selector allows you to choose which columns to hide or display. Click the Select Columns button and mark the checkbox next to the columns you want to display. Clear the checkbox next to the columns you want to hide.Group Report by Specific Columns (Grouping Options)
The report displays differently based on the grouping options you select. Select the column(s) you want to group together and drag the column(s) to the area above the table. You can select multiple columns and further group the report results.Payments Reporter Column Descriptions
The following columns are available on the Payments Reporter. These columns are available via the column selector and can be grouped, filtered, and saved as templates.
TIP
You can sort the Payments Report by clicking a column heading. Each click changes the data in ascending or descending order. When grouping specific columns, be sure to also sort the column headings to ensure you are viewing the report results in an organized manner.
Create and Manage Templates
Templates allow you to save a custom view of the Payments Reporter and use it again later. You can choose specific columns to display, group them in a useful way, filter data in each column, and save your selections as a template. You can create multiple templates as well as update or delete templates at any time.
Due to recent changes, the following template selections will need to be reselected and the template will need to be updated before it can be used:
- FundID
- Fund Description
- Bank Account
Also, if a pre-existing Template is grouped or filtered by Payer Name, the output may look different because some of the data from Payer Name may have been moved to Payment Method Account Name.
Create a New Template
- Use the Select Columns tool to choose the column(s) you want to display then drag the column(s) you want to group together to the area above the table.
- Click the Show Filters button and enter any filter data you want to use. (Optional)
- Further narrow down report results by using the filters in each column. (Optional)
- Click the New button (next to the Load Template dropdown list).
Result: The Create Template panel displays.
- Enter the Template Name then click Save.
Result: The new template displays in the Load Template dropdown list.
Delete a Template
To delete a template, select the template you want to delete in the Load Template dropdown list then click the Delete button.
Update a Template
To update a template, select the template you want to update in the Load Template dropdown list. Make any necessary changes then click the Update button to save your changes.
Identify Deposit Balance by Fund ID
The report displays differently based on the grouping options you select. Select the column(s) you want to group together and drag the column(s) to the area above the table. To identify the balance by Fund ID, group columns in the following order:
- Bank Account
- Deposit Date
- Fund ID
Export the Report
You can export the report to CSV or PDF format. To export the report, select the format you want from the Export Type dropdown list then click the Export button.
If you do not limit the report results using the Payment Start Date and/or the Payment End Date, the export will be limited to the last 60 days.
Previous Version
Payments Reporter [.2347-.2431]