Staff Evaluations will no longer be available after June 30th, 2025. For more information, visit the Human Resources and Staff Evaluation Deprecation FAQ.
Complete the following steps to add supporting documentation to an evaluation. Once supporting documents are added to an evaluation and sent to the employee or evaluator, the document cannot be deleted or updated by anyone other than the initial person who added it.
The File Upload option is enabled by the Staff Evaluations administrator and may not be available.
Video files cannot be uploaded.
Click the Show Details link in the File Upload section.
Result
The following screen displays.The Terms and Conditions checkbox must be selected or Campus will not allow you to upload.
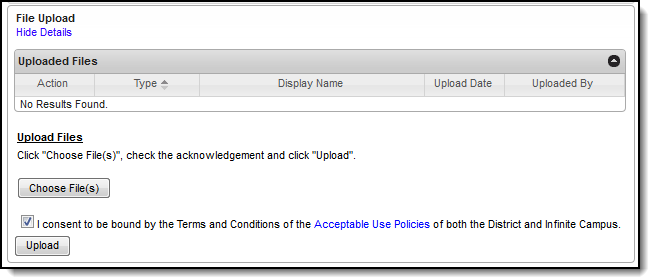
- Click the Choose File(s) button.
Result
The Choose File to Upload window displays.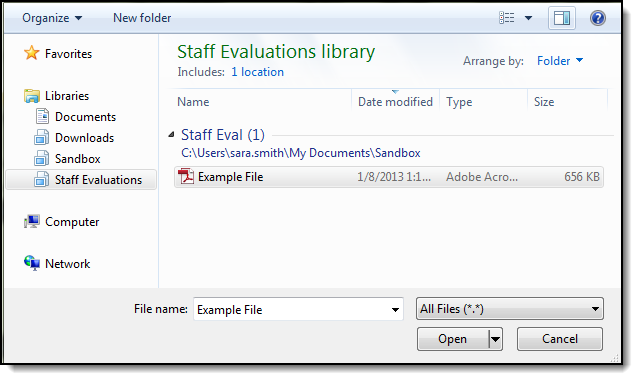
- Navigate to the file you want to upload, select the file and click Open.
Result
The editor displays.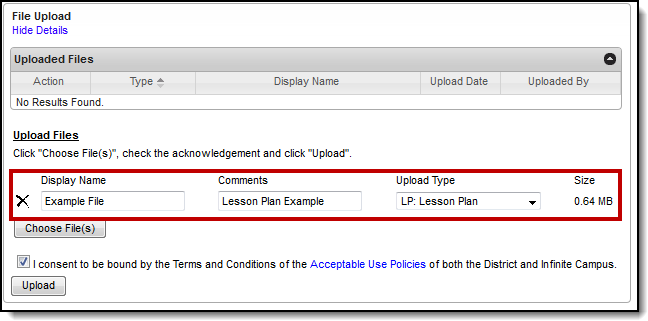
Select an Upload Type to identify the information in the file.
Options are determined by the Staff Evaluations administrator. If your district uses the Human Resources module, options will include the following: Cont. Education, Form, Lesson Plan and Student Assignment.
- Enter any additional Comments about the file.
- Click the Upload button.
Result
Campus adds the file to the evaluation and a confirmation message displays. - Click OK.
Result
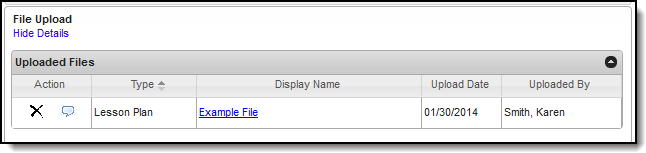
The file displays in the Uploaded Files table.