Tool Search: Fees
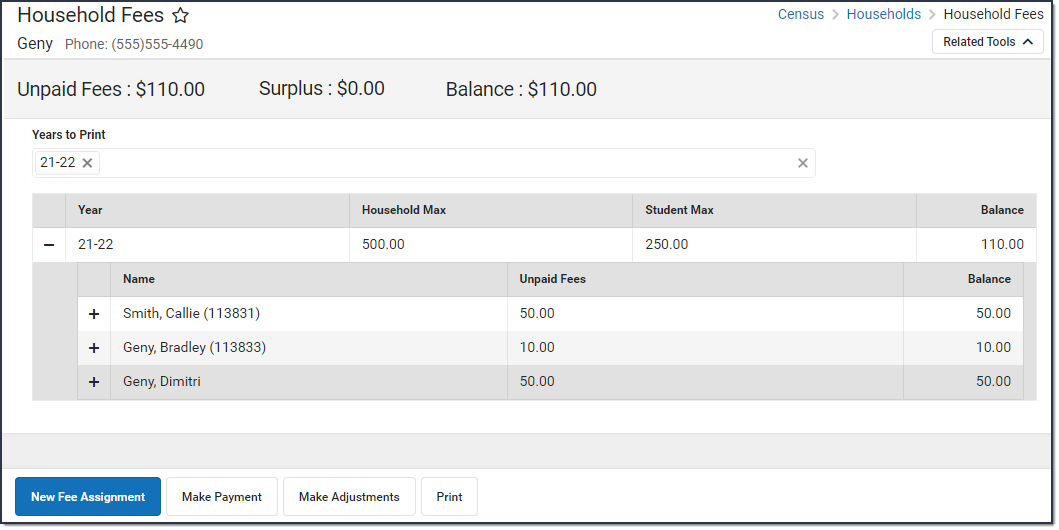
The Household Fees tool displays fees transactions for all members of a household, including fee assignments, payments and adjustments.
If the household has reached the maximum fee amount established by the school and/or district, that will be noted in the Fees Editor.
If a school or district has a household maximum set, individuals' fees should be managed here, on the Household Fees tool.
Deposits cannot be made in the Household Fees tool. Deposits can be made in Student Fees or Person Fees; however, surplus values do appear in the Household Fees Editor.
See the Fees page for additional information on tasks that can be performed on all Fees tools.
Household Fees Logic
Fees are not directly tied to a calendar: if fees remain unpaid from a previous year, they will appear in the Unpaid Fees amount. However, the calendar selected in the Campus Toolbar controls the calendar in which the fee is assigned.
Inactive students with previous enrollments can pay old, unpaid fees and students with future enrollments can pay unpaid fees on future calendars using Online Payments.
Fees are assigned to a person and are not dependent on an enrollment. Therefore, the fees listed for a person can include fees assigned by other schools.
Calendar rights are enforced when assigning fees to individuals. Users will only be able to select fees that are created for a school to which they have rights. Fees created for use by all schools in the district will also display.
Primary vs. Secondary Households
When managing fees for students who belong to multiple households, or for blended households which include students with primary and secondary memberships in the household, the following items should be considered:
- Only members indicated as primary can be assigned fees in the Household Fees editor.
- Only fees assigned to members indicated as primary will calculate towards the Household Fee Maximum.
- If a student has primary household memberships in two households, the Household Fee Max does NOT apply for any person in the household. However, the Student Fee Max (if set) does apply to all students in the household.
Fees Editor
The Fees Editor itemizes all fees assigned to each member of a household, including totals of how much was charged, how much was paid and the remaining debt or surplus. The following table describes all of the columns found in the Fee Editor.
The following table describes all of the columns found in the Household Fees Editor.
| Field | Description |
|---|---|
| Unpaid Fees | The total amount that needs to be paid. |
| Surplus | If more has been paid than has been charged, a positive value appears and indicates the surplus amount available to be applied to later fees. Even after Surplus money is applied to other fees or refunded, you can see deposit and withdrawal details in the Surplus table. The Auto-pay Fees with Surplus Balance District Preference automatically pays any fee from the Surplus. |
| Balance | The Balance is the net of all debits minus all credits. A negative account balance indicates the account holder has funds available to pay unpaid fees, while a positive balance indicates the account holder owes money. |
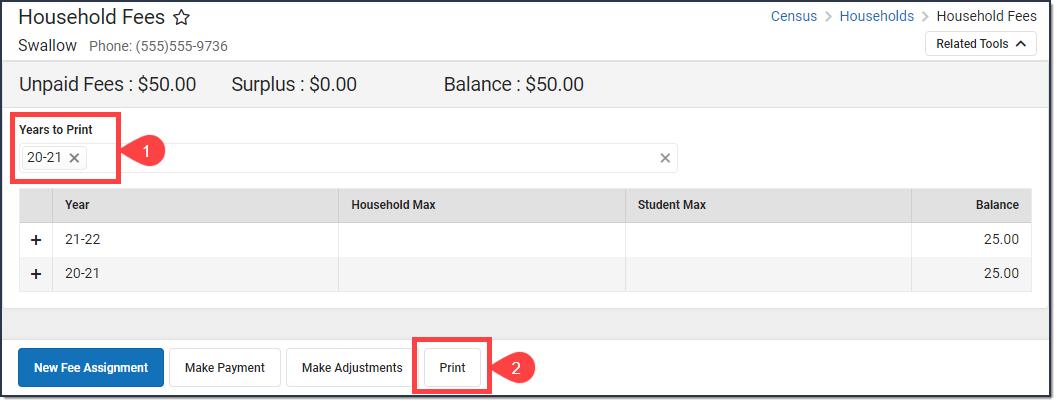
| Years to Print | The years for which you want to print a Fee Billing Statement for the household. |
| Year | The year in which the fees were assigned. |
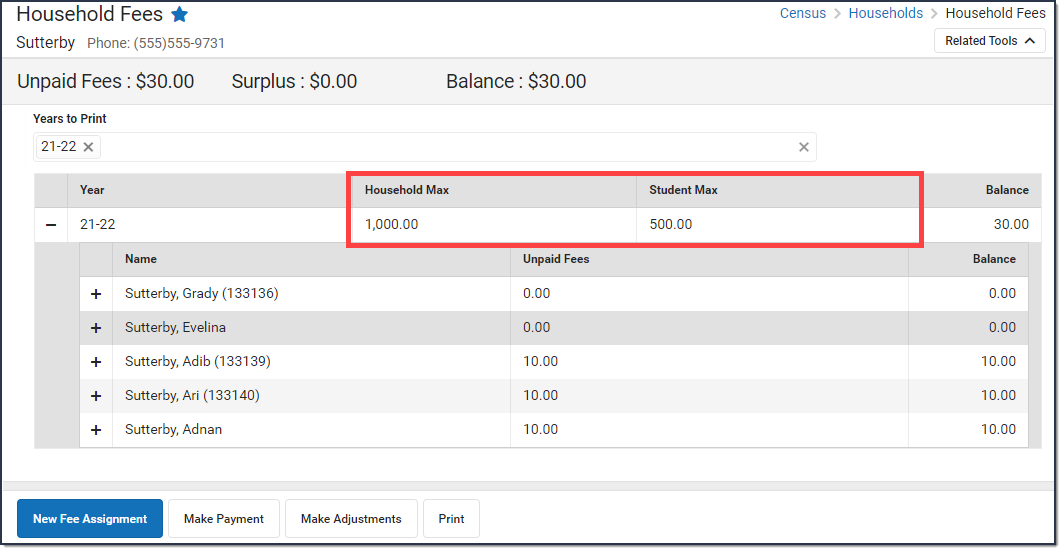
| Household Max Student Max |
The Fee Maximums tool sets a cap on the amount of fees a family pays for a school year. This cap can be set for just student fees (applies to fees listed on the Student Fees tool), for just household fees (applies to fees listed on the Household Fees tool) or both.The fee maximums defined in the Fee Maximums tool display.
 |
| Name | The member of the household to whom the fee was assigned. |
| Fee | The name of the name. |
| Due Date | The date the fee payment is due. If a due date has passed and the fee has not yet been paid, the due date will appear in red. |
| Balance | Indicates the amount remaining to be paid. |
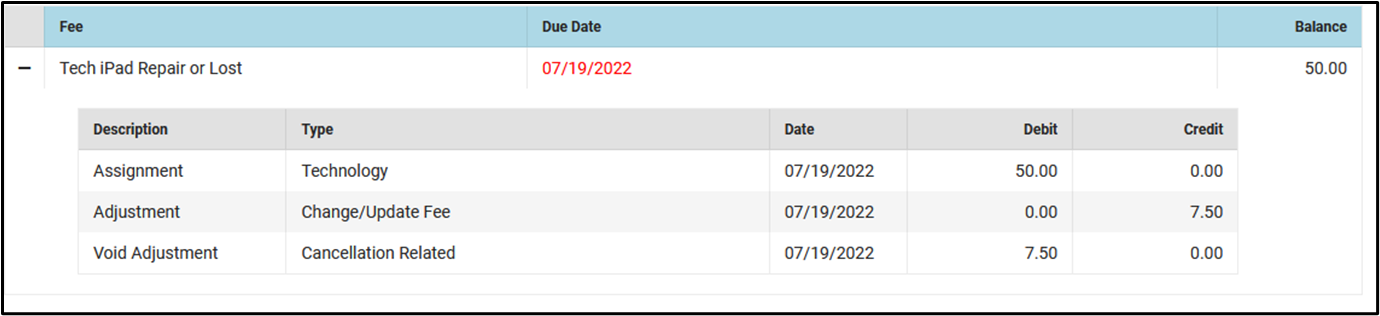
Description |
For gray rows, this column includes a description of the fee, such as "Athletic Shorts" or "Summer School Tuition." For white rows, this column indicates what kind of transaction was performed, either a Payment or an Adjustment. Information about individual fees can be expanded and collapsed by clicking the + or - sign next to the Fee Description. |
Type |
For gray rows, this column includes the category of the fee, such as "Gym Uniforms" or "Registration." For white rows, this column indicates where the Payment was made, such as "In Office" or "Online." |
Date |
Applies to Payments and Adjustments, indicating when the transaction took place. |
Exempt |
Indicates if a fee is considered exempt and therefore does not need to be paid. If a Student or Household Fee Maximum has been reached, the word Exempt displays in parenthesis next to the fee. |
Debit |
The original amount of the fee. |
Credit |
Applies to Payments and Adjustments, indicating the amount that was deducted, through either payment or removal because of an adjustment. |
Assign a Fee to Family Members
You can use the Household Fees tool to assign Fees to an individual household member or to multiple household members at the same time.
Assign a Fee
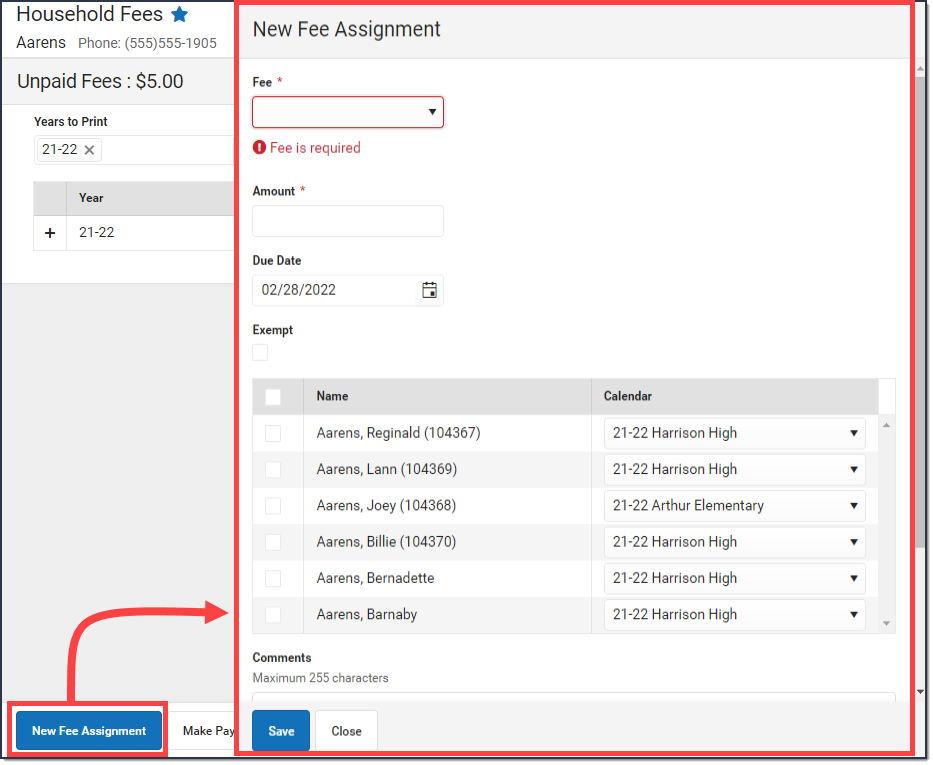
- Click the New Fee Assignment button.
Result: The New Fee Assignment panel displays. - Select a Fee from the dropdown list.
Tip: This list is populated with values set in the Fees section. - If applicable, enter the Amount of the fee.
Tip: If the description of the fee ends in an asterisk (*), the fee amount can be edited. - Enter a Due Date for the fee in mmddyyyy format.
Tip: Click the date field to open a calendar where you can pick the date. - Mark the Exempt checkbox if the person is exempt from paying this fee.
- Select the checkbox next to the member(s) of the household to whom the fee should be Assigned.
- Select the Calendar of enrollment for each individual from the dropdown list.
Tip: The current calendar of enrollment is automatically selected. - Enter any Comments related to the fee assignment in the Comments field.
- Click the Save button when finished.
Result: The new fee displays in the Fee Editor with the total adjusted appropriately.
Edit a Fee Assignment
Once a fee has been assigned, clicking on the fee displays the Assignment panel. Only the Due Date, Exempt Status and Comments can be modified in this window.
Click Save when finished. To change the amount of a fee, Make an Adjustment.
Adjust Fees for Household Members
Fee adjustments are used to modify the amount due for a fee. Fee adjustments may only be made for up to the amount of the fee assignment.
 Make an Adjustment
Make an Adjustment
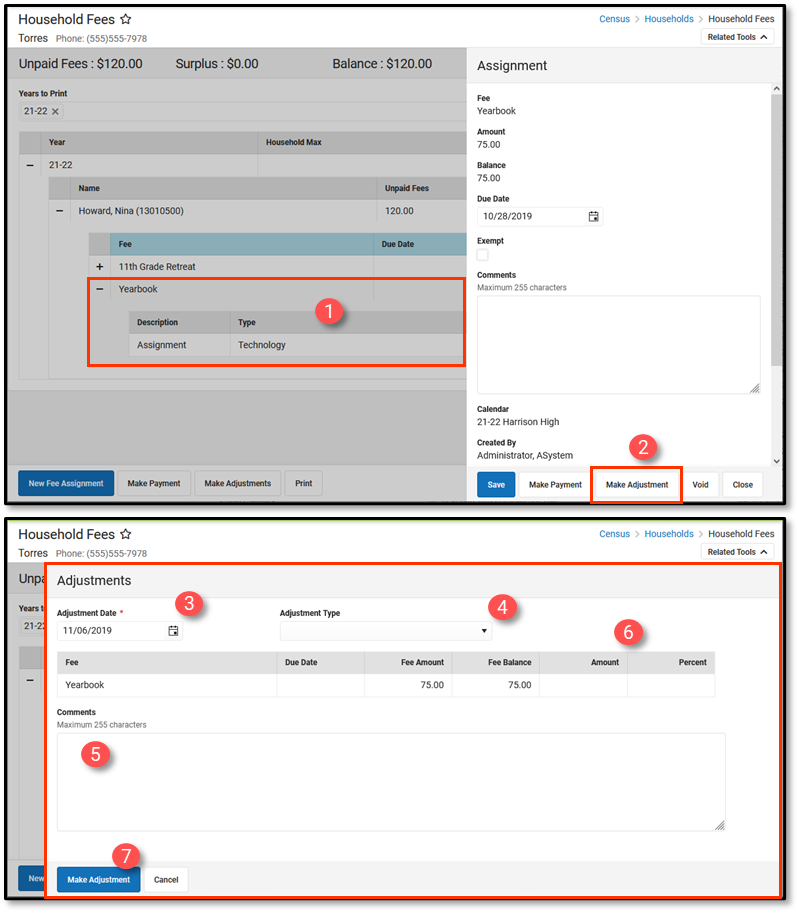
- Select the Fee Assignment to which you want to make an adjustment.
Result: The Assignment panel displays. - Click the Make Adjustment button.
Result: The Adjustments panel displays. - Enter an Adjustment Date in mmddyyyy format.
Clicking the date field opens a calendar from which you can pick a date.
- Select the Type of adjustment. (Optional)
- Enter any Comments associated with the adjustment.
- Enter the amount to be removed from the fee(s) in the Amount or % field.
The subtracted amount cannot exceed the amount of the fee assignment. Enter a dollar amount in the Amount field OR a Percentage amount (do not enter the '%' sign, just a number up to three decimal points like 10 or 10.567).
- Click Make Adjustment when finished.
Result: The entered adjustment displays below the fee to which it was applied with the date of the adjustment, the amount deducted in the Credit column and Balances and Totals updated accordingly.
Edit an Adjustment
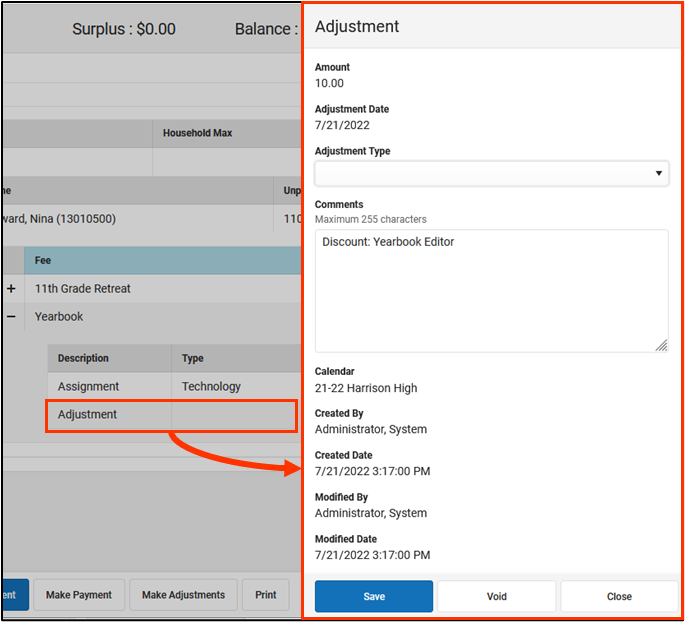
After an adjustment is made, clicking on the adjustment displays the Adjustment panel which includes the adjusted Amount, the Adjustment Date, the Type of adjustment, as well as any Comments attached to the adjustment.
Only adjustment Type and Comments can be added or modified. Click Save when finished.
 Edit an Adjustment
Record Household Fee Payments
Fees can be paid one at a time or you can pay multiple fees with a single payment. You cannot use the Household Fees tool to pay more than the required balance.
Make a Payment
- Click the Make Payment button at the bottom of the screen.
Result: The Payment panel displays all fees from all years for all household members for which a payment is needed.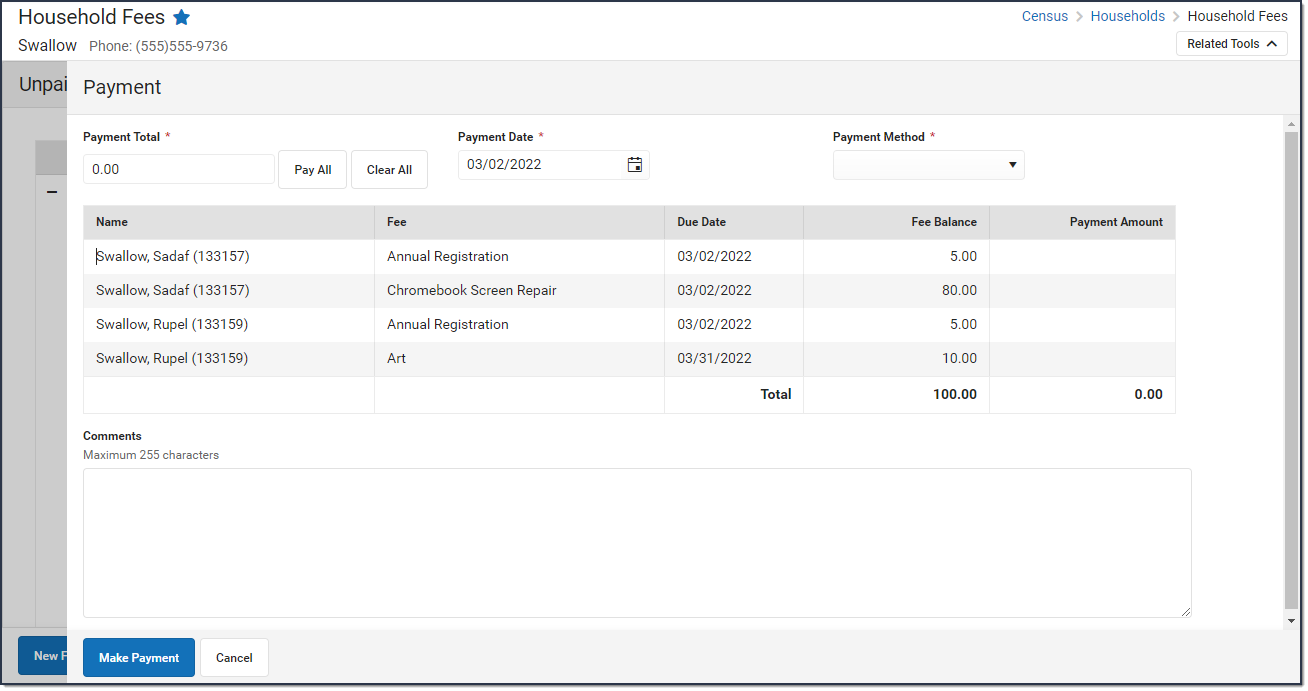
- Enter a Payment Date in mmddyyyy format.
- Enter the amount of the payment using one of the following options.
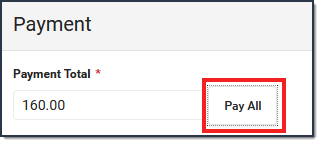
Option Description Pay All Click Pay All to populate this field with the total amount remaining to be paid. 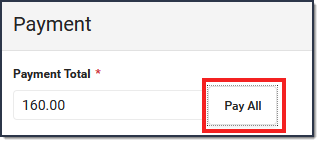
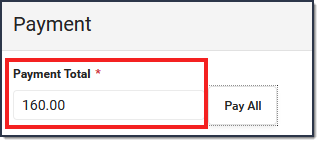
Payment Total The Payment Total field at the top of the panel allows you to enter the amount to be paid. If the total amount exceeds the Fee Assignment amount, the remaining amount is deposited as a surplus. 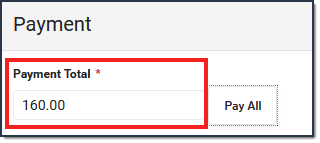
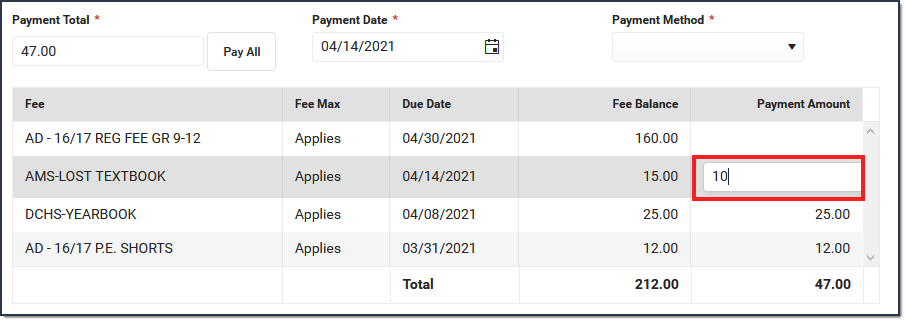
PaymentAmount The Payment Amount column allows you to manually enter a unique value for each line. Campus automatically updates the Payment Total to match the values you enter. 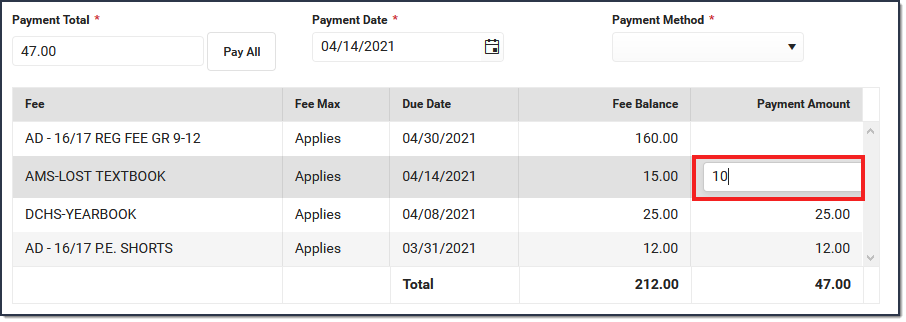
Enter any Comments associated with the payment.
Select one of the following Payment Methods and complete the payment.
Payment Method Description Cash Click the Make Payment button. Check The Check # field displays when you select this option. Enter the Check # then click the Make Payment button.
Surplus (Balance: $XX.XX) This option only displays if a surplus is available on the account. If the Amount you previously entered is higher than the available Surplus, Campus clears the Amount field and you must enter the Amount again. The Surplus Balance is reduced by the amount used to pay the fee.
Surpluses can only be applied to fees for the selected student. When a surplus is available, the payment of a fee comes from the surplus amount for that student only.
Record Credit/Debit Card If your district does NOT use Online Payments or a Desktop Card Reader, enter the Reference # then click the Make Payment button.
Process Credit/Debit Card (Card Swipe) Complete these steps if you are using a Desktop Card Reader.
- Click the Make Payment button.
Result
The Card Present Processing window displays.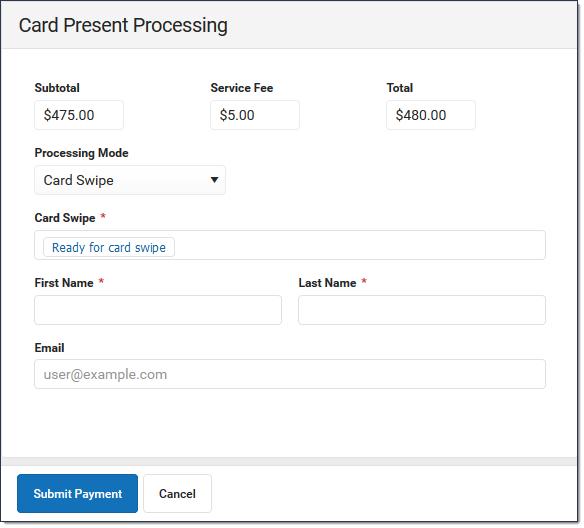
Swipe the card through the card reader.
Result
A progress bar appears in the Card Swipe field. When the process completes, the message changes to Success.If you already entered the First Name and Last Name, click Enable Card Swipe in the Card Swipe field then swipe the card through the card reader.
- Enter the First Name and Last Name.
Enter an Email address. (Optional)
If Email Settings are set up, Campus will send the receipt to the Email address entered here. This email is not included in the Sent Message Log.
- Click the Submit Payment button.
Result
If the transaction is successful, the receipt displays and you can print the receipt from your browser. A receipt is emailed if an email address was entered in the Email field.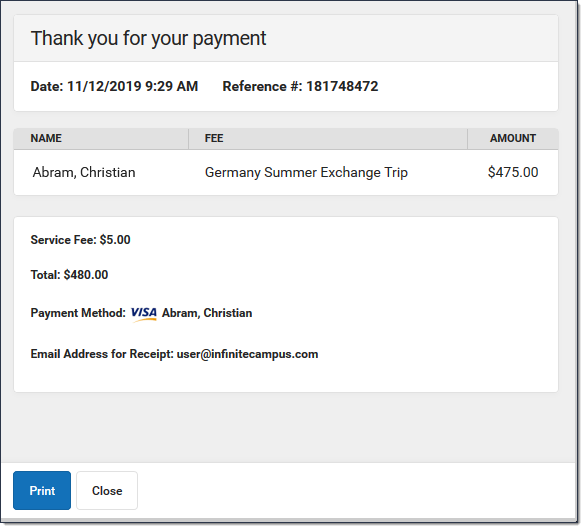
- Click the Close button.
Result
The payment displays below the fee(s) with the type and date of the payment, the amount paid in the Credit column and Balances and Totals updated accordingly.
Process Credit/Debit Card (Manual Entry) Complete these steps if you do not have a Desktop Card Reader.
- Click the Make Payment button.
Result
The Card Present Processing window displays.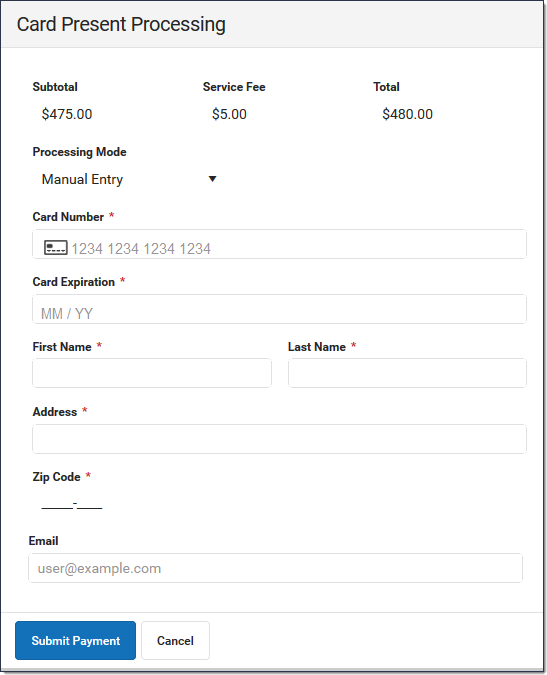
- Select Manual Entry in the Processing Mode dropdown list.
- Fill out the following fields.
- Card Number
- Card Expiration
- Name on Card
- Address
- Zip Code
- Click the Submit Payment button.
Result
If the transaction is successful, the receipt displays and you can print the receipt from your browser. A receipt is emailed if an email address was entered in the Email field. This email is not included in the Sent Message Log. - Click the Close button.
Result
The payment displays below the fee(s) with the type and date of the payment, the amount paid in the Credit column and Balances and Totals updated accordingly.
- Click the Make Payment button.


Void Fees for Household Members
Fee Assignments, Payments and Adjustments cannot be deleted. Instead, they are voided, which reverses the transaction.
| What can I do? | What do I need to know? |
|---|---|
Important Information about Voiding Fees
- Deposits cannot be voided, only refunded in the Census People Fees tool.
- Voided fees are not visible on the Portal.
- Voiding an Assignment also voids all Payments and Adjustments attached to the assignment.
- After you void a Payment, the Fees tool displays any deposits made as a result of the payment.
- When voiding a Payment, indicate What to Void.
- Void payment to this fee and create deposit will void the selected payment only and create a surplus with the amount paid.
- Void payments to all fee assignments paid with this fee payment will void the selected payment and any other payments made in the same transaction. All payments made in the transaction payment are listed in the payment transaction table.
Void an Assignment
When voiding a fee assignment that was paid using an online payment, this message appears:
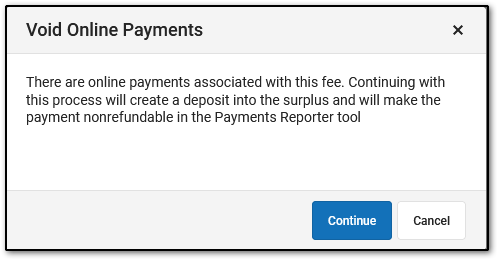
- Clicking Continue voids the payment and deposits the amount into the surplus, and the payment can NOT be refunded in the Payments Reporter tool.
- Clicking Cancel does NOT void the online payment through the Fees tool. Instead, you can use the Payments Reporter to refund the payment.
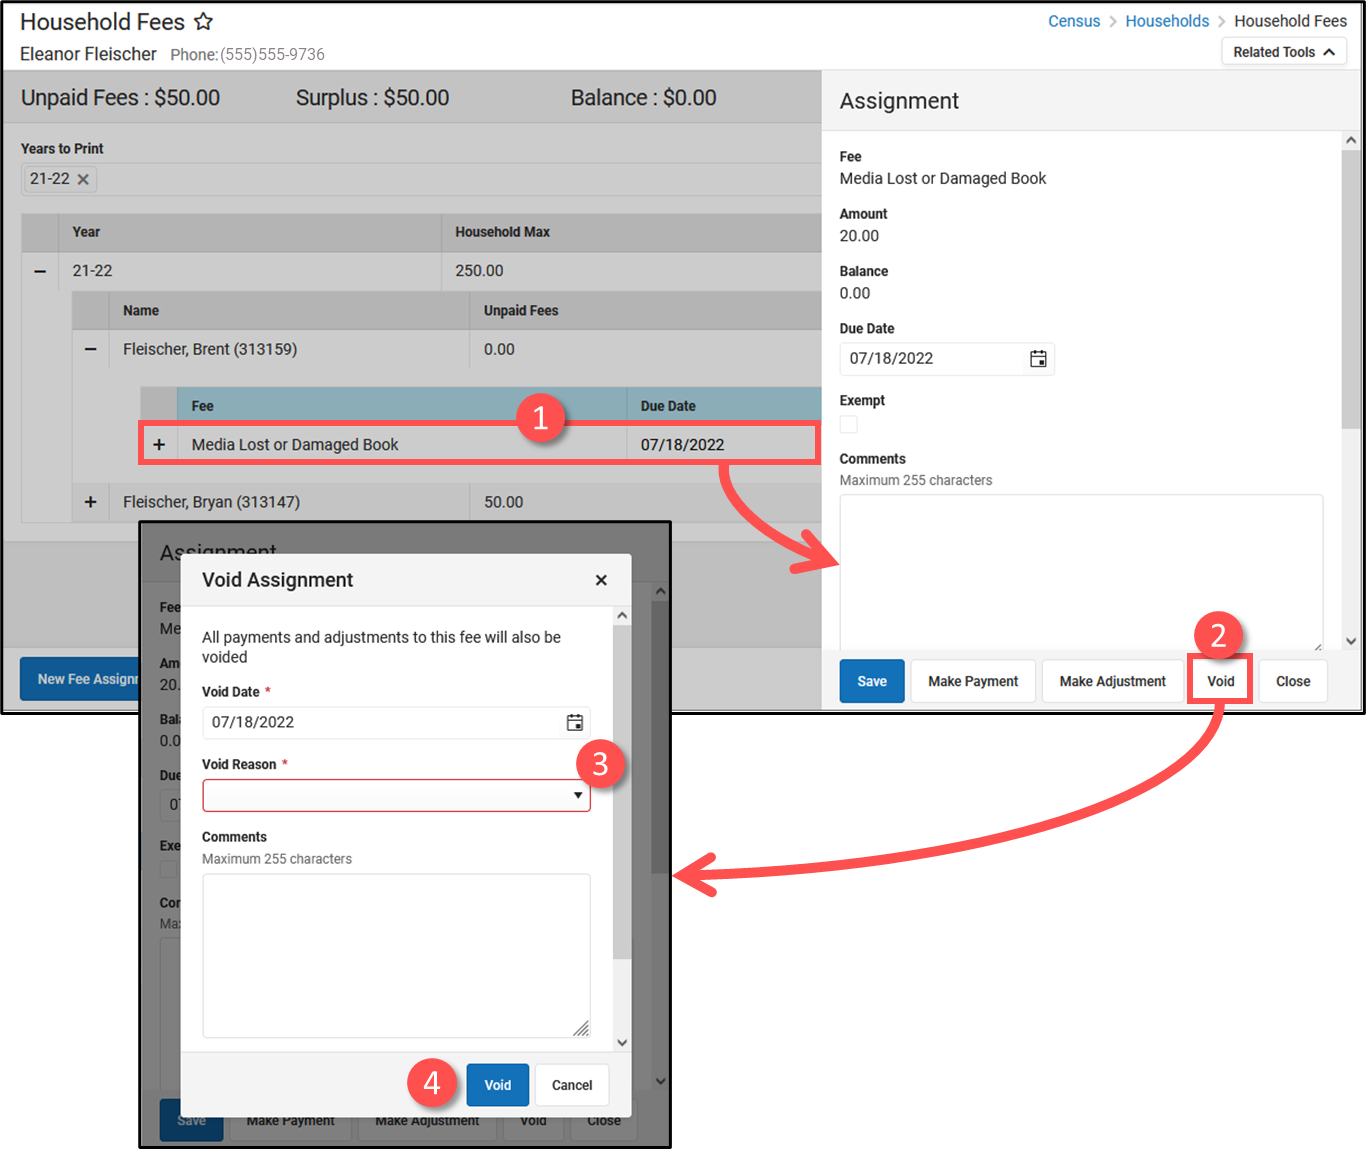
- Select the fee assignment you want to void.
Result: The Assignment panel displays. - Click the Void button.
Result: The Void Assignment screen displays. - Enter the Void Date and select a Void Reason. Comments are optional.
- Click Void.
 Void Fee Assignment Workflow
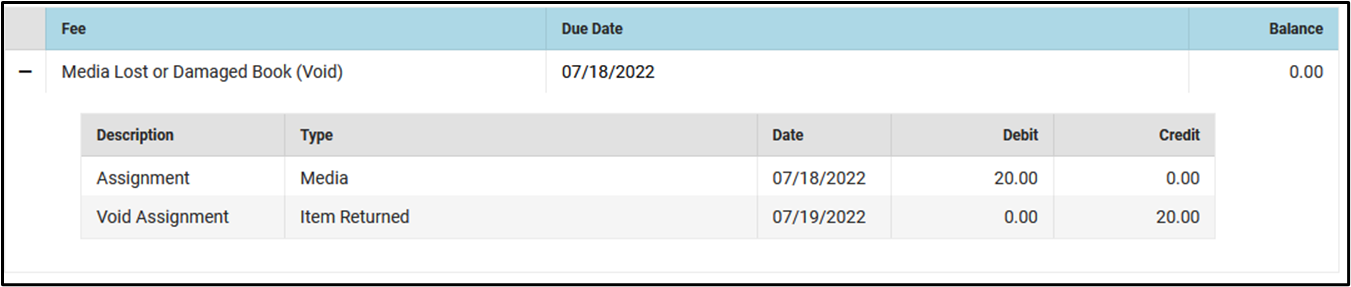 Void Fee Assignment Example
Void a Payment
When voiding a fee payment that was paid using an online payment, this message appears:
- Clicking Continue voids the payment and deposits the amount into the surplus, and the payment can NOT be refunded in the Payments Reporter tool.
- Clicking Cancel does NOT void the online payment through the Fees tool. Instead, you can use the Payments Reporter to refund the payment.
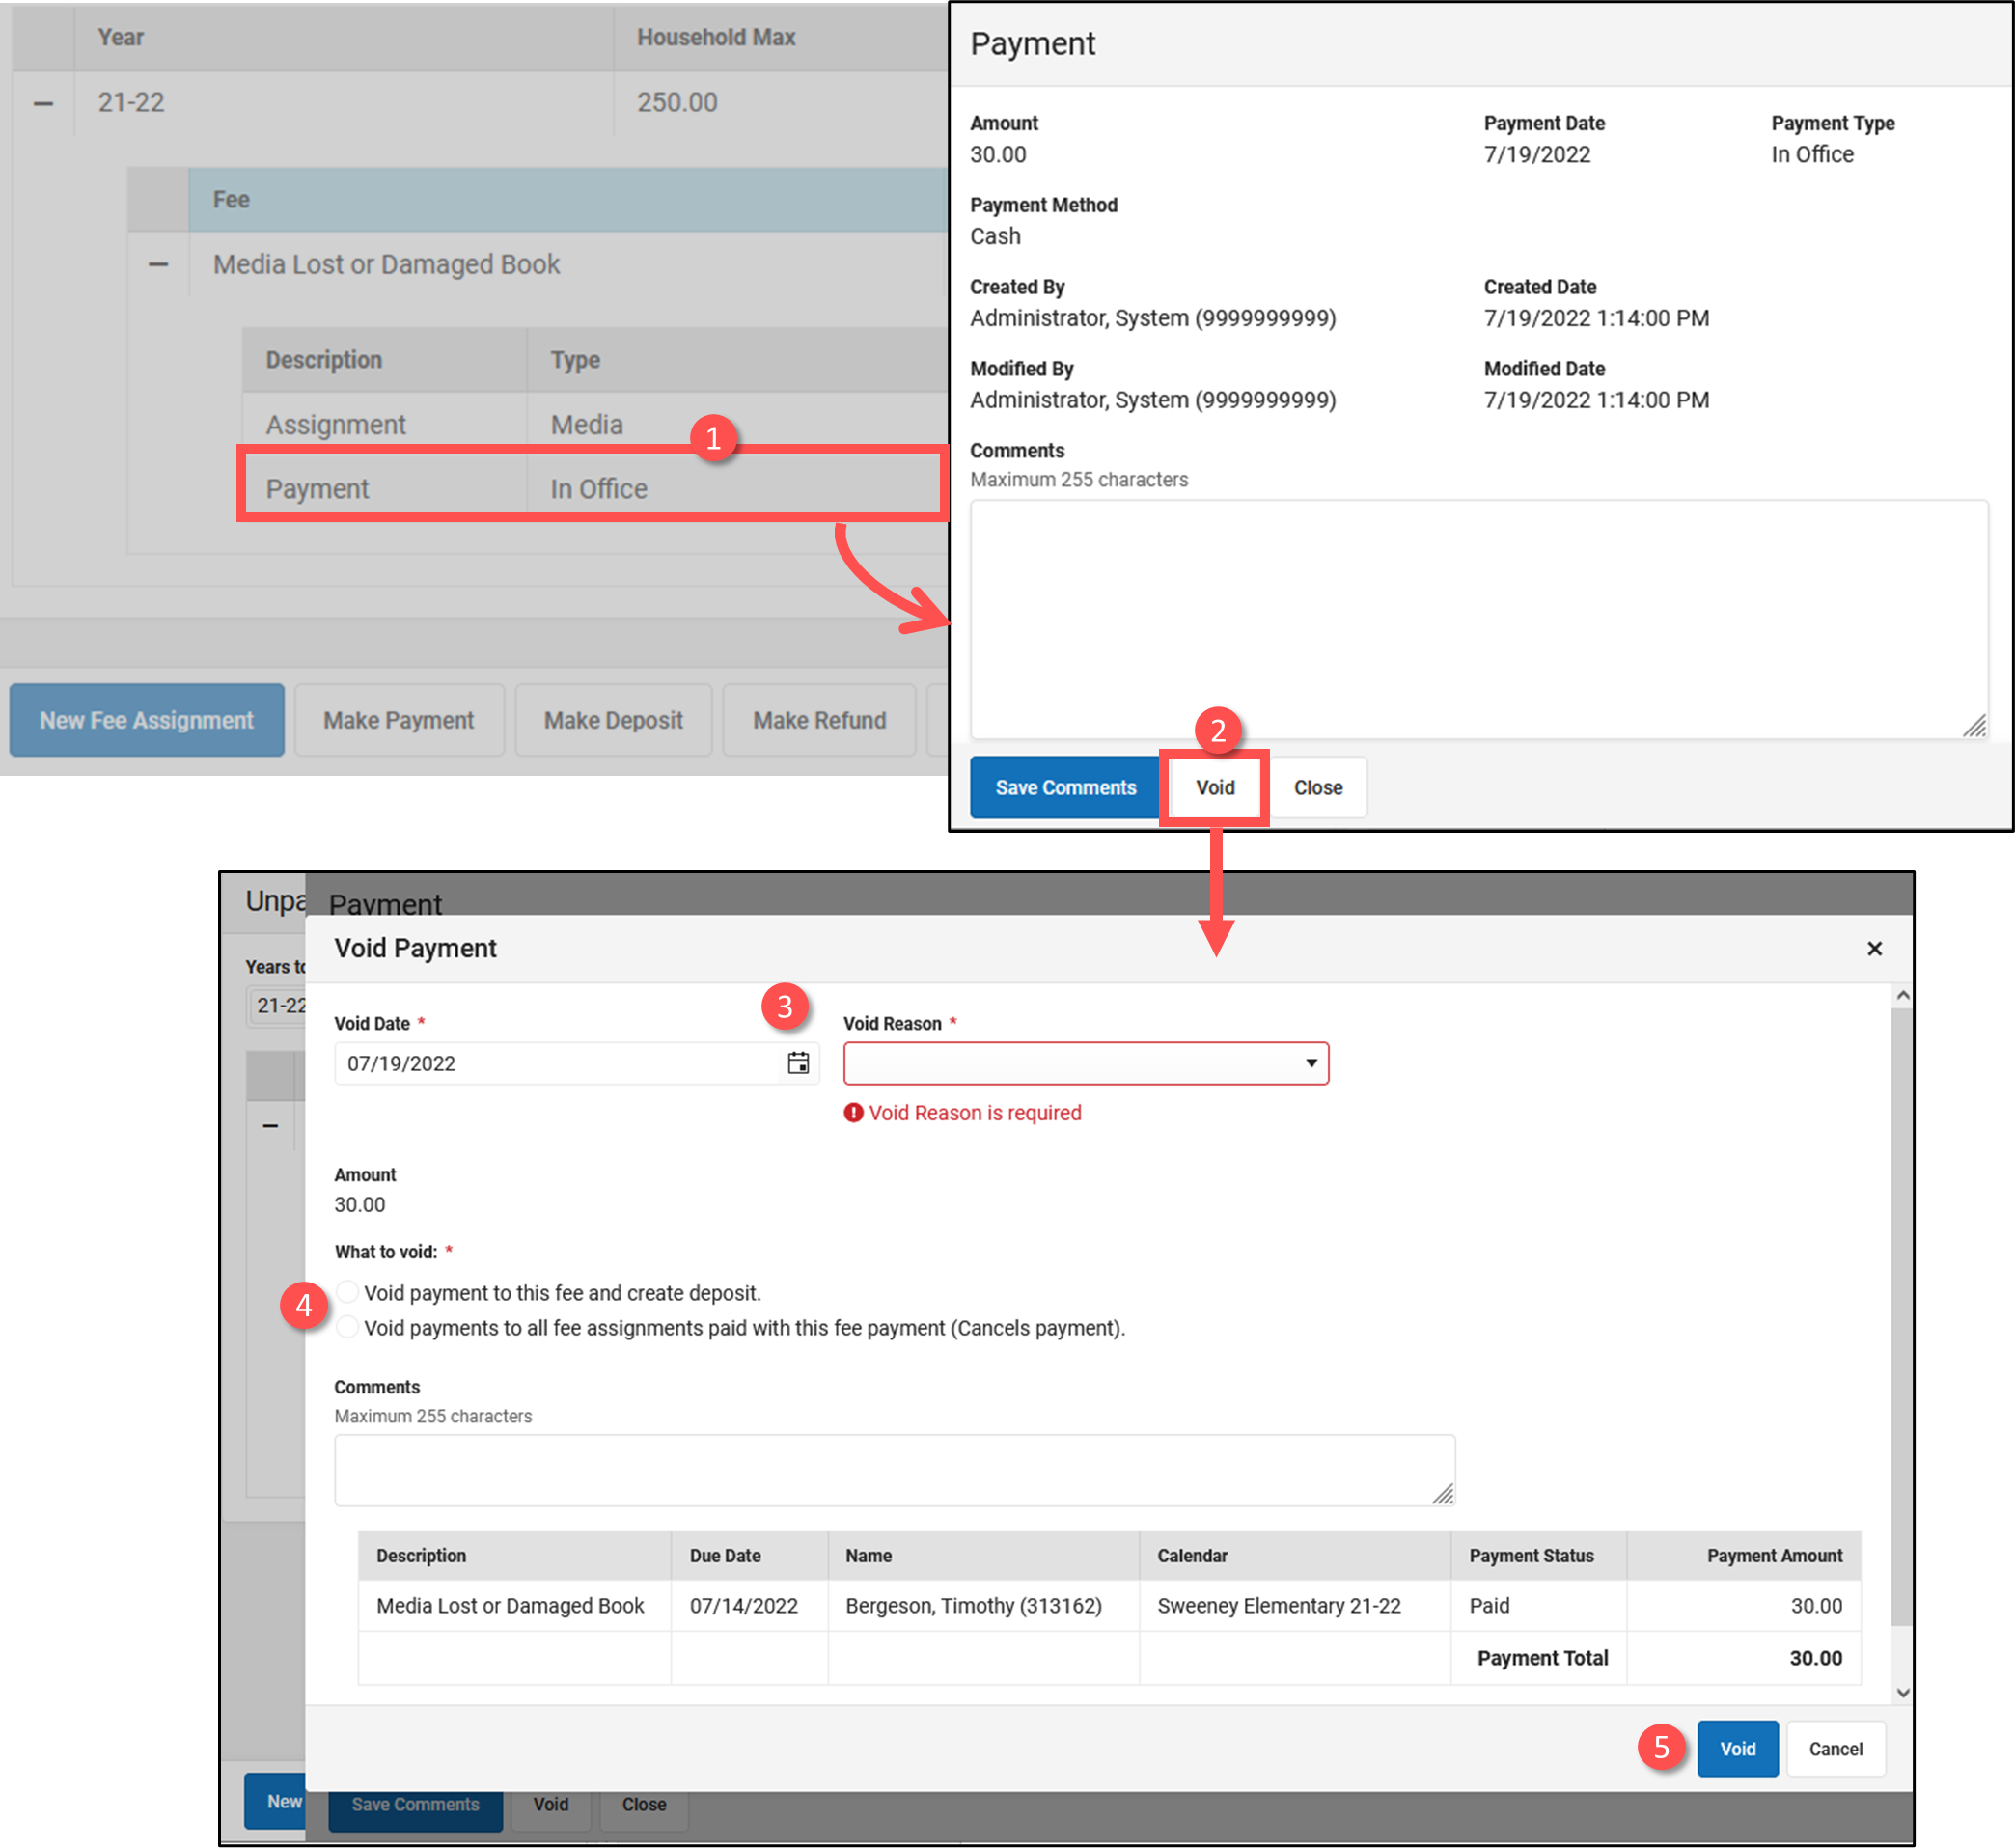
- Select the fee payment you want to void.
Result: The Payment panel displays. - Click the Void button.
Result: The Void Payment screen displays. - Enter the Void Date and select a Void Reason. Comments are optional.
- Select What to Void.
- Void payment to this fee and create deposit will void the selected payment only and create a surplus with the amount paid.
- Void payments to all fee assignments paid with this fee payment will void the selected payment and any other payments made in the same transaction. All payments made in the transaction payment are listed in the payment transaction table.
- Click Void.
 Void Fee Payment Workflow
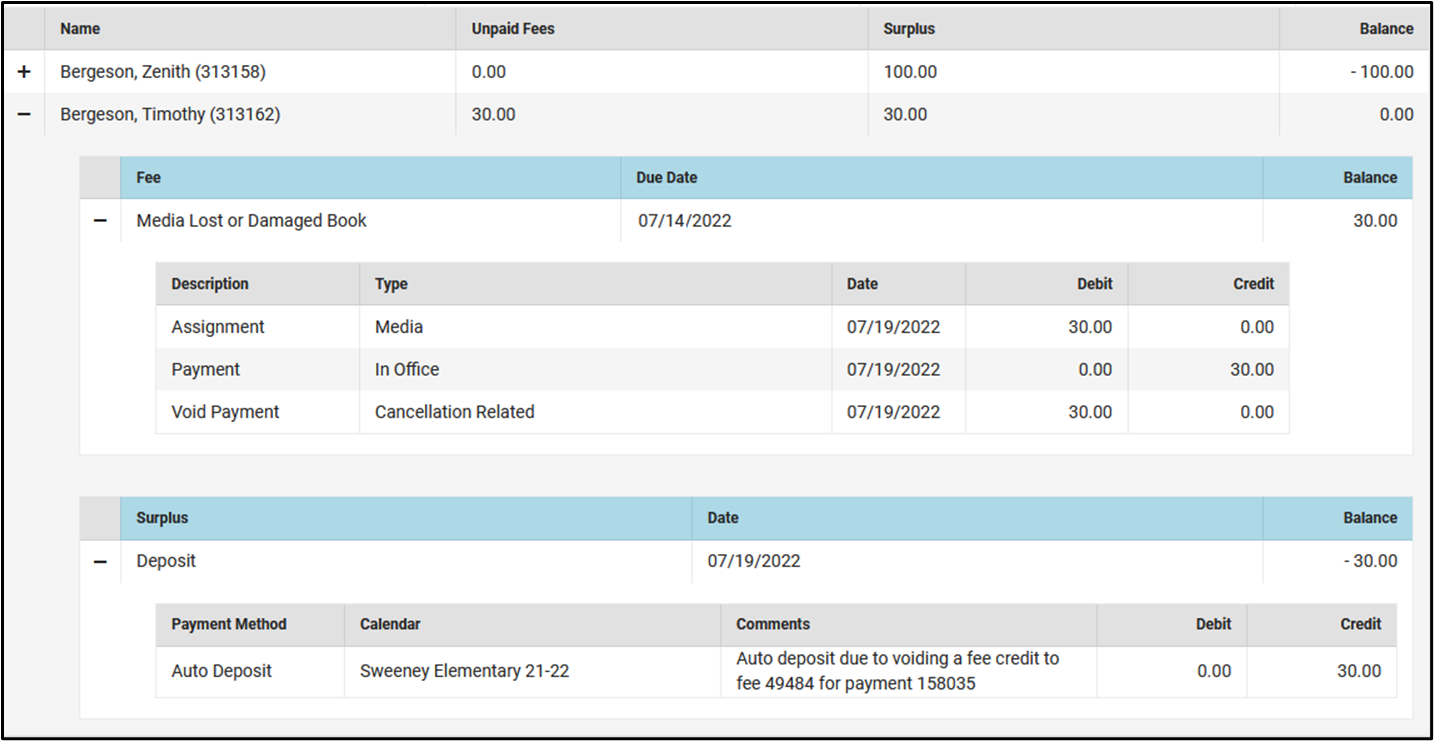 Void Fee Payment Example
Void an Adjustment
- Select the fee adjustment you want to void.
Result: The Adjustment panel displays. - Click the Void button.
Result: The Void Assignment screen displays. - Enter the Void Date and select a Void Reason. Comments are optional.
- Click Void.
 Void Fee Adjustment Workflow
Print a Fee Billing Statement for a Household
To print a report detailing what fees remain unpaid, select the Years to Print then click the Print button.
The Fee Billing Statement generates in a PDF format that can be printed, folded, and mailed to the household's primary address. Beside the address appears a summary of information about the individual and a list of totals, including the number and value of all fees incurred, the district-determined fee maximum if applicable and the total amount paid. The Balance Due follows this list, in larger font and underlined.
The Fee detail section lists the fees assessed to the person, the due date, the fee amount and any adjustments or payments that have been made. The total balance due appears at the end of the list.
 Fee Billing Statement Example
