Human Resources will no longer be available after June 30th, 2025. For more information, visit the Human Resources and Staff Evaluation Deprecation FAQ.
Tool Search: Contact Information
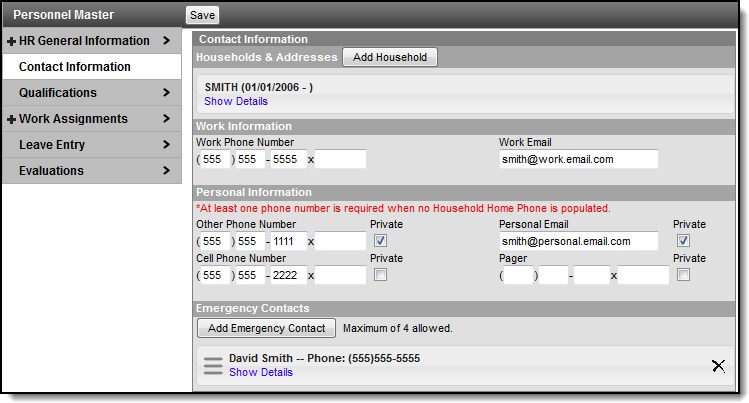
The Contact Information editor allows you to manage personal, work, and emergency contact information.
Add Households and Addresses
- You can save current and future addresses.
- Addresses are removed from the system once the end date has been reached. However, if the household includes members that are not saved in the Human Resources application, students for example, Campus will continue to display old addresses in the Campus Households tool and the address will be accessible when searching for addresses in Campus.
- You may or may not be able to save multiple Primary addresses. This feature is controlled by the System Preference called Allow Multiple Primary Addresses.
- At least one active household and one phone number is required before you can save any information on the Contact Information screen.
- The Payroll Residence checkbox only displays if the Campus Payroll module is enabled.
- Click the Add Household button.
Result
The Add Household wizard displays.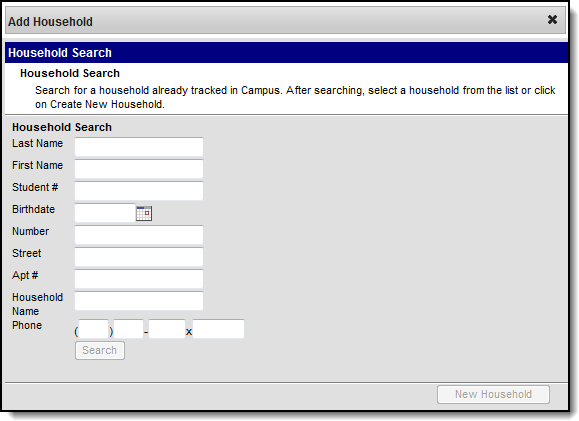
Use the information in the following table to enter search criteria.
Field
Description
Last Name
Last name of the individual that is being searched.
First Name
First name of the individual that is being searched.
Student Number
Local identification number assigned to a student.
Birth Date
Birth date of the person being searched, in mmddyy format.
Number
Street number of the household address.
Street
Street name of the household address.
Apartment Number
Apartment number assigned to the household address.
Household Name
Name of the household being searched.
Phone
Household phone number being searched.
- Click the Search button.
Result
The wizard is designed with built-in checks to eliminate the creation of multiple households with identical members and contact information. If the search criteria are entered with the same information as an existing household, the existing household(s) appear to the right of the search fields. Complete one of the following options.
To...
Then...
add personnel to an existing household
select the household from the search results. Campus adds the person to the household and creates a new entry on the Contact Information editor.
create a new household
click the New Household button.
Campus displays a new entry on the Contact Information editor.
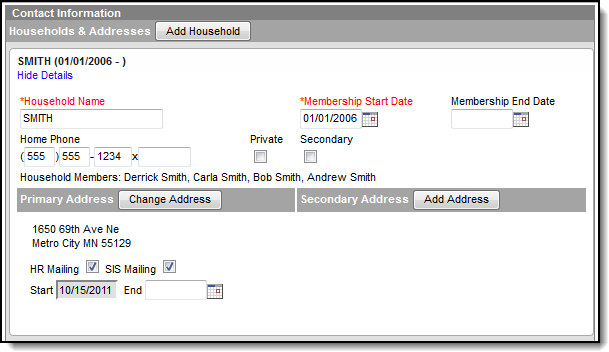
Enter a Household Name.- Enter a Membership Start Date.
Enter a Home Phone number. (optional)
The Private checkbox serves as a visual reminder that the numbers are unpublished and should remain confidential. The checkbox can be used as a filter in Ad hoc to remove people who do not want to be listed.
- Select the Secondary checkbox if the household is not the person's primary household. (optional)
- Click the Add Address button.
Result
The Address Update window displays. Enter the address number in the Number field and press Enter.
Existing addresses that match your entry display on the right-hand side. If the address you need displays, click the existing address to quickly enter the remaining address fields on this window and go to step 10.
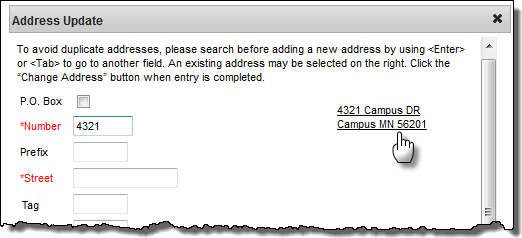
Fill in the remaining address fields and click the Update Address button.
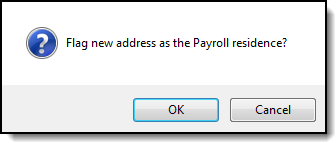
If the Campus Payroll module is enabled, a confirmation message displays asking whether this should be the Payroll residence.
- Select the HR Mailing checkbox to indicate that Human Resource mailings and employee-related mailings should be sent to this address.
Select the SIS Mailing checkbox to indicate that mail from the student information system should be sent to this address.
This feature is useful for specifying a different mailing address for student information.
Select the HR Private checkbox (Secondary Address only) to indicate that this address is only available to Campus Human Resource users and not the student information system.
To avoid duplicate entries of addresses, the address is updated in Campus; however, the person's name on the address or household is marked "Private."
You cannot select this checkbox if the SIS Mailing checkbox on this address is also marked.- Select the Payroll Residence checkbox to indicate this address should be used for Payroll taxation and reporting purposes. Only one Payroll residence is allowed.
- Enter a Start date in the Start field.
Repeat steps 8-14 to enter additional addresses.
At least one active primary address must exist on a person's record at all times. You may or may not be able to save multiple Primary addresses. This feature is controlled by the System Preference called Allow Multiple Primary Addresses.
- Click the Save button.


Update a Work Phone Number or Email
- Select Contact Information from the left-hand navigation.
Result
The Contact Information editor displays. - Enter or change the Work Phone Number and/or Work Email.
Click the Save button.
Updates to the Work Phone Number and Work Email are reflected in the student information system. The Work Email address updates the Email Messenger preferences.
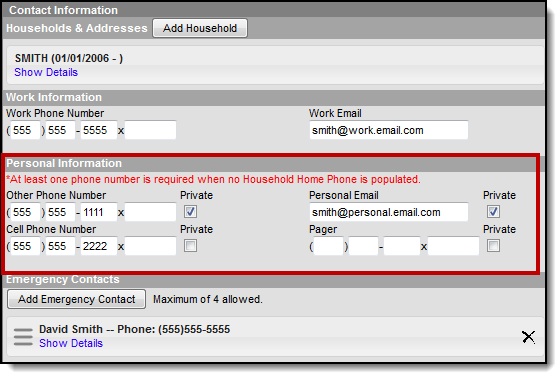
Add Personal Information
At least one active household and one phone number is required before you can save any information on the Contact Information screen.
The Private checkbox serves as a visual reminder that the numbers are unpublished and should remain confidential. The checkbox can be used as a filter in Ad hoc to remove people who do not want to be listed.
- Select Contact Information from the left-hand navigation.
Result
The Contact Information editor displays. - Enter or change the Other Phone Number or Cell Phone Number. At least one number is required.
- Enter or change the Personal Email address. (optional)
- Enter or change the Pager number. (optional)
- Click the Save button.
Change Address Information
You can save current and future addresses. Addresses are removed from the system once the end date has been reached. However, if the household includes members that are not saved in the Human Resources application, students for example, Campus will continue to display old addresses in the Campus Households tool and the address will be accessible when searching for addresses in Campus.
You must always have at least one active address marked as HR Mailing. If you are removing an address that starts in the future, click the black "X" next to the address.
If the Campus Payroll module is enabled, one address must always be marked as the Payroll Residence.
- Select Contact Information from the left-hand navigation.
Result
The Contact Information editor displays.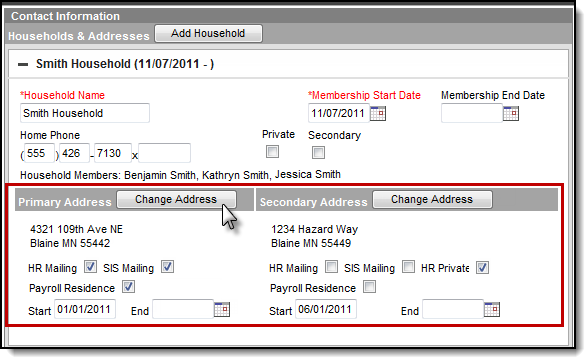
- Expand the household for which you want to change an address.
- Click the Change Address button.
Result
The Address Update window displays.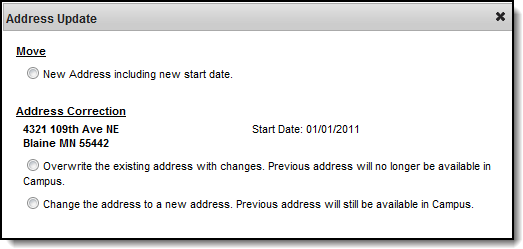
Select one of the following options.
Option
Description
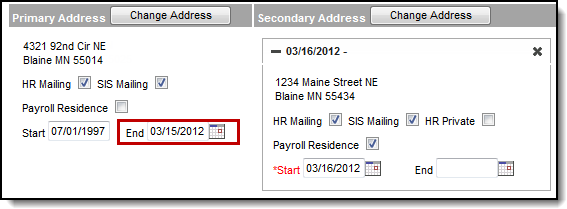
New Address including start date.
Select this option if you want to enter a new address and a new start date.
Result
The Update Address window displays.When the Address Update wizard closes and the Household editor displays, you must enter an end date on the original address. When the end date is reached, Campus will remove the original address from Human Resources for this person.
Overwrite the existing address with changes. Previous address will no longer be available in Campus.
Select this option if you need to make corrections to the original address.
Selecting this option updates the address for ALL households currently using this address.
Result
The Update Address window displays.Change the address to a new address. Previous address will still be available in Campus.
Select this option if you want to change the address but keep the original start date and previously selected mailing options.
Result
The Update Address window displays.Enter the address number in the Number field and press Enter.
Existing addresses that match your entry display on the right-hand side. If the address you need
displays, click the existing address to quickly enter the remaining address fields on this window
and go to step 7.Fill in the remaining address fields and click the Update Address button.
Result
If you choose to enter a new address including a start date and Campus Payroll is enabled, the following notice displays: "Flag new address as the Payroll residence?" Click OK to use the address as the Payroll residence or Cancel if you do not want to use the address as the Payroll residence.
If there are other employees in the same household, an additional option appears on the Notice: "Use the new address as the Payroll residence for all household members." When the checkbox is marked, Campus updates the Payroll residence for all members in the household regardless of whether their existing Payroll residence is tied to an address in a different household, or if their Payroll residence was tied to a secondary address in the same household.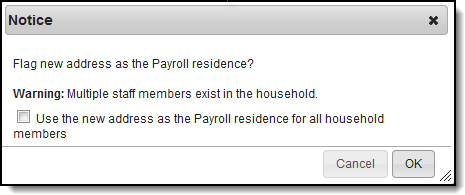
- Complete the following options if you are entering a new address or overwriting the existing address.
- Select the HR Mailing checkbox to indicate that Human Resource mailings and employee-related mailings should be sent to this address.
Select the SIS Mailing checkbox to indicate that mail from the student information system should be sent to this address.
This feature is useful for specifying a different mailing address for student information.
Select the HR Private checkbox (Secondary Address only) to indicate that this address is only available to Campus Human Resource users and not the student information system.
To avoid duplicate entries of addresses, the address is updated in Campus; however, the person's name on the address or household is marked "Private."
You cannot select this checkbox if the SIS Mailing checkbox on this address is also marked.- Enter a Start date in the Start field.
- Enter an end date on the original address if you added a new address. When the end date is reached, Campus will remove the original address from Human Resources for this person.
- Click the Save button.


Remove Address Information
You must always have at least one active address marked as HR Mailing. If you are removing an address that starts in the future, click the black "X" next to the address. The following procedure is for removing addresses with a Start date in the past.
If the Campus Payroll module is enabled, one address must always be marked as the Payroll Residence.
- Select Contact Information from the left-hand navigation.
Result
The Contact Information editor displays. - Enter an end date in the End date field.
- Click the Save button.

Add Emergency Contacts
You may enter up to 4 Emergency Contacts. New contacts are added to the bottom of the list. You may need to scroll down to see the new emergency contact information. You can prioritize contacts by dragging the contacts into the order in which the people should be contacted.
- Select Contact Information from the left-hand navigation.
Result
The Contact Information editor displays. - Click the Add Emergency Contact button.
Result
The New contact fields display.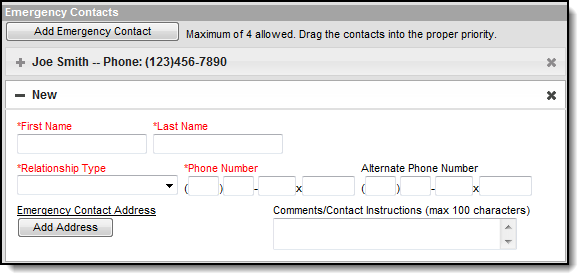
- Enter the contact's First Name and Last Name.
- Select one of the following Relationship Types:
- Child
- Extended Family
- Friend
- Parent
- Sibling
- Significant Other
- Spouse
- Unknown
- Enter a Phone Number.
- Enter information in any of the following optional fields:
- Alternate Phone Number
- Emergency Contact Address (The Add Address button displays a window where you can enter the address.)
- Comments/Contact Instructions.
- Click the Save button.

Remove Emergency Contacts
- Select Contact Information from the left-hand navigation.
Result
The Contact Information editor displays. - Click the yellow X on the contact you want to remove.

Result
A confirmation window displays. - Click the OK button.
- Click the Save button.

