Human Resources will no longer be available after June 30th, 2025. For more information, visit the Human Resources and Staff Evaluation Deprecation FAQ.
Tool Search: Add Personnel Wizard
The Add Personnel Wizard allows you to add new personnel to Campus. The wizard walks you through entering general information, contact information, work assignments, and qualifications.
The wizard may display different screens for different users. The screens that display are controlled by the user's tool rights. To use this tool, users must have Social Security Number Tool Rights.
Using the Add Personnel Wizard
Before you Begin
Before you can add personnel, you must first set up Campus Human Resources. Setting up Campus Human Resources includes creating Position Codes, HR Codes, Status Codes, Bargaining Groups, and Salary Schedules. The Add Personnel Wizard uses these codes to expedite the entry process.
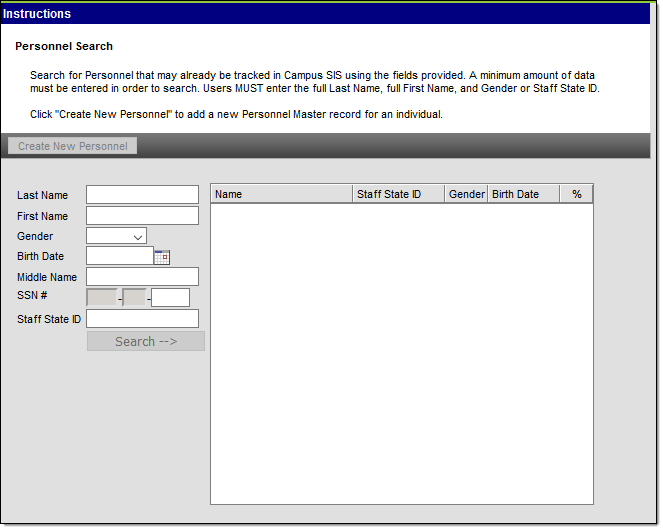
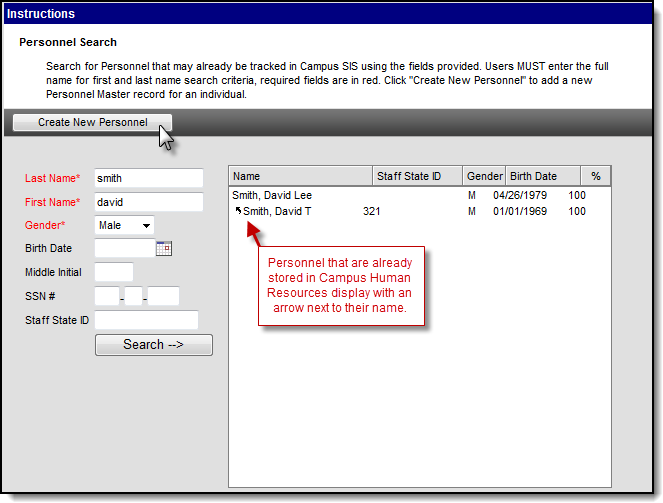
Step 1. Search for Personnel
On the first screen of the wizard, search for personnel that may already be tracked in Campus SIS. When you search, personnel that exist in Campus SIS and Campus Human Resources are displayed in the search results. Personnel that are already stored in Campus Human Resources are displayed with an arrow next to their name on the right-hand side of the screen.
These fields are optional; however, they improve the search results.
- Birth Date
- Middle Initial
- SSN # (Social Security number)
If... | Then... |
|---|---|
the person already exists in Campus Human Resources (indicated by the arrow next to their name) | click their name to edit their personnel record in Campus Human Resources. |
the person already exists in Campus SIS | click their name and continue to Step 2. Entering General and Contact Information. |
the person was partially entered using the wizard previously | clicked their name to continue entering personnel information in Campus Human Resources. |
| the person is a Non-employee Resource | click their name and continue to Step 2. Entering General and Contact Information. Completing this step ends their Non-employee Resource assignment. If the wizard finds a future-dated Non-Employee Resource assignment for the person, a message displays asking whether you want to delete the assignment. To continue adding the new employee, the future-dated Non-Employee Resource assignment must be deleted. |
the person does not display in the search results | click the Create New Personnel button and continue to Step 2. Entering General and Contact Information. |
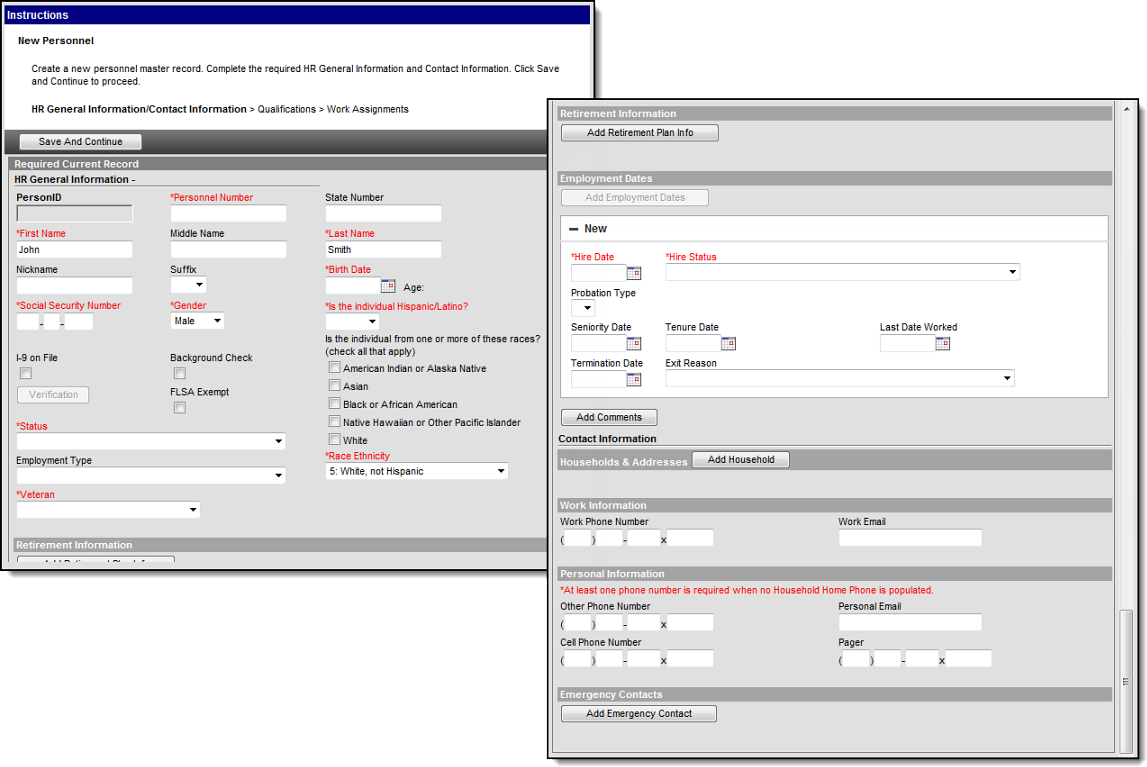
Step 2. Entering General and Contact Information
The General Information section allows you to enter confidential information, not tied to a specific work assignment, about a person employed by the district. The Contact Information editor allows you to enter personal, work, and emergency contact information. Keep the following items in mind when filling out fields on this screen:
- The Effective Date is the current system date and cannot be edited.
- If Auto-Personnel Numbering is set up on the District Master tab, you cannot edit the Personnel Number field.
- At least one phone number is required in the Personal Contact section.
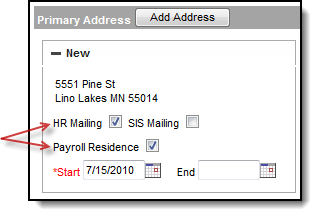
- At least one address is required with the HR Mailing checkbox selected to indicate that Human Resource mailings and employee-related mailings should be sent to this address. If your district uses the Payroll module, the PR Residence checkbox must also be selected.

For more detailed information about the fields on this screen, see the articles Managing General Information and Managing Contact Information.
If... | Then... |
|---|---|
the New Qualifications screen displays | Go to Step 3. Adding Qualifications. |
the New Work Assignments screen displays | Go to Step 4. Adding Work Assignments. |
the HR General Information displays in the Personnel Master | you have finished using the wizard. |
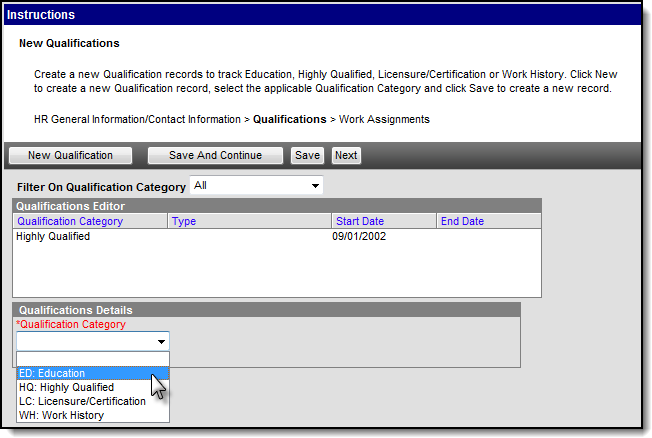
Step 3. Adding Qualifications
Qualifications are a staff member's education, licensure, and work history. Qualification information is useful for determining which courses a staff member may teach and scheduling teachers and other personnel for subsequent school years. You can enter multiple qualifications for a staff member. For example, the staff member may be highly qualified in two subject areas or may have multiple degrees.
Entering qualifications is optional; however, for detailed accountability reporting (i.e., Federal EDEN reporting and NCLB data collection) each staff member should have the proper qualifications entered.
Qualification Categories
- ED: Education. The Education Credential is used to track a staff person's education level.
- HQ: Highly Qualified. The Subject Type for which the staff person is highly qualified and the Subject Matter Competency.
- LC: Licensure/Certification. The staff person's English Learners (EL), Special Education settings, and other non-instructional licensing and/or certification that may be received. This option also allows you to enter endorsements related to the license/certification. You may enter an unlimited number of endorsements.
- WH: Work History. The staff person's past and current work experience.
For more detailed information about the fields on this screen, see the article Managing Qualifications.
Click the Next button to skip this step.
This screen only displays if you have access to the Qualifications screen. If you do not see this screen, continue to Step 4. Adding Work Assignments
If... | Then... |
|---|---|
the New Work Assignments screen displays | Go to Step 4. Adding Work Assignments. |
the HR General Information displays in the Personnel Master | you have finished using the wizard. |
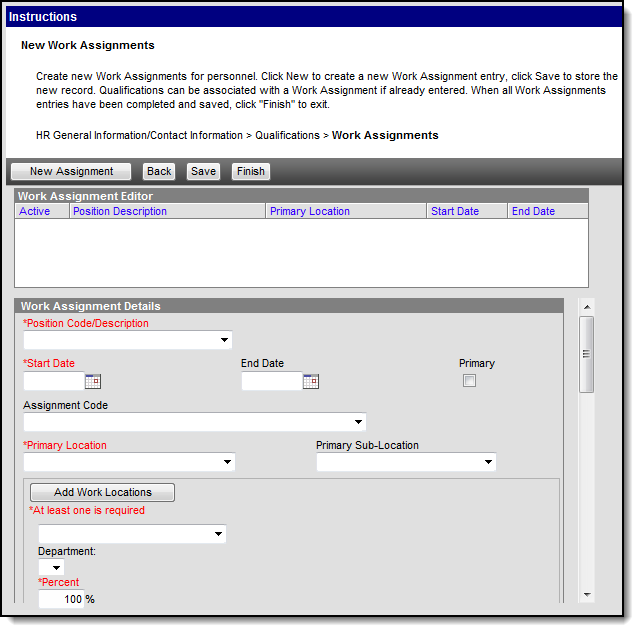
Step 4. Adding Work Assignments
The Work Assignment describes the position a person holds within a district as well as the agreed-upon terms of employment. If your district uses the Campus Payroll module, fields specific to Campus Payroll will display. See the article, Work Assignments (Payroll) for more information. If you entered Qualifications (Step 3. Adding Qualifications), you can assign them to the work assignment.
For more detailed information about the fields on this screen, see the article Managing Work Assignments.
This screen only displays if you have access to the Work Assignments screen.
Required Fields
See the Managing Work Assignments article for more information about these fields.
Field | Description |
|---|---|
Position Code/Description | The options that appear in this dropdown field are set up on the Position Codes tab. The Position Code you select may automatically update other fields on this screen. |
Start Date | The date on which the employee started this work assignment. |
Primary | This checkbox indicates whether the position is the employee's primary position. It is strongly recommended that each person have one position with the Primary checkbox marked. The Personnel Master tool includes this field to further identify a person when searching for employees. If your district uses the Campus Payroll module, Campus will automatically mark the first assignment you enter as the Primary work assignment. This can be changed once multiple work assignments have been entered. |
Primary Location | The main location where this person works and the percentage of time at the location. The locations that are displayed in this field are set up on the HR Codes tab. |
Work Locations | All location(s), including the Primary Location, where this person will work. You may select more than one location. |
EEO Category | The EEO Category for the work assignment. |
GL Account Number | The General Ledger account to which you want to record the distribution of salary funds. |
Percent | The percent allocated to the account. |
The following required fields only display if your district uses the Campus Payroll module. See the Work Assignments (Payroll) article for more information.
Field | Description |
|---|---|
Benefit Plan | This field determines the default benefit deductions to assign to the employee. Options in this field are set up in the Campus Payroll module. |
Conversion Plan | Conversion Plans tell the Payroll system how to calculate various salary amounts for this position; e.g., daily, weekly, monthly, hourly, and annual amounts. Conversion Plans are defined in the Campus Payroll module. |
Earn Plan | This field determines the default earn plan to be assigned to an employee in this position. Earn Plans are defined in the Campus Payroll module. |
Pay Frequency | The frequency with which this position is paid. Options include the following:
|
The following fields are required if your district uses Position Control.
| Field | Description |
|---|---|
| Position FTE | This field displays the Full-Time Equivalent the individual is working on the work assignment. |
| GL Account Number | The General Ledger account to which you want to record the distribution of salary funds. The Position Code may include default information for this field; however, you can change the default information at any time. |
