Human Resources will no longer be available after June 30th, 2025. For more information, visit the Human Resources and Staff Evaluation Deprecation FAQ.
Tool Search: User Fields
The User Fields tool allows you to set up user-defined fields and values without requiring system administrator involvement. You can specify where the fields appear and whether they display.
| What can I do? | What do I need to know? |
|---|---|
Field Descriptions
Field | Description | ||||||
|---|---|---|---|---|---|---|---|
Display Name | The name of the field as it appears on the screen. | ||||||
Screen Location | The screen on which the field appears. | ||||||
Data Type | This option defines the field type. Options include the following types:
| ||||||
Required | This checkbox indicates whether the field is required. | ||||||
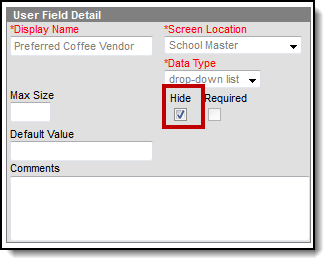
Hide | This checkbox indicates whether the field is visible on the screen. | ||||||
Default Value | The value that automatically appears in the field.
| ||||||
Max Size | The largest number of characters the field allows. | ||||||
Comments | Additional information about the field. |
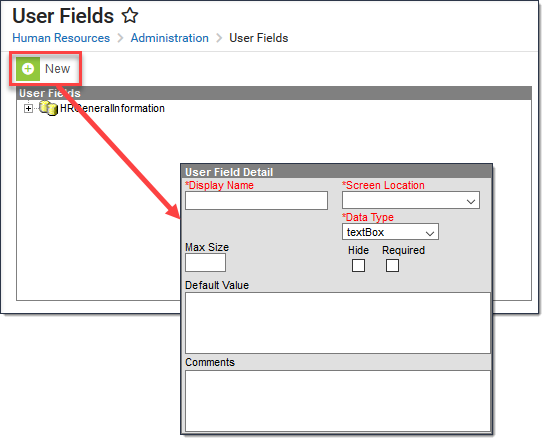
Add a User-defined Field
- Click the New button.
Result
The User Field Detail editor displays. - Type the Display Name.
- Select the Screen Location.
- Select the Data Type.
- Select the Required checkbox if you want to make this field required for the end user. (optional)
Select the Hide checkbox if you want to hide this field from the end user. (optional)
Selecting this checkbox clears the Required checkbox.
Type a Default Value and a Max Size.
These fields are optional and do not apply to dropdown lists or checkbox fields.
- Type any additional Comments . (optional)
- Click the Save button.
Result
Campus adds the field to the User Fields navigation tree. - Complete the following steps if you are adding a dropdown list.
- Expand the navigation tree and click the button to expand the newly created field.
Result
The Dictionary entry appears.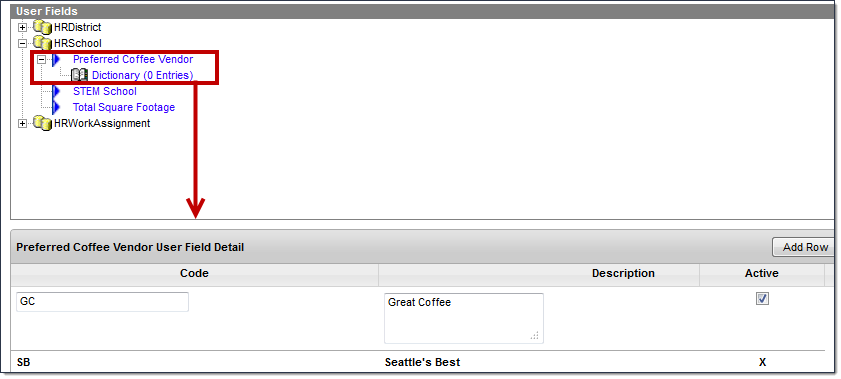
- Select the Dictionary.
Result
The Code and Description fields appear. The Active checkbox is selected by default. To hide the option in the dropdown list, clear the Active checkbox. Type a Code and Description for the option.
- Click the Add Row button to add additional options to the dropdown list.
- Click the Save button.
- Expand the navigation tree and click the button to expand the newly created field.

Dictionary items can be sorted alphabetically or numerically by the Code, Description or the Active checkbox by clicking on the name of that column.
Hide a User-Defined Field
User-defined fields cannot be deleted; however, they can be hidden from the user. To a hide a user-defined field, select the field to be hidden, check the Hide checkbox, and click the Save button.