Tool Search: Fees
Fees can be paid one at a time or you can pay multiple fees with a single payment.
Make a Payment
- Click the Make Payment button at the bottom of the screen.
Result: The Payment panel displays all fees from all years for which a payment is needed.
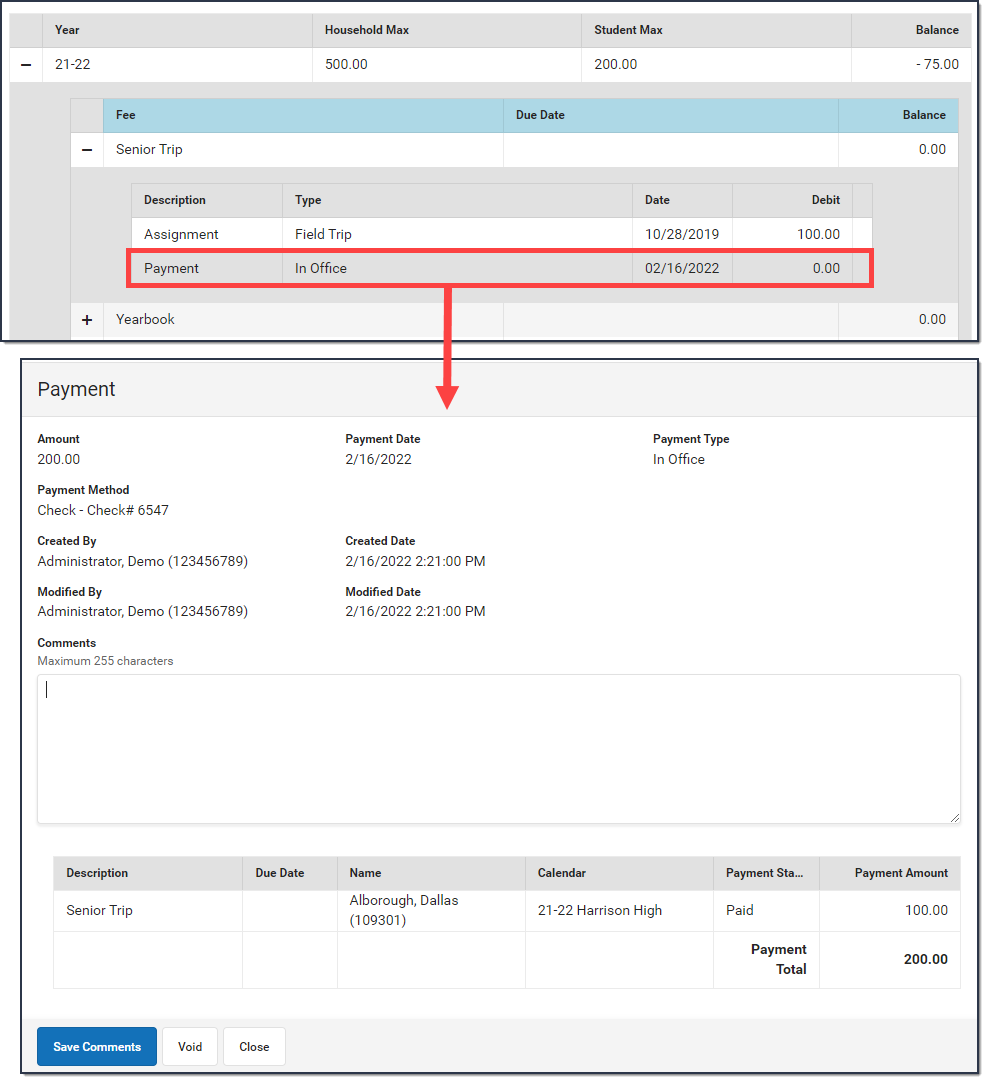
 You can also access the Payment panel by clicking an individual fee then clicking the Make Payment button on the Assignment panel.
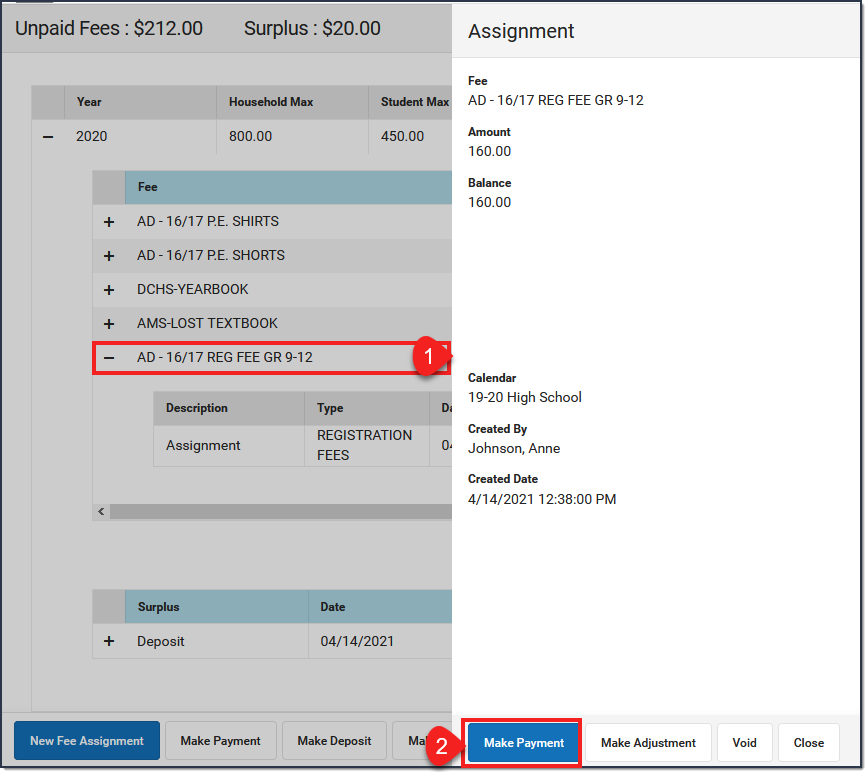
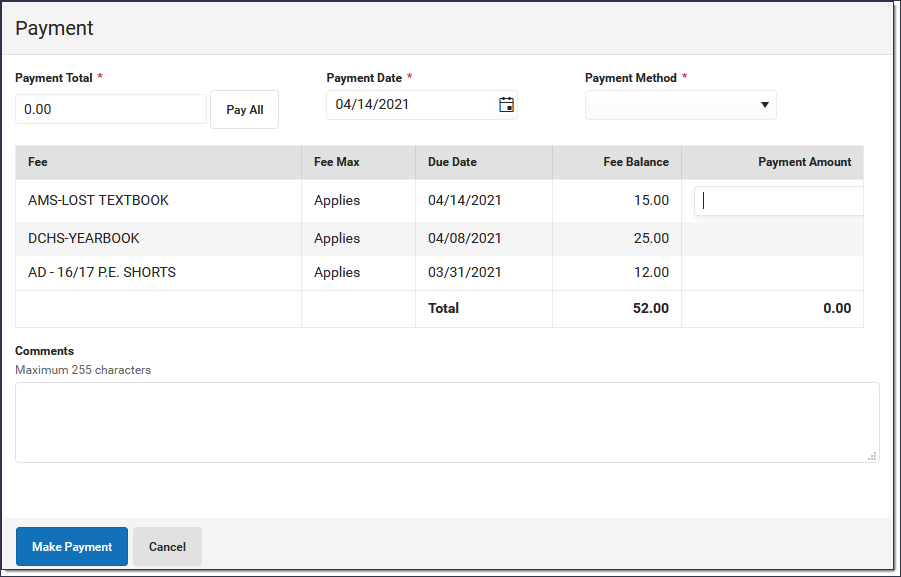
- Enter a Payment Date in mmddyyyy format.
- Enter the amount of the payment using one of the following options.
Option Description Pay All Click Pay All to populate this field with the total amount remaining to be paid. 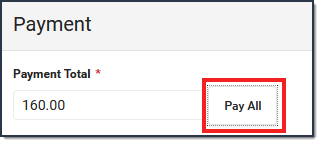
Payment Total The Payment Total field at the top of the panel allows you to enter the amount to be paid. If the total amount exceeds the Fee Assignment amount, the remaining amount is deposited as a surplus. 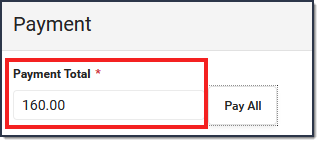
Payment Amount The Payment Amount column allows you allows you to manually enter a unique value for each line. Campus automatically updates the Payment Total to match the values you enter. 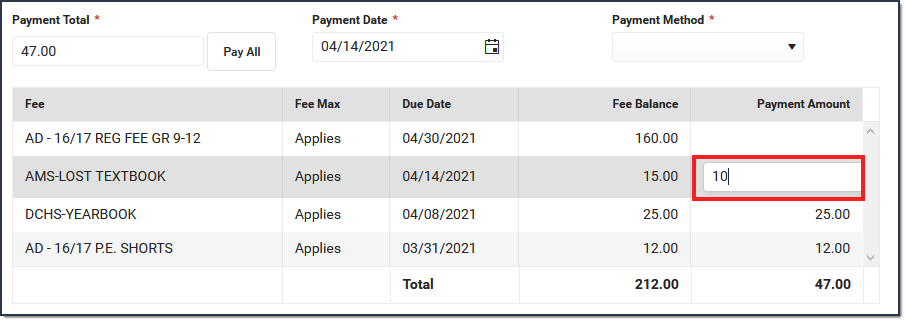
Enter any Comments associated with the payment.
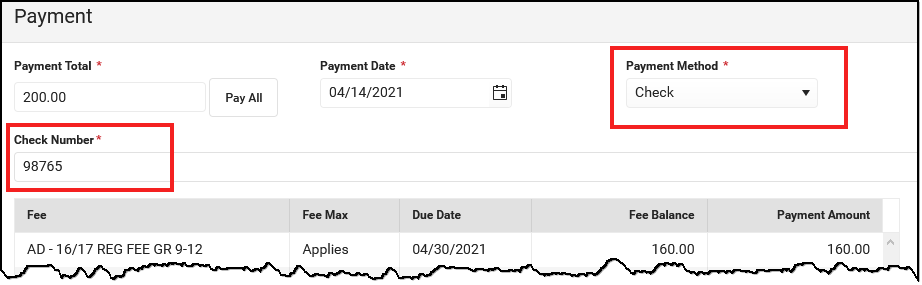
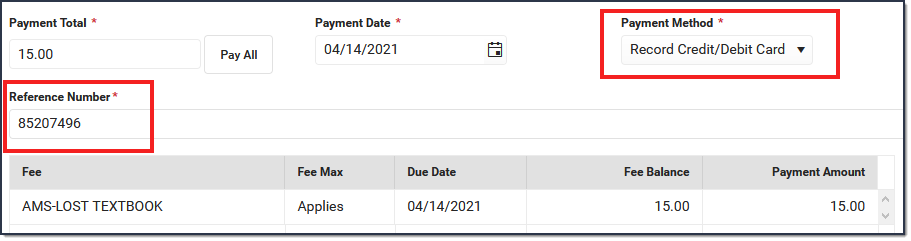
Select one of the following Payment Methods and complete the payment.
Payment Method Description Cash Click the Make Payment button.
Result
If more than the amount of the fee selected is paid, the extra amount becomes a Surplus. Campus saves the surplus amount and it can be applied to other fees.Check The Check # field displays when you select this option. Enter the Check # then click the Make Payment button.
Result
The payment displays below the fee(s) with the type and date of the payment, the amount paid in the Credit column.If more than the amount of the fee selected is paid, the extra amount becomes a Surplus. Campus saves the surplus amount and it can be applied to other fees.
Surplus (Balance: $XX.XX) This option only displays if a surplus is available on the account.
Click the Make Payment button.

Result
The Surplus Balance is reduced by the amount used to pay the fee. The payment displays below the fee(s) with the type and date of the payment, the amount paid in the Credit column.Record Credit/Debit Card If your district does NOT use Online Payments or a Desktop Card Reader, enter the Reference Number then click the Make Payment button.
Result
The payment displays below the fee(s) with the type and date of the payment, the amount paid in the Credit column. If more than the amount of the fee selected is paid, the extra amount becomes a Surplus Campus saves the surplus amount and it can be applied to other fees.Process Credit/Debit Card
(Card Swipe)Complete these steps if you are using a Desktop Card Reader.
- Click the Make Payment button.
Result
The Card Present Processing window displays.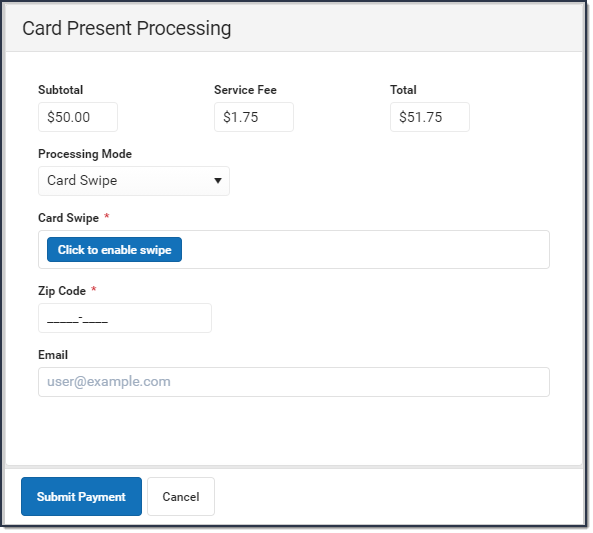
Click the Click to enable swipe in the Card Swipe field then swipe the card through the card reader.
Result
A progress bar appears in the Card Swipe field. When the process completes, the message changes to Success.Enter an Email address. (Optional)
If Email Settings are set up, Campus will send the receipt to the Email address entered here. This email is not included in the Sent Message Log.
- Click the Submit Payment button.
Result
If the transaction is successful, the receipt displays and you can print the receipt from your browser. A receipt is emailed if an email address was entered in the Email field.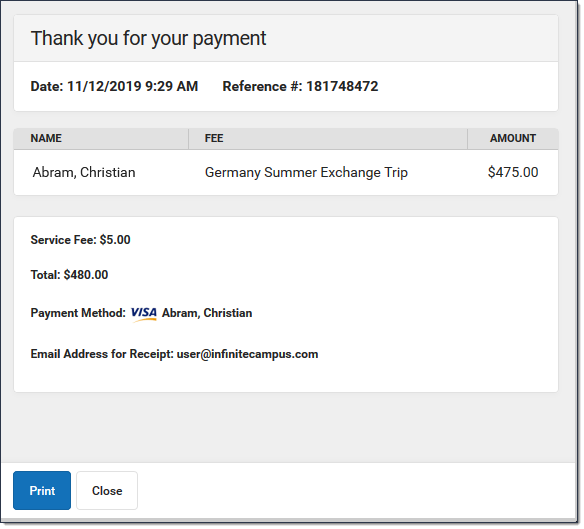
- Click the Close button.
Result
The payment displays below the fee(s) with the type and date of the payment, the amount paid in the Credit column and Balances and Totals updated accordingly.
Process Credit/Debit Card (Manual Entry) Complete these steps if you do not have a Desktop Card Reader.
- Click the Make Payment button.
Result
The Card Present Processing window displays.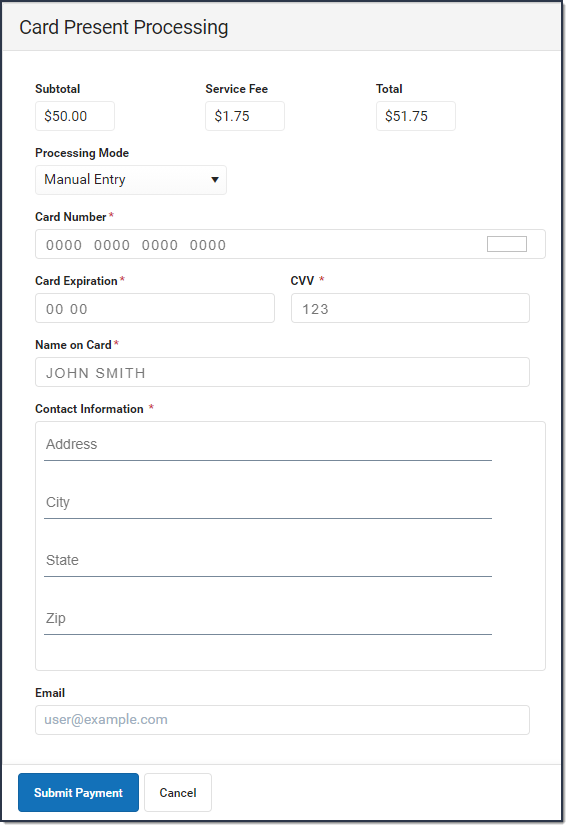
- Select Manual Entry in the Processing Mode dropdown list.
- Fill out the following fields.
- Card Number
- Card Expiration
- Name on Card
- Address
- Zip Code
- Click the Submit Payment button.
Result
If the transaction is successful, the receipt displays and you can print the receipt from your browser. A receipt is emailed if an email address was entered in the Email field. This email is not included in the Sent Message Log. - Click the Close button.
Result
The payment displays below the fee(s) with the type and date of the payment, the amount paid in the Credit column and Balances and Totals updated accordingly.
- Click the Make Payment button.


Payment Panel
Only Comments can be added or modified in this panel.
After a payment is made, you can click the payment to display the Payment panel. This panel includes the Payment Date, the total Amount, the Payment Method, and any Comments attached to the payment. The calendar in which the payment was made and the name of the user(s) who created the payment also display.
Below the Comments section, the panel displays all fees paid with that payment, the due dates of each fee, and the amount paid for each fee.