Classic View: School Store > Product Inventory > General Product
Search Terms: General Product
Products are set up using the Product progress tracker. The Product progress tracker includes the following three parts:
- 1 - Product
- 2 - Product Items
- 3 - Availability
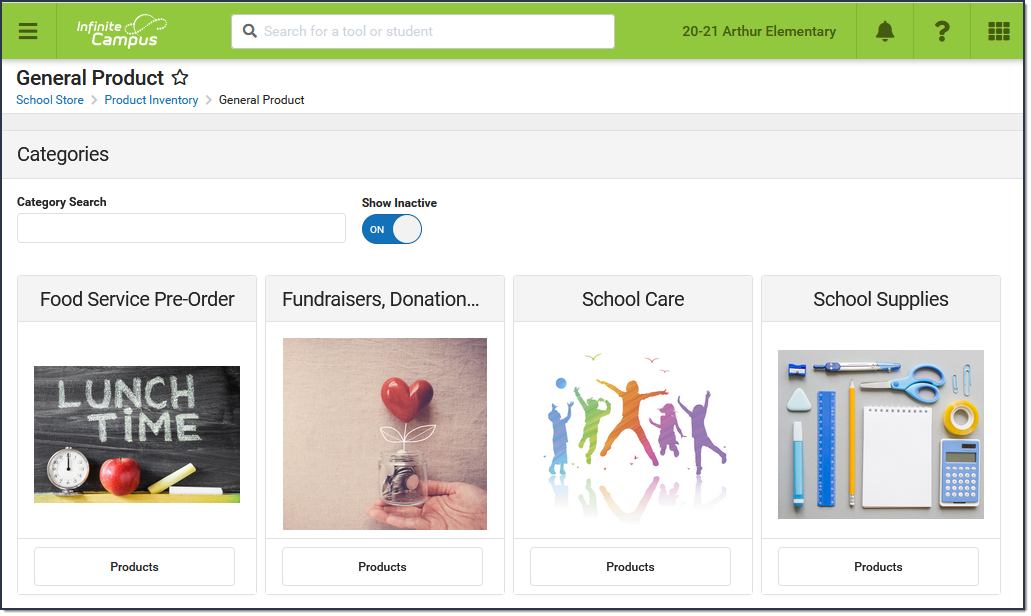
To get started, select All Schools or a specific school in the Campus toolbar, then click the Products button on a Category.
If you create a Product and decide you do not want it, you can delete the Product if it has never been purchased.
Part 1 - Product

| Field | Description |
|---|---|
| Product Name | The name that displays in the School Store and/or Public Store. |
| Categories | The Categories under which you want the Product to appear. You can select multiple Categories. When you select a Category, the assigned Products display. The Product Category is a required field on the Orders Report. If you remove a school from a Category, you will not be able to use the Orders Report for purchases made for that combination of Category and School. |
| Product Type | The Product Type to which you want to assign the Product. When this product is purchased, funds are deposited into the bank associated with the Product Type's Fund Account. |
| Purchase Limits | Purchase Limits restrict the number of products or product items that can be bought for an individual recipient. Purchase Limits are not required; but, if you choose to use them, this field determines whether purchase limits are set for at a Product level or for individual Product Items.
If you choose not to use this feature, Campus automatically limits the number of products that may be purchased to 10 products per recipient. Purchase Limits are only allowed for Portal and Employee Self Service. |
| Description | Detailed information about the product. This Description appears below the picture of the product. |
| Receipt Comments | This field allows you to enter comments or special instructions that you want on the customer's receipt. Comments appear below the purchased item.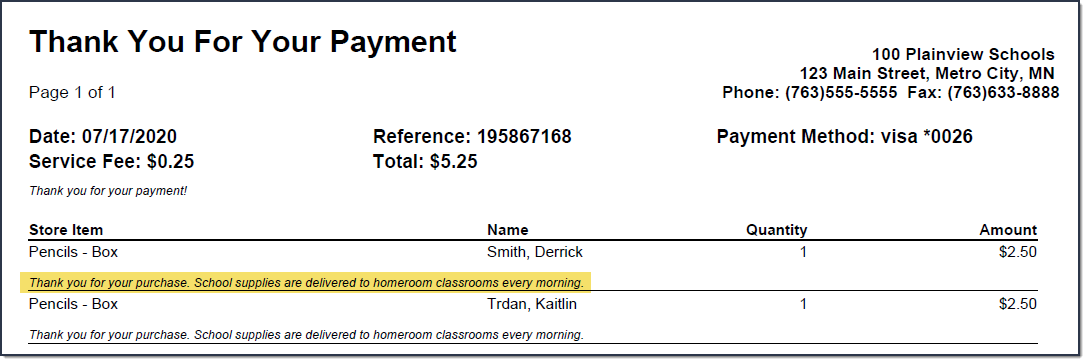 |
| Variable Rate | Mark this checkbox if you do not want to set a specific price for the item. When this checkbox is marked, the customer can enter any amount they want when they check out. This option is useful for things like donations. |
| Partial Refund | Mark this checkbox if you want to allow partial refunds for this item. |
| Inventory Tracking | When this checkbox is marked, Campus calculates the amount of inventory you have available after a purchase is made. An additional column called Inventory on Hand displays on the Step 2 Attributes screen and allows you to manage the items in your store. If the number in this column is zero, Campus displays the message Out of Stock when the users tries to add the item to their cart. Do NOT mark this option if
When this checkbox is marked, the product is included in the Inventory on Hand report. If you use the Payments Reporter to issue refunds for products purchased in the School Store and this checkbox is marked, Campus allows you to choose whether you want to return the item to Inventory on Hand. |
| Customer Comments | When this checkbox is marked, customers can add information to their purchase before they check out. Comments appear on the Pick List report. You may enter text in the customer comment field to automatically display a message. |
| Description | Detailed information about the product. This Description appears below the picture of the product. |
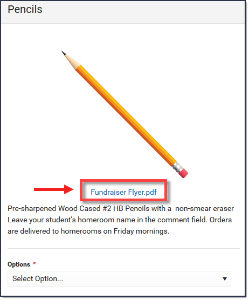
| Image Upload | This option allows you to add a picture of the product. The image must use one of the following extensions: .jpg, .jpeg, .png, or .gif. As a best practice, the file should not exceed 3MB. The image that displays in the store is a square, so a 1:1 aspect ratio is also recommended. |
| File Upload | This option allows you to add a PDF file to the product. A link to the PDF file displays between the image and the description.
|
Part 2 - Product Items

You can drag and drop rows to easily reorder lines in the table. To add multiple attributes (lines and rows) to the table, you must first click the Add Attribute button.
| Field | Description |
|---|---|
| Export | The Export button allows you to download an Excel version of the Product Items table. |
| Import | The Import button allow you to upload an Excel or CSV file to populate the Product Items table. To begin, use the Export button to download a template of the Product Items table.
|
| Add Item | The Add Item button allows you to add another row to the table if you are using custom attributes. |
| Add Attribute | The Add Attribute button allows you to add custom attributes to the table. You can add up to three custom attribute columns for tracking additional product information. |
| SKU | You can enter your own SKU or one from a vendor. If you leave this field blank, Campus assigns a unique, system generated number. Infinite Campus recommends using unique SKUs for each product. |
| Inventory on Hand | This column only displays if Inventory on Hand is selected in Step 1 Product. The total amount of inventory on hand. You can manually update this number at any time. If the number in this column is zero, Campus displays the message Out of Stock when the users tries to add the item to their cart. |
| Selling Price | The price customers pay and see in the store. The price can be $0.00. Items that cost $0 cannot be purchased through the Public Store. |
| Reduced Price | The price students with reduced eligibility status pay and see in Campus Parent/Student. The price can be $0.00. |
| Free Price | The price students with a free eligibility status pay and see in Campus Parent/Student. The price can be $0.00. |
| Cost | The price the district paid to purchase the product from the vendor. This field is optional. |
| Purchase Limit | This column only displays if you chose Purchase Item in the Product Limits dropdown list (Part 1 of the the Product Progress Tracker). Enter the maximum number the user is allowed to purchase for a recipient. |
Part 3 - Availability

| Field | Description |
|---|---|
| Active | When this checkbox is marked, the product is available in the store on the Start Date. |
| Restrict to Associated School Enrollments | When this checkbox is marked, the Recipient dropdown list in the School Store will only display students who have an enrollment in the active school year at the school to which the product is attached. This includes primary, secondary, and enrollments with a future end date. Example If you have a Product attached to the High School only and this checkbox is marked, parents will only be able to select their student(s) with primary and secondary High School enrollments in the active school year as well as enrollments with a future end date. Please note that if the same Product is associated with multiple schools; e.g., a middle school and a high school, parents can select both middle and high school students in both stores. This option is only available when the product is only available on the Portal. If the Employee Self Service or Public Store checkboxes are also selected, this field is disabled. |
| Available On |
|
| Start Date | The first day and time on which the product may be purchased. This field is required. Campus verifies the Product Type and Category are active on the same day or prior. |
| End Date | The last day and time on which the product may be purchased. After the date and time entered here, the product is inactive and is not available in the store. |
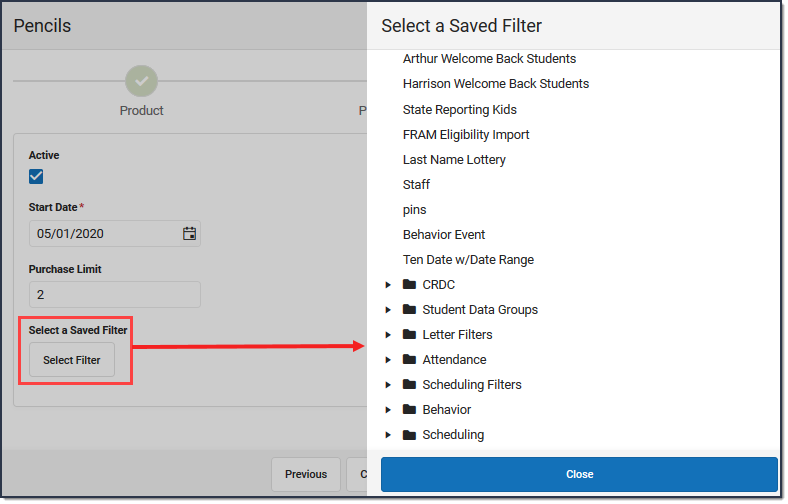
| Purchase Limit | This field only displays if you chose Product in the Product Limits dropdown list (Part 1 of the the Product Progress Tracker). Enter the maximum number the user is allowed to purchase for a recipient. Purchase Limits are only allowed for Portal and Employee Self Service. |
| Select a Saved Filter | This option allows you to select an Ad Hoc filter to limit purchasing to the people included in the filter. Only people who are included in the Ad Hoc filter and have an active enrollment in the active calendar year can be selected as a Recipient.
See the Ad Hoc Filter Examples for more information. |